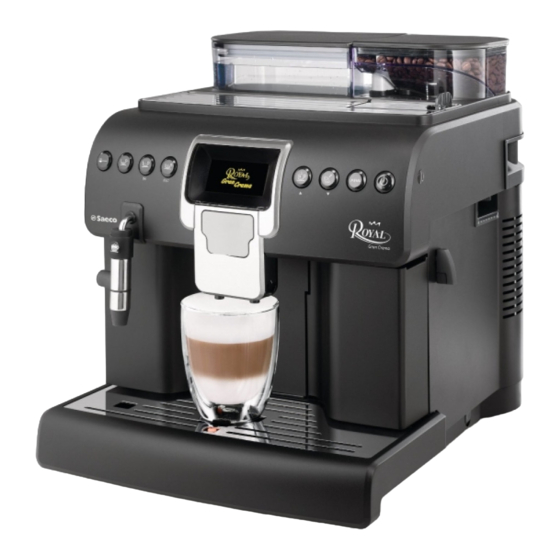
Summary of Contents for Saeco Royal Gran Crema
- Page 1 INSTRUCTIONS INSTRUKCJE READ THESE INSTRUCTIONS CAREFULLY BEFORE USING THE MACHINE. PRZED PRZYSTĄPIENIEM DO UŻYTKOWANIA URZĄDZENIA NALEŻY DOKŁADNIE ZAPOZNAĆ SIĘ Z NINIEJSZĄ INSTRUKCJĄ OBSŁUGI.
-
Page 3: Table Of Contents
CONTENT SAFETY INSTRUCTIONS ..................................4 FIRST INSTALLATION ..................................6 MANUAL RINSE CYCLE ..................................7 FIRST ESPRESSO .....................................8 MY FAVORITE ESPRESSO ..................................8 ADJUSTING THE COFFEE GRINDER ..............................9 FROTHING MILK....................................9 HOT WATER ....................................10 DESCALING ....................................11 BREW GROUP CLEANING ................................13 CAPPUCCINATORE CLEANING ................................13 MENU FOR CUSTOMIZATION AND MAINTENANCE ..........................16 BEVERAGE MENU ..................................16 MACHINE MENU ....................................17 WARNING ....................................18... -
Page 4: Safety Instructions
Safety instructions Instrukcje zapewnienia bezpieczeństwa • Never clean with scrubbing powders or harsh cleaners. Simply use a EN - Safety instructions soft cloth dampened with water. This machine is equipped with safety features. Nevertheless read the safety • Descale your machine regularly. The machine indicates when descal- instructions carefully and only use the machine as described in these in- ing is needed. -
Page 5: Instrukcje Zapewnienia Bezpieczeństwa
• Nie dokonywać samemu żadnych modyfikacji urządzenia lub jego przewodu zasilania. Dla uniknięcia jakichkolwiek zagrożeń, wszelkie naprawy mogą być przeprowadzane wyłącznie przez autoryzowane centra serwisowe Saeco. Symbol na produkcie lub jego opakowaniu wskazuje, że produkt • Urządzenie nie jest przeznaczone do użytkowania przez osoby (w tym ten nie może być... -
Page 6: First Installation
Instructions Instrukcje FIRST INSTALLATION PIERWSZE URUCHOMIENIE Insert the drip tray until it Remove the Cappuccinatore with the suction tube from the If the Cappuccinatore is fi tted up to its limit stop (beyond the locks into place. packaging. Insert the Cappuccinatore until it locks into place highlighted seat) it might not operate correctly since no milk in the highlighted steam wand seat. -
Page 7: Manual Rinse Cycle
Instructions Instrukcje LANGUAGE HEATING UP… ITALIANO ENGLISH DEUTSCH FRANÇAIS Insert the plug into the wall Switch the main power but- The machine is in warm-up Press to select the language, then press to save the socket. ton to “I”. phase. setting! Only at fi rst installation. -
Page 8: First Espresso
Instructions Instrukcje HOT WATER Gran Crema STOP HOT WATER Repeat the step from 1 to 3 When the process is com- When the process is com- Now the machine is ready Press the “ ” button to for three times, then con- plete, empty the container plete, empty the container. -
Page 9: Adjusting The Coffee Grinder
Instructions Instrukcje ADJUSTING THE COFFEE GRINDER REGULACJA MŁYNKA DO KAWY The grinder adjustment lever, which is placed on the side of the machine, must be turned only when the coff ee grinder is working. Dźwignię regulacji młynka, znajdującą się z boku urządzenia, należy przesuwać... -
Page 10: Hot Water
Instructions Instrukcje HOT WATER GORĄCA WODA HOT WATER rema STOP HOT WATER Remove the pin with the suc- Remove the Cappuccinatore Place a container under the Press the button to start The machine needs a warm- tion tube from the Cappuc- end part. -
Page 11: Descaling
Instructions Instrukcje DESCALING - 35 min. ODKAMIENIANIE - 35 minut The (A) display pops up when the machine needs a descaling cycle. At next start-up the (B) display is shown to provide a quick access to the descaling cycle. Not doing this will make your appliance stop working properly. In this case repair is not covered under your warranty! Gran Crema Gdy urządzenie wymaga przeprowadzenia cyklu odkamieniania, to na wyświetlaczu urządzenia pojawi się... - Page 12 Instructions Instrukcje DESCALING DESCALING DESCALING DESCALING DESCALING RINSE TANK & PLACE A CONTAINER STEP 1/2 DESCALING EMPTY DRIP TRAY STEP 2/2 RINSING FILL WITH FRESH WATER UNDER DISPENSING SPOUTS PAUSE PAUSE The machine starts the des- Rinse the water tank and Empty the drip tray and Empty and place the con- The machine starts the rinse...
-
Page 13: Brew Group Cleaning
Instructions Instrukcje BREW GROUP CLEANING CZYSZCZENIE BLOKU ZAPARZAJĄCEGO Remove the drip tray. Remove the coff ee grounds Open the service door: Remove the brew group: pull drawer. 1) turn the lever clockwise by 90°; it by the handle and press 2) pull the service door towards you. - Page 14 , zatrzymujący nalewanie wody. Pour the Saeco Milk Circuit Cleaner bag into a container. Add Insert the suction tube into Place an empty container Monthly ½ lt of lukewarm water and wait for the product to dissolve the container.
- Page 15 Instructions Instrukcje STEAM STOP STEAM Insert the suction tube into Empty the container and The machine needs a warm- When the process is com- Press the button to start the container. place it back under the Cap- brewing. up time. plete, the machine dispenses puccinatore.
-
Page 16: Menu For Customization And Maintenance
Instructions Instrukcje MENU FOR CUSTOMIZATION AND MAINTENANCE MENU DLA DOSTOSOWANIA URZĄDZENIA ORAZ DLA KONSERWACJI When you enter the programming mode, the buttons have a diff erent function: button = (confi rms a selection or a change you have made) MENU button = (scrolls up the menu) BEVERAGE MENU... -
Page 17: Machine Menu
Instructions Instrukcje MACHINE MENU MENU URZĄDZENIA MENU MENU MENU BEVERAGE MENU BEVERAGE MENU MACHINE MENU MACHINE MENU Press the button. Press the button to scroll down and the button to enter the MACHINE MENU. Wcisnąć przycisk . Wcisnąć przycisk w celu przewinięcia menu w dół oraz przycisk w ... -
Page 18: Warning
Instructions Instrukcje WARNING OSTRZEŻENIA CLOSE INSERT DRIP TRAY INSERT COFFEE CLOSE REFILL SIDE DOOR GROUNDS DRAWER HOPPER DOOR WATER TANK Close the service door. Insert the drip tray. Insert the coff ee grounds Close the coff ee bean hop- Remove the tank and fi ll it drawer. - Page 20 The manufacturer reserves the right to change the features of the product without prior notice. Producent zastrzega sobie prawo dokonywania zmian w funkcjach produktu bez uprzedniego powiadamiania.


