Table of Contents
Advertisement
Available languages
Available languages
Quick Links
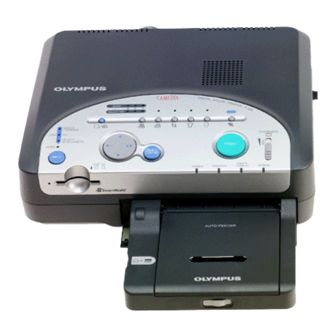
P-330E
Digital color printer
Imprimante couleur numérique
Digitaler Farbdrucker
G B
• Thank you for purchasing this Olympus digital color printer.
• Before using this product, read this manual carefully to
ensure correct use.
F R
• Nous vous remercions d'avoir choisi cette imprimante couleur
numérique.
• Avant d'utiliser votre imprimante couleur numérique, nous
vous recommandons de lire attentivement ce mode d'emploi.
D E
• Vielen Dank für der Kauf dieses Digitaler Farbdruckers von
OLYMPUS.
• Bitte lessen Sir diese Angaben durch, ehe Sie ihren Digitaler
Farbdrucker in Betrieb nehmen.
C T
Instructions
3-865-711-21(1)
Advertisement
Chapters
Table of Contents

Related Manuals for Olympus Camedia P-330E


Summary of Contents for Olympus Camedia P-330E
- Page 1 Digital color printer Imprimante couleur numérique Digitaler Farbdrucker Instructions • Thank you for purchasing this Olympus digital color printer. • Before using this product, read this manual carefully to ensure correct use. • Nous vous remercions d’avoir choisi cette imprimante couleur numérique.
- Page 2 Introduction Before using the printer, read the Thank you for purchasing this safety precautions given on pages 4 OLYMPUS digital color printer. through 9 and follow them to ensure proper handling. Keep this manual handy for future reference. Read this manual and warranty and keep them for future reference and use them when requesting service.
-
Page 3: Table Of Contents
Table of contents Safety precausions ........4 Making Various Prints Making split prints ........ 35 Getting Started Selecting the same image for split planes ..........35 Unpacking the printer ......10 Selecting different images for split What you can do with the Digital planes .......... -
Page 4: Safety Precausions
Safety precautions It is dangerous to tamper with the printer because this can cause fire or electric shock possibly resulting in death or serious injury. Before use, read the safety precautions thoroughly and follow them for proper handling. This manual uses the following icons to indicate hazardous situations. - Page 5 WARNING p If anything strange occurs with the printer, unplug the power cord. If the printer emits smoke, strange smells, or strange sounds, turn off and unplug the printer to prevent fire or electric shock. Then contact your dealer. p Should any liquid or foreign object fall into the printer, unplug the power cord.
- Page 6 WARNING p Do not disassemble or modify the printer. The printer has both hot and high voltage parts on the inside. To prevent an electric shock or printer malfunction, do not attempt to disassemble or modify the printer. For service or repair, contact your dealer. p Do not place liquids on the printer.
- Page 7 WARNING p Make sure that excessive dust and foreign matter do not accumulate on the power cord. Dust and foreign matter conduct electricity, which can cause fire and electric shock. If excessive dust and foreign matter accumulate on the cord, unplug the cord and clean it.
- Page 8 NOTE p Do not block the vent. Doing so may cause the printer to heat up, possibly resulting in fire or electric shock. • Do not block the top or side vent. • Do not put the printer in the following places. –...
- Page 9 NOTE p Unplug the power cord from the power outlet before cleaning the printer. Accidentally touching a non-user-serviceable part may cause electric shock. p Unplug the printer if it will not be used for an extended period of time, for example while you are on a long trip.
-
Page 10: Getting Started
Getting Started Unpacking the printer Make sure that the following accessories are supplied with your printer. • Automatic feeder (1) • AC power cord (1) • CD-ROM (for Windows 95/98, 3.1 and Macintosh) • Video connecting cable (1) • Connecting cable for computer (for Macintosh x 1, for IBM PC/AT and its compatibles x 1) •... -
Page 11: What You Can Do With The Digital Color Printer P-330E
P-330E. By connecting the P-330E to your PC or Macintosh, you can make prints of images from your computer. Direct printing of the image from a OLYMPUS Digital Cameras You can directly print the images recorded with the OLYMPUS CAMEDIA C-1400L/C-1000L/and C- 1400XL Digital Cameras. -
Page 12: Identifying The Parts
Identifying the parts See the pages given in parentheses for use of the parts. 1 Paper outlet (p. 53) 2 Serial port (p. 18) 3 Parallel port (p. 17) 4 Power (on/off) switch (p. 18) 5 AC power connector (p. 18) 6 VIDEO OUT (output) connector (p. - Page 13 Operation Panel (display) button (p. 27) (split) (SAME/SELECTED 16/ 9/4) button (p. 35, 49) (date) button (p. 42) (trimming) button (p. 44) (mirror) button (p. 48) (card function) button (p. 46) (motion picture) button (p. 33) 8 INPUT ( (card) : (single/ random), (all),...
-
Page 14: Setting Up
Setting Up Connecting the printer Notes • When printing from the Smart Media, see below. • Before making • When printing from the OLYMPUS CAMEDIA C- connections, turn off 1400L/C-1000L/C-1400XL digital cameras, see page the power of the printer, television, digital camera, video •... -
Page 15: Connecting To The Digital Camera
Connecting to the digital camera When printing images from the OLYMPUS CAMEDIA C-1400L/C-1000L/C-1400XL digital cameras, connect the parallel port of the printer to the printer port of the digital camera with the parallel type print cable CB-P14 (not supplied). For printing operations, see page 30. -
Page 16: Connecting To The Video Equipment
Connecting the printer (continued) Tips Connecting to the video equipment • If the video equipment has an S-Video output When printing the images from a video camera or connector, connect it to other video equipment having a video output the S-VIDEO IN (input) connector, use a commercially available video connector of the printer connecting cable to connect the video equipment to the... -
Page 17: Connecting To The Computer
Notes on connection Connecting to the computer • Connect either the serial cable or the For how to install the printer driver and print from parallel cable. the computer, refer to the supplied installation • If a camera is guide. connected, you cannot print from the By connecting the printer to your computer and... -
Page 18: Connecting The Ac Power Cord
Connecting the printer (continued) For Macintosh: Connecting to a Macintosh and its compatibles If your computer does Use the supplied cable (Mini DIN 8-pin plug, male/ not match the plug Mini DIN 8-pin plug, male) to connect the computer to Use a commercially the serial port of the printer. -
Page 19: Using Print Packs (Optional)
Using print packs (optional) Notes You need a print pack (not supplied) for printing. A • Use the set of the print print pack contains a set of print paper and ink ribbon paper and ink ribbon cartridge. cartridge supplied Use the following set for printing purposes: together in the same carton. -
Page 20: Loading The Ink Ribbon Cartridge
Loading the ink ribbon cartridge Caution Insert the ink ribbon cartridge into the printer. Never put your hand into Use only the ink ribbon cartridge supplied with the the cartridge print paper packed in the same carton. compartment. The thermal head reaches high temperatures, especially after repeated printing. - Page 21 Notes on storing the ink If the cartridge compartment lid does not close ribbon cartridge Remove the ink ribbon cartridge, and then re-insert it. • Avoid placing the cartridge in a location To remove the used ink ribbon cartridge subject to: If the (paper/ribbon) indicator flashes slowly –...
-
Page 22: Inserting The Print Paper
Inserting the print paper Inserting the print paper into the automatic feeder To open the cover, slide the front switch to the right. Stand the spacer up. Spacer To avoid paper jamming, riffle the print paper. Make sure not to touch the printing surface (shiny side where nothing is printed). - Page 23 Printing surface imperfect printing. • Use the print paper For stickers, place the side recommended for this with “OLYMPUS” face printer only. If you use down, and for standard a different type of and passport photo paper, it may cause...
-
Page 24: Attaching The Automatic Feeder To The Printer
Inserting the print paper (continued) Attaching the automatic feeder to the Notes on storing the printer print paper • Avoid placing the print paper in a location Push the automatic feeder compartment lid. subject to: – high temperatures The lid of the automatic feeder compartment opens. –... -
Page 25: Making Basic Prints
Making Basic Prints Printing an image recorded on the Smart Media You can select an image recorded on the Smart Media and print it in full-size (standard print). Standard print Preparations INPUT button (split) button (power) indicator Access indicator Notes Turn on the printer and television and set the TV/ •... -
Page 26: Printing
Smart Media as they While accessing the Smart Media, the access were recorded with the indicator next to the slot flashes. After the images OLYMPUS digital of the Smart Media are read, they are displayed as camera. For the images retouched or saved thumbnails (small image) in the list. - Page 27 Displaying the selected image in full-size Press the (display) button. The image selected with the white frame is displayed in full- size. You can view the previous or next image by pressing “ or ” . To go back to the image list, press (display) button again.
- Page 28 Printing an image recorded on the Smart Media (continued) To stop continuous Press the (print) button of the printer to start printing printing. Set the dial of the (printing) indicator lights and the printer automatic feeder to 1. The printer stops after the prints the number of copies you have set.
- Page 29 • If you press (print) Selecting and printing multiple images at a time button when the image Press the SELECT/CAPTURE button with the white is displayed in full size, frame on the desired image in step 1; the red frame only the displayed appears inside the white frame showing that the image image is printed.
-
Page 30: Printing An Image Recorded By Digital Cameras
Printing an image recorded by digital cameras You can directly print the image recorded by One-sheet print, Index OLYMPUS CAMEDIA C-1400L/C-1000L/C-1400XL print, Multi print, Mirror Digital Cameras. For other models, you cannot make print, All print, Random direct printing with the connecting cable. -
Page 31: Printing An Image From The Video Equipment
Printing an image from the video equipment You can capture the input image of the video equipment connected to the video input connector of the printer and print it in full-size (standard print). Standard print Preparations (split) button (power) indicator Turn on the printer and television and set the TV/ VIDEO selector of the television to “VIDEO.”... -
Page 32: Printing
Printing an image from the video equipment (continued) Printing (motion picture) button Start playback of images with the video equipment. The video playback images (input image) are displayed on the television. For playback operations, refer to the instruction manual of the video equipment you are using. - Page 33 If the image is blurred When a fast-moving image is captured, the image displayed on the television may be blurred. Press (motion picture) button. When you correct the blur, the print resolution may be slightly degraded. Printing a number of Turn the dial of the automatic feeder to set the copies not specified on number of copies to be printed.
- Page 34 Printing an image from the video equipment (continued) If print paper runs out Press the (print) button of the printer to start If the print paper is not printing. inserted or runs out (printing) indicator lights and the printer during printing, remove prints the number of copies you have set.
-
Page 35: Making Various Prints
Making Various Prints Making split prints Before you begin 1 Turn on the printer and television and set the TV/ VIDEO selector of the television to “VIDEO.” 2 When printing from the Smart Media, press the INPUT button until the (single/random) indicator turns on. - Page 36 Making split prints (continued) Note Press the (split) button until the desired split- When printing from the plane number indicator among SAME 16, 9 or 4 video equipment, the lights. SELECTED 16, 9, and 4 To display the image in full size, press the indicators do not light.
-
Page 37: Selecting Different Images For Split Planes
Selecting different images for split You can also make split planes ( , VIDEO) prints with different images when the You can select different images from the Smart Media indicators are on. For for 4-split, 9-split, or 16-split planes and print them on the operations, see page a sheet of print paper. - Page 38 Making split prints (continued) Turn the dial of the automatic feeder to set the You can print the date of number of copies to be printed. recording with the image. Press the (date) Press the (print) button of the printer to start button to turn the printing.
-
Page 39: Printing All The Recorded Or Protected Images In The Smart Media
Printing all the recorded or protected images in the Smart Media ( You can print all the images recorded in the Smart Media or all the images selected or protected by the digital camera. The images can be printed one by one in either full-size or split-planes. - Page 40 Printing all the recorded or protected images in the Smart Media (continued) Press the (split) button to select the desired number of plane(s) for printing. • To print images one by one in full size, turn off all the indicators of the (split) button.
-
Page 41: Printing The Date
Printing the date ( Notes You can print the date recorded together with the • The date is set by the image in the Smart Media. digital camera. For the details, refer to the instruction manual of the digital camera you are using. - Page 42 Printing the date (continued) Press the (date) button. (date) indicator turns on. To display the date, press the (display) button to display the image in full size. Turn the dial of the automatic feeder to set the number of copies to be printed. Press the (print) button of the printer to start printing.
-
Page 43: Printing The Trimmed Image
Printing the trimmed image , VIDEO) You can enlarge part of an image 1.5 or 2.0 times and print the trimmed image. Before you begin 1 Turn on the printer and television and set the TV/ VIDEO selector of the television to “VIDEO.” 2 When printing from the Smart Media, press the INPUT button until the (single/random) - Page 44 Printing the trimmed image (continued) Press the (trimming) button. (trimming) indicator turns on and the 1.5 times trimming frame is displayed. Inside the frame is the area to be enlarged. 1.5 times trimming frame Press the (trimming) button to select the Note magnification.
- Page 45 Press the (split) button to select the desired number of plane(s) for printing. • To print the image in full size, turn off all the indicators of the (split) button. Note • To print the image in split-planes, turn on the You cannot select the indicator of SAME 16, 9 or 4.
-
Page 46: Printing With The Card Function
Printing with the card function ( You can use the functional Smart Media (title card: Note M-4NE) to print a composite image with a title image. The title card Smart Media may not be For the details, refer to the instruction manual of the available in some functional Smart Media. - Page 47 Press the (card function) button to select the title Tips image to overlay the image. • To print without a title Each time you press the button, the title image image, press the changes. (card function) button until the (card function) indicator Press the (split) button to select the desired...
-
Page 48: Adding Touches To A Print (Mirror/ Sharpness)
Adding touches to a print (mirror/ sharpness) You can flip the image horizontally or adjust the sharpness of the image to be printed. Notes Flipping the image horizontally ( • The image displayed on Press the (mirror) button. the television is not flipped horizontally. -
Page 49: For Your Information
For Your Information Troubleshooting Use the following measures to solve problems you may experience with your printer. If the problem persists, contact your dealer for information on what to do next. • Cannot operate the printer after the power switch is turned on. - Page 50 Troubleshooting (continued) • Printing takes longer than usual. m If the (printing) indicator is flashing, see “If the indicators are on” on the next page. • Cannot print. m Install the printer driver in the computer. m Insert the ink ribbon cartridge and automatic feeder containing the print paper (pages 22 to 24).
-
Page 51: If The Indicators Are On
If the indicators are on If you cannot print, check the indicators on the front panel. (power) indicator* (printing) indicator (paper/ribbon) indicator (error) indicator Access indicator * The (power) indicator stays on while power is supplied to the printer. • The (paper/ribbon) indicator is flashing slowly (at intervals of about 0.5 second). - Page 52 Troubleshooting (continued) • The (power) indicator is flashing m The printer is communicating with the computer. Wait until the communication is over. • The (power) indicator and the (printing) indicator are flashing m The printer is communicating with the computer or waiting for the printing commands from the computer.
-
Page 53: If The Print Paper Is Jammed
Notes If the print paper is jammed • If the (power) indicator does not turn on after having If the print paper is jammed, all indicators flash and removed the jammed paper, turn the power printing stops. Turn off the power and remove the off and on again. -
Page 54: About The Ink Ribbon Cartridge And Print Paper
About the ink ribbon cartridge and print paper Notes on the ink ribbon cartridge Print packs (optional) • The ink ribbon cartridge is not You need an optional set of print paper reusable. When it runs out, the and ink ribbon cartridge for printing. (paper/ribbon) indicator flashes slowly (at intervals of about 0.5 Make sure to use the following set. -
Page 55: Specifications
Specifications Dimensions Printer Approx. 274 x 83 x 362 mm Printing system (w/h/d, excluding protruding parts) Sublimation dye transfer printing x 14 inches) (Yellow/Magenta/Cyan 3 pass) Without the automatic feeder: Effective pixels Approx. 274 x 83 x 242 mm 1376 (H) x 1024 (V) dot (w/h/d, excluding protruding parts) Printing size inches) -
Page 56: Index
Index Memory image 32 S-VIDEO IN (input) Adjusting the sharpness 48 connector 16 Mirror button 48 Arrow buttons 26 Scrolling the pages 39 Motion picture button 33 Automatic feeder 22 SELECT/CAPTURE button 29, 32 Serial port 18 Paper jamming 53 Card function button 46 Setting the print quantity Paper/ribbon indicator... -
Page 57: Print Index
Print index Standard print Split printing with the same image (p.35) , VIDEO) (p.25) 4-split print (sticker) 9-split print 16-split print (sticker) (p.39) VIDEO (p.31) Split printing with different images (p.37) 4-split print (sticker) 9-split print 16-split print (sticker) Strobe print (p.38) (VIDEO) 4-split print (sticker) 9-split print... - Page 58 Furthermore, “™” and “®” are not mentioned in each case in this manual. © OLYMPUS OPTICAL CO., LTD. 1998. All rights reserved • No portion of this manual may be copied or reproduced by any means without the prior written permission of OLYMPUS.
- Page 59 For Your Information...
- Page 60 Nous vous remercions d’avoir fait lisez les précautions de sécurité stipulées l’acquisition de cette imprimante dans les pages 4 à 9 et auxquelles vous couleur numérique OLYMPUS. vous conformerez pour garantir une Lisez le présent mode d’emploi ainsi utilisation appropriée. Conservez ce que les conditions de garantie pour mode d’emploi à...
- Page 61 Table des matières Réalisation de différents Précautions de sécurité ......4 tirages Réalisation de tirages fractionnés ..35 Préparation Sélection de la même image pour des plans fractionnés ....... 35 Déballage de l’imprimante ....10 Sélection d’images différentes pour Que pouvez-vous réaliser avec des plans fractionnés .......
-
Page 62: Précautions De Sécurité
Précautions de sécurité Il est dangereux de tenter d’ouvrir l’imprimante en raison du risque d’incendie ou d’électrocution, susceptible d’entraîner de graves blessures, voire la mort. Avant la mise en service, lisez attentivement les précautions de sécurité et conformez-vous y pour une utilisation appropriée. - Page 63 ATTENTION p Si quoi que ce soit de bizarre survient sur l’imprimante, débranchez le cordon d’alimentation. Si l’imprimante émet de la fumée, des odeurs ou des bruits anormaux, mettez l’imprimante hors tension et débranchez-la de manière à éviter tout risque d’électrocution.
- Page 64 ATTENTION p Ne démontez pas l’imprimante et ne la transformez pas. A l’intérieur de l’imprimante se trouvent des composants brûlants et soumis à de hautes tensions. Pour prévenir tout risque d’électrocution ou de dysfonctionnement de l’imprimante, ne tentez pas de démonter ou de modifier l’imprimante.
- Page 65 ATTENTION p Assurez-vous que de la poussière ou des substances étrangères ne s’accumulent pas sur le cordon d’alimentation. La poussière et les substances étrangères sont conductrices de l’électricité et sont de ce fait susceptibles de provoquer un incendie ou une électrocution. Si de la poussière ou des substances étrangères se sont accumulées sur le cordon d’alimentation, débranchez et nettoyez le cordon d’alimentation.
- Page 66 REMARQUE p N’obstruez pas les ouïes de ventilation. L’imprimante risque sinon de surchauffer, ce qui pourrait provoquer un incendie ou une électrocution. • N’obstruez pas les ouïes de ventilation supérieures ou latérales. • Ne placez pas l’imprimante dans les endroits suivants. –...
- Page 67 REMARQUE p Débranchez le cordon d’alimentation de la prise de courant avant de nettoyer l’imprimante. Un contact accidentel avec les composants non accessibles à l’utilisateur peut provoquer une électrocution. p Débranchez l’imprimante si vous prévoyez de ne pas l’utiliser pendant une période prolongée, par exemple lorsque vous partez en vacances.
-
Page 68: Préparation
Préparation Déballage de l’imprimante Assurez-vous que les accessoires suivants sont fournis avec votre imprimante. • Chargeur automatique (1) • Cordon d’alimentation CA(1) • CD-ROM (pour Windows 95/98, 3.1 et Macintosh) • Câble de connexion vidéo (1) • Câble de connexion pour ordinateur (pour Macintosh x 1, IBM PC/AT et compatibles x 1) •... -
Page 69: Que Pouvez-Vous Réaliser Avec L'imprimante Couleur Numérique P-330E
P-330E L’imprimante couleur numérique P-330E vous permet d’imprimer directement des images des appareils photo numériques OLYMPUS ou via un Smart Média. Vous pouvez également imprimer des images transmises par un appareil vidéo comme une caméra vidéo raccordée à l’imprimante P-330E. -
Page 70: Identification Des Composants
Identification des composants Pour plus de détails sur l’utilisation des composants, reportez-vous aux pages indiquées entre parenthèses. 1 Sortie du papier (p. 53) 2 Port sériel (p. 18) 3 Port parallèle (p. 17) 4 Commutateur d’alimentation (marche/arrêt) (p. 18) 5 Connecteur d’alimentation secteur (p. - Page 71 Panneau de commande 1 Touche (affichage) (p. 27) 2 Touche (fractionnement) (SAME/SELECTED 16/9/4) (p. 35, 49) 3 Touche (date) (p. 42) 4 Touche (détourage) (p. 44) 5 Touche (miroir) (p. 48) 6 Touche (fonction de carte) (p. 46) 7 Touche (image animée) (p.
-
Page 72: Installation
• Pour imprimer au départ d’un appareil photo mettez hors tension l’imprimante, le numérique OLYMPUS CAMEDIA C-1400L/C- téléviseur, l’appareil 1000L/C-1400XL, voir page 15. photo numérique, • Pour imprimer à partir d’un appareil vidéo doté l’ordinateur et tout autre appareil à... -
Page 73: Raccordement De L'appareil Photo Numérique
Raccordement de l’appareil photo numérique Pour imprimer les images d’un appareil photo numérique OLYMPUS CAMEDIA C-1400L/C-1000L/ C-1400XL, raccordez le port parallèle de l’imprimante au port d’imprimante de l’appareil photo numérique à l’aide du câble d’impression directe CB-P14 (non fourni). Pour les opérations d’impression, voir page 30. -
Page 74: Raccordement D'un Appareil Vidéo
Raccordement de l’imprimante (suite) Conseils Raccordement d’un appareil vidéo • Si l'appareil vidéo est doté d'un connecteur Pour imprimer les images d’une caméra vidéo ou d’un de sortie S-Video, autre appareil vidéo via le connecteur de sortie vidéo, raccordez-le au utilisez un câble de connexion vidéo disponible dans le connecteur S-VIDEO commerce pour raccorder l’appareil vidéo au... -
Page 75: Raccordement D'un Ordinateur
Raccordement d’un ordinateur Remarques sur le Pour installer le du pilote d’imprimante et imprimer raccordement au départ de l’ordinateur, reportez-vous au guide • Raccordez uniquement installation fourni. le câble série ou le câble parallèle. En raccordant l’imprimante à votre ordinateur et en •... -
Page 76: Raccordement Du Cordon D'alimentation Secteur
Raccordement de l’imprimante (suite) Pour les Macintosh: Raccordement d’un Macintosh ou compatible Si votre ordinateur ne Utilisez le câble fourni (minifiche DIN à 8 broches, correspond pas à la fiche mâle/minifiche DIN à 8 broches, mâle) pour raccorder Utilisez un câble l’ordinateur au port sériel de l’imprimante. -
Page 77: Utilisation De Jeux D'impression (En Option)
Utilisation de jeux d’impression (en option) Remarques Pour l’impression, vous avez besoin d’un jeu • Utilisez le papier d’impression (non fourni). Un jeu d’impression d’impression et la comprend du papier d’impression et une cartouche de cartouche de ruban ruban encré. encré... -
Page 78: Chargement De La Cartouche De Ruban Encré
Chargement de la cartouche de ruban encré Attention Introduisez la cartouche de ruban encré dans N’introduisez jamais les l’imprimante. doigts dans le Utilisez uniquement la cartouche de ruban encré compartiment à fournie avec le papier d’impression et emballés dans le cartouche. - Page 79 Remarques sur le Si le couvercle du compartiment à cartouche ne se rangement des referme pas cartouches à ruban Retirez la cartouche de ruban encré et réintroduisez-la encré à nouveau. • Ne placez pas les cartouches dans des Pour retirer une cartouche de ruban encré usagée endroits soumis à: - de hautes Si l’indicateur...
-
Page 80: Introduction Du Papier D'impression
Introduction du papier d’impression Introduction du papier d’impression dans le chargeur automatique Pour ouvrir le couvercle, faites glisser le coulisseau frontal vers la droite. Remarques Relevez l’espaceur. • Lorsque vous manipulez le papier d’impression, ne touchez pas la surface d’impression (face brillante qui ne Espaceur comporte aucune... - Page 81 Pour les étiquettes, vous ajoutez du papier Surface orientez la face portant la dans le chargeur à d’impression marque "OLYMPUS" moitié vide. vers le bas; pour les • N’introduisez pas papiers standard et pour différents types de photo passeport ,...
-
Page 82: Installation Du Chargeur Automatique Sur L'imprimante
Introduction du papier d’impression (suite) Installation du chargeur automatique Remarques sur le sur l’imprimante rangement du papier d’impression • Ne placez pas le papier Poussez sur le couvercle du logement du chargeur d’impression dans des automatique. endroits soumis à: Le couvercle du logement du chargeur - de hautes automatique. -
Page 83: Réalisation De Tirages De Base
Réalisation de tirages de base Impression d’une image enregistrée sur le Smart Média Vous pouvez sélectionner une image enregistrée sur le Smart Média et l’imprimer en format pleine page (tirage standard). Tirage standard Préparation Touche INPUT Touche (fractionnement) Indicateur (alimentation) Indicateur d’accès Remarques... -
Page 84: Impression
été de la fente clignote. Lorsque les images du Smart enregistrées avec Média ont été lues, elles sont affichées en format l’appareil photo numérique OLYMPUS. pendentif (petite image) dans la liste. Nous ne pouvons garantir un affichage Curseur (cadre blanc) - Page 85 Affichage de l’image sélectionnée en format pleine page 1 Appuyez sur la touche (affichage). L’image sélectionnée avec le cadre blanc s’affichent en format pleine page. Vous pouvez visualiser l'image précédente ou la suivante en appuyant sur la touche “ ou ”. Pour revenir à la liste d’images, appuyez sur la touche (affichage).
- Page 86 Impression d’une image enregistrée sur le Smart Média (suite) Pour interrompre une Appuyez sur la touche (impression) de impression en continu l’imprimante pour démarrer l’impression. Réglez la molette du L’indicateur (impression en cours) s’allume et chargeur automatique sur l’imprimante imprime le nombre de copies que 1.
- Page 87 enregistrée par Sélection et impression de plusieurs images en l’appareil photo même temps numérique. Appuyez sur la touche SELECT/CAPTURE avec le • Si vous appuyez sur la cadre blanc sur l’image désirée à l’étape 1; le cadre touche (impression) rouge apparaît à l'intérieur du cadre blanc pour alors que l'image est indiquer que la sélection d'image est confirmée.
-
Page 88: Impression D'une Image Enregistrée Par Un Appareil Photo Numérique
Conseil Vous pouvez imprimer directement une image Les fonctions enregistrée par un appareil photo numérique d’impression One-sheet, OLYMPUS CAMEDIA C-1400L/C-1000L/C-1400XL. Index, Multi, Mirror, All, Random et Date sont Avec d’autres modèles, vous ne pouvez pas réaliser disponibles. Pour plus de d’impressions directes avec le câble de connexion. -
Page 89: Impression D'une Image De L'appareil Vidéo
Impression d’une image de l’appareil vidéo Vous pouvez saisir une image transmise par un appareil vidéo raccordé via le connecteur d’entrée vidéo de l’imprimante et l’imprimer en format pleine page (tirage standard). Tirage standard Préparation Touche (fractionnement) Indicateur (alimentation) Mettez l’imprimante et le téléviseur sous tension et réglez le sélecteur TV/VIDEO du téléviseur sur “VIDEO”. -
Page 90: Impression
Impression d’une image de l’appareil vidéo (suite) Impression Touche (image animée) Lancez la lecture des images avec l’appareil vidéo. Les images de lecture vidéo (image entrée) sont affichées sur le téléviseur. Pour les opérations de lecture, reportez-vous au mode d’emploi de l’appareil vidéo que vous utilisez. - Page 91 Si l’image est floue Lors de la saisie d’une image animée d’un mouvement rapide, il se peut que l’image affichée sur le téléviseur soit floue. Appuyez sur la touche (image animée). Lorsque vous avez corrigé la netteté, il se peut que la résolution d’impression se soit légèrement altérée.
- Page 92 Impression d’une image de l’appareil vidéo (suite) Pour interrompre une Appuyez sur la touche (impression) de impression en continu l’imprimante pour démarrer l’impression. Réglez la molette du L’indicateur (impression en cours) s’allume et chargeur automatique sur l’imprimante imprime le nombre de copies que 1.
-
Page 93: Réalisation De Différents Tirages
Réalisation de différents tirages Réalisation de tirages fractionnés Avant de commencer... 1 Mettez l’imprimante et le téléviseur sous tension et réglez le sélecteur TV/VIDEO du téléviseur sur “VIDEO”. 2 Pour imprimer au départ du Smart Média, appuyez sur la touche INPUT jusqu’à ce que l’indicateur (simple/aléatoire) s’allume. - Page 94 Réalisation de tirages fractionnés (suite) Remarque Appuyez sur la touche (fractionnement) Si vous imprimez au jusqu’à ce que l’indicateur de plan fractionné voulu départ d’un appareil (SAME 16, 9 ou 4) s’allume. vidéo, les indicateurs Pour afficher l'image en format plein écran, SELECTED 16, 9 et 4 ne appuyez sur la touche (affichage).
-
Page 95: Sélection D'images Différentes Pour Des Plans Fractionnés
Conseil Sélection d’images différentes pour Vous pouvez également des plans fractionnés , VIDEO) réaliser des tirages fractionnés de différentes Vous pouvez sélectionner différentes images au départ images lorsque les du Smart Média pour des plans fractionnés en 4, 9 ou indicateurs 16, et les imprimer sur une feuille de papier s’allument. - Page 96 Réalisation de tirages fractionnés (suite) Conseil Tournez la molette du chargeur automatique pour Vous pouvez imprimer la définir le nombre de copies à imprimer. date d’enregistrement avec l’image. Appuyez Appuyez sur la touche (impression) de sur la touche (date) l’imprimante pour démarrer l’impression. de manière à...
-
Page 97: Impression De Toutes Les Images Enregistrées Ou Protégées Sur Le Smart Média
Impression de toutes les images enregistrées ou protégées sur le Smart Média( Vous pouvez imprimer toutes les images enregistrées sur le Smart Média ou toutes les images sélectionnées ou protégées par l'appareil photo numérique. Les images peuvent être imprimées une par une en format pleine page ou en plan fractionné. - Page 98 Impression de toutes les images enregistrées ou protégées sur le Smart Média (suite) Appuyez sur la touche (fractionnement) pour sélectionner le plan fractionné voulu en vue de l’impression. • Pour imprimer les images une par une en format pleine page, désactivez tous les indicateurs de la touche (fractionnement).
-
Page 99: Impression De La Date
Impression de la date ( Remarques Vous pouvez imprimer la date enregistrée en même • La date est définie par temps qu’une image du Smart Média. l’appareil photo numérique. Pour plus de détails, reportez- vous au mode d’emploi qui accompagne l’appareil photo .01.01.’98 numérique que vous... - Page 100 Impression de la date (suite) Appuyez sur la touche (date) . L'indicateur (date) s'allume. Pour afficher la date, appuyez sur la touche (affichage) de manière à afficher l'image en format pleine page. Tournez la molette du chargeur automatique pour définir le nombre de copies à imprimer. Appuyez sur la touche (impression) de l’imprimante pour démarrer l’impression.
-
Page 101: Impression D'une Image Détourée
Impression d’une image détourée , VIDEO) Vous pouvez agrandir 1,5 ou 2 fois une partie d’une image et imprimer l’image détourée. Avant de commencer... 1 Mettez l’imprimante et le téléviseur sous tension et réglez le sélecteur TV/VIDEO du téléviseur sur “VIDEO”. - Page 102 Impression d’une image détourée (suite) Appuyez sur la touche (détourage). L’indicateur (détourage) s’allume et le cadre de détourage 1,5 fois apparaît. La zone à agrandir se trouve à l’intérieur du cadre. Cadre de détourage 1,5 fois Appuyez sur la touche (détourage) pour Remarque sélectionner l’agrandissement.
- Page 103 Appuyez sur la touche (fractionnement) pour sélectionner le plan fractionné en vue de l’impression. • Pour imprimer l’image en format pleine page, Remarque désactivez tous les indicateurs de la touche Vous ne pouvez pas (fractionnement). sélectionner les • Pour imprimer l’image en plan fractionné, indicateurs SELECTED activez l’indicateur du plan fractionné...
-
Page 104: Impression Avec La Fonction De Carte
Impression avec la fonction de carte Remarque Vous pouvez utiliser le Smart Média fonctionnel (carte Il se peut que la carte de de titre: M-4NE) pour imprimer une image composite titre Smart Media ne soit avec une image titre. Pour plus de détails, reportez- pas disponible dans vous au mode d’emploi du Smart Média fonctionnel. - Page 105 Appuyez sur la touche (fonction de carte) pour Conseils sélectionner l'image titre à fusionner avec l'image. • Pour imprimer sans un titre, appuyez sur la Chaque fois que vous appuyez sur la touche, touche (fonction de l'image titre change. carte) jusqu’à ce que l’indicateur Appuyez sur la touche (fractionnement) pour...
-
Page 106: Création D'effets Sur Un Tirage (Miroir/Netteté)
Création d’effets sur un tirage (miroir/ netteté) Vous pouvez inverser l’image horizontalement ou ajuster la netteté de l’image à imprimer. Remarques Inversion horizontale de l’image • L’image affichée sur le téléviseur n’est pas inversée Appuyez sur la touche (miroir). horizontalement. L’indicateur (miroir) s’allume. -
Page 107: Pour Votre Information
Pour votre information Dépannage Appliquez les mesures suivantes pour résoudre les problèmes que vous pourriez rencontrer dans le cadre de l’utilisation de cette imprimante. Si le problème persiste, consultez votre revendeur, qui vous renseignera sur la procédure ultérieure. • Impossible de faire fonctionner l’imprimante après avoir enclenché... - Page 108 Dépannage (suite) • L’impression dure plus longtemps que d’habitude. m Si l’indicateur (impression en cours) clignote, voir “Si les indicateurs sont activés” à la page suivante. • Impossible d’imprimer. m Installez le pilote d’imprimante sur l’ordinateur. m Introduisez la cartouche de ruban encré et le chargeur automatique avec du papier d’impression (pages 22 à...
-
Page 109: Si Les Indicateurs Sont Activés
Si les indicateurs sont activés Si vous ne pouvez pas imprimer, vérifiez les indicateurs sur le panneau frontal. Indicateur (alimentation)* Indicateur (impression en cours) Indicateur (papier/ruban) Indicateur (erreur) Indicateur d’accès * L’indicateur (alimentation) reste allumé tant que l’imprimante est sous tension. •... - Page 110 Dépannage (suite) • L’indicateur (alimentation) clignote. m L’imprimante communique avec l’ordinateur. Attendez que la communication soit terminée. • L’indicateur (alimentation) et l’indicateur (impression en cours) clignotent. m L’imprimante communique avec l’ordinateur ou attend les commandes d’impression de l’ordinateur. Il faut du temps pour que les commandes émises soient traitées.
-
Page 111: Si Le Papier D'impression S'est Coincé
Remarques Si le papier d’impression s’est coincé • Si l’indicateur (alimentation) ne s’allume pas après que Si le papier d’impression s’est coincé, tous les vous avez retiré le papier, mettez indicateurs clignotent et l’impression s’arrête. Mettez l’imprimante hors et l’imprimante hors tension et retirez le papier coincé. puis à... -
Page 112: A Propos De La Cartouche De Ruban Encré Et Du Papier D'impression
A propos de la cartouche de ruban encré et du papier d’impression Remarques sur la cartouche de ruban qu’il y ait un transfert d’encre vers ces encré éléments. • La cartouche de ruban encré n’est pas Lisez les précautions imprimées sur la réutilisable. -
Page 113: Spécifications
Spécifications Dimensions Imprimante Approx. 274 x 83 x 362 mm Système d’impression (l/h/p, parties saillantes non Impression par sublimation du comprises) transfert d’encre (3 passages jaune/ x 14 pouces) magenta/cyan) Sans le chargeur automatique: Pixels réels Approx. 274 x 83 x 242 mm 1376 (H) x 1024 (V) points (l/h/p, parties saillantes non Format d’impression... -
Page 114: Index
Index de la date 41 Accessoires fournis 10 de l’appareil vidéo 31 Raccordement Affichage pleine page de de l’image détourée 43 Cordon d’alimentation d’un appareil photo secteur 18 numérique 30 IBM PC/AT et Bourrage papier 53 du Smart Média 25 compatibles 17 toutes les images 39 Macintosh 18... -
Page 115: Index Des Tirages
Index des tirages Tirage standard Tirage fractionné avec la même image (p.35) , VIDEO) Tirage fractionné Tirage fractionné Tirage fractionné (p.25) en 4 (étiquettes) en 9 (étiquettes) en 16 (étiquettes) (p.39) VIDEO (p.31) Tirage fractionné avec différentes images (p.37) Tirage fractionné Tirage fractionné... - Page 116 De même, les logos “™“ et “®” ne sont pas systématiquement mentionnés dans le présent mode d’emploi. © OLYMPUS OPTICAL CO., LTD. 1998. Tous droits réservés. • Aucune partie du présent manuel ne peut être copiée ou reproduite par quelque procédé que ce soit sans l’autorisation écrite préalable d’OLYMPUS.
- Page 117 Pour votre information...
- Page 118 Einführung maßnahmen Danke, daß Sie sich für diesen digitalen Bevor Sie das Gerät benutzen, lesen Sie Farbdrucker von OLYMPUS bitte die Sicherheitshinweise auf Seite 4 entschieden haben. bis 9. Beachten Sie diese Hinweise. So können Sie sicher sein, daß Ihr Drucker Lesen Sie diese Anleitung und die jederzeit bestmöglich funktioniert.
- Page 119 Inhalt Sicherheitsmaßnahmen ......4 Erzeugen spezieller Ausdrucke Erste Schritte Geteilter Druck ........35 Auspacken des Druckers ...... 10 Auswählen desselben Bildes für Funktionen des Digitalfarbdruckers geteilten Druck ........ 35 P-330E ..........11 Auswählen verschiedener Bilder für geteilten Druck ......37 Lage und Funktion der Teile und Bedienelemente ........
-
Page 120: Sicherheitsmaßnahmen
Sicherheitsmaßnahmen Bitte versuchen Sie nicht, den Drucker zu zerlegen, selbst zu reparieren oder in irgendeiner Weise zu modifizieren. Andernfalls besteht Feuergefahr bzw. die Gefahr eines elektrischen Schlags. Schwere Verletzungen und Todesfälle können die Folge sein. Bevor Sie das Gerät benutzen, lesen Sie bitte die Sicherheitshinweise sorgfältig durch, und beachten Sie sie, wenn Sie mit dem Gerät arbeiten. - Page 121 ACHTUNG p Im Fall unerwarteter Fehlfunktionen lösen Sie bitte das Netzkabel des Druckers. Wenn vom Drucker Rauch, ungewöhnliche Gerüche oder Geräusche ausgehen, schalten Sie ihn aus, und lösen Sie das Netzkabel. Andernfalls besteht das Risiko eines Feuers oder eines elektrischen Schlags. Wenden Sie sich dann bitte an Ihren Händler.
- Page 122 ACHTUNG p Zerlegen Sie den Drucker nicht, und nehmen Sie keine Veränderungen daran vor. Im Inneren des Druckers liegen hohe Spannungen an, und einige Teile können sehr heiß werden. Bitte versuchen Sie nicht, den Drucker zu zerlegen oder in irgendeiner Weise zu modifizieren. Andernfalls besteht das Risiko eines elektrischen Schlags oder einer Fehlfunktion.
- Page 123 ACHTUNG p Achten Sie darauf, daß das Netzkabel nicht zu sehr verschmutzt. Staub und andere Fremdkörper können elektrisch leitend sein und auf diese Weise Feuer oder einen elektrischen Schlag verursachen. Ist das Netzkabel verschmutzt, lösen Sie es bitte von der Netzsteckdose, und reinigen Sie es. p Lösen Sie bei einem Gewitter bitte sofort das Netzkabel.
- Page 124 HINWEIS p Blockieren Sie die Lüftungsöffnungen nicht. Andernfalls kann sich im Inneren des Druckers ein Wärmestau bilden, und es besteht das Risiko eines Feuers oder eines elektrischen Schlags. • Blockieren Sie die Lüftungsöffnungen oben und seitlich nicht. • Stellen Sie den Drucker nicht an folgenden Standorten auf: –...
- Page 125 HINWEIS p Trennen Sie das Netzkabel von der Netzsteckdose, bevor Sie den Drucker reinigen. Andernfalls kann es zu einem elektrischen Schlag kommen, wenn Sie ein Teil im Druckerinneren berühren. p Trennen Sie den Drucker vom Netzstrom, wenn Sie ihn für längere Zeit - zum Beispiel während einer Reise - nicht verwenden wollen.
-
Page 126: Erste Schritte
Erste Schritte Auspacken des Druckers Überprüfen Sie, ob das folgende Zubehör mit Ihrem Drucker geliefert wurde. • Automatische Zuführung (1) • Netzkabel (1) • CD-ROM (für Windows 95/98, 3.1 und Macintosh) • Video-Verbindungskabel (1) • Verbindungskabel für Computer (1 für Macintosh, 1 für IBM PC/AT und Kompatible) •... -
Page 127: Funktionen Des Digitalfarbdruckers P-330E
Funktionen des Digitalfarbdruckers P-330E Mit dem Digitalfarbdrucker P-330E können Sie Bilder, die Sie mit einer digitalen Kamera von OLYMPUS aufgenommen haben, direkt oder über ein eine Smart Media-Karte ausdrucken. Sie können auch Bilder ausdrucken, die von einem an den P-330E angeschlossenen Videogerät (z. -
Page 128: Lage Und Funktion Der Teile Und Bedienelemente
Lage und Funktion der Teile und Bedienelemente Nähere Erläuterungen zu den Teilen und Bedienelementen finden Sie auf den in Klammern angegebenen Seiten. 1 Papierausgabe (S. 53) 2 Serieller Anschluß (S. 18) 3 Paralleler Anschluß (S. 17) 4 Netzschalter (ein/aus) (S. 18) 5 Netzanschluß... - Page 129 Bedienfeld 1 Taste (Anzeige) (S. 27) 2 Taste (geteilter Druck) (SAME/ SELECTED 16/9/4) (S. 35, 49) 3 Taste (Datum) (S. 42) 4 Taste (Ausschnitt) (S. 44) 5 Taste (Spiegelbild) (S. 48) 6 Taste (Kartenfunktion) (S. 46) 7 Taste (bewegtes Bild) (S. 33) 8 INPUT ( (Karte): Taste (einzeln/ausgewählt),...
-
Page 130: Vorbereitungen
• Wenn Sie Bilder von der digitalen Kamera schalten Sie Drucker, Fernsehgerät, digitale CAMEDIA C-1400L/C-1000L/C-1400XL von Kamera, Videokamera, OLYMPUS drucken wollen, schlagen Sie auf Seite 15 Computer oder ein nach. anderes Gerät, das Sie an den Drucker • Wenn Sie Bilder drucken wollen, die von einem anschließen wollen,... -
Page 131: Anschließen An Die Digitale Kamera
Anschließen an die digitale Kamera Wenn Sie Bilder von der digitalen Kamera CAMEDIA C-1400L/C-1000L/C-1400XL von OLYMPUS drucken wollen, verbinden Sie den parallelen Anschluß am Drucker über das parallele Druckerkabel CB-P14 (nicht mitgeliefert) mit dem Druckeranschluß der digitalen Kamera. Informationen zum Drucken finden Sie auf Seite 30. -
Page 132: Anschließen An Ein Videogerät
Anschließen des Druckers (Fortsetzung) Tips Anschließen an ein Videogerät • Wenn das Videogerät über einen S- Wenn Sie die Bilder einer Videokamera oder eines Videoausgang verfügt, anderen Videogeräts über den Videoausgang drucken verbinden Sie diesen wollen, schließen Sie das Videogerät über ein mit dem Eingang S- handelsübliches Video-Verbindungskabel an den VIDEO IN am Drucker. -
Page 133: Anschließen An Einen Computer
Hinweise zum Anschließen an einen Computer Anschließen Informationen zum Installieren des Druckertreibers • Schließen Sie nur das serielle oder das und zum Drucken vom Computer finden Sie in der parallele Kabel an. mitgelieferten Installationshandbuch. • Ist eine Kamera Wenn Sie den Drucker an einen Computer anschließen angeschlossen, können und den mitgelieferten Druckertreiber auf dem Sie nicht vom... -
Page 134: Anschließen Des Netzkabels
Anschließen des Druckers (Fortsetzung) Bei einem Macintosh: Anschließen an einen Macintosh- oder Wenn der Stecker nicht kompatiblen Computer in den Anschluß am Schließen Sie den Computer über das mitgelieferte Computer paßt Kabel (8poliger Mini-DIN-Stecker, männlich/8poliger Verwenden Sie einen Mini-DIN-Stecker, männlich) an den seriellen handelsüblichen, 8poligen Mini-DIN-Stecker zum Anschluß... -
Page 135: Verwenden Von Drucksätzen (Gesondert Erhältlich)
Verwenden von Drucksätzen (gesondert erhältlich) Hinweise Zum Drucken benötigen Sie einen Drucksatz (nicht • Verwenden Sie bitte mitgeliefert). Ein Drucksatz besteht aus Druckpapier immer das Druckpapier und Farbbandkassette. zusammen mit der Verwenden Sie zum Drucken folgende Drucksätze: Farbbandkassette, die als Drucksatz im Drucken Modell Druckpapier... -
Page 136: Einlegen Der Farbbandkassette
Einlegen der Farbbandkassette Vorsicht Setzen Sie die Farbbandkassette in den Drucker ein. Greifen Sie nie ins Verwenden Sie bitte immer die Farbbandkassette Kassettenfach. Der zusammen mit dem im gleichen Karton gelieferten Thermokopf wird sehr Druckpapier. heiß, besonders nach wiederholtem Drucken. Halten Sie den Hebel gedrückt, und öffnen Sie den Deckel des Kassettenfachs. - Page 137 Hinweise zum Lagern Wenn sich der Deckel des Kassettenfachs nicht der Farbbandkassette schließen läßt • Lagern Sie die Kassette Nehmen Sie die Farbbandkassette heraus, und legen nicht an Orten, an Sie sie nochmals ein. denen sie folgenden Bedingungen So entnehmen Sie eine verbrauchte ausgesetzt ist: Farbbandkassette - hohen Temperaturen...
-
Page 138: Einlegen Des Druckpapiers
Einlegen des Druckpapiers Einlegen des Druckpapiers in die automatische Zuführung Schieben Sie den Schalter vorn nach rechts, um die Abdeckung zu öffnen. Stellen Sie die Papierführung auf. Hinweise Papierführung • Berühren Sie beim Handhaben des Druckpapiers nicht die Druckoberfläche (glänzende Seite ohne Aufdruck). - Page 139 Zuführung nicht von Papier bedeckt sind. einlegen, achten Sie darauf, daß nie mehr Bei Aufklebern legen Sie Druckoberfläche als die genannte die Seite mit "OLYMPUS" Höchstzahl an nach unten, bei Standard- Druckblättern in der und Paßfoto-Papier legen Zuführung liegen. Sie die Seite mit der Andernfalls könnte es...
-
Page 140: Anbringen Der Automatischen Zuführung Am Drucker
Einlegen des Druckpapiers (Fortsetzung) Hinweise zum Lagern Anbringen der automatischen des Druckpapiers Zuführung am Drucker • Lagern Sie das Druckpapier nicht an Orten, an denen es folgenden Drücken Sie auf den Deckel des Fachs für die Bedingungen automatische Zuführung. ausgesetzt ist: Der Deckel des Fachs für die automatische - hohen Temperaturen Zuführung öffnet sich. -
Page 141: Erzeugen Normaler Ausdrucke
Erzeugen normaler Ausdrucke Drucken von auf der Smart Media- Karte aufgezeichneten Bildern Sie können Bilder, die auf einer Smart Media-Karte aufgezeichnet sind, auswählen und in voller Größe ausdrucken (Standardausdruck). Standardausdruck Vorbereitungen Taste INPUT Taste (geteilter Druck) Netzanzeige Zugriffsanzeige Hinweise Schalten Sie den Drucker und das Fernsehgerät ein, •... -
Page 142: Drucken
Smart Media- Druckers ein. Karte so aus, wie Sie mit der digitalen Während des Zugriffs auf die Smart Media-Karte Kamera von OLYMPUS blinkt die Zugriffsanzeige neben dem Einschub. aufgezeichnet wurden. Sobald die Bilder von der Smart Media-Karte Bei Bildern, die mit... - Page 143 Anzeigen des ausgewählten Bildes in voller Größe Drücken Sie die Taste (Anzeige). Das mit dem weißen Rahmen ausgewählte Bild wird in voller Größe angezeigt. Mit der Taste “ oder ” können Sie sich das vorhergehende oder das nächste Bild anzeigen lassen. Wenn Sie wieder zur Bildliste wechseln wollen, drücken Sie die Taste (Anzeige) erneut.
- Page 144 Drucken von auf der Smart Media-Karte aufgezeichneten Bildern (Fortsetzung) Starten Sie den Druck mit der Taste (Drucken) Beenden eines am Drucker. kontinuierlichen Drucks Stellen Sie den Regler an Die Anzeige (Drucken) leuchtet, und der der automatischen Drucker druckt die eingestellte Kopienzahl aus. Zuführung auf 1.
- Page 145 • Je nach der Größe des Auswählen und Drucken mehrerer Bilder auf einmal mit der digitalen Drücken Sie in Schritt 1 die Taste SELECT/CAPTURE, Kamera wenn der weiße Rahmen auf dem gewünschten Bild aufgenommenen Bildes steht. Der rote Rahmen wird nun innerhalb des weißen dauert es Rahmens angezeigt, d.
-
Page 146: Drucken Von Mit Einer Digitalen Kamera Aufgezeichneten Bildern
Drucken von mit einer digitalen Kamera aufgezeichneten Bildern Bilder, die mit den digitalen Kameras CAMEDIA C- Druck auf einem Blatt, 1400L/C-1000L/C-1400XL von OLYMPUS Indexdruck, aufgenommen werden, können Sie direkt ausdrucken. Mehrfachdruck, Bei anderen Kameramodellen ist über das gespiegelter Druck, Druck aller Bilder, Druck Verbindungskabel kein Direktdruck möglich. -
Page 147: Drucken Von Bildern Vom Videogerät
Drucken von Bildern vom Videogerät Sie können das Eingangsbild vom Videogerät, das an den Videoeingang des Druckers angeschlossen ist, speichern und in voller Größe drucken (Standardausdruck). Standardausdruck Vorbereitungen Taste (geteilter Druck) Netzanzeige Schalten Sie den Drucker und das Fernsehgerät ein, und stellen Sie den Wählschalter TV/VIDEO am Fernsehgerät auf “VIDEO”. -
Page 148: Drucken
Drucken von Bildern vom Videogerät (Fortsetzung) Drucken Taste (bewegtes Bild) Starten Sie die Wiedergabe der Bilder am Videogerät. Die Videowiedergabebilder (Eingangsbilder) werden auf dem Fernsehschirm angezeigt. Wie Sie die Wiedergabe starten, schlagen Sie in der Bedienungsanleitung zum verwendeten Videogerät nach. Speichern Sie mit der Taste SELECT/CAPTURE ein Bild zum Drucken. - Page 149 Wenn das Bild verschwommen ist Wenn Sie ein schnell bewegtes Bild speichern, kann das Bild auf dem Fernsehschirm verschwommen sein. Drücken Sie die Taste (bewegtes Bild). Wenn Unschärfen korrigiert werden, kann sich die Druckauflösung leicht verringern. Stellen Sie mit dem Regler an der automatischen Zuführung die Anzahl der Kopien ein, die gedruckt Drucken einer Anzahl an Kopien, die mit dem...
- Page 150 Drucken von Bildern vom Videogerät (Fortsetzung) Beenden eines Starten Sie den Druck mit der Taste (Drucken) kontinuierlichen Drucks am Drucker. Stellen Sie den Regler an der automatischen Die Anzeige (Drucken) leuchtet, und der Zuführung auf 1. Der Drucker druckt die eingestellte Kopienzahl aus. Drucker stoppt nach Beendigung des aktuellen Wenn der Druckvorgang beendet ist, erlischt die...
-
Page 151: Erzeugen Spezieller Ausdrucke
Erzeugen spezieller Ausdrucke Geteilter Druck Vorbereitungen 1 Schalten Sie den Drucker und das Fernsehgerät ein, und stellen Sie den Wählschalter TV/VIDEO am Fernsehgerät auf “VIDEO”. 2 Wenn Sie Bilder von der Smart Media-Karte drucken wollen, drücken Sie die Taste INPUT so oft, bis die Anzeige (einzeln/ausgewählt) leuchtet. - Page 152 Geteilter Druck (Fortsetzung) Hinweis Drücken Sie die Taste (geteilter Druck), bis die Wenn Sie vom Videogerät Anzeige für die gewünschte Anzahl an drucken, leuchten die Einzelbildern neben SAME (16, 9 oder 4) leuchtet. Anzeigen SELECTED 16, Wenn Sie das Bild in voller Größe anzeigen wollen, 9 und 4 nicht.
-
Page 153: Auswählen Verschiedener Bilder Für Geteilten Druck
Auswählen verschiedener Bilder für Sie können einen geteilten geteilten Druck ( , VIDEO) Druck mit unterschiedlichen Bildern Für einen geteilten Druck mit 4, 9 oder 16 Einzelbildern auch erzeugen, wenn die können Sie unterschiedliche Bilder von der Smart Anzeige oder Media-Karte auswählen und auf einem Blatt Papier leuchtet. - Page 154 Geteilter Druck (Fortsetzung) Stellen Sie mit dem Regler an der automatischen Sie können das Bild mit Zuführung die Anzahl der Kopien ein, die gedruckt dem Aufnahmedatum werden sollen. drucken lassen. Drücken Starten Sie den Druck mit der Taste (Drucken) Sie dazu die Taste am Drucker.
-
Page 155: Drucken Aller Aufgezeichneten Oder Geschützten Bilder Auf Der Smart Media-Karte
Drucken aller aufgezeichneten oder geschützten Bilder auf der Smart Media-Karte( Sie können alle Bilder, die auf der Smart Media-Karte aufgezeichnet sind, oder alle Bilder, die mit der digitalen Kamera ausgewählt oder geschützt wurden, ausdrucken. Die Bilder können nacheinander in voller Größe oder als geteilter Druck ausgedruckt werden. - Page 156 Drucken aller aufgezeichneten oder geschützten Bilder auf der Smart Media-Karte (Fortsetzung) Wählen Sie mit der Taste (geteilter Druck) die gewünschte Anzahl an Einzelbildern für das Drucken. • Wenn Bilder nacheinander in voller Größe gedruckt werden sollen, schalten Sie alle Anzeigen der Taste (geteilter Druck) aus.
-
Page 157: Drucken Des Datums
Drucken des Datums ( Hinweise Sie können das Datum drucken, das zusammen mit • Das Datum wird an der dem Bild auf dem Smart-Medium aufgezeichnet ist. digitalen Kamera eingestellt. Näheres dazu finden Sie in der Bedienungsanleitung zur verwendeten digitalen Kamera. 01.01.’98 •... - Page 158 Drucken des Datums (Fortsetzung) Dücken Sie Taste (Datum). Die Anzeige (Datum) leuchtet auf. Zum Anzeigen des Datums drücken Sie die Taste (Anzeige), um das Bild in voller Größe anzuzeigen. Stellen Sie mit dem Regler an der automatischen Zuführung die Anzahl der Kopien ein, die gedruckt werden sollen.
-
Page 159: Drucken Eines Bildausschnitts
Drucken eines Bildausschnitts , VIDEO) Sie können einen Bildbereich 1,5- oder 2,0fach vergrößern und den Bildausschnitt drucken. Vorbereitungen 1 Schalten Sie den Drucker und das Fernsehgerät ein, und stellen Sie den Wählschalter TV/VIDEO am Fernsehgerät auf “VIDEO”. 2 Wenn Sie Bilder vom Smart-Medium drucken wollen, drücken Sie die Taste INPUT so oft, bis die Anzeige (einzeln/ausgewählt) leuchtet. - Page 160 Drucken eines Bildausschnitts (Fortsetzung) Drücken Sie die Taste (Ausschnitt). Die Anzeige (Ausschnitt) leuchtet, und der Rahmen für 1,5fache Vergrößerung wird angezeigt. Innerhalb des Rahmens befindet sich der zu vergrößernde Bereich. Rahmen für 1,5fache Vergrößerung Hinweis Wählen Sie mit der Taste (Ausschnitt) die Wenn das Bild nicht Vergrößerung aus.
- Page 161 Wählen Sie mit der Taste (geteilter Druck) die gewünschte Anzahl an Einzelbildern für das Drucken. Hinweis • Wenn das Bild in voller Größe gedruckt werden Die Anzeigen SELECTED soll, schalten Sie alle Anzeigen der Taste 16, 9 oder 4 können Sie nicht auswählen.
-
Page 162: Drucken Mit Der Kartenfunktion
Drucken mit der Kartenfunktion ( Mit der funktionalen Smart Media-Karte (Titelkarte: M- Hinweis 4NE) können Sie ein bearbeitetes Bild mit einem Die Smart Media- Titelkarte ist in einigen Titelbild ausdrucken lassen. Näheres dazu finden Sie Ländern und Regionen in der Bedienungsanleitung den funktionalen Smart möglicherweise nicht Media-Karte. - Page 163 Tips Wählen Sie mit der Taste (Kartenfunktion) das • Wenn Sie wieder ohne Titelbild für das Bild aus. Titelbild drucken wollen, drücken Sie die Mit jedem Tastendruck wechselt das Titelbild. Taste (Kartenfunktion), bis Wählen Sie mit der Taste (geteilter Druck) die die Anzeige gewünschte Anzahl an Einzelbildern für das (Kartenfunktion)
-
Page 164: Ausdrucken Von Bildern Mit Spezialeffekten (Spiegelbild/Schärfe)
Ausdrucken von Bildern mit Spezialeffekten (Spiegelbild/Schärfe) Sie können das Bild horizontal spiegeln oder die Schärfe des zu druckenden Bildes einstellen. Hinweise Spiegeln des Bildes horizontal ( • Das auf dem Drücken Sie die Taste (Spiegelbild). Fernsehschirm angezeigte Bild wird Die Anzeige (Spiegelbild) leuchtet auf. -
Page 165: Weitere Informationen
Weitere Informationen Störungsbehebung Falls an Ihrem Drucker Probleme auftreten, versuchen Sie bitte, diese anhand der folgenden Abhilfemaßnahmen zu beheben. Läßt sich ein Problem auf diese Weise nicht beheben, wenden Sie sich bitte an Ihren Händler. • Der Drucker läßt sich nach dem Einschalten nicht bedienen. - Page 166 Störungsbehebung (Fortsetzung) • Das Drucken dauert länger als üblich. m Wenn die Anzeige (Drucken) blinkt, schlagen Sie unter “Wenn Anzeigen leuchten” auf der nächsten Seite nach. • Es läßt sich nichts ausdrucken. m Installieren Sie den Druckertreiber auf dem Computer. m Legen Sie die die Farbbandkassette und die automatische Zuführung mit dem Druckpapier ein (Seite 22 bis 24).
-
Page 167: Wenn Anzeigen Leuchten
Wenn Anzeigen leuchten Wenn es beim Drucken zu Störungen kommt, sehen Sie nach, welche Anzeigen an der Vorderseite leuchten. Netzanzeige Anzeige (Drucken) Papier-/Farbbandanzeige Fehleranzeige Zugriffsanzeige * Die Netzanzeige leuchtet stetig, solange der Drucker mit Strom versorgt wird. • Die Papier-/Farbbandanzeige blinkt langsam (mit einem Intervall von etwa 0,5 Sekunden). - Page 168 Störungsbehebung (Fortsetzung) • Die Netzanzeige blinkt. m Der Drucker kommuniziert mit dem Computer. Warten Sie, bis die Datenübertragung abgeschlossen ist. • Die Netzanzeige und die Anzeige (Drucken) blinken. m Der Drucker kommuniziert mit dem Computer oder wartet auf Druckbefehle vom Computer. Es dauert etwas, bis die eingegangenen Befehle verarbeitet sind.
-
Page 169: Wenn Sich Das Papier Staut
Hinweise Wenn sich das Papier staut • Wenn sich die Netzanzeige nicht einschaltet, nachdem Wenn sich das Druckpapier staut, blinken alle Sie das gestaute Papier entfernt haben, schalten Anzeigen, und der Druckvorgang stoppt. Schalten Sie Sie den Drucker aus das Gerät aus, und entfernen Sie das gestaute Papier. und wieder ein. -
Page 170: Hinweise Zu Farbbandkassette Und Druckpapier
Hinweise zu Farbbandkassette und Druckpapier Hinweise zur Farbbandkassette Lesen Sie die Hinweise auf der Farbbandkassetten- und • Die Farbbandkassette läßt sich nicht Druckpapierverpackung zusammen mit wiederverwenden. Wenn sie zu Ende den hier aufgeführten Hinweisen. geht, blinkt die Papier-/ Farbbandanzeige langsam (mit einem Intervall von etwa 0,5 Sekunden). -
Page 171: Technische Daten
Technische Daten Abmessungen Drucker ca. 274 x 83 x 362 mm Drucksystem (B/H/T, ohne vorstehende Teile und Sublimations-Farbtransfer Bedienelemente) (3 Durchgänge Gelb/Magenta/Zyan) Ohne automatisches Zuführung: Effektive Bildpunkte ca. 274 x 83 x 242 mm 1376 (h) x 1024 (v) Punkte (B/H/T, ohne vorstehende Teile und Druckbereichsgröße Bedienelemente) -
Page 172: Index
Index Anschließen Eingangsbild 32 Papier-/Farbbandanzeige 21, 24, 51 Digitale Kameras 15 Einstellen der Druckmenge 27, 33 Papierstau 53 IBM PC/AT und Kompatible 17 Einstellen der Schärfe 48 Paralleler Anschluß 15, 17 Macintosh 18 Entnehmen der Pfeiltasten 26 verbrauchten Netzkabel 18 Farbbandkassette 21 Smart Media-Karte 14 S-VIDEO IN (Eingang) 16... -
Page 173: Übersicht Über Mögliche Ausdrucke
Übersicht über mögliche Ausdrucke Standardausdruck Geteilter Druck mit demselben Bild (S. 35) , VIDEO) (S.25) Geteilter Druck mit Geteilter Druck mit Geteilter Druck mit16 4 Bildern (Aufkleber) 9 Bildern Bildern (Aufkleber) (S.39) VIDEO (S.31) Geteilter Druck mit unterschiedlichen Bildern (S. 37) Geteilter Druck mit Geteilter Druck mit Geteilter Druck mit16 4 Bildern (Aufkleber) - Page 174 Im Handbuch sind die Warenzeichen und eingetragenen Warenzeichen nicht in jedem Fall ausdrücklich durch “™” bzw. “®” gekennzeichnet. © OLYMPUS OPTICAL CO., LTD. 1998. Alle Rechte vorbehalten. • Ohne die vorherige schriftliche Genehmigung von OLYMPUS darf dieses Handbuch weder ganz noch auszugsweise in irgendeiner Weise kopiert oder reproduziert werden.
- Page 175 Weitere Informationen...
- Page 176 OLYMPUS OPTICAL CO., LTD. San-Ei Building, 22-2, Nishi Shinjuku 1-chome, Shinjuku-ku, Tokyo, Japan. Tel. 03-3340-2026 OLYMPUS OPTICAL CO. (EUROPA) GMBH. (Lieferadresse) Wendenstraße 14-16, 20097 Hamburg, Germany. Tel. 040-237730 (Postanschrift) Postfach 10 49 08, 20034 Hamburg, Germany. OLYMPUS OPTICAL CO. (U.K.) LTD.