Table of Contents
Advertisement
Quick Links
Advertisement
Chapters
Table of Contents
Troubleshooting

Related Manuals for Olympus CAMEDIA P-330


Summary of Contents for Olympus CAMEDIA P-330
-
Page 1: Installation Guide
P-330 Digital color printer Installation Guide • This Installation Guide explains how to install and use the Digital Color Printer P-330 for Windows 95/98, 3.1 and Macintosh software. • Keep this guide handy for future reference and refer to it when requesting service. -
Page 2: Notice For Users
Notice for users Program © 1998 Olympus Optical Co., Ltd. All rights reserved. This manual or the software described herein, in whole or in part, may not be reproduced, translated or reduced to any machine readable form without prior written approval from Olympus Optical Co.,... -
Page 3: Table Of Contents
Contents For Windows 95/98 (from page 4) System requirements ... 4 Installing the software ... 5 Uninstalling the software ... 7 Printing ... 8 Stopping printing ... 10 Hints for better printout ... 11 Setting the resolution ... 12 Adjusting the picture quality ... 13 Making the split print ... -
Page 4: For Windows 95/98
For Windows 95/98 System requirements Notes • This software is subject to be upgraded without notice. • The pictures used in this manual may be different from the actual screen of the software. For Windows 95/98 Your computer and system software must meet the following minimum requirements to run the printer driver. -
Page 5: Installing The Software
Installing the software Install the software containing the printer driver for Windows 95/98 in the supplied CD-ROM. Connect the printer to the computer. See the operating instructions of the Digital Color Printer. Turn on the printer and the computer. Then start Windows 95/98. - Page 6 Notes • When the dialog prompting you to insert the Windows CD-ROM or floppy disk appears during installation, insert the specified CD- ROM or floppy disk and click [OK]. If the Windows Setup starts after the Windows CD- ROM is inserted, finish the Setup program.
-
Page 7: Uninstalling The Software
Click the Windows [Start] button, click [Settings], and click [Printers]. The [Printers] dialog appears. Click to select [OLYMPUS P-330]. Click [Delete] from the [File] menu. Follow the on screen instructions to remove the OLYMPUS P-330 Printer Driver from your hard disk. For Windows 95/98... -
Page 8: Printing
Click [Printer Setup] from the [File] menu of the application. The [Print Setup] dialog appears. Set the printer. The above dialog is of the OLYMPUS C-2.0W95 as an example. The dialog differs depending on the application. Set [Printer] to [OLYMPUS P-330]. - Page 9 The [Print] dialog appears. Set [Copies]. You can set up to 30 copies. You can print continuously using the supplied automatic feeder. The above dialog is of the OLYMPUS C-2.0W95 as an example. The dialog differs depending on the application. For Windows 95/98...
-
Page 10: Stopping Printing
Click the [Stop] button or the [Cancel] button. The printing is canceled. When the data is in the print spooler of Windows 95/98 Click [Start]. Point to [Settings] and click [Printers]. Double-click [OLYMPUS P-330] and open the [OLYMPUS P-330] window. -
Page 11: Hints For Better Printout
Click the "Document Name" waiting to be printed. Click [Document] in the menu and then click [Cancel Printing]. Refer to the manual of the Windows 95/98 for details. Hints for better printout To obtain better print result, read the application software manual carefully. -
Page 12: Setting The Resolution
Start the application software used to print, and click [Printer Setup] from the [File] menu. The [Print Setup] dialog appears. Set [Printer] to [OLYMPUS P-330], click [Properties] and then click [Graphics]. Set the resolution to 306 dpi or 153 dpi. -
Page 13: Adjusting The Picture Quality
You can adjust the picture quality of the prints. Click [Print] from the [File] menu of the application, and in the [Print] dialog click [OK]. The [OLYMPUS P-330] dialog appears. Adjust the picture. Red/Green/Blue Move the Red/Green/Blue sliders to... -
Page 14: Making The Split Print
Click [Print] from the [File] menu of the application, and in the [Print] dialog click [OK]. The [OLYMPUS P-330] dialog appears. Select the desired number of images per sheet in [Split]. You can select 1, 2, 4, 9, or 16 images per sheet. -
Page 15: Making Multiple Prints At High Speed
[Print directly to the printer] in the [Spool Settings] window before you start printing. Click [Start]. Point to [Settings] and click [Printers]. Double-click [OLYMPUS P-330] and open the [OLYMPUS P-330] window. Click [Printer] on the menu bar, click [Properties] and click [Details]. - Page 16 Check [Print directly to the printer]. Click [OK] and close the [Spool Settings] window. Click [OK] and close the [OLYMPUS P-330 Properties] window. For Windows 95/98...
-
Page 17: For Windows 3.1
For Windows 3.1 System requirements Notes • This software is subject to be upgraded without notice. • The pictures used in this manual may be different from the actual screen of the software. Your computer and system software must meet the following minimum requirements to run the printer driver. -
Page 18: Installing The Software
Installing the software For Windows 3.1 Install the software containing the printer driver for the Windows 3.1 in the supplied CD-ROM. Connect the printer to the computer. See the operating instructions of the Digital Color Printer. Turn on the printer and the computer. Then start the Windows 3.1. - Page 19 Click [Install]. Insert the supplied CD-ROM. Input "D:\English\Win31" and click [OK]. Input your CD-ROM drive for "D." You can also select from [Browse]. Make sure that "OLYMPUS P-330" is selected and click [OK]. For Windows 3.1...
- Page 20 You cannot print without checking "Fast Printing Direct to Port." For Windows 3.1 Make sure that "OLYMPUS P-330 on LPT1:" is added in the [Installed Printers:] box and click [Connect]. Set [Transmission Retry] to "300," check "Fast Printing Direct to Port," and click [OK].
-
Page 21: Uninstalling The Software
Double-click the [Control Panel] icon in the [Main] window. Double-click the [Printers] icon in the [Control Panel] window. Click to select "OLYMPUS P-330 on LPT1:" in the [Installed Printers:] box. Click [Remove]. The confirmation window appears. Click [Yes]. For Windows 3.1... -
Page 22: Printing
The [Print] dialog appears. Click [Setup]. The [Print Setup] dialog appears. Set the printer. The dialog differs depending on the application. Set [Specific Printer] to [OLYMPUS P-330]. Set [Size] referring to the combination below. Print paper Ink ribbon loaded cartridge loaded... - Page 23 You can make split prints (page 27), set resolution (page 25) or adjust the picture quality (page 26). Click [OK]. The [Print] dialog appears. Set [Copies]. You can set up to 30 copies. You can print continuously using the supplied automatic feeder. Click [OK].
-
Page 24: Stopping Printing
Note If the printing of the data has already started, don't try to cancel printing. Doing so will cause the paper to jam. For Windows 3.1 Stopping printing When a "printing" message is on the screen Click the [Stop] button or the [Cancel] button. The printing is canceled. -
Page 25: Setting The Resolution
Setting the resolution Maximum picture size • 1376 x 1024 pixels at 306 dpi • 688 x 512 pixels at 153 Tips • To print the picture smaller than 688 x 512 pixels, select 153 dpi. Printing is performed more quickly. •... -
Page 26: Adjusting The Picture Quality
For Windows 3.1 You can adjust the picture quality of the prints. Click [Print] from the [File] menu of the application, and in the [Print] dialog click [OK]. The [OLYMPUS P-330] dialog appears. Adjust the picture. Red/Green/Blue Move the Red/Green/Blue sliders to... -
Page 27: Making The Split Print
Click [Print] from the [File] menu of the application, and in the [Print] dialog click [OK]. The [OLYMPUS P-330] dialog appears. Select the desired number of images per sheet in [Split]. You can select 1, 2, 4, 9, or 16 images per sheet. -
Page 28: Making Multiple Prints At High Speed
Making multiple prints at high speed For Windows 3.1 To print multiple copies at high speed or with limited hard disk space, uncheck [Use Print Manager] in the [Printers] dialog before you start printing. Double-click [Control Panel] in the [Main] window, and then double-click [Printers] to open the [Printers] dialog. -
Page 29: For Macintosh
For Macintosh System requirements Notes • If an application to increase memory virtually or to accelerate the process speed is installed, this software may not operate properly. • If you use a facsimile modem and set to automatic reception, this software may not operate properly. -
Page 30: Installing The Software
Installing the software For Macintosh Install the software containing the printer driver for the Macintosh in the supplied CD-ROM. Connect the printer to the computer. See the operating instructions of the Digital Color Printer. Turn on the printer and the computer. Then start the Macintosh. - Page 31 Click [Install]. Installation starts up. When the software is installed successfully, the next screen appears. Click [OK]. For Macintosh...
-
Page 32: Printing
Printing For Macintosh Set [Chooser]. Select [Chooser] from the [Apple] menu. The [Chooser] window is displayed. Click the [P-330] icon in the left box. Select the icon in the right box according to the port you connected the printer. When the printer is connected to Printer port Modem port Select [ON] or [OFF] for the [Background Print]. - Page 33 When you print in 306 dpi in the application software, set the picture size to 1376 x 1024 pixels. Notes • Use the set of the print paper and ink ribbon cartridge supplied together in the same carton. Also make sure to set [Size] in the combination shown in the table.
- Page 34 For Macintosh Display the [Print] dialog in the [File] menu from the application and set the pages and quantity for printing. The dialog differs depending on the application software. Page No. To print all the pages, select [All]. To print the selected pages, input the pages in the boxes to start and end the printing with.
-
Page 35: Stopping Printing
Stopping printing When a "printing" message is on the screen Click the [Stop] button or the [Cancel] button. Or you may press the period (.) key while holding the command ( ) key down. The printing is canceled. When using the Print Monitor Click the [Cancel] button to cancel printing. -
Page 36: Adjusting The Picture Quality
Adjusting the picture quality For Macintosh Adjusting the picture quality may result in better printout depending on images. Adjust the picture quality as described below. Display the [Print] dialog in the [File] menu from the application software. Click [Option]. The picture adjust dialog appears. - Page 37 Note If the application software has the same adjustment item as the driver software, do the adjustment on the application software, not on the driver software. If you adjust the same item on both the application software and the driver software, the image may be printed with unexpected result.
-
Page 38: Making The Split Print
Making the split print Tips • To preview the printed image, see page 39. • You can set [Split] also on the [Preview] screen (page 39). Note The 16-split images printed on the 16-cut sticker are partly cut off due to the size of the sticker. -
Page 39: Previewing The Image
Previewing the image Previewing function lets you confirm on the monitor screen how the printed image will appear before printing. Display the [Print] dialog in the [File] menu from the application software. Click [Preview]. The preview screen appears. You can also set [Split] and adjust color balance on this screen. - Page 40 For Macintosh Check that the image is placed within the print paper, and click [Print this page] or [Print this page onward]. The printer starts printing. If you click [Print this page onward], the printer prints from the current page through the last page. If you decide not to print the page after previewing Click the [Next page] button to go to the next...
-
Page 41: For Windows 95/98/3.1, Macintosh (From
For Windows 95/98/3.1, Macintosh Troubleshooting Use the following measures to solve problems you experience with your printer. If the problem persists, contact your dealer for information on what to do next. The printer prints the image split into pieces. • The resolution of the image is incorrectly set or the size of the image is too large. - Page 42 For Windows 95/98/3.1, Macintosh • The printer may be malfunctioning. Check the indicators of the printer or the error messages of the computer. If printer does not start printing in 5 minutes after print paper is installed when there is nothing wrong with the printer or computer, turn off the printer and turn it on again.
- Page 43 • Paintings, photographs, and books under copyright cannot be duplicated without permission of the copyright holder. • Olympus reserves the right to alter the features and contents of this guide without obligation or advance notice. • Olympus reserves the right to alter the features and contents of this publication of specifications without obligation or advance notice.
-
Page 44: Digital Camera
3-861-012-11(1) Digital Camera P-300U Digital color printer Instructions •Thank you for purchasing this Olympus digital color printer. • Before using this product, read this manual carefully to ensure correct use. - Page 45 (1) This device may not cause harmful interference, and (2) this device must accept any interference received, including interference that may cause undesired operation. OLYMPUS P-300U OLYMPUS AMERICA INC. 2 Corporate Center Drive, Melville, New York 11717-3157, U.S.A. 516-844-5000 Information...
- Page 46 Identifying the parts... 12 Loading the ink ribbon cartridge ... 14 Inserting the print paper ... 16 Printing Printing an image recorded by OLYMPUS Printing an image from the computer... 26 Printing while directly inserting print paper ... 28 For Your Information Troubleshooting...
-
Page 47: Introduction
Introduction Thank you for purchasing this OLYMPUS digital color printer. Read this manual and warranty for future reference and use them when requesting service. Make sure that the date of purchase and dealer's name are included on your warranty. Safety precautions... - Page 48 Do not allow any liquids, metals, or inflammable objects to infiltrate the printer through the vent. This may cause fire or electric shock. Turn off and unplug the printer, and then contact Olympus. If the printer cabinet is damaged, unplug the power cord.
- Page 49 For service or repair, contact Olympus. Do not place liquids on the printer. Should any liquid penetrate the printer, it may result in fire or electric shock.
- Page 50 WARNING Make sure that excessive dust and foreign matter do not accumulate on the power cord. Dust and foreign matter conduct electricity, which can cause fire and electric shock. If excessive dust and foreign matter accumulate on the cord, unplug the cord and remove them. Immediately unplug the power cord when an electric storm starts outside.
- Page 51 NOTE Do not block the vent. Doing so may cause the printer to heat up, possibly resulting in fire or electric shock. • Do not block the top or side vent. • Do not put the printer in the following places. - Badly-ventilated place - On a soft surface like a rug or bed Do not put the printer on an unstable surface such as a shaky...
- Page 52 NOTE Unplug the power cord from the power outlet before cleaning the printer. Accidentally touching a non-user-serviceable part may cause electric shock. Unplug the printer if it is not used for an extended period of time, for example while you are on a long trip. Otherwise, deteriorated insulation or leakage current may cause fire or electric shock.
-
Page 53: Getting Started
Getting Started Unpacking the printer Getting Started Make sure that the following accessories are supplied with your printer. • Automatic feeder (1) • Power cord (1) • CD-ROM (for Windows 95, 3.1 and Macintosh) (1) • Instruction Manual (1) • Installation Guide (1) •... -
Page 54: What You Can Do With The Digital Color Printer P-300U
Color Printer P-300U The Digital Color Printer P-300U enables you to directly print the image you recorded using the OLYMPUS Digital Cameras. By connecting the P-300U to your PC or Macintosh, you can make prints of images from your computer. -
Page 55: Identifying The Parts
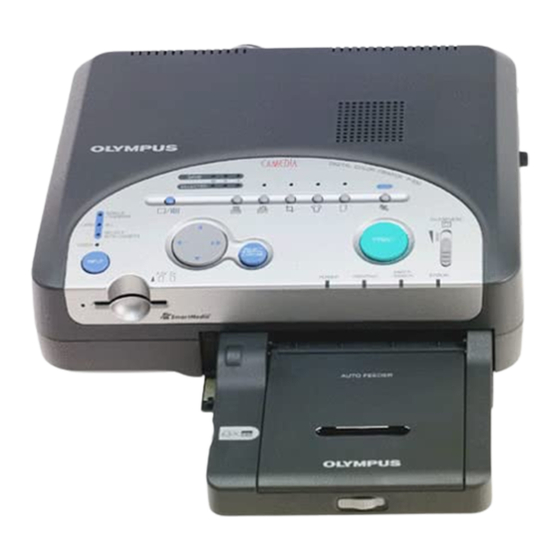
Identifying the parts See the pages given in parenthesis for use of the parts. Getting Started Paper outlet (p. 32) Serial port (p. 19, 22,27) Parallel port (p. 25,26) Power switch (p. 18) AC power connector (p. 18) Direct print button (p. 21,24) Automatic feeder compartment lid (p. - Page 56 Automatic feeder Connecting terminal Window showing number of copies (number of copies) dial (p. 21, 24) Cover (p. 16) Spacer (p. 16) Slide switch (p. 16) Getting Started...
-
Page 57: Loading The Ink Ribbon Cartridge
Loading the ink ribbon cartridge Getting Started Insert the ink ribbon cartridge into the printer. Use only the ink ribbon cartridge supplied with the print paper packed in the same carton. While pressing down the lever, open the cartridge compartment lid. Wind up the ink ribbon to remove the slack. - Page 58 Caution Never put your hand into the cartridge compartment. The thermal head reaches high temperatures, especially after repeated printing. Notes • When installing the ink ribbon cartridge, stand it as illustrated so that dust will not get on the ink ribbon. •...
-
Page 59: Inserting The Print Paper
Inserting the print paper Notes • Insert the print paper with the glaring/shiny side facing up. Face down the side on which "OLYMPUS" is printed for stickers, and that the stamp mark is printed for standard papers. • Do not touch the... - Page 60 Make sure that the metal tabs in the automatic feeder are not covered by the paper. Printing surface front Close the automatic feeder cover. Face down the side on which "OLYMPUS" is printed for stickers, and that the stamp mark is printed for standard papers. Getting Started...
-
Page 61: Installing The Automatic Feeder To The Printer
Inserting the print paper (continued) Getting Started Installing the automatic feeder to the printer Connect the supplied power cord to the printer, and then to the AC outlet. Power cord (supplied) Power to the AC outlet switch Push the automatic feeder compartment. The lid of the automatic feeder compartment opens. -
Page 62: Printing
Printing Printing an image recorded by OLYMPUS Digital Cameras Note Before printing, be sure to close the lens barrier of the digital camera. You can directly print the image recorded by OLYMPUS Digital Cameras. Printing operation differs depending on the model as described below. - Page 63 Printing an image recorded by OLYMPUS Digital Cameras (continued) Printing Press the LCD ON/OFF button of the digital camera to turn on the playback mode. Control panel LCD ON/OFF button Frame backward and forward buttons Select the photo to be printed using the frame backward and forward buttons on the digital camera.
- Page 64 Notes • Press the direct print button only after the image you had selected was displayed. • We recommend using the digital camera with the AC power adapter. • It may take longer to print the photo recorded in HQ mode than other modes of D-320L.
-
Page 65: Digital Vision D-300L/D-200L Digital Cameras
Printing an image recorded by OLYMPUS Digital Cameras (continued) Note Before printing, be sure to close the lens barrier of the digital camera. Printing DIGITAL VISION D-300L/D-200L Digital Cameras Check that the printer and digital camera are turned off. Connect the serial port of the printer to the communication port of the digital camera with the Macintosh connecting cable (supplied). - Page 66 Press the LCD ON/OFF button of the digital camera to turn on the playback mode. Select the photo to be printed using the frame backward and forward buttons on the digital camera. Control panel LCD ON/OFF button Frame backward and forward buttons continued Printing...
- Page 67 Printing an image recorded by OLYMPUS Digital Cameras (continued) Notes • Press the direct print button only after the image you had selected was displayed. • We recommend using the digital camera with the AC power adapter. To stop continuous...
-
Page 68: Digital Vision D-600L/D-500L Digital Cameras
Tips • One-sheet print, Index print, Multi print, Mirror print, All print, Random print, and Date print are available. See the instruction manual of the digital camera for details. • The image displayed on the digital camera is printed in the direction as shown below. -
Page 69: Connect To The Computer
Printing an image from the computer Notes on connection • Use a shielded printer cable which is shorter than 2m. • Connect only one of the serial or parallel cable. • If a camera is connected, you cannot print from the computer. -
Page 70: Install The Printer Driver
Note on the power If you connect the printer to the computer via other devices (such as OLYMPUS ES-10 film scanner), turn on all devices connected. The image of the computer is printed in the direction as shown below. -
Page 71: Printing While Directly Inserting Print Paper
Printing while directly inserting print paper Notes • Align the print paper to the left guide, and insert the print paper straight. • When you insert the paper manually, remove the automatic feeder. Printing Send the print command from the computer or digital still camera. -
Page 72: For Your Information
For Your Information Troubleshooting Use the following measures to solve problems you may experience with your printer. If the problem persists, contact your dealer for information on what to do next. • The power is not turned on. Connect the AC power cord to an AC outlet securely. -
Page 73: If The Indicators Are On
Troubleshooting (continued) For Your Information If the indicators are on If you cannot print, check the indicators on the front panel. • The RIBBON indicator is on. The ink ribbon cartridge is not loaded. The ink ribbon has run out. Change the ink ribbon cartridge. - Page 74 • The READY indicator does not light or all indicators are flashing. Print paper is jammed. Remove the jammed paper from the paper outlets on the front and rear panels. Remove the automatic feeder from the printer and see if the paper jammed. •...
-
Page 75: If The Print Paper Is Jammed
• If you cannot remove the jammed paper, contact Olympus. For Your Information If the print paper is jammed If the print paper is jammed, all indicators flash and printing stops. Turn off the power and remove the jammed paper. -
Page 76: Specifications
Specifications Printer Printing system Sublimation dye transfer printing (Yellow/Magenta/Cyan 3 pass) Effective pixels 1376 (H) x 1024 (V) dot Printing size 4 ½ (H) x 3 (114 x 85 mm) Gradations 256 levels (8 bits), per color (24 bits) Approx. 16 million colors Printing time (excluding data transmission time) Approx. -
Page 77: Precautions On The Ink Ribbon Cartridge And Print Paper
Precautions on the ink ribbon cartridge and print paper For Your Information Notes on storing the ink ribbon cartridge • Avoid placing the cartridge in a location subject to: - high temperatures - high humidity - excessive dust - direct sunlight •... - Page 78 Furthermore, "™" and "®" are not mentioned in each case in this manual. © OLYMPUS OPTICAL CO., LTD. 1997. All rights reserved • No portion of this manual may be copied or reproduced by any means without the prior written permission of OLYMPUS.
- Page 79 (Postanschrift) Postfach 10 49 08, 20034 Hamburg, Germany. OLYMPUS OPTICAL CO. (U.K.) LTD. 2-8 Honduras Street, London EC1Y 0TX, United Kingdom, Tel 0171-253-2772 For technical support, please contact Olympus at DISTEC@olympus.com or 1-888-55-DIGITAL. For additional product information, please contact Olympus at www.olympus.com.