GE GXCC01D Use & Care Manual
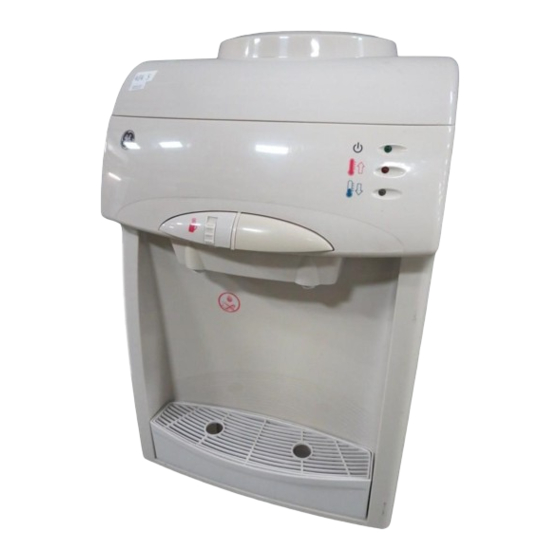
Hot & cold water dispenser
Hide thumbs
Also See for GXCC01D:
- Owner's manual (28 pages) ,
- Owner's manual (28 pages) ,
- Owner's manual (24 pages)
Table of Contents
Advertisement
Available languages
Available languages
Quick Links
Advertisement
Table of Contents

Related Manuals for GE GXCC01D


Summary of Contents for GE GXCC01D
-
Page 2: Precauciones De Seguridad
INSTRUCCIONES IMPORTANTES DE SEGURIDAD LEA TODAS LAS INSTRUCCIONES ANTES DE USAR ADVERTENCIA Use este aparato solamente con el propósito para el cual fue fabricado de acuerdo con lo que se describe en este manual. PRECAUCIONES DE SEGURIDAD Cuando use aparatos, debe tomar ciertas precauciones de seguridad, incluyendo las siguientes: •... -
Page 3: Instrucciones De Conexión A Tierra
INSTRUCCIONES DE CONEXIÓN A TIERRA ADVERTENCIA: El uso inapropiado de una clavija que no esté correcta- mente conectada a tierra podría resultar en riesgo de sufrir un choque eléctrico. Si el cordón de alimentación es dañado, Si la clavija es estándar de dos patas, es éste debe ser reemplazado por el fabri- su responsabilidad personal y obligación cante o su agente de servicio o por perso-... - Page 4 LEA Y SIGA CUIDADOSAMENTE LA INFORMACIÓN DE SEGURIDAD CONSERVE ESTAS INSTRUCCIONES Cómo usar el despachador de agua. 1. Collar de apoyo de la botella. 4. Botón para suministrar agua fría. 2. Interruptores para agua Fría y Caliente 5. Botón para suministrar agua caliente (en la porte posterior del despachador).
- Page 5 3. Conecte el despachador. 4. Coloque los interruptores CALIENTE (rojo) y FRÍO (verde) en la posición I (encendido). 5. Deje que transcurran 30 minutos para que el agua alcance las temperaturas fría y caliente. Póngase en contacto con un distribui- dor local de botellas de agua para com- prar las botellas.
- Page 6 Charola de goteo y perillas La charola de goteo del despachador no Para remover, levante la parrilla y remue- drena automáticamente. Para reducir el va la parrilla y la charola del despachador. goteo de agua, la charola y su parrilla de- Remueva la parrilla de la charola para ben ser vaciadas, limpiadas y secadas de drenarla y límpiela.
- Page 7 Cómo drenar el despachador 1. Remueva la botella de agua del despa- chador. El despachador debe drenarse antes de limpiar los tanques antes de salir de vaca- 2. Presione ambos botones del despacha- ciones o para una ausencia larga. dor hasta que no salga agua de ningu- no de los dos grifos.
-
Page 8: Solucionando Problemas
Solucionando problemas Problema Causas Posibles Qué hacer El agua no está lo El despachador de agua está • Empuje la clavija totalmente en el contacto suficientemente desconectado. tomacorriente. caliente o fría. El fusible o el disyuntor de circuitos • Reemplace el fusible o reajuste el disyuntor de se quemó... -
Page 10: Safety Precautions
IMPORTANT SAFETY INFORMATION READ ALL INSTRUCTIONS BEFORE USING. WARNING! Use this appliance only for its intended purpose as described in this Owner’s Manual. SAFETY PRECAUTIONS When using electrical appliances, basic safety precautions should be followed including the following: • This water dispenser must be properly •... -
Page 11: Grounding Instructions
GROUNDING INSTRUCTIONS WARNING: Improper use of the grounding plug can result in a risk of electric shock. If the electric cord is damaged, it must be If the outlet is a standard 2-prong wall out- replaced by the manufacturer or its service let, it is your personal responsibility and agent or by qualified personnel in order to obligation to have it replaced with a prop-... -
Page 12: Using The Water Dispenser
Using the water dispenser. 1. Bottle Support Collar 4. Cold Water Dispenser Button 2. Hot and Cold Power switches (back of 5. Hot Water Dispenser Button dispenser) 6. Dispenser Drip Tray 3. Indicator Lights 7. Storage Cabinet (on some models) The indicator light will be lit when the The cabinet has an adjustable shelf that dispenser is plugged in. - Page 13 Child Safety Dispenser Button The HOT dispenser button is equipped with a child safety switch that prevents hot water from being dispensed accidentally or by small children. To use the button, slide the switch up and press the button in. Child Safety Switch The dispenser heats water to a tem- perature of approximately 190 °F...
-
Page 14: Cleaning The Water Tanks
Cleaning the Water Tanks IMPORTANT: Set both power switches in 5. Pour the solution in the opening at the the 0 (off) position and unplug the water top of the dispenser. dispenser before cleaning. 6. Press each dispenser button until water The water dispenser tanks need to be just begins to flow from the tap. -
Page 15: Troubleshooting Tips
Troubleshooting Tips Problem Possible Causes What To Do Water not hot enough Dispenser is unplugged. • Push the plug completely into the outlet. or cold enough The fuse is blown/circuit breaker is • Replace house fuse or reset the house circuit breaker. tripped. - Page 16 Notas/Notes:...
- Page 17 Notas/Notes:...
- Page 18 Notas/Notes:...
- Page 19 Antes de solicitar un servicio de garantía: 1) Asegúrese de haber seguido las indicaciones de instalación, uso y cuidados que menciona el instructivo. 2) Localice y tenga a la mano su garantía debidamente sellada o bien la factura, nota o comprobante de compra. Este documento es indispensable para hacer válida la garantía.
-
Page 20: Póliza De Garantía
Póliza de garantía Mabe, S.A. de C.V. garantiza este producto por 1 año a partir de la fecha de compra, contra cualquier defecto atribuible a la calidad de sus materiales o mano de obra durante su fabricación, bajo las siguientes condiciones: 1) Para hacer efectiva esta garantía, deberá...