Table of Contents
Advertisement
Quick Links
Advertisement
Chapters
Table of Contents

Related Manuals for Texas Instruments 900 Series


Summary of Contents for Texas Instruments 900 Series
- Page 1 Extensa™ 900 Series Notebook Computers User’s Guide 9813630-0001...
- Page 2 Copyright © 1996 Texas Instruments All Rights Reserved — Printed in Taiwan Extensa™ 900 Series Notebook Computer User’s Guide TI Part No. 9813630-0001 Original Issue: September 1996 First Revision: November 1996 Changes may be made periodically to the information in this publication. Such changes will be incorporated in new editions of this manual.
- Page 3 Contents Extensa and livegear are trademarks of Texas Instruments. The icons in the Windows Notebook and Startup groups are copyrighted by Texas Instruments. AT and PS/2 are registered trademarks and OS/2 is a trademark of International Business Machines Corporation. Microsoft, MS-DOS, Windows and Xenix are registered trademarks of Microsoft Corporation.
- Page 4 This device has been tested and found to comply with the limits for a Class B digital device pursuant to Part 15 of the FCC Rules. These limits are designed to provide reasonable protection against harmful interference in a residential installation. This device generates, uses, and can radiate radio frequency energy and, if not installed and used in accordance with the instructions, may cause harmful interference to radio...
-
Page 5: Fcc Notice
FCC Notice Use Conditions This part complies with Part 15 of the FCC Rules. Operation is subject to the following two conditions: (1) this device may not cause harmful interference, and (2) this device must accept any interference received, including interference that may cause undesired operation. -
Page 6: Table Of Contents
Contents Preface Chapter 1 Before You Begin Creating Backup Disks ... 1-2 Features of the Computer ... 1-3 Environmental Specifications ... 1-5 Using the Computer ... 1-7 Power Saving Modes ... 1-9 Securing the Computer ... 1-14 Using the AC Adapter ... 1-15 Chapter 2 Using Your Computer Starting the Computer ... - Page 7 Calibrating the Battery ... 3-7 Removing and Installing the Battery Pack... 3-9 Conserving Battery Power ... 3-12 Chapter 4 Options AC Adapter... 4-2 PC Cards... 4-3 PS/2 Devices... 4-4 External Monitor ... 4-5 External Mouse ... 4-6 Memory... 4-7 Audio Options ... 4-8 Mobile Productivity Base Option...
-
Page 8: Preface
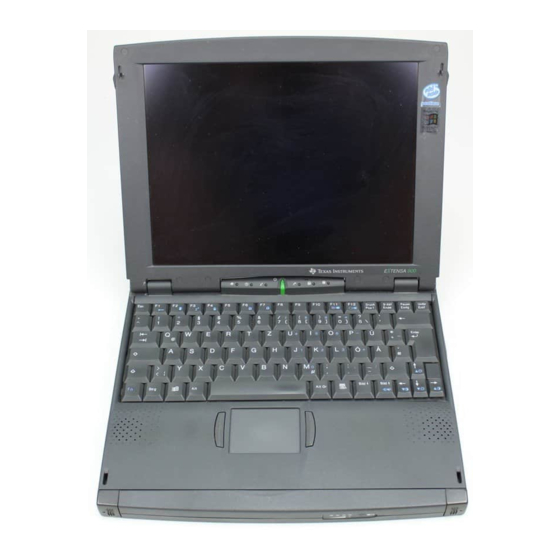
Preface This manual describes features of the Texas Instruments Extensa™ 900 Series notebook computers. The Extensa series computers share similar appearance and incorporate such features as: CardBus with Zoomed Video support, 16-bit stereo audio, Fast Infrared and internal pointing device in an ultra-slim form factor and light weight package. - Page 9 After completing the instructions in Just for Starters…, read this chapter to learn about the important functions of your computer. Some functions, such as Creating Backup Disks, should be performed as soon as possible after the purchase of your computer. Contents Creating Backup Disks ...
-
Page 10: Creating Backup Disks
Creating Backup Disks You should create your backup system disks as soon as possible after purchasing your computer. The process you follow depends on the operating system you selected when you setup the computer for the first time. Windows Backing up Windows 95 requires several boxes of formatted 3½-inch, 1.44 MB floppy disks. -
Page 11: Features Of The Computer
Features of the Computer Standard Features The following list displays the standard features of your Extensa computer: PCI Bus architecture 16 MB EDO (Extended Data Out) memory 256 KB Level-2 cache memory 2 MB EDO video memory Fast video graphics accelerator 0-Volt Suspend, 5-Volt Suspend and Standby power saving modes No-reboot setup function... -
Page 12: Customizing Features
Features of the Computer Customizing Features The following features allow you to customize your computer to fit your requirements. PS/2 port for connecting an external keyboard, numeric keypad, or mouse 9-pin serial port for connecting external devices such as a modem or mouse Simultaneous display with external CRT One Type III or two Type II or Type I Cardbus PC Card slots;... -
Page 13: Environmental Specifications
Environmental Specifications This section provides information on the optimum operating environment for your Extensa notebook computer. Temperature Operating: Storage: Relative Humidity (Noncondensing) Operating: Storage: Shock Operating: Storage: Vibration Operating: Storage: 50° to 95°F (10° to 35°C) -4° to 140°F (-20° to +60°C) 20% to 85% 20% to 85% Maximum 5g pulse in X,... - Page 14 Environmental Specifications Note: Your computer is equipped with a fan to keep the computer cool under extreme high temperature conditions. The fan will not normally operate, but may turn on when the computer’s internal components become warm. You will hear the fan when it turns on.
-
Page 15: Using The Computer
Using the Computer Never pick up or carry the computer by the display. Never use the computer in harsh environments where it could be subjected to rapid temperature changes or excessive dust. Never expose the computer to excessive vibration. Never expose the hard disk drive or floppy disk(s) to strong magnetic fields, such as those generated by audio system speakers, telephone handsets, or hand-held metal... - Page 16 (smoke or a strange smell): 1. Turn off the power. 2. Disconnect the AC adapter from the power source and the computer. 3. Remove the battery pack. 4. Contact your Texas Instruments dealer or service center.
-
Page 17: Power Saving Modes
Power Saving Modes Power Savings Options Your Extensa system offers several options for you to extend your battery life while you are not actively using your computer. These options turn off different sections of the computer that are not currently being used. These options are listed in the page of the System Setup screen MANAGEMENT... -
Page 18: 0V Suspend Mode
Power Saving Modes 0V Suspend Timeout Hard Disk Timeout Display Timeout The computer will not enter any of the power management time-out modes if the hard disk drive, floppy disk drive (or CD-ROM drive in the optional MPB docking module) is active. Note: If the “Auto Insert Notification”... - Page 19 In 0V Suspend mode, the computer saves the current computer state onto your hard disk drive then shuts off. When you turn the computer on again, it restores the computer to the saved state within about a minute. Press the 0V Suspend hot key (Fn+F2) to enter 0V Suspend mode.
-
Page 20: Standby Mode
Power Saving Modes In 5V Suspend mode, the computer saves the current computer state onto your system memory then shuts off power to most of the devices except the system memory. The standby indicator flashes to indicate the computer is in 5V Suspend mode. - Page 21 Power Saving Modes Press the Standby hot key (Fn+F4) to enter Standby mode. The computer also enters Standby mode if the in Setup is enabled and times out. To resume from Standby mode, press any key or touch the touchpad. The computer also resumes from Standby if the RING RESUME ON ALARM...
-
Page 22: Securing The Computer
Your computer comes with a Kensington notch. If your computer store does not carry Kensington locks, you can buy one directly from Texas Instruments. To secure your computer, follow these steps: 1. Wrap the cable of a portable computer Kensington security lock (optional) around a table, desk drawer handle, or any immovable object. -
Page 23: Using The Ac Adapter
Adapter Caution: Use only the AC adapter supplied with your computer. Another adapter can damage your computer and create a safety hazard. Using the AC Adapter DC Connector AC Adapter Male Plug AC Adapter Charges the internal battery pack and operates the computer on AC power whether or not a battery pack is installed. - Page 24 Using Your Computer Before beginning this chapter, ensure you have read and understood Chapter 1. Chapter 2 describes how to start and use your Extensa notebook computer. Contents Starting the Computer ... 2-3 Running the “About Your Extensa” Demo Program ... 2-4 Contents of the Demo Program...
- Page 25 Removing Your Hard Disk Drive ... 2-17 Inserting Your Hard Disk Drive ... 2-19 Using the External Floppy Disk Drive .. 2-19 Floppy Disk Drive Guidelines ... 2-20 Adding Memory ... 2-22 Running PHDISK ... 2-23 Using the Keyboard ... 2-25 Special Keys ...
-
Page 26: Starting The Computer
Starting the Computer Power Switch Power Turns the computer on and off for both Switch AC and battery operation; also resumes from 0V Suspend and 5V Suspend modes. The power switch is software controlled to allow for a proper shutdown of the Windows 95 operating system. -
Page 27: Running The "About Your Extensa" Demo Program
In Windows 95 1. Double-click on the About Your Extensa icon on the desktop. 2. Follow the directions to use the program. In Windows for Workgroups 1. From the Program Manager double-click on the Texas Instruments Multimedia group. accessories available for your... -
Page 28: Deleting The Demo Program
Ok. In Windows for Workgroups 1. From the Program Manager double-click on the Texas Instruments Multimedia group. 2. Double-click on the Uninstall Demo icon. 3. When the Uninstall window appears, you can choose a complete or partial uninstall. If you want to keep some parts of the demo, you can deselect those parts, then click on Ok. -
Page 29: Using The Brightness And Contrast Controls
Using the Brightness and Contrast Controls You can adjust the screen brightness and contrast levels using hot keys. Note: The hot keys for brightness and contrast are continuous keys. They will adjust as long as you hold them down. Brightness Control Contrast Control... -
Page 30: Turning The Speakers On And Off
Turning the Speakers On and Off Your computer comes with 16-bit stereo audio. Two built-in speakers are located on the palmrest. You can turn the built-in speakers on and off using a hot key. Speaker On/Off You can also enable or disable the speaker from your Setup screen. -
Page 31: Using The Microphone
Using the Microphone Your computer has a built-in microphone located in the LED display area to the upper right of the power switch. To use the microphone, face your computer from a normal distance and speak in a normal voice. You do not need to bend down to speak directly into the microphone. -
Page 32: Using Pc Cards
Using PC Cards Inserting PC Cards You can insert up to two Type I or Type II PC cards, or one Type III PC card, into the slots on the side of the computer. You can install PC cards while the computer is running. Inserting a PC Card In Windows 95 Windows 95 beeps to indicate it has detected a... -
Page 33: Ejecting Pc Cards
Using PC Cards In Windows for Workgroups Windows for Workgroups beeps to indicate it has detected the card. If a driver for the PC card has already been loaded, you can use the card immediately. If a driver has not been loaded, you must manually load the driver. - Page 34 In Windows 95 Follow these steps to eject a PC Card while using Windows 95. 1. Open the Control Panel. 2. Click on the PC Card icon. 3. Select the card you want to eject. 4. Click on Stop. 5. When Windows 95 responds with the message “You may safely remove this device”, click Ok, then press the eject button to eject the PC Card.
-
Page 35: Using Indicator Lights
Using Indicator Lights The computer uses the following indicator lights. Disk Media Indicator Battery Charging Indicator 2-12 Disk Media Indicator Battery Charging Indicator Standby Mode Indicator Power/ Battery-Low Indicator Caps Lock Indicator Num Lock Indicator Indicator Lights Lights when the computer writes to or reads from the hard disk drive, or reads from the CD-ROM drive. - Page 36 Using Indicator Lights Standby Lights when the computer is in Mode Standby mode. Off when the computer Indicator is in 5V Suspend mode. The computer enters Standby mode if the Standby hot key (Fn+F4) is pressed or the parameter in Setup is enabled and expires.
-
Page 37: Using The Touchpad
Using the Touchpad Moving the Cursor The embedded touchpad offers a unique and efficient way of pointing and selecting in a Windows environment. The following figure shows the touchpad. The touchpad responds to finger movements on its surface. To move the cursor, move your finger on the touchpad surface. -
Page 38: Configuring The Touchpad
Using the Touchpad Configuring the Touchpad You can personalize the control of the touchpad by configuring various settings using the Synaptics Touchpad utility. Configure the touchpad using the Mouse utility located in the Control Panel window. Follow these steps to configure the touchpad: In Windows 95 1. -
Page 39: Using Disk Drives
Using Disk Drives Hard Disk Drive Floppy Disk Drive Hard Disk Drive Guidelines If you format the hard disk drive, all data on the hard disk drive will be erased. Do not move the computer when the Disk Media indicator is on. Press the 0V Suspend hot key (Fn+F2) to suspend the computer or turn off the computer before moving it. -
Page 40: Removing Your Hard Disk Drive
You may remove your hard disk drive for safe keeping away from your computer and/or swap drives with other Extensa 900 series systems. The following steps show you how to remove and install your hard disk drive. You may also purchase upgrades to your current hard disk drive by contacting Texas Instruments. - Page 41 Using Disk Drives 4. Unlock the release latches on the hard disk drive bay cover, and remove the cover. Removing the Hard Disk Drive Bay Cover 5. Using a Phillips screwdriver, remove the two screws that secure the hard disk drive to the computer.
-
Page 42: Inserting Your Hard Disk Drive
Inserting Your Hard Disk Drive Use the following instructions to re-insert a hard disk drive. Follow the instructions that came with your hard disk drive upgrade kit for inserting a new hard disk drive. 1. Connect the hard disk drive cable to the hard disk drive, making sure to match the key on the connector. -
Page 43: Floppy Disk Drive Guidelines
Using Disk Drives Connecting the External Floppy Disk Drive Floppy Disk Drive Guidelines Failure to observe the following precautions can damage both the floppy disk drive and the data on the floppy disk: Insert the floppy disk into the floppy disk drive slot label side up and the metal shutter end first. - Page 44 Always remove a floppy disk from the floppy disk drive before turning off the computer. Never transport the computer with a floppy disk in the floppy disk drive. Doing so can damage the drive head. If a floppy disk is damaged, try to make a copy of it and immediately discard it.
-
Page 45: Adding Memory
To ensure compatibility and best performance, you should purchase soDIMMs from your local Texas Instruments dealer. Refer to Chapter 4, Options, for ordering information. To add memory, locate the memory option door on the bottom of your computer. -
Page 46: Running Phdisk
Remove the screw from the memory door. Lift up the memory door from the recess in the screw area, then remove the door. Follow the instructions that came with your memory upgrade option to install the additional memory. Whenever you change your memory size, you should run the PHDISK utility to re-size your Suspend to Disk file. - Page 47 Adding Memory In Windows for Workgroups 1. Save and exit all applications. 2. From the Program Manager Window, select File. 3. Select Exit Windows. 4. When asked to confirm, click on Ok. 5. Type PHDISK /C /F at the DOS Prompt. Note: If you are using an operating system other than Windows 95, Windows for Workgroups, or DOS, you may need to re-partition your hard disk...
-
Page 48: Using The Keyboard
Using the Keyboard The computer has many special keys, most of which depend on an application for their functionality. Special Keys The following keys have special functions at the command level of MS-DOS and within many programs. Stops a command or application; Fn+Pause primarily used to stop the screen from scrolling;... - Page 49 Using the Keyboard Ctrl+Alt+F1 Ctrl+Alt+F2 Ctrl+Alt+F3 Ctrl+Alt+F12 Ctrl+Alt+S (during POST) Fn+F1 Fn+F2 Fn+F3 Fn+F4 Fn+F6 2-26 Brings up the System Setup screen anytime from an external keyboard Invokes 0V Suspend from an external keyboard Invokes 5V Suspend from an external keyboard Toggles the screen output between the LCD, external CRT or both...
- Page 50 Using the Keyboard Toggles the NumLock function ON and Fn+F7 OFF. The internal numeric keypad is activated when NumLock is ON. Refer to the Using the Internal Numeric Keypad section for more details. Turns the LCD backlight off (blanks Fn+F11 the screen).
-
Page 51: Windows 95 Keys
Using the Keyboard Windows 95 Keys The keyboard also has two Windows 95-specific keys that allow you to perform special functions under Windows 95. Windows logo key Windows logo key + Tab Windows logo key + E Windows logo key + F Windows logo key + M Windows logo key + R Application key... -
Page 52: Using The Internal Numeric Keypad
Using the Internal Numeric Keypad The keyboard has an embedded keypad that provides the same functions as the discrete numeric keypad on an AT enhanced keyboard. The embedded numeric keypad keys shown in the following figure generate AT-keypad characters and functions when pressed in conjunction with Num Lock, Fn and Shift. -
Page 53: Num Lock Off
Using the Internal Numeric Keypad Pressing Shift with a key generates the characters shown in the following figure. If you press and hold Fn in this mode, the keypad generates their normal characters. Num Lock Off When the Num Lock indicator is OFF, the keyboard acts as normal. -
Page 54: Using Connectors And Ports
Using Connectors and Ports This section provides a description of connectors and ports on the Extensa notebook computer. Ports are found on the right, left and rear of the computer. Right and Rear Ports PC Card Right and Rear Ports PC Card PS/2 Serial... - Page 55 Using Connectors and Ports DC In Caution: Use only the supplied AC adapter with your computer. Other adapters can cause serious damage to the electronic circuits. Parallel (25-pin) Serial (9-pin) External Monitor (15-pin) 2-32 Connects the AC adapter output connector to this jack to recharge the battery and supply power to the computer Connects to a parallel printer or...
-
Page 56: Left Ports
Using Connectors and Ports Left Ports Line Out Line out Line in Microphone in Line In Microphone In Left Ports Connects to any IrDA device (such as another IrDA computer or printer) without the use of a cord or cable. Transmits up to 4 Megabits per second Connects to a line out device such as headphones or amplified... -
Page 57: Bottom Port
Using Connectors and Ports Bottom Port Expansion (200-pin) 2-34 Expansion Bottom Port Connects to the Extensa Mobile Productivity Base Module. Refer to the Mobile Productivity Base Option in Chapter 4. -
Page 58: Chapter 3 Using Battery Power
Using Battery Power The primary difference between using battery power and AC power is the time you can operate before you must recharge the battery. This chapter covers charging the battery and maximizing the time between charges and assumes that you installed and charged the battery as directed in Just for Starters…. -
Page 59: Guidelines For Battery Use
Guidelines for Battery Use Caution: Never dispose of exhausted batteries in a fire. Observe applicable environmental regulations and recycle if possible. The battery should be handled carefully to ensure maximum life. In particular: Do not drop the battery or subject it to shocks. -
Page 60: Switching To Battery Power
Switching to Battery Power To use battery power, install batteries as described in Installing the Battery Pack later in this section. As long as the battery has charge remaining, you can switch to battery power by removing the connection to the AC adapter, even if the computer is already on. -
Page 61: Responding To Low Battery Conditions
Responding to Low Battery Conditions There are two battery low stages in this computer. When the battery capacity reaches 7% (about 10 minutes remaining), the computer enters the first stage of battery-low warning. At this time the battery-low LED, found on the LCD center hinge, flashes and an audible warning sounds. -
Page 62: Low Battery Conditions
Low Battery Conditions Whenever you are not actively using the computer, press the 5V Suspend hot key (Fn+F3) or Standby hot key (Fn+F4) to put the computer into 5V Suspend mode or Standby mode respectively. Turn off the computer or put it in 0V Suspend mode (Fn+F2) if it does not need to be active. -
Page 63: Recharging The Battery
Recharging the Battery Caution: Never recharge the battery differently from the procedure described in this manual. The following procedure is acceptable under most circumstances: 1. Install the battery pack into your computer (if not already installed). 2. Connect the AC adapter. To maintain a full charge, leave the computer connected to the AC adapter except when transporting the computer. -
Page 64: Calibrating The Battery
Calibrating the Battery The Extensa system uses a smart Lithium-Ion (Li-Ion) rechargeable battery. Your new smart batteries keep extremely accurate track of the battery capacity. However, all rechargeable batteries lose capacity over time due to different charging and discharging conditions, as well as general wear and usage. - Page 65 Calibrating the Battery 3. Turn the computer power ON, if not already 4. Exit the Windows operating System to DOS. a) From Windows 95, Exit by selecting Restart in MS-DOS Mode from the Shutdown menu. b) From Windows for Workgroups, Exit by selecting FILE then EXIT WINDOWS from the Program Manager.
-
Page 66: Removing And Installing The Battery Pack
Removing and Installing the Removing the Battery Pack Follow these steps to remove the battery: Caution: You will lose all power to the computer when the battery is removed unless an external AC source is attached. 1. Unlatch the battery locks on both ends of the battery by pushing the endcaps outward with your thumbs. -
Page 67: Installing The Battery Pack
Removing and Installing the Battery Pack 2. Grasp the grooves on the top and bottom of the battery pack and pull the battery out. Installing the Battery Pack Follow these steps to install the battery: 1. Unlatch the battery locks on both ends of the computer. -
Page 68: Re-Installing The Battery Locks
Removing and Installing the Re-installing the Battery Locks The battery locks are designed to not break, but come off easily when they have been forced open too far. To re-install the battery locks, follow these instructions: Note: The left and right battery locks are not interchangeable. -
Page 69: Conserving Battery Power
Disconnect or turn off external options that you are not using. Use only Texas Instruments options. These options are designed to operate with the least possible energy consumption. Third- party options (such as devices) can drain the battery more quickly. - Page 70 1-800-TI-TEXAS, option 2, then 1, in the United States or Canada. Outside of the United States or Canada, please contact your local Texas Instruments dealer. A listing of local dealers is available at the end of this User’s Guide.
-
Page 71: Ac Adapter
AC Adapter Your Extensa uses a small lightweight external AC adapter to charge and power the computer. The AC adapter can be operated anywhere between 100 - 240 volts AC and has a detachable AC power cord. You can order power cords with specific plugs for the region you will be operating the computer Caution: Use only the AC adapter recommended in this document (TI Part No. -
Page 72: Pc Cards
PC Cards Your Extensa computer supports all PCMCIA and Cardbus PC cards. These PC cards are used to add functionality to your computer, such as communicating over a telephone or connecting to a network. The computer has built-in slots that support one Type III or two Type II or Type I PC cards. -
Page 73: Ps/2 Devices
PS/2 Devices Your Extensa computer supports external devices that connect to a PS/2 port. Such devices include an external numeric keypad, external keyboards, or external mouse. -
Page 74: External Monitor
External Monitor Your Extensa computer supports standard analog external monitors with resolutions up to 1280 x 1024. The computer also supports DDC compatible monitors allowing you to use the “Green” monitors (those monitors that meet the Energy Star standards). When the computer is connected to an external monitor, you can use the computer with the display closed. -
Page 75: External Mouse
External Mouse Your Extensa computer comes with a pointing device already installed, but you can also use an external PS/2 or serial mouse. To connect a PS/2 mouse, insert the connector into the PS/2 port in the rear of the Extensa. To connect a serial mouse, attach the connector to the 9-pin serial port in the rear of the Extensa. -
Page 76: Memory
Your Extensa computer comes with 16 MB of dynamic random access memory (DRAM). Your computer has one memory slot. You can increase memory by installing an upgrade module into the memory upgrade slot on your computer. You can expand RAM from 16 MB up to 48 MB. -
Page 77: Audio Options
Audio Options Your computer comes with a set of built-in stereo speakers and a monaural microphone, but if you wish to use other stereo equipment, the computer comes with three audio jacks — Line-out, Line-in and Microphone-in. Line-out allows you to use a headset or amplified external speakers. -
Page 78: Mobile Productivity Base Option
Mobile Productivity Base Option The Mobile Productivity Base (MPB) option is a full-featured docking module that duplicates all of the ports on your computer plus additional ports. In addition to replicating ports, the MPB docking option also has a removable modular bay that houses a CD-ROM drive or floppy disk drive module and supports the Texas Instruments proprietary Advance PCI card. -
Page 79: Miscellaneous Options
Miscellaneous Options Your Extensa computer can accept many additional options, and Texas Instruments is the best source for these options. Some of the additional options include: Batteries Carrying Case Printers 4-10 You can purchase spare Li-Ion batteries. For more information, call 1-800-TI- TEXAS. - Page 80 This chapter describes the software supplied with the computer and how to configure application software to run on the computer. Contents Using Supplied Software ... 5-2 Getting Online Help ... 5-3 Guidelines for Installing Applications ... 5-4 Adjusting the Software for the Computer ...
-
Page 81: Using Supplied Software
Using Supplied Software Your computer is shipped with the following software installed on the hard disk drive: Microsoft Windows 95 Power-saving utilities PC-Doctor About Your Extensa system demo program Various third-party application software... -
Page 82: Getting Online Help
Getting Online Help The supplied software has online help files, which reduce the need to refer to printed manuals and provide you with help any time it’s needed. To obtain Windows 95 help, select the Start button and then select Help. -
Page 83: Guidelines For Installing Applications
Guidelines for Installing Applications Adjusting the Software for the Computer Your computer can execute almost all programs written to execute on AT installing software, you may need to provide the following information to the installation program: Display Keyboard computers. When ®... -
Page 84: Configuring The Computer For The Software
Guidelines for Installing Mouse If you are using the built-in pointing device or an external PS/2 mouse, you may select the Microsoft PS/2 port mouse. You can also select Synaptics PS/2 touchpad for the built-in pointing device. Configuring the Computer for the Software Some programs require you to modify the way the computer operates to ensure compatibility. -
Page 85: Using System Passwords
Using System Passwords The computer has a two-password security system — Supervisor and User. The Supervisor password is used by system administrators who manage multiple notebooks and gives an extra level of security while still allowing users to set their individual Setup preferences in the system Setup menu. -
Page 86: Setting A System Password
Caution: If you forget the system password, you will not be able to use your computer. To regain access, you will need to send your computer to Texas Instruments. This service is not covered by warranty. To set a password in Setup, follow these steps: 1. -
Page 87: Disabling Or Changing A System Password
Using System Passwords If you set a password, you are prompted for the new password before starting your computer or entering Setup. Disabling or Changing a System Password To disable or change a system password: 1. Press Fn+F1 (or F2 during boot) to enter Setup. -
Page 88: Overview Of Mobility
This chapter describes all the considerations to help you take advantage of your computer’s mobility. Contents Overview of Mobility ... 6-2 Disconnecting from the Desktop... 6-3 Moving Around ... 6-4 Preparing the Computer... 6-4 What to Bring to Short Meetings ... 6-4 What to Bring to Long Meetings ... -
Page 89: Overview Of Mobility
Overview of Mobility Disconnecting from the Desktop No matter where you are taking your computer, you need to disconnect it from your desktop accessories. Moving Around “Moving around” refers to using your computer at different locations within the same building, for example, taking it with you to meetings. -
Page 90: Disconnecting From The Desktop
Disconnecting from the Desktop Follow these steps to disconnect your computer from external accessories. 1. Save your work in progress. 2. Shut down the operating system. 3. Turn off the computer. 4. Disconnect the cord from the AC adapter. 5. Disconnect the keyboard, pointing device, printer, external monitor, and other external devices. -
Page 91: Moving Around
Moving Around Preparing the Computer Before moving the computer, press Fn+F3 to place it in 5V Suspend mode. After placing the computer in 5V Suspend mode, close and latch the cover. You can now safely take the computer anywhere you go within the building. To bring the computer out of 5V Suspend mode, press a key or touch the touchpad. -
Page 92: Taking The Computer Home
Taking the Computer Home Preparing the Computer After disconnecting the computer from your desktop, follow these steps to prepare the computer for the trip home. 1. Remove all media from the drives. Failure to remove the media can damage the drive head. 2. -
Page 93: Setting Up A Home Office
Taking the Computer Home Minimize the effect of temperature changes by keeping the computer with you. If you need to stop for an extended period of time and cannot bring the computer with you, leave the computer in the trunk of the car to avoid exposing the computer to excessive heat. -
Page 94: Traveling With The Computer
Traveling with the Computer Preparing the Computer Prepare the computer as if you were taking it home. Be sure the battery in the computer is charged. Airport security often requires you to turn on your computer when bringing it to the gate area. -
Page 95: Special Considerations
Traveling with the Computer Special Considerations In addition to the guidelines for taking the computer home, follow these guidelines to protect your computer while traveling. Always take the computer as carry-on luggage Have the computer inspected by hand or X- ray machine. -
Page 96: Traveling Internationally With The Computer
Traveling Internationally with the Computer Preparing the Computer Prepare the computer as you would normally prepare it for traveling. What To Bring with You Bring the following items with you. AC adapter Power cords that are appropriate to the country to which you are traveling External floppy disk drive and floppy disk drive cable Spare, fully-charged battery packs... -
Page 97: Special Considerations
Traveling Internationally with the Computer Special Considerations Follow the same special considerations as when traveling with the computer. 6-10... - Page 98 Care and Troubleshooting This chapter tells you how to clean your computer safely and solve operational problems. Contents Cleaning the Computer ... 7-2 Troubleshooting Tips ... 7-3 Startup Error Messages ... 7-4...
-
Page 99: Cleaning The Computer
Cleaning the Computer To ensure trouble-free computing, regularly take the time to check your computer and clean the screen, keyboard, and case. Caution: Never use alcohol, benzene, thinner, or strong chemical agents that could damage the computer’s case, and never apply liquid directly to the computer, only to a clean cloth. -
Page 100: Troubleshooting Tips
Computer does not turn off Computer does not come on when power switch is pressed Computer power is on but screen is blank Computer indicates an error at start-up Troubleshooting Tips o The Operating System is locked up; press and hold the power switch for 2 seconds to force the computer to turn off. -
Page 101: Startup Error Messages
Startup Error Messages Disk drive A error Extended RAM Failed at offset: nnnn Failing Bits: nnnn Fixed Disk 0 Failure Fixed Disk Controller Failure Incorrect Drive A type Invalid NVRAM media type Keyboard controller error o Drive A: is present but fails the BIOS POST disk tests. - Page 102 Keyboard error Keyboard error nn Operating system not found Press <F1> to resume, <F2> to Setup Previous boot incomplete - Default configuration used Startup Error Messages q The keyboard is not working. q Contact your dealer or an authorized service center. q BIOS discovered a stuck key and displays the scan code nn for the key.
- Page 103 Startup Error Messages Real time clock error Shadow Ram Failed at offset: nnnn System battery is dead - Replace and run SETUP System cache error - Cache disabled System CMOS checksum bad - run SETUP q Realtime clock fails test. q This may require board repair.
- Page 104 System RAM Failed at offset: nnnn System timer error Startup Error Messages q System RAM failed at offset nnnn of the 64K block at which the error was detected. q Contact your dealer or an authorized service center. q The timer test failed. q This requires system board repair.
-
Page 105: Appendix A Where To Get Help
Where To Get Help Technical Assistance Customer support for your computer is available 24 hours a day, 7 days a week. Please have your serial number ready when you call. Phone (US / Canada) Phone (International) Email Mail (800) TI-TEXAS Option 3,2,2 (817) 771-5856 (817) 774-6660 (800) 735-2989... -
Page 106: World Wide Web
Where To Get Help Ordering Notebook Products Phone (US / Canada) Phone (International) Email Mail World Wide Web http://www.ti.com/notebook/index.html Feedback on Manuals To comment on the manuals for your computer, send email to *PUBT@msg.ti.com (800) TI-TEXAS Option 2,1 (817) 774-6969 (800) 44FAX-TI (800) 735-2989 (817) 774-6809... - Page 107 Worldwide Sales Offices Australia Texas Instruments Australia Ltd. Unit 1B, 11-17 Khartoum Road North Ryde, NSW 2113 Tel: 61-2-99103100 Fax: 61-2-98051186 Belgique/België (Belgium) S.A. Texas Instruments Belgium N.V. 11, Avenue Jules Bordetlaan 1, 1140 Bruxelles, Brussel Tel: (32) 27 45 54 00...
- Page 108 Worldwide Sales Offices Holland S.A. Texas Instruments Belgium N.V. 11, Avenue Jules Bordetlaan 1, 1140 Bruxelles, Brussel Tel: (32) 27 45 54 00 Fax: (32) 27 45 54 10 Telex: 61161 TEXBEL Hong Kong Texas Instruments Hong Kong Ltd. 15th Floor, Tower 2, The...
- Page 109 (Sverigefilialen) Box 30 S-164 93 Kista Isafjordsgatan 7 Tel: (08) 752 58 00 Fax: (08) 751 97 15 Taiwan Texas Instruments Taiwan Ltd. 26F, 216, Sec. 2 Tun Hua South Road, Taipei, Taiwan, R.O.C. Tel: 886-2-3762710 Fax: 886-2-3772908 United Kingdom Texas Instruments Ltd.