
Related Manuals for Teac GF GF-450K7


Summary of Contents for Teac GF GF-450K7
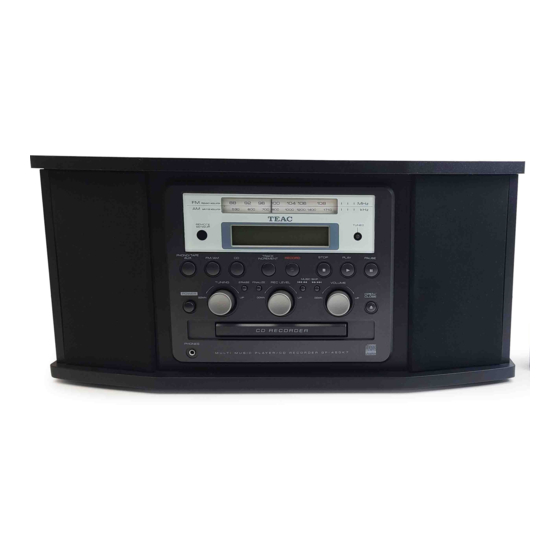
- Page 1 CEC6P10501630 GF - 450K7 CD recorder with turntable/cassette player OWNER'S MANUAL...
-
Page 2: Important Safety Instructions
CAUTION: TO REDUCE THE RISK OF ELECTRIC SHOCK, DO NOT REMOVE COVER (OR BACK). NO USER-SERVICEABLE PARTS INSIDE. REFER SERVICING TO QUALIFIED SERVICE PERSONNEL. The lightning flash with arrowhead symbol, within an equilateral triangle, is intended to alert the user to the presence of uninsulated “dangerous voltage”... - Page 3 THE ELECTRONICS. NO USER SERVICEABLE PARTS ARE WITHIN! < IF YOU ARE EXPERIENCING PROBLEMS WITH THIS PRODUCT, CONTACT TEAC FOR A SERVICE REFERRAL. DO NOT USE THE PRODUCT UNTIL IT HAS BEEN REPAIRED. < USE OF CONTROLS OR ADJUSTMENTS OR PERFORMANCE OF PROCEDURES OTHER THAN THOSE SPECIFIED HEREIN MAY RESULT IN HAZARDOUS RADIATION EXPOSURE.
-
Page 4: Table Of Contents
Contents Thank you for choosing TEAC. Read this manual carefully to get the best performance from this unit. Before using the unit ..........4 Handling Records . -
Page 5: Handling Records
The replacement stylus for this GF-450K7 is a STL-103. A SPL-102 (2 pieces) for use with SP records only is also available. Please contact TEAC Parts at (323) 726-0303, extension 840 to order. Or call our automated Service Agency Locator at: (800) 447- TEAC for the closest authorized repair company that can replace the stylus for you. -
Page 6: Discs
< Copy-protected discs and other discs which do not conform to the CD standard may not play back correctly in this player. If you use such discs in this unit, TEAC Corporation and its subsidiaries cannot be responsible for any consequences or guarantee the quality of reproduction. -
Page 7: How To Open/Close The Turntable Cover
About CD-R and CD-RW discs CD-R discs can be recorded once only. Once they have been used for recording, they cannot be erased or re-recorded. However, if space is available on the disc (and the disc has not been finalized), additional material can be recorded. By contrast, a CD-RW disc can be used in much the same way as a CD-R disc, but the last track or tracks recorded can be erased, and the space on the disc can be re- used for other recordings. -
Page 8: Remote Control Unit
The provided Remote Control Unit allows the unit to be operated from a distance. When operating the remote control unit, point it towards the REMOTE SENSOR on the front panel of the unit. < Even if the remote control unit is operated within the effective range, remote control operation may be impossible if there are any obstacles between the unit and the remote control. -
Page 9: Handling Cassette Tape
Instructions for use < Do not open a cassette or pull out the tape. < Do not touch the tape. < Do not leave cassette tapes in a place with a lot of rubbish or dust. < Do not use or store cassette tapes in an area with high temperatures or humidity. -
Page 10: Connection
CAUTION: < Switch off the power to all equipment before making connections. < Read the instructions of each component you intend to use with this unit. < Be sure to insert each plug securely. To prevent hum and noise, avoid bundling the signal interconnection cables together with the AC power cord. -
Page 11: Parts Of The Turntable
turntable screw fixing the turntable for transportation Before use, completely loosen the screw by turning it clockwise with a coin or screwdriver. Side view of the screw for transport During transport (when shipped from the factory) When you transport the unit, turn the screw counterclockwise to secure the turntable. -
Page 12: Unit Functions And Remote Control
Unit Functions and Remote Control... - Page 13 POWER Press this button to turn the unit on or off. PHONO/TAPE/AUX, FM/AM, CD Press the PHONO/TAPE/AUX button and select PHONO to play a record. Press the PHONO/TAPE/AUX button and select AUX to listen to the external source connected to the AUX IN jacks. Press the FM/AM button to listen to the radio.
-
Page 14: Basic Operation
Basic Operation Press the POWER switch to turn the unit on. Select a source by pressing the corresponding button. < To listen to an external source connected to AUX jacks, select AUX by pressing the PHONO/AUX button once or twice. When PHONO/TAPE is selected, set the Input Selecting switch by the turntable to “RECORD”... -
Page 15: Listening To A Record 1
< Before use, completely loosen the transportation screw by turning them clockwise with a coin and remove the stylus guard. Press the PHONO/TAPE/AUX button once or twice to select PHONO/TAPE. Gently open the dust cover. Be careful not to pinch your finger. Set the Input Selecting switch to RECORD. - Page 16 Move the tone arm gently to the edge of the record (or the starting point of a track). The turntable will begin to turn. Gently lower the tone arm by slowly releasing the cue lever. You can lower the tone arm manually if the cue lever has not been raised.
-
Page 17: Listening To A Cd 1
Press the CD button. “--” blinks for a few seconds. When no disc is set, “nOdISC” appears on the display. Press the OPEN/CLOSE button (L). Place a disc on the tray with the printed label face up. < Never place more than one disc on the tray. <... -
Page 18: Time Display
Listening to a CD 2 To suspend playback temporarily (pause mode) Press the PAUSE button (J) during playback. Playback stops at the current position. To resume playback, press the PLAY button (y) or the PAUSE button (J). To stop playback Press the STOP button (H) to stop playback. -
Page 19: Repeat Playback
Repeat Playback Each time the REPEAT button is pressed, the repeat mode is changed as follows: REPEAT ALL REPEAT 1 (off ) REPEAT ALL (Repeat All the Tracks) Press the REPEAT button once during playback. All the tracks of the disc will be played repeatedly. REPEAT 1 (Repeat one track) Press the REPEAT button twice during playback. -
Page 20: Programmed Playback
Up to 32 tracks can be programmed in the desired order. < Insert a disc and select “CD” before beginning programming. < Shuffle playback does not work during programmed playback. < Programmed playback works with finalized discs only. Press the PROGRAM button in the stop mode. “PROGRAM”... -
Page 21: Listening To A Cassette Tape 1
Press the PHONO/TAPE/AUX button to select PHONO/ TAPE. < Each time the PHONO/TAPE/AUX button is pressed, PHONO/ TAPE (record or cassette tape) and AUX (external component) are selected alternatively. Slowly open the cover. < When opening the cover, pay attention to prevent your hand from getting caught. -
Page 22: Before Recording
Listening to a Cassette Tape 2 To stop playback Press the Stop button during playback to stop. To suspend playback temporarily Press the Pause button to suspend playback temporarily. Press the button again to play again. Fast-forwarding/rewinding Press the Fast-forward or Rewind button (,/m) to fast- forward or rewind a tape respectively. -
Page 23: Recording 1
Audio from the PHONO/TAPE (cassette tapes)/AUX sources can be recorded on the CD recorder. Press the PHONO/TAPE/AUX button once or twice to select the source to be recorded. To record a record or cassette tape, select PHONO/TAPE and set the Input Selecting switch by the turntable to the desired source. To record an external source connected to the AUX IN jacks, select AUX. - Page 24 Press the RECORD button. The red indicator on the RECORD button lights. The unit enters record pause mode. In record pause mode, “REC” indicator blinks and the J indicator lights on the display. < No button will work while “busy” is displayed. Wait a few seconds until “busy”...
-
Page 25: Manual Track Division
If AUX is selected in step , play the source to be recorded. When playback of a record finishes and the turntable stops rotating or playback of a cassette tape finishes, recording automatically ends. Not to record excessive operation sound, press the STOP button (H) to stop recording as soon as the number on a record or cassette tape to be recorded finishes. -
Page 26: Finalize
This section deals with the actions taken after recording. Once finalized, CD-R discs are truly final. No more tracks can be recorded on them. By contrast, CD-RW discs can be “unfinalized”, and if there is space, further material can be recorded on them. Finalizing As has been explained earlier, in order for a disc to become a standard CD, it must have a Table of Contents (TOC) written to it. -
Page 27: Erase Or Unfinalize A Cd-Rw
It is possible to erase the last recorded track. It is also possible to erase a whole disc. Erase procedures are possible only on an unfinallized CD-RW disc. If a CD-RW disc has been finalized, unfinalize it prior to erasure. Remember that it is not possible to perform any erase or unfinalize procedures on a CD-R disc. -
Page 28: Troubleshooting
If you experience any problems with the unit, please take a moment to look through this chart and see if you can solve the problem yourself before you call your dealer or a TEAC service center. General No power e Check the connection to the AC power source. Check and make sure the AC source is not a switched outlet and if it is, the switch is turned on. -
Page 29: Messages
Messages 0:00 A blank CD-R/CD-RW disc is set on the tray. BUSY The unit is reading the disc. Wait a few seconds. CLOSE Close the disc tray. Er ** Erase the last track of the CD-RW disc. Er ALL Erase all the tracks of the CD-RW disc. FIN - - d Finalize the disc. - Page 32 7733 Telegraph Road, Montebello, California 90640 Phone: (323) 726-0303 TEAC CANADA LTD. 5939 Wallace Street, Mississauga, Ontario L4Z 1Z8, Canada Phone: (905) 890-8008 TEAC MEXICO, S.A. De C.V Campesinos N°184, Colonia Granjas Esmeralda, Delegacion Iztapalapa, CP 09810, México DF Phone: (525) 581-5500 TEAC UK LIMITED Unit 19 &...