Fisher-Price K6070 Manual
Hide thumbs
Also See for K6070:
- Instruction sheet (20 pages) ,
- User manual (16 pages) ,
- Instruction manual (16 pages)
Advertisement
Quick Links
• Read all instructions before assembly and use
of the product.
• Keep instructions for future use.
• Adult assembly is required. Tool needed for
battery installation: Phillips screwdriver
(not included).
• Requires three AA (LR6) alkaline batteries
(not included) for electronic toy operation.
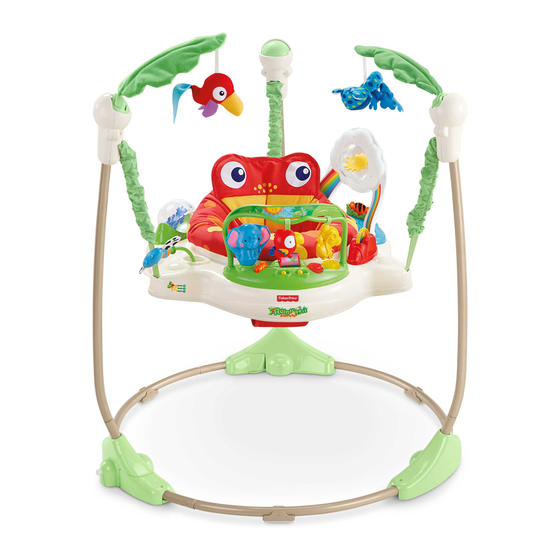
• Product features and decorations may vary
from photos.
fisher-price.com
• Lee estas instrucciones antes de ensamblar
y usar este producto.
• Guarda estas instrucciones para
futura referencia.
• Requiere montaje por un adulto.
Herramienta necesaria para instalar las pilas:
desatornillador de cruz (no incluido).
• El juguete electrónico funciona con 3 pilas
alcalinas AA (LR6) x 1,5V (no incluidas).
• Las características y decoración pueden
variar de las mostradas.
1
K6070
Advertisement

Related Manuals for Fisher-Price K6070


Summary of Contents for Fisher-Price K6070
- Page 1 K6070 • Read all instructions before assembly and use • Lee estas instrucciones antes de ensamblar of the product. y usar este producto. • Keep instructions for future use. • Guarda estas instrucciones para • Adult assembly is required. Tool needed for futura referencia.
- Page 2 WARNING To prevent serious injury or death: • Use only for a child who is able to hold head upright unassisted and who is not able to walk or climb out of product. • Never leave child unattended. Always keep child in view while in product. •...
- Page 3 Parts Piezas Small Base 2 Hinged Bases Large Base Base pequeña 2 bases con bisagra Base grande Almohadilla Frame Armazón Electronic Toy Seat 2 Leaf Toys Asiento Before beginning assembly, 2 hojas de juguete you may want to install batteries into the electronic toy.
- Page 4 UNITED STATES ARGENTINA 1-800-432-5437. Fisher-Price, Inc., 636 Girard Avenue, Mattel Argentina, S.A., Curupaytí 1186, (1607) – East Aurora, NY 14052. Hearing-impaired consumers: Villa Adelina, Buenos Aires. Tel.: 0800-666-3373. 1-800-382-7470. COLOMBIA MÉXICO Mattel Colombia, S.A., Calle 123#7-07 P.5, Bogotá. Importado y distribuido por Mattel de México, S.A. de Tel.: 01800-710-2069.
- Page 5 Battery Installation Colocación de las pilas Hint: We recommend using alkaline batteries • Desatornillar los tornillos de la tapa for longer battery life. del compartimento de pilas con un desatornillador de cruz y retirar la tapa. Atención: Se recomienda usar pilas alcalinas •...
- Page 6 Assembly Montaje IMPORTANT! Before assembly and each use, inspect this product for damaged hardware, Hinged Base loose joints, missing parts or sharp edges. Do Base con bisagra not use the product if any parts are missing, damaged or broken. Do not use accessories or replacement parts other than those approved Small Base by the manufacturer.
- Page 7 Assembly Montaje Star Marking Marca de Seat estrella Asiento Large Base Base grande Clavija PRESS Clavija PRESIONAR • While pressing the button on the large base Yellow Slots Yellow Slots tube, insert it into the hinged base assembly Ranuras amarillas Ranuras amarillas tube.
- Page 8 Assembly Montaje PRESS PRESS PRESIONAR PRESIONAR Base Tube Tubo de base • Pull the pad through the seat. Wrap the edges of the pad around the outside of the seat. • While pressing the button on a frame tube, • Jalar la almohadilla por el asiento y enrollar la insert it into a base tube.
- Page 9 Assembly Montaje Seat with Pad Leaf Toys Asiento con Hojas de juguete almohadilla Seat Ring Aro del asiento • Insert and “snap” the seat with pad into the seat ring. Pull up on the seat to be sure it is secure. •...
-
Page 10: Bottom View
Seat Height Adjustment Ajuste de altura de la silla Strap Bar Barra de cinta BOTTOM VIEW BOTTOM VIEW VISTA DE ABAJO VISTA DE ABAJO Remove your child from the seat. • Lift the seat ring so the bottom faces you. •... - Page 11 Seat Height Adjustment Ajuste de altura de la silla Slot Ranura • Push to “snap” and fasten the strap bar. • Repeat this process to attach the other two • Fit the strap bar into the desired slot in straps to the seat ring. the strap.
- Page 12 Jumpin’ Fun! ¡Diversión saltando! Power/Volume Switch Mode Switch Interruptor de Interruptor de encendido/volumen modalidad • Slide the power/volume switch to: • Poner el interruptor de encendido/ ON with low volume volumen en: ON with high volume ENCENDIDO con volumen bajo ENCENDIDO con volumen alto •...
- Page 13 Care Mantenimiento • The seat pad, frog toy and bird toy are machine washable. Place the toys in a pillow case. Wash the pad and toys separately in cold water on the gentle cycle. Do not use bleach. Tumble dry separately on low heat and remove promptly.
- Page 14 Storage Almacenamiento • Protect the environment by not disposing of this product or any batteries with household waste. This symbol indicates that this product Frame Release Button Frame Release Button shall not be treated as household waste. Botón para soltar el armazón Botón para soltar el armazón Check your local authority for recycling advice and facilities.
- Page 15 Battery Safety Information Información de seguridad acerca de las pilas In exceptional circumstances, batteries may En circunstancias excepcionales, las pilas leak fluids that can cause a chemical burn pueden derramar líquido que puede causar injury or ruin your product. To avoid quemaduras o dañar el producto.
-
Page 16: Fcc Statement (United States Only)
Consumer Information Información al consumidor FCC STATEMENT (UNITED STATES ONLY) NOTA FCC (VÁLIDO SÓLO EN LOS This equipment has been tested and found ESTADOS UNIDOS) to comply with the limits for a Class B digital Este equipo fue probado y cumple con los device, pursuant to Part 15 of the FCC límites de un dispositivo digital de Clase B, rules.