Honeywell HE240 Installation Instructions Manual
Hide thumbs
Also See for HE240:
- Installation manual & owner's manual (41 pages) ,
- Installation manual (41 pages)

Related Manuals for Honeywell HE240


Summary of Contents for Honeywell HE240
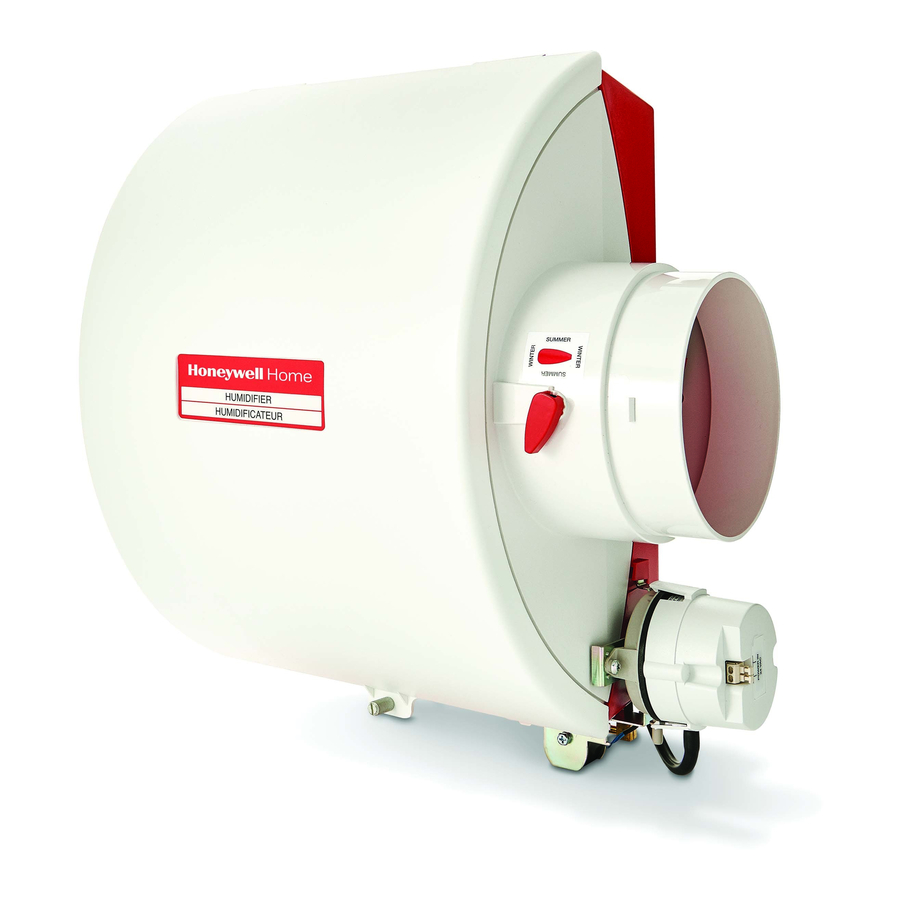
- Page 1 HE240, HE280 Humidifier and Installation Kit INSTALLATION INSTRUCTIONS M33322 SAVE THIS DOCUMENT FOR FUTURE REFERENCE READ BEFORE INSTALLING 69-2685ES-01...
-
Page 2: Safety Definitions
HE240, HE280 HUMIDIFIER AND INSTALLATION KIT Safety Definitions These safety terms identify information you must read prior to installing or operating the humidifier. WARNING Indicates a hazardous situation which, if not avoided, could result in death or serious injury. CAUTION Indicates a hazardous situation which, if not avoided, could cause bodily injury or property damage. -
Page 3: How Your Humidifier Works
30% versus leading brands. This translates to up to 20 gallons of water saved per day! APPLICATION This kit contains your new HE240 or HE280 Humidifier, H8908 Humidistat and all the accessories required for installation. Input: 120 V - 24 V~ 60 Hz... -
Page 4: Preparing For The Installation
HE240, HE280 HUMIDIFIER AND INSTALLATION KIT PREPARING FOR THE INSTALLATION Be sure to identify all the required (Table 1) accessories (included) and make sure the appropriate tools are available before beginning the installation. Included Accessories Table 1. Included Accessories. Quantity... - Page 5 HE240, HE280 HUMIDIFIER AND INSTALLATION KIT Determining Best Location for Humidifier • Select a location for the humidifier on the supply (warm air stream) duct. See Fig. 1 for examples. Return duct mounting is acceptable if there are space restrictions on the supply duct. If you are mounting the humidifier on the return duct, simply swap “return duct”...
- Page 6 HE240, HE280 HUMIDIFIER AND INSTALLATION KIT CHOOSE A LOCATION IN A CONDITIONED SPACE THAT HAS ACCESS TO A WATER SUPPLY PIPE. COLD OR HOT WATER CAN BE USED. SELECT A SURFACE ON THE HVAC SUPPLY OR RETURN DUCT WITH CLEARANCE FOR THE SOLENOID VALVE, DRAIN LINE AND COVER REMOVAL.
-
Page 7: Installation
Use of a small level is recommended. Locate the template (form number 69-2710 included in the box). For the HE240 model, cut out the template along the dotted line. Tape the template in position and trace around the template. - Page 8 HE240, HE280 HUMIDIFIER AND INSTALLATION KIT Make sure the humidifier housing is DUCT LEVEL SHEET METAL level, then position it in the opening SCREWS (4) so the plastic tabs are in place on the lower sheet metal edge of the opening.
- Page 9 These tabs, when bent outwards, will help secure the flex duct into your home's duct work. Slide remaining loose end of flex duct over the humidifier port on the HE240/ HE280, making sure that the flex duct advances past the raised plastic tabs on the port.
-
Page 10: Connecting The Plumbing
HE240, HE280 HUMIDIFIER AND INSTALLATION KIT Connecting the Plumbing Use hot or cold water and either hard or softened water in the humidifier. NOTE: Using hot water will increase operating costs, but may provide a small increase in the amount of humidity delivered. - Page 11 HE240, HE280 HUMIDIFIER AND INSTALLATION KIT d. Insert the tubing into the saddle valve fitting and support the valve while tightening the compression nut. e. Insert plastic supply tubing into quick connect fitting. Insert fully, and apply modest pull pressure to ensure a tight fit.
- Page 12 HE240, HE280 HUMIDIFIER AND INSTALLATION KIT Insert the black rubber grommet into the duct hole. Connect the tubing to the tubing fitting elbow and insert the tubing fitting elbow into the black rubber grommet. Connect the other end of the tubing to the applicable pressure connection on the switch.
-
Page 13: Installing The Humidistat
HE240, HE280 HUMIDIFIER AND INSTALLATION KIT Installing the Humidistat Find the mounting template included in the H8908 Humidistat Installation Instructions. Apply the template to the return duct (see Fig. 3 on page 6). Make sure the template is level before... - Page 14 HUMIDIFIER SOLENOID WHITE WIRE WHITE WIRE RED WIRE VALVE WIRE NUT WIRE WIRE M33413 WHITE WIRE Fig. 16. Wiring the controls and the HE240. HUMIDISTAT WIRE NUT WIRE NUT RED WIRE WHITE WIRE TRANSFORMER WIRE HUMIDIFIER WHITE WIRE SOLENOID WIRE NUT...
-
Page 15: Testing Humidifier Operation
HE240, HE280 HUMIDIFIER AND INSTALLATION KIT TESTING HUMIDIFIER OPERATION Checklist Humidifier is level. Control wiring was reviewed using circuit diagram. Humidifier is plugged in. Feed line has no kinks. Drain line slopes continuously down and ends at floor drain. -
Page 16: Maintaining Your Humidifier
HE240, HE280 HUMIDIFIER AND INSTALLATION KIT Table 2. Setting Your Humidistat. When Outside Use This Control Temperature is: Setting: -20 °F (-29 °C) -10 °F (-23 °C) 0 °F (-18 °C) +10 °F (-12 °C) +20 °F (-7 °C) Above 20 °F (-7 °C) -
Page 17: End Of Humidification Season
HE240, HE280 HUMIDIFIER AND INSTALLATION KIT Clean the drain fitting, if necessary. Bend the drain hose to loosen PerfectFLO™ WATER any mineral deposits. DISTRIBUTION TRAY Flush the drain hose with WATER FEED NOZZLE pressurized water (a running tap) to clean the hose. -
Page 18: Troubleshooting Your Humidifier
HE240, HE280 HUMIDIFIER AND INSTALLATION KIT Vacation • When leaving on vacation, turn off the humidifier water supply and your humidistat. • When you return, turn on the humidifier water supply and reset your humidistat. Start of the Humidification Season Use the following steps to bring the humidifier back to normal (winter) operation: Turn damper blade to "winter"... - Page 19 HE240, HE280 HUMIDIFIER AND INSTALLATION KIT Table 4. Troubleshooting Humidifier. (Continued) Furnace blower Reset circuit breaker or check for blown fuse. • humidity not operating. Check that the furnace power is on. • Check all external wiring connections. • Check the humidity control setting.
-
Page 20: Year Limited Warranty
69-2685ES—01 M.S. Rev. 08-19 | Printed in United States This product is manufactured by Resideo Technologies, Inc., Golden Valley, MN, 1-800-468-1502 ©2019 Resideo Technologies, Inc. The Honeywell Home trademark is used under license from Honeywell International Inc. All rights reserved. - Page 21 Humidificadores HE240 o HE280 y kit de instalación INSTRUCCIONES DE INSTALACIÓN M33322 GUARDE ESTE DOCUMENTO PARA REFERENCIA FUTURA LEER ANTES DE INSTALAR 69-2685ES-01...
- Page 22 HUMIDIFICADORES HE240 O HE280 Y KIT DE INSTALACIÓN Definiciones de seguridad Estos términos de seguridad identifican la información que deberá leer antes de instalar o utilizar el humidificador. ADVERTENCIA Indica una situación peligrosa que, si no se evita, podría ocasionar la muerte o lesiones graves.
- Page 23 ¡Esto significa un ahorro de hasta 20 galones (75.7 l) de agua al día! APLICACIÓN Este kit contiene su nuevo humidificador HE240 o HE280, el humidistato H8908 y todos los accesorios necesarios para la instalación.
-
Page 24: Preparación Para La Instalación
HUMIDIFICADORES HE240 O HE280 Y KIT DE INSTALACIÓN PREPARACIÓN PARA LA INSTALACIÓN Cerciórese de identificar todos los accesorios necesarios que se incluyen (Tabla 1) y tener disponibles los implementos adcuados antes de comenzar la instalación. Accesorios incluidos Tabla 1. Accesorios incluidos. - Page 25 HUMIDIFICADORES HE240 O HE280 Y KIT DE INSTALACIÓN HUMIDIFICADOR COLLARÍN DEL R I Z DESVIADOR H I G MS12248D Fig. 1. Ubicaciones de instalación típicas para el humidificador. ELIJA UN LUGAR EN UN ESPACIO ACONDICIO- NADO QUE TENGA ACCESO A UNA TUBERÍA DE SUMINISTRO DE AGUA.
- Page 26 HUMIDIFICADORES HE240 O HE280 Y KIT DE INSTALACIÓN UBICACIÓN ALTERNA AIRE DE AIRE DE RETORNO RETORNO MÍNIMO 6 in MÍNIMO 15 in. (152 mm) (381 mm) UBICACIÓN PREFERENTE CONDUCTO DE MS12831A AIRE DE RETORNO Fig. 3. Elección de la ubicación del conducto para el humidistato.
-
Page 27: Instalación
Para lograr un óptimo rendimiento del producto, cerciórese de que la plantilla de montaje esté a nivel antes de marcar. Se recomienda el uso de un nivel pequeño. 3. Ubique la plantilla (forma número 69-2710 que se incluye en la caja). Para el modelo HE240, corte la plantilla por la línea punteada. - Page 28 13. Coloque el extremo suelto restante del conducto flexible sobre el puerto del humidificador en el HE240/HE280 y compruebe que el conducto flexible se prolonga más allá de las lengüetas plásticas elevadas del puerto. Estas lengüetas contribuirán a retener el conducto flexible en su lugar. Verifique que la hoja del regulador tenga el despeje adecuado para moverla hacia atrás y hacia adelante en las posi-...
- Page 29 HUMIDIFICADORES HE240 O HE280 Y KIT DE INSTALACIÓN PUERTO DEL HUMIDIFICADOR BANDA DEL CONECTOR MS33325 Fig. 7. Conexión del conducto de derivación. 16. Coloque la cubierta en su lugar y asegure con los tornillos de pulgar ubicados en la parte inferior de la cubierta.
- Page 30 HUMIDIFICADORES HE240 O HE280 Y KIT DE INSTALACIÓN Conexión de plomería Utilice agua caliente o fría y dura o suave en el humidificador. NOTA: Utilizar agua caliente aumentará los costos de funcionamiento, pero puede proporcionarle un pequeño aumento en la cantidad de humedad que se proporciona.
- Page 31 HUMIDIFICADORES HE240 O HE280 Y KIT DE INSTALACIÓN c. Apriete a mano la abrazadera alrededor de la tubería para asegurar el drenaje del humidificador. La abrazadera se aprieta comprimiendo los dos lados juntos para que uno de los lados encaje en la ranura estriada del otro lado.
- Page 32 HUMIDIFICADORES HE240 O HE280 Y KIT DE INSTALACIÓN M33326 Fig. 12. Instalación de la tubería del interruptor de presión. 6. Puede cortar la tubería para adecuar el largo de la conexión entre el codo de acople y el interruptor. Tam- bién se recomienda fijar la manguera a las...
- Page 33 HUMIDIFICADORES HE240 O HE280 Y KIT DE INSTALACIÓN Instalación del humidistato 1. La plantilla de montaje se incluye con las instrucciones de instalación del humidistato. 2. Aplique la plantilla al conducto de retorno (consulte la Fig. 3). Compruebe que la plantilla esté nivelada antes de perforar los agujeros.
- Page 34 SOLENOIDE DEL WHITE WIRE RED WIRE WHITE WIRE HUMIDIFICADOR WIRE NUT WIRE WIRE WHITE WIRE MS33413 Fig. 16. Cableado de los controles y el HE240. HUMIDISTATO WIRE NUT WIRE NUT RED WIRE WHITE WIRE TRANSFORMADOR WIRE VÁLVULA DEL WHITE WIRE...
- Page 35 HUMIDIFICADORES HE240 O HE280 Y KIT DE INSTALACIÓN PRUEBA DE FUNCIONAMIENTO DEL HUMIDIFICADOR Checklist El humidificador está nivelado. El cableado de control ha sido revisado utilizando el diagrama de circuito. El humidificador está enchufado. La tubería de alimentación no tiene torceduras.
- Page 36 ) hacia adentro hasta que pueda extraer la boquilla del agua de la bandeja. 6. Deslice la almohadilla del humidificador hacia afuera para retirarla del marco y deséchela. Honeywell Home recomienda reemplazar la almohadilla del humidificador anualmente. Sin embargo, si el agua de su vivienda tiene una alta concentración de minerales, es posible que la almohadilla deba cambiarse con mayor frecuen-...
-
Page 37: Localización Y Solución De Problemas
Cerciórese de que la electricidad que alimenta el humidificador esté desconectada. Reemplazo de las almohadillas del humidificador Honeywell Home recomienda reemplazar la almohadilla del humidificador anualmente. Sin embargo, si el agua de su vivienda tiene una alta concentración de minerales, es posible que la almohadilla deba cambiarse con mayor frecuencia porque la acumulación de minerales disminuye su capacidad de funcionar normalmente. - Page 38 HUMIDIFICADORES HE240 O HE280 Y KIT DE INSTALACIÓN Tabla 4. Localización y solución de problemas. (Continued) No hay Electricidad Verifique el cableado del circuito de control. agua en Revise todas las conexiones. Humidistato Gire el humidistato hacia arriba y hacia abajo y drenaje.
-
Page 39: Poliza De Garantia
HUMIDIFICADORES HE240 O HE280 Y KIT DE INSTALACIÓN POLIZA DE GARANTIA IMPORTADO EN MEXICO POR: Instromet Mexicana S. de R.L. de C.V. Avenida Insurgentes 2453, Piso 6, Tizapan, Alvaro Obregon, Ciudad de Mexico, CP 01090 Telefono: 01 (55) 800 00423 Instromet Mexicana S. - Page 40 69-2685ES—01 M.S. Rev. 08-19 | Impreso en EE. UU. Este producto es fabricado por Resideo Technologies, Inc., Golden Valley, MN, 1-800-468-1502 ©2019 Resideo Technologies, Inc. La marca comercial Honeywell Home se utiliza en virtud de la licencia emitida por Honeywell International Inc. Todos los derechos reservados.