Table of Contents
Advertisement
Operating Instructions
Easy Use Mobile Phone
KX-TU150
Model No.
Thank you for purchasing a Panasonic product.
Please read these operating instructions before using the unit and
save them for future reference.
Before initial use, see "Important Information" on page 4.
Supplied accessories
– Power adapter (Part No. A31A-050055U-EU1): 1 pc
– Rechargeable battery (Part No. 454854AR): 1 pc
– Headset (Part No. JYK-E112): 1 pc
1
Advertisement
Table of Contents

Related Manuals for Panasonic KX-TU150


Summary of Contents for Panasonic KX-TU150
- Page 1 Operating Instructions Easy Use Mobile Phone KX-TU150 Model No. Thank you for purchasing a Panasonic product. Please read these operating instructions before using the unit and save them for future reference. Before initial use, see “Important Information” on page 4.
-
Page 2: Table Of Contents
Content 1 Important Information..................4 2 General information..................9 2.1 Profile....................10 2.2 Safety Information................10 2.3 Safety warning and Attentions............10 2.4 Precautions..................11 3 Your phone....................12 3.1 Phone overview..................12 3.2 Status icons..................12 3.3 Functions of Keys................13 3.4 Technical specifications..............14 4 Getting started....................15 4.1 Installing the SIM Cards and the Battery..........15 4.2 Installing Memory Card..............16 4.3 Charging the Battery................16 4.4 Powering On/Off the Mobile Phone..........17... - Page 3 5.4 English input and numeric input:............18 5.5 Inserting a Symbol................19 6 Using the Menus....................20 6.1 Phonebook...................20 6.2 Messages....................20 6.3 Call center....................21 6.4 Camera....................22 6.5 Multimedia...................22 6.6 Organizer.....................22 6.7 File manager..................22 6.8 Settings....................23 7 Appendix.......................25 Appendix 1: How to handling the battery and SIM card......25 Appendix 2: Troubleshooting..............26 Appendix 3: For your future reference............27 Appendix 4: Sales department..............28...
-
Page 4: Important Information
1 Important Information For your safety Read this section carefully before using the product to ensure proper and safe operation. Fail- ure to read them carefully may cause severe injury, loss of life/property, or be illegal. Please read enclosed instructions completely before operating this unit. WARNING Power connection ● Use only the power source marked on the product... - Page 5 bracelets, or keys to touch the battery, otherwise a short circuit may cause the battery and/or the conductive material to overheat and cause burns. ● Do not use or charge a wet battery. This can result in the risk of fire, explosion, overheating, and leaking of the electrolyte. ● Charge the battery provided with or identified for use with this product only, in accordance with the instructions and limitations specified in this manual. ● Only use a compatible charger to charge the battery. Do not tamper with the charger. Failure to follow these instructions may cause the battery to swell or explode.
- Page 6 Medical ● Consult the manufacturer of any personal medical devices, such as pacemakers or implanted cardioverter defibrillators to determine if they are adequately shielded from external RF (radio frequency) energy. ● Wireless Technology Research (WTR) recommends a minimum separation of 15.3 cm between a wireless device and an implanted medical device such as pacemaker or implanted cardioverter defibrillator to avoid potential interference with the medical device. If you have any reason to suspect that your phone is interfering with a pacemaker or other medical devices, turn off the phone immediately and contact the manufacture of pacemaker or other medical devices.
- Page 7 For best performance Environment ● The product should be kept free from excessive smoke, dust, moisture, high temperature and vibration. ● To avoid damage, charge the battery only in temperatures ranging from 5 °C to 40 °C. Routine care ● Wipe the outer surface of the product and/or charge contacts with a soft and dry cloth. ● Do not use benzine, thinner, or any abrasive powder. Other information Notice for product disposal, transfer, or return ● This product and SIM card can store your private/confidential information. To protect your privacy/confidentiality, we recommend that you erase information such as contacts stored in the contacts list and call logs from the memory before you dispose of, transfer, or return the product. Information for Users on Collection and Disposal of Old Equipment and used Batteries These symbols ( ) on the products, packaging, and/or accompanying documents mean...
- Page 8 ( ), then remove it ( ). Trademarks ● Micro SDHC Logo is a trademark of SD-3C, LLC. ● The Bluetooth® word mark and logos are registered trademarks owned by Bluetooth SIG, Inc.,and any use of such marks by Panasonic Corporation is under licence. ● All other trademarks identified herein are the property of their respective owners. Notice ● The phone supports microSD and microSDHC memory cards. In this document, the term “microSD card” is used as a generic term for any of the supported cards.
-
Page 9: General Information
power level of the device to ensure it only uses the minimum level required to communicate with the network. ICNIRP (http://www.icnirp.org) This device was tested for typical body-worn operation with the back of the phone kept 0.5 cm from the body. Specifications ● Standard: ● Power consumption (when charging): Dual band GSM 900/1800 MHz Standby: Approx. 0.6 W Bluetooth version 3.0, Class 1 Maximum: Approx. 2.5 W USB version 2.0 ● Operating/Charging conditions:... -
Page 10: Profile
Additional/replacement accessories Please contact your place of purchase or Panasonic sales office for sales information. Accesory item Model number Rechargeable battery 454854AR ● Lithium Ion (Li-Ion) battery Headset JYK-E112 2.1 Profile Please read this pamphlet carefully in order to make your phone in perfect condition. Our company may change this mobile phone without prior written notice and reserves the final right to interpret the performance of this mobile phone. Due to different software and network operators, display on your phone may be different, refer to your phone for details. -
Page 11: Precautions
● Qualified service Only qualified personnel may install or repair phone equipment. Installing or repairing the mobile phone on your own may bring great danger and violates the warranty rules. ● Accessories and batteries Use only approved accessories and batteries. ● Use sensibly Use only in a normal and proper manner. ● Emergency calls Ensure the phone is switched on and in service, enter the emergency number, e.g. -
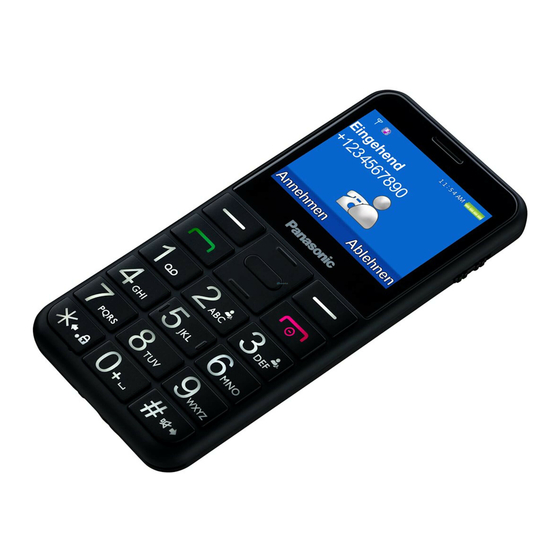
Page 12: Your Phone
3 Your phone 3.1 Phone overview 3.2 Status icons The table below lists various icons that might appear on the status bar while using the phone. Apart from the icons for signal strength level and the power, other icons are displayed as per the current mode and priority of the phone. -
Page 13: Functions Of Keys
3.3 Functions of Keys The mobile phone provides the following keys: ● Left and right soft key The bottom line on the screen displays the functions of the Left and Right soft key. ● Dial key Press it to originate a call by entering the called number or selecting a contact from the phonebook;... -
Page 14: Technical Specifications
Side key Keypad Center key USB jack Left key Torch button Dial key Camera Earpiece SOS key Display Speaker Navigation key Torch Right key Headphone jack End/Power key 3.4 Technical specifications Phone Dimensions (121.3 ˣ 58.2 ˣ 11.8 mm): Weight: 100.3 g (With battery) Lithium battery Rated capacity: 1400 mAh Talk time: Approx. -
Page 15: Getting Started
4 Getting started 4.1 Installing the SIM Cards and the Battery An SIM card carries useful information, including your mobile phone number, PIN (Personal Identification Number), PIN2, PUK (PIN Unlocking Key), PUK2 (PIN2 Unlocking Key), IMSI (International Mobile Subscriber Identity), network information, contacts data, and short messages data. Note: After powering off your mobile phone, wait for a few seconds before removing or inserting an SIM card. Exercise caution when operating an SIM card, as friction or bending will damage the SIM card. -
Page 16: Installing Memory Card
4.2 Installing Memory Card The memory card is a pluggable mobile storage card inside the mobile phone. To install the memory card, insert the card into the card slot. To remove the memory card, take the card out. Note: 1. The mobile phone cannot automatically identify the memory card being inserted when the mobile phone is powered on. You must power off the mobile phone and then power it on, so that the phone can identify the memory card. -
Page 17: Powering On/Off The Mobile Phone
has other damage, or if the electrolyte leaks. ● The battery wears out with use. A longer charging time is required as the battery is put into use for a long time. If the total conversation duration decreases but the charging time increases even though the battery is properly charged, purchase a standard battery from the OEM or use a battery approved by our company. Using any poor-quality fittings will cause harm to your mobile phone or even incur danger! Note: To guarantee your personal safety and protect the environment, do not litter the battery! Return the old battery to the mobile phone manufacturer or place it in specified battery reclamation areas. -
Page 18: Using The Headset
● Using options during a conversation Select Options during a conversation to pause, end the ongoing call, browse the phonebook, view information, set the mute, or perform other operations. For details, refer to the menu guide. 4.7 Using the Headset It would enter headset mode automatically when you insert headset to the slot. Make sure of inserting it at the bottom of the slot, or you can’t use it normally. -
Page 19: Inserting A Symbol
Number key 8 TUVtuv8 Number key 9 WXYZwxyz9 Number key 0 * key Press it to input a symbol # key Press it to switch be- tween input methods Up direction key Press it to move to the left Down direction key Press it to move to the right End key... -
Page 20: Using The Menus
6 Using the Menus 6.1 Phonebook The mobile phone can store up to 300 telephone numbers. The number of telephone numbers that an SIM card can store depends on the storage capacity of the SIM card. The telephone numbers stored in the mobile phone and in the SIM cards form a phonebook. Add new contact: Create new contact to phonebook. -
Page 21: Call Center
6.3 Call center Call history Missed calls You can view a list of the latest missed calls. Note: When the mobile phone indicates that some calls are missed, you can select View to enter the missed calls list. Navigate to a missed call and then press the Dial key to dial the number that originated that call. Dialled calls You can view the latest dialed calls. Choose Dialled calls and then select a dialed call to delete, save, dial, or send a short message to it. -
Page 22: Camera
6.4 Camera The phone is provided with a camera, which supports the photographing functions. Roll the phone to align the camera to the picture and then press OK key to capture photos. Pictures will be saved in the file system of the phone or the memory card. In the capture interface, you can press up or down direction key to zoom in and zoom out. -
Page 23: Settings
6.8 Settings ● Profiles The mobile phone provides multiple user profiles, so that you can customize some settings to adapt to the specific events and environments. Customize the user profiles according to your preference and then activate the user profiles. The user profiles fall into four scenarios: General, Silent, Meeting and Outdoor. - Page 24 SIM card is registered. When Network selection mode is set to Manual, you need to select the network operator’s network where the SIM card is registered. GPRS transfer pref.: Select Call first or Data first.). ● Security settings This function provides you with related settings about safety use. SIM security: ● PIN lock: To activate PIN lock, you need to input the correct PIN code. If you set PIN lock to on, you need to input the PIN each time you power on the mobile phone.
-
Page 25: Appendix
7 Appendix Appendix 1: How to handling the battery and SIM card ● Remove the back cover above the battery. ● Pull the left battery buckle outward and then lift the battery away. ● To install the Micro SD card, place its indented side downward, insert the card into the card slot. -
Page 26: Appendix 2: Troubleshooting
Appendix 2: Troubleshooting If you find exceptions when operating the mobile phone, restore the factory settings and then refer to the following table to solve the problem. If the problem persists, contact the distributor or service provider. Fault Cause Solution The SIM card is damaged. -
Page 27: Appendix 3: For Your Future Reference
Appendix 3: For your future reference We recommend keeping a record of the following information to assist with any repair under warranty: Serial No. Date of purchase (found on the carton box or in the battery compartment) Name and address of dealer Attach your purchase receipt here. -
Page 28: Appendix 4: Sales Department
Sales department/Vertrieb/Organisation Commerciale/Klantenservice/Försäljning/ Salgsavdeling/Maahantuonti/Departamento comercial/Tμήμα Πωλήσεων/Salgskontor/ Departamento de ventas/Ufficio Vendite/Satιş bölümü Belgique/België France Panasonic Belgium is a branch of Panasonic France, une Succursale Panasonic Marketing Europe GmbH de Panasonic Marketing Europe GmbH Brusselsesteenweg 502 1 à 7 Rue du 19 Mars 1962... - Page 29 186 00 Praha 8 Telefon: +420 236 032 511 Produkt Panasonic Centrální fax: +420 236 032 411 Produkt objęty jest E-Gwarancją Panasonic. Zákaznická linka: +420 236 032 911 Prosimy o zachowanie dowodu zakupu. E-mail: panasonic.praha@eu.panasonic.com Warunki gwarancji oraz informacje o produkcie Web: www.panasonic.cz są...
-
Page 30: Appendix 5: Graphical Symbol
9) “OFF” (power) 4) Protective bonding earth 10) Stand-by (power) 11) “ON”/“OFF” 5) Functional earth (power; push-push) 6) For indoor use only 12) Caution, risk of electric shock Panasonic Corporation 1006, Oaza Kadoma, Kadoma-shi, Osaka 571-8501, Japan www.panasonic.com © Panasonic Corporation 2018...