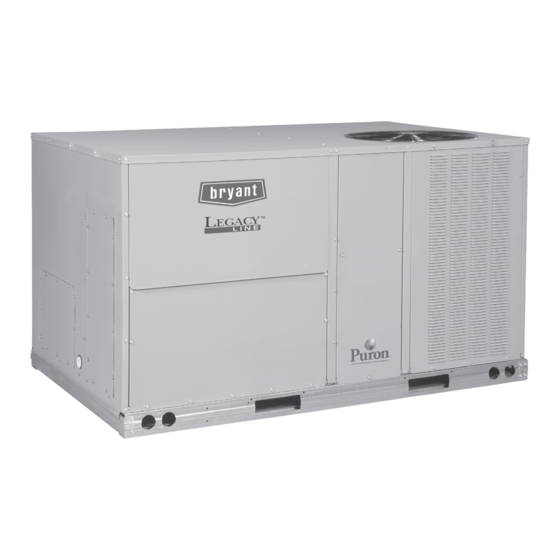
Bryant Legacy Series Installation Instructions Manual
Single package rooftop gas heat/electric cooling unit with puron (r-410a) refrigerant
Hide thumbs
Also See for Legacy Series:
- Owner's manual (60 pages) ,
- Manual (56 pages) ,
- Installation, start-up and service instructions manual (56 pages)
Table of Contents
Advertisement
Legacy Series
582J 04-06
Single Package Rooftop Gas Heat/Electric Cooling Unit with
Puron
®
(R-410A) Refrigerant
CONTENTS
SAFETY CONSIDERATIONS. . . . . . . . . . . . . . . . . . . . . . 1
Rated Indoor Airflow . . . . . . . . . . . . . . . . . . . . . . . . . . . . 3
INSTALLATION . . . . . . . . . . . . . . . . . . . . . . . . . . . . . . . . . 6
Jobsite Survey . . . . . . . . . . . . . . . . . . . . . . . . . . . . . . . . . . 6
Step 1 - Plan for Unit Location . . . . . . . . . . . . . . . . . . . 6
Step 2 - Plan for Sequence of Unit Installation . . . . . . 7
Step 3 - Inspect Usonit. . . . . . . . . . . . . . . . . . . . . . . . . . 7
Step 4 - Provide Unit Support. . . . . . . . . . . . . . . . . . . . 7
Step 5 - Field Fabricate Ductwork . . . . . . . . . . . . . . . . 9
Step 6 - Rig and Place Unit . . . . . . . . . . . . . . . . . . . . . . 9
Ductwork (When Required) . . . . . . . . . . . . . . . . . . 10
Step 8 - Install Outside Air Hood . . . . . . . . . . . . . . . . .11
Step 9 - Units with Hinged Panels Only. . . . . . . . . . . 12
Step 10 - Install Flue Hood . . . . . . . . . . . . . . . . . . . . . 12
Step 11 - Install Gas Piping. . . . . . . . . . . . . . . . . . . . . 12
and Line . . . . . . . . . . . . . . . . . . . . . . . . . . . . . . . . . . 15
Step 13 - Make Electrical Connections . . . . . . . . . . . 15
®
(Factory-Installed Option). . . . . . . . . 26
(P/N 33CSENTHSW) . . . . . . . . . . . . . . . . . . . . . . . . 38
Smoke Detectors . . . . . . . . . . . . . . . . . . . . . . . . . . . . . . . 38
Step 14 - Adjust Factory-Installed Options . . . . . . . . 39
Step 15 - Install Accessories . . . . . . . . . . . . . . . . . . . . 39
Step 16 - Check Belt Tension . . . . . . . . . . . . . . . . . . . 40
START-UP CHECKLIST . . . . . . . . . . . . . . . . . . . . . . . CL-1
SAFETY CONSIDERATIONS
Improper
installation,
maintenance, or use can cause explosion, fire, electrical shock or
other conditions which may cause personal injury or property
damage. Consult a qualified installer, service agency, or your
distributor or branch for information or assistance. The qualified
installer or agency must use factory-authorized kits or accessories
when modifying this product. Refer to the individual instructions
packaged with the kits or accessories when installing.
Follow all safety codes. Wear safety glasses and work gloves. Use
quenching cloths for brazing operations and have a fire
extinguisher available. Read these instructions thoroughly and
follow all warnings or cautions attached to the unit. Consult local
building codes and appropriate national electrical codes (in USA,
Installation Instructions
adjustment,
alteration,
ANSI/NFPA70, National Electrical Code (NEC); in Canada, CSA
C22.1) for special requirements.
Page
It is important to recognize safety information. This is the safety-
alert symbol
instructions or manuals, be alert to the potential for personal
injury.
Understand the signal words DANGER, WARNING, CAUTION,
and NOTE. These words are used with the safety-alert symbol.
DANGER identifies the most serious hazards which will result in
severe personal injury or death. WARNING signifies hazards
which could result in personal injury or death. CAUTION is used
to identify unsafe practices, which may result in minor personal
injury or product and property damage. NOTE is used to highlight
suggestions which will result in enhanced installation, reliability,
or operation.
Ensure clearances are in accordance with local installation
codes, the requirements of the gas supplier and the manufac-
turer's installation Instructions.
Assurez-vous que les dégagements sont conformes aux codes
d'installation locaux, aux exigences du fournisseur de gaz et
aux instructions d'installation du fabricant.
ELECTRICAL OPERATION HAZARD
Failure to follow this warning could result in personal injury or
death.
Units with convenience outlet circuits may use multiple
disconnects. Check convenience outlet for power status before
opening unit for service. Locate its disconnect switch, if
appropriate, and open it. Lock-out and tag-out this switch, if
necessary.
service,
. When you see this symbol on the unit and in
CAUTION
ATTENTION
WARNING
Advertisement
Table of Contents

Related Manuals for Bryant Legacy Series


Summary of Contents for Bryant Legacy Series
-
Page 1: Table Of Contents
Legacy Series 582J 04-06 Single Package Rooftop Gas Heat/Electric Cooling Unit with Puron ® (R-410A) Refrigerant Installation Instructions CONTENTS ANSI/NFPA70, National Electrical Code (NEC); in Canada, CSA C22.1) for special requirements. Page It is important to recognize safety information. This is the safety- SAFETY CONSIDERATIONS. - Page 2 AVERTISSEMENT WARNING FIRE, EXPLOSION HAZARD RISQUE D’INTOXICATION AU MONOXYDE CARBONE Failure to follow this warning could result in serious personal Si ces directives ne sont pas suivies, cela peut entraîner des injury, death, and/or property damage. blessures graves ou une intoxication au monoxyde de carbone Disconnect gas piping from unit when leak testing at pressure pouvant causer la mort, si des produits de combustion greater than 0.5 psig (3450 Pa).
-
Page 3: Model Number Nomenclature And Dimensions
Position: 9 10 11 12 13 14 15 16 17 Example: Unit Type Packaging and Control 582 - Gas Heat RTU, Legacy Series A = Standard Packaging, electro-mechanical ® controls that require W7212 EconoMi$er B = LTL Packaging, electro-mechanical Model... - Page 4 Fig. 2 — Unit Dimensional Drawing...
- Page 5 Fig. 2 — Unit Dimensional Drawing (cont)
-
Page 6: Installation
LOCATION DIMENSION CONDITION 48 in. (1219 mm) Unit disconnect is mounted on panel 18 in. (457 mm) No disconnect, convenience outlet option 18 in. (457 mm) Recommended service clearance 12 in. (305 mm) Minimum clearance 40 in. (1067 mm) Surface behind servicer is grounded (e.g., metal, masonry wall) 36 in. -
Page 7: Step 2 - Plan For Sequence Of Unit Installation
ROOF MOUNT Confirm before installation of unit that voltage, amperage and cir- cuit protection requirements listed on unit data plate agree with Check building codes for weight distribution requirements. Unit power supply provided. operating weights are shown in Table 2. On units with hinged panel option, check to be sure all latches are snug and in closed position. - Page 8 Fig. 4 — Roof Curb Details...
-
Page 9: Step 5 - Field Fabricate Ductwork
Step 6 — Rig and Place Unit CAUTION Failure to follow this caution may result in damage to roofing materials. Membrane roofs can be cut by sharp sheet metal edges. Be careful when placing any sheet metal parts on such roof. Keep unit upright and do not drop. -
Page 10: Step 7 - Convert To Horizontal And Connect Ductwork (When Required)
POSITIONING ON CURB REMOVABLE HORIZONTAL RETURN DUCT OPENING COVER Position unit on roof curb so that the following clearances are maintained: in. (6.4 mm) clearance between the roof curb and the base rail inside the front and rear, 0.0 in. clearance between the roof curb and the base rail inside on the duct end of the unit. -
Page 11: Step 8 - Install Outside Air Hood
Step 8 — Install Outside Air Hood ECONOMIZER AND TWO-POSITION HOOD NOTE: If the power exhaust accessory is to be installed on the ECONOMIZER AND TWO POSITION DAMPER HOOD unit, the hood shipped with the unit will not be used and must be PACKAGE REMOVAL AND SETUP (FACTORY OPTION) discarded. -
Page 12: Step 9 - Units With Hinged Panels Only
Canada, installation must be accordance with the CAN/CSA B149.1 and CAN/CSA B149.2 installation codes for gas burning appliances. This unit is factory equipped for use with Natural Gas fuel at ele- vations up to 2000 ft (610 m) above sea level. Unit may be field converted for operation at elevations above 2000 ft (610 m) and/or for use with liquefied petroleum fuel. - Page 13 CAUTION Failure to follow this caution may result in equipment damage. LOW VOLTAGE CONDUIT When connecting the gas line to the unit gas valve, the in- CONNECTOR staller MUST use a backup wrench to prevent damage to the valve. Install a gas supply line that runs to the unit heating section. Refer to the NFPA 54/NFGC or equivalent code for gas pipe sizing data.
- Page 14 When installing the gas supply line, observe local codes pertaining to gas pipe installations. Refer to the NFPA 54/ANSI Z223.1 NFGC latest edition (in Canada, CAN/CSA B149.1). In the ab- 9” (229mm) MIN sence of local building codes, adhere to the following pertinent recommendations: •...
-
Page 15: Step 12 - Install External Condensate Trap
MINIMUM PITCH 1˝ (25 mm) PER BASE RAIL 10´ (3 m) OF LINE 3˝ (76 mm) OPEN VENT TO ROOF SEE NOTE DRAIN ROOF BURNER CURB ORIFICE DRAIN PLUG NOTE: Trap should be deep enough to offset maximum unit static difference. - Page 16 NOTE: Unit may be equipped with short test leads (pigtails) on Connect field power supply conductors to LINE side terminals the field line connection points on contactor C or optional discon- when the switch enclosure cover is removed to attach the handle. nect switch.
- Page 17 UNITS WITHOUT FACTORY-INSTALLED NON-FUSED PWD-CO TRANSFORMER DISCONNECT CONVENIENCE When installing units, provide a disconnect switch per NEC (Na- OUTLET GFCI tional Electrical Code) of adequate size. Disconnect sizing data is provided on the unit informative plate. Locate on unit cabinet or within sight of the unit per national or local codes.
- Page 18 Non-Powered Convenience Outlet 15-amps loading for continuous duty loads (such as electric heat- ers for overnight use). Observe a 50% limit on circuit loading This type requires the field installation of a general-purpose 125v above 8 amps. Convenience outlet usage rating: 15A circuit powered from a source elsewhere in the building.
- Page 19 Building Management Systems using non-CCN protocols (RTU Open is available as a factory-installed option only). THERMOSTAT Install a Bryant-approved accessory thermostat according to in- stallation instructions included with the accessory. For complete economizer function, select a two-stage cooling thermostat. Lo-...
- Page 20 PINK lead to the LTLO switch with field-supplied wire nuts. Refer to the installation instructions included with Set heat anticipator settings at 0.14 amp for the first stage and 0.14 the Bryant programmable thermostat device for more amp for second-stage heating, when available. information.
- Page 21 Fig. 38 — Typical Perfect Humidity ™ Adaptive Dehumidification System Humidistat Wiring...
- Page 22 EDGE Pro THERMIDISTAT Unit CTB THERMOSTAT O/W2/B SRTN Humidi-MiZer™ FIOP *Connection not required. Fig. 39 — Typical Rooftop Unit with Perfect Humidity ™ Adaptive Dehumidification System and Programmable Thermostat Device...
- Page 23 Fig. 40 — Typical Control Wiring Diagram Electro-Mechanical with W7212...
- Page 24 LOW AMBIENT CONTROL (FACTORY OPTION) When the thermostat calls for heating, power is sent to W on the Integrated Gas Controller (IGC) board. An LED (light emitting di- If the unit comes with Electro-Mechanical (EM) control, then no ode) on the IGC board turns on and remains on during normal op- adjustment is necessary.
- Page 25 Fig. 43 — Typical IGC Control Wiring Diagram...
-
Page 26: Economi$Er X ® (Factory-Installed Option)
EconoMi$er ® X (Factory-Installed Option) User Interface Provides status for normal operation, setup parameters, checkout PRODUCT DESCRIPTION tests, and alarm and error conditions with a 2-line 16 character The EconoMi$er X system is an expandable economizer control LCD display and four button keypad. system, which includes a W7220 economizer module (controller) Electrical with an LCD and keypad (See Fig. - Page 27 Storage Temperature Table 8 — Economizer Module - Right Hand Terminal Blocks –40 to 150°F (–40 to 65°C) LABEL TYPE DESCRIPTION Shipping Temperature Top Right Terminal Blocks –40 to 150°F (–40 to 65°C) AUX2 I 24 vac IN The first terminal is not used. Relative Humidity Shut Down (SD) or HEAT (W) 5% to 95% RH non-condensing...
- Page 28 Table 9 — HH57AC081 Sensor Wiring Terminations To use the keypad when working with menus: TERMINAL • Press the ▲ (Up arrow) button to move to the previous TYPE DESCRIPTION menu. NUMBER LABEL • Press the ▼ (Down arrow) button to move to the next S-BUS menu.
- Page 29 SETUP AND CONFIGURATION IMPORTANT: Table 11 illustrates the complete hierarchy. Before being placed into service, the W7220 Economizer module Menu parameters may be different depending on the con- must be setup and configured for the installed system. figuration. For example, if there is no DCV (CO ) sensor, then none of the DCV parameters appear and only MIN POS will display.
- Page 30 Table 11 — Menu Structure PARAMETER PARAMETER MENU PARAMETER DEFAULT RANGE AND NOTES VALUE INCREMENT FIRST STAGE COOLING DEMAND (Y1–IN) ECONO AVAIL YES/NO YES = economizing available; the system can use outside air for free cooling when required FIRST STAGE COOLING RELAY OUTPUT ECONOMIZING YES/NO YES = outside air being used for 1 stage cooling...
- Page 31 Table 11 — Menu Structure (cont) PARAMETER PARAMETER MENU PARAMETER DEFAULT RANGE AND NOTES VALUE INCREMENT Displays number of times actuator has cycled. ACT COUNT 1 to 65535 1 cycles equals 180 deg. of actuator movement in any direction. OK/Alarm (on ACTUATOR Displays ERROR if voltage or torque is below actuator range.
- Page 32 Table 11 — Menu Structure (cont) PARAMETER PARAMETER MENU PARAMETER DEFAULT RANGE AND NOTES VALUE INCREMENT Display order = MM/DD/YY INSTALL 01/01/10 Setting order = DD, MM, then YY. UNITS DEG F or C Sets economizer controller in degrees Fahrenheit or Celsius CONV = conventional;...
- Page 33 Table 11 — Menu Structure (cont) PARAMETER PARAMETER MENU PARAMETER DEFAULT RANGE AND NOTES VALUE INCREMENT SUPPLY AIR TEMPERATURE CALIBRATION MAT T CAL 0.0°F ±2.5°F Allows for the operator to adjust for an out of calibration temperature sensor. OUTSIDE AIR TEMPERATURE CALIBRATION OAS T CAL 0.0°F ±2.5°F...
- Page 34 Table 11 — Menu Structure (cont) PARAMETER PARAMETER MENU PARAMETER DEFAULT RANGE AND NOTES VALUE INCREMENT AUX2 IN is programmed for SHUTDOWN and 24 V has been applied SHUTDOWN ACTIVE to AUX2 IN terminal. DAMPER CALIBRATION ROUTINE RUNNING If DCV Auto enable has been programmed, when the W7220 is completing a calibration on the dampers, this alarm will display.
- Page 35 For damper minimum position settings and checkout menu enthalpy operation with a 1 speed indoor fan, with or without readings, see Table 12. For dry bulb operation with a 1 speed DCV, see Tables 15 and 16. indoor fan, with or without DCV, see Tables 13 and 14. For Table 12 —...
- Page 36 Table 15 — Enthalpy Operation Without DCV (CO Sensor) — 1 Speed Fan DEMAND OUTSIDE AIR CONTROLLED GOOD TO Y1-I Y2-I Y1-O Y2-O OCCUPIED UNOCCUPIED SPEED VENTILATION (DCV) ECONOMIZE HIGH 0v/Off 0v/Off MIN POS Closed NONE HIGH 24v/On 0v/Off MIN POS Closed HIGH 24v/On...
- Page 37 ECONOMIZING DUAL ENTHALPY AVAILABLE HIGH LIMIT NOT AVAILABLE SINGLE ENTHALPY P2 (T,RH) (T,RH) TEMPERATURE Fig. 49 — Single Enthalpy Curve Boundaries Enthalpy Settings Power Up When the OA temperature, enthalpy and dew point are below the After the W7220 module is mounted and wired, apply power. respective setpoints, the Outdoor Air can be used for economiz- Initial Menu Display ing.
-
Page 38: Outdoor Air Enthalpy Control
Troubleshooting PL6-1 (24-V) Alarms – 4-20 The economizer module provides alarm messages that display on MAIN PL6-4 (COM) the 2-line LCD. + VDC CTB ECON (P’LINK: to J4-2) or NOTE: Upon power up, the module waits 60 minutes before (RTU Open: to J2-6) OUTSIDE AIR checking for alarms. -
Page 39: Rtu Open Controller (Factory-Installed Option)
COMPLETING RETURN AIR SMOKE SENSOR Step 15 — Install Accessories INSTALLATION Available accessories include: Unscrew the two screws holding the Return Air Smoke • Curb Detector assembly. See Fig. 53, Step 1. Save the screws. • Thru-base connection kit (must be installed before unit is Turn the assembly 90 degrees and then rotate end to end. -
Page 40: Step 16 - Check Belt Tension
Fig. 54 — EconoMi$er IV Wiring Step 16 — Check Belt Tension Measure the belt span length as shown in Fig. 55. Calculate the re- quired deflection by multiplying the belt span length by . For example, if the belt span length is 32 inches: 32 x inch deflection. - Page 41 BELT TENSION METHOD Requires belt tension gauge that measures tension in belt in units of lbs force. BLOWER PULLEY V-BELT MOTOR PULLEY MOTOR MOUNTING MOTOR MOUNTING BOLTS (4) PLATE Fig. 56 — Belt Drive Motor Mounting...
- Page 42 Copyright 2019 Bryant Heating & Cooling Systems Cat. No. 04-53582001-01 Edition Date: 1/19 Printed in U.S.A. Form No: II582J-4-6-03 Manufacturer reserves the right to change, at any time, specifications and designs without notice and without obligations. Replaces: II582J-4-6-02...
-
Page 43: Start-Up Checklist
START-UP CHECKLIST FOR 582J04-06 SINGLE PACKAGE ROOFTOP GAS HEATING/ELECTRIC COOLING UNIT (REMOVE AND USE FOR JOB FILE) NOTE: To avoid injury to personnel and damage to equipment or prop- erty when completing the procedures listed in this start-up checklist, use good judgment, follow safe practices, and adhere to the safety considerations/information as outlined in preceding sections of this Installation Instruction document. - Page 44 8. Open W1 restore unit to dehumid mode (Y/N) _____ 9. Open humidistat input compressor and outdoor fan stop; LSV and DSV solenoids de-energized (Y/N) _____ 10. Restore set-points for thermostat and humidistat (Y/N) _____ Copyright 2019 Bryant Heating & Cooling Systems Cat. No. 04-53582001-01 Edition Date: 1/19 Printed in U.S.A.