Advertisement
333 Bayview Avenue Amityville, New York 11701
For Sales and Repairs, (800) 645-9445
For Technical Service, (800) 645-9440 or visit us at
http://tech.napcosecurity.com/
(Note: Technical Service is for security professionals only)
Publicly traded on NASDAQ
Symbol: NSSC
© NAPCO 2018
OVERVIEW
™
The StarLink
Connect models SLECDMA-CB-C and
SLECDMA-CB-TF-C are multi-function Commercial / Resi-
dential Burglary and Residential Fire alarm radio communi-
cators and supervised system interface modules. They pro-
vide several options to the user:
1. A monitoring path to a central station through a digital
CDMA radio and optionally through a TCP/IP network to
the Internet using a hardwired or optional Wi-Fi connec-
tion;
2. Notification alerts of alarm system changes to a mobile
device. Notifications use iBridge Messenger SMS text
messaging and/or emails to inform the user and/or deal-
er of system state changes. For this release, these noti-
fications are enabled in the iBridge Connected Home
Services website at http://ibridge.napconoc2.com;
3. Both radio models are compatible with most 12VDC
alarm control panels, including Honeywell and DSC
(always adhere to the documentation provided by the
control panel manufacturer). Residing in the Windows
System Tray, the StarLink Connect application allows
you to use your customary control panel communication
software for remote programming and communication:
DSC DLS
Honeywell Compass
NAPCO control panels are programmed in the tradition-
al way using PCD-Windows Quickloader software.
StarLink Connect is available on the enclosed CD.
If required, mount the unit to a single-, dual-, or three-gang
electrical box and route the wires through the back knock-
out(s), or as specified by local codes. See WI2140 for pro-
gramming instructions (all manuals are available for
download at http://tech.napcosecurity.com/).
StarLink SLE Series radios use proprietary data-capture
technology that captures the alarm report from the control
panel and transmits the alarm signals to the SLE Control
Center (the Napco "NOC"); the alarm signals are then for-
warded to ANY central station via Contact ID or Sur-Gard
System II or Sur-Gard System V central station receivers via
TCP/IP using standard line security. The SLE Control Cen-
ter reports a trouble signal in the event that the network does
not receive the expected supervision signal from the wire-
less communicator. In addition, both StarLink radio models
can be powered directly from the control panel.
The StarLink radio model names are as follows:
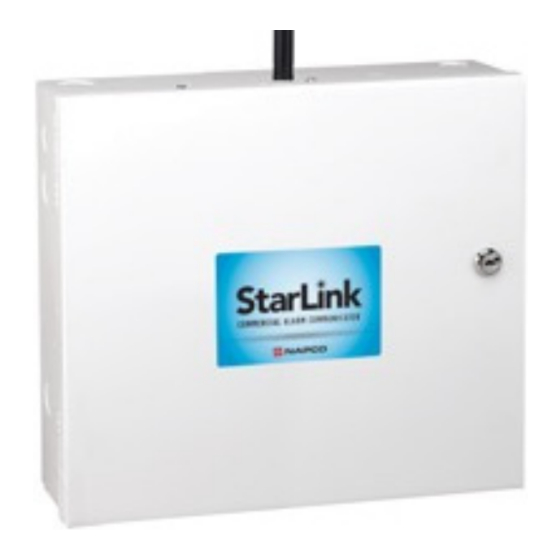
SLECDMA-CB-C - Commercial / Residential Burglary and
Residential Fire Network Compatible CDMA alarm cap-
ture radio communicator in white metal housing. Pow-
ered directly from control panel (no power supply, no
transformer).
StarLink™ Connect SLECDMA-CB Series Alarm Communicators -- Installation Instructions
StarLink
SLECDMA-CB-C & SLECDMA-CB-TF-C
Multi-Function Alarm Communicators
INSTALLATION INSTRUCTIONS
®
™
Connect Series
SLECDMA-CB-TF-C - Commercial / Residential Burglary
and Residential Fire Network Compatible CDMA alarm
capture radio communicator in white metal housing. In-
cludes SLE-ULPS-R power supply and TRF12/T123
plug-in 16.5V / 20VA transformer.
ADDITIONAL COMPONENTS
In addition to the models listed above, the
following sub-assemblies are available:
SLE-WIFI-MODULE - Allows your StarLink
device to connect to the Internet by means of a wireless
(Wi-Fi) link, eliminating a wired Ethernet cable connec-
tion.
SLE-DLCBL - Download Cable, 6 feet.
SLE-ANTEXT30 - Extended antenna with 30 feet of cable.
SLE-ANTEXT50 - Extended antenna with 50 feet of cable.
SLE-ANTEXT75 - Extended antenna with 75 feet of cable.
(Any suitable external cellular antenna is permitted by
UL). Always follow the manufacturer's installation in-
structions. Note: Antennas are not Listed by UL. For
3/4G radios where an External Antenna needs to be
installed outside of the room in which the radio is in-
stalled (maximum 30 meters (98 feet) in Residential ap-
plications),
please
9GPS5320EXAPSLD available from our Customer Ser-
vice
Department,
9GPS5320EXAPSLD is identified by "two red dots" lo-
cated on the lower right corner of the board.
WI2222 included with the 9GPS5320EXAPSLD for the
simple installation procedure.
SPECIFICATIONS
The following specifications apply to all StarLink radio mod-
els in these installation instructions unless otherwise stated:
Electrical Ratings for +12V (both models powered by the
control panel)
Input Voltage: 10-15VDC (power-limited output from con-
trol panel). Do NOT connect to full-wave rectified (FWR)
power.
Input Current:
SLECDMA-CB-C standby current: 100mA (110mA
with telco EOLR)
SLECDMA-CB-TF-C standby current: 100mA
(110mA with telco EOLR)
Transmission current (all models): 200mA max.
Electrical Ratings for the IN 1 Burg/Fire Input:
Input Voltage: 9-15VDC.
Maximum Input Current: Up to 2mA from control panel
supply circuit
WI2247ALF 8/18
™
use
RF
Transmitter
if
not
provided.
Board
The
See
1
Advertisement
Table of Contents

Related Manuals for NAPCO StarLink Connect Series


Summary of Contents for NAPCO StarLink Connect Series
-
Page 1: Specifications
SLE Control Electrical Ratings for +12V (both models powered by the Center (the Napco "NOC"); the alarm signals are then for- control panel) warded to ANY central station via Contact ID or Sur-Gard Input Voltage: 10-15VDC (power-limited output from con- ... -
Page 2: Terminal Descriptions
(dBm) the output is active low. TB5: PGM3 (–): Open collector output. This output is normally open collector / high. Use the Napco "NOC" Green LED Operation to configure options for PGM activation. Signal strength (as received by the radio) is displayed by... - Page 3 When DS14 is flashing slowly = Normal operation: 1 Slow Blink: Static IP Address (as programed by the NOC) 2 Slow Blinks: DHCP (default) 3 Slow Blinks: Auto IP (if unable to acquire DHCP DL: RED DIAGNOSTIC LED address, after 5 minutes radio will convert to Auto IP.
- Page 4 DSC or Honeywell should spend as much time as needed to obtain the control panel (when connected to a NAPCO control pan- highest signal level possible. el, both LEDs remain off). The LED labeled "D44" is not a.
- Page 5 (input) to annunciate the trouble (activate a trouble ent from that to which the receiver is connected; 4. Consult sounder) when an open is detected. With Napco control the dealer or an experienced radio/TV technician for help. panels, program a dedicated zone for Day Zone, Mini- sounder on Alarm and No bell on Alarm.
-
Page 6: Jumper Descriptions
STARLINK RADIO RELATED EVENT JUMPER DESCRIPTIONS REPORT CODES (Contact ID by default) Jumper block labeled "X5"; from top to bottom, as detailed in the following table. Note: Contact ID is CONTACT ID PULSE always available in response to a Contact ID EVENT AREA CODE... -
Page 7: Wiring Diagram
(Commercial Fire and Commercial Burglary) SLECDMA-CB-C & SLECDMA-CB-TF-C Wiring Diagram SLECDMA-CB-C & SLECDMA-CB-TF-C Yellow Green AC PC Board Trouble ON LED All connections are power limited except Telco Power Supply and battery terminals (SLE-ULPS-R) Terminals 14-17: No connections permitted. Relay con- tacts rated Note: Connect IN2 to a max 30VDC,... - Page 8 DEDICATED TO GPRS POWER". 10K EOLR required when TIP/RING Wiring SUPERVISION Fault Report is enabled in the Napco "NOC". For optional local line fault annunciation, enable the Telco Line Cut Monitor feature in the control panel programming. S t a r L i n k R a d i o T e r m i n a l s ™...
-
Page 9: Control Panel Compatibility
Suspend or Exit the application; clicking the X in the upper right corner will keep the application Installs in the Windows System Tray, the Napco StarLink Con- running in the background. nect communication software allows remote management of alarm control panels connected to the StarLink radio. - Page 10 When connected DSC Control Panels Programming Software, the Napco StarLink Connect The Napco StarLink Connect software is compatible with the icon in the System Tray turns yellow. Upload, download DSC DLS Programming Software. www.dsc.com and/or program the DSC control panel as usual.
-
Page 11: Communicator Programming
Allow notification alerts (iBridge Messenger text messaging) Allow mobile device app communication for remote system control Allow Napco StarLink Connect software to support DSC DLS IV& DLS 5 software. IMPORTANT: See page 9 for compatible DSC control panels. Programming for Telco Reporting... - Page 12 When connected to the Compass Downloader for Windows software, the Napco StarLink Honeywell Control Panels Connect icon in the System Tray turns yellow. The Napco StarLink Connect software is compatible with the Upload, download and/or program the Honeywell control ® ®...
- Page 13 9 for compatible models and firmware versions. Note: If telco reporting and using Notifications, the Mobile App and/or Napco StarLink Connect, program the items in the above table and also the table below. For Honeywell Vista-128 control panels, go to page 14.
- Page 14 Allow notification alerts (iBridge Messenger text messaging) Allow mobile device app communication for remote system control Allow Napco StarLink Connect to support Honeywell Compass software. In addition, verify that your Vista control panel firmware revision allows for radio emulation programming.
- Page 15 The absence of a name or logo in this document does not constitute a waiver of any and all intellectual property rights that NAPCO Security Technologies, Inc. has established in any of its product, feature, or service names or logos.
-
Page 16: Napco Limited Warranty
In no event shall NAPCO be liable for an amount months following the date of manufacture. NAPCO in excess of NAPCO's original selling price of the...