
Related Manuals for Polaris 7240 Sport


Summary of Contents for Polaris 7240 Sport
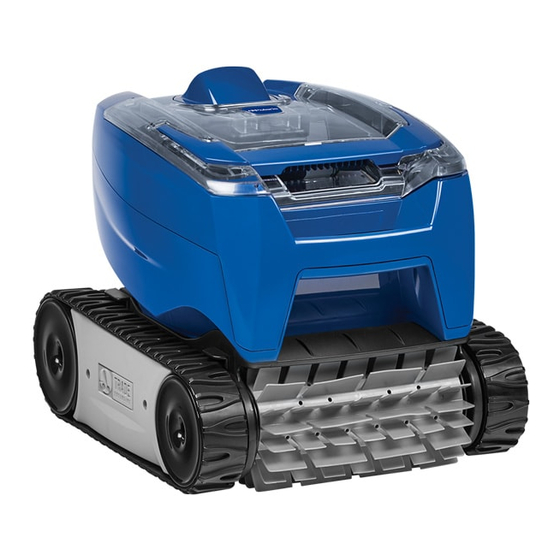
- Page 1 7240 Sport P724 TYPE EP37-- Owner's Manual ENGLISH FRANÇAIS ESPAÑOL H0582000_REVA...
- Page 2 FCC Statement This device complies with Part 15 of the FCC Rules and IC licence-exempt RSS standard. Operation is subject to the following two conditions: (1) this device may not cause harmful interference, and (2) this device must accept any interference received, including interference that may cause undesired operation.
-
Page 3: Table Of Contents
THANK YOU FOR PURCHASING THE POLARIS CLEANER. YOUR POLARIS ROBOTIC CLEANER HAS BEEN DESIGNED AND MANUFACTURED TO BE EASILY INSTALLED AND TO PROVIDE LOW MAINTENANCE OPERATION. PRIOR TO INSTALLING YOUR NEW POLARIS CLEANER, PLEASE DO THE FOLLOWING: Complete and return the warranty card. -
Page 4: Important Safety Instructions
• To reduce the risk of electrical shock, do not use the Polaris robotic cleaner or control unit if the cord is worn or damaged. Contact Zodiac Pool Systems, Inc. Technical Support immediately for proper servicing and replacement of the damaged cord. -
Page 5: Cleaner Specifications
• Clean the filter canister in the Polaris cleaner after each use. • Do not use the product in your pool if the water temperature is above 95˚ F (35˚ C) or below 55˚ F (13˚ C). -
Page 6: Assembly
Page 6 Assembly Contents The packaging should contain the following items: • Polaris robotic cleaner and fl oating cable • Control unit • Control unit base To protect the control unit from possible damage (which could lead to injury or property damage), always secure the control unit to the control unit base during operation and storage. - Page 7 Page 7 Seat the control unit firmly in the control unit base (Figure 1). "CLICK" Figure 1. Connect Control Unit Base Unscrew the protective cap for the floating cable from the side of the control unit by turning counter-clockwise (Figure 2). Figure 2.
-
Page 8: General Cleaner Operation
Start at the cleaner head and untangle any coils in the cable before storing the cleaner. The Polaris robotic cleaner includes a safety feature that automatically stops the cleaner if it is powered on but not submerged in water. For pools equipped with a beach area, this safety feature is programmed to drive the cleaner in reverse and back into the pool when the impeller is out of the water. -
Page 9: Install And Submerge The Cleaner
Page 9 Install and Submerge the Cleaner 1. With the control box plugged into a GFCI outlet, spread the fl oating cable across the pool deck until you reach the middle of the pool length. 2. Submerge cleaner vertically (1) and hold it under the surface, moving gently from side to side (2) until the bubbles stop to remove any air trapped inside (Figure 4). -
Page 10: Start / Stop Cleaning
Page 10 Figure 5. Pool Entry Point for Optimal Patterning Recommended cleaner Control Unit cleaner Recommended entry point WARNING: Do not use an extension cord Start / Stop Cleaning Press Start/Stop button to begin or interrupt cleaner operation (Figure 6). Information Start/Stop Cleaner Operation... -
Page 11: Remove From The Pool
Page 11 Remove from the Pool Gently pull the fl oating cable to bring the cleaner within arm's reach. Use the handle to lift the cleaner from the water (Figure 7). Never lift the cleaner out of the pool by the fl oating cable. Hold the cleaner vertically over the pool surface to drain water before removing (Figure 8). -
Page 12: Clean The Filter Canister
Page 12 Clean the Filter Canister Empty the canister as soon as the cycle ends. WARNING To avoid electric shock and other hazards which could result in permanent injury or death, disconnect (unplug) the cleaner from the power source before performing any cleaning and maintenance. Unplug power to the cleaner at the control unit. - Page 13 Page 13 Press the interior latch and remove the fi lter canister lid (Figure 11). Figure 11. Remove Filter Canister Lid Using a hose with clean water, rinse the fi lter canister and lid to remove all debris (Figure 12). Figure 12.
-
Page 14: Store The Cleaner When Not In Use
Page 14 Store the Cleaner When Not in Use The cleaner must be cleaned regularly using slightly soapy clean water. Do not use solvents such as trichlorethylene or its equivalent. Rinse the cleaner generously using clean water. Do not let your cleaner dry in direct sunlight near the pool. - Page 15 Page 15 Recommended cleaner Control Unit cleaner Recommended entry point WARNING: Do not use an extension cord Figure 14. Optimal Entry Point in Pool IMPORTANT Cleaner power cable may become tangled if correct procedure is not followed after each cleaning cycle. If tangling occurs, follow these steps: Gently pull the fl oating cable to bring the cleaner within arm's reach.
- Page 16 Page 16 Hold the cleaner vertically to drain (Figure 16). Figure 16. Hold Vertically to Drain Water Unplug power to the cleaner at the control unit (Figure 17). Figure 17. Unplug the Floating Cable Remove the cleaner from the pool and untangle all kinks and coils in the fl oating cable (Figure 18).
-
Page 17: Replacing Wear Parts
Page 17 Replacing Wear Parts Replacing Brushes The cleaner is fitted with a TPE brush in front. There are ''wear'' indicators (Figure 19) on the brush. To maintain cleaner performance at its best, replace the brush as soon as the wear indicator has been reached. Zodiac recommends that you replace the brushes every two (2) years. -
Page 18: Replacing The Track
Page 18 Thread each tab into the slot provided and gently feed it through until the heel comes out at the other side of the slot (Figure 21). Figure 21. Pull Tabs Through Each Slot Use scissors to cut the tabs so they are no higher than the spikes (Figure 22). -
Page 19: Spare Parts
Verify the rib of the track is positioned properly within the groove of each of the wheels. If necessary, turn the wheels gently to seat track. Figure 24. Stretch Track Around Wheels Spare Parts The complete spare parts list and exploded view is available on the Polaris website. www.polarispool.com • USA: www.polarispool.ca... -
Page 20: Troubleshooting
LED flashes once reconnect. with one second • If the problem persists, contact your local retailer to interval. request a diagnostic review or call Polaris Technical Support. 2 Flashes • Turn cleaner wheels to ensure they are not jammed. LED flashes twice •... -
Page 21: General Troubleshooting
Turn the tracks then disconnect the control unit and wait at least 20 seconds befpre reconnecting. If the problem persists, contact your local retailer to request a diagnostic review or call Polaris Technical Support Cable is tangling in the pool... - Page 22 Polaris ® and the 3-wheeled cleaner design are registered trademarks of Zodiac Pool Systems, Inc. All other trademarks referenced herein are the property of their respective owners. Polaris et la conception de nettoyeur à 3 roues sont des marques déposées de Zodiac Pool Systems, Inc.