Table of Contents
Advertisement
Advertisement
Table of Contents

Related Manuals for Baofeng DM-1801


Summary of Contents for Baofeng DM-1801
- Page 2 To users Thank you for your favor with our products. We are dedicated to providing high performance and high stability radio communication products. This two-way radio is no exception. The radio is a DMR dual-slot digital walkie-talkie developed and pro- duced by my team with 3000 memory channels, full-color LCD display and full keyboard hand-tuning function.
-
Page 3: Main Features
Main Features RF radiation information This product is intended for professional applications that meet RF Broadband walkie talkie ● radiation requirements. Users must be aware of the hazards of RF Support UV double segment, frequency range radiation and take appropriate measures to meet the requirements of RF UHF400.000-480.000MHz / VHF136.000-174.000MHz radiation limit. - Page 4 User Safety Information High/low power switch ● Meets the power requirements of different call distances to save more Please read the following information in order to use this two-way radio safely and efficiently. energy 1.The maintenance work of the two-way radio can only be carried out by Alarm function ●...
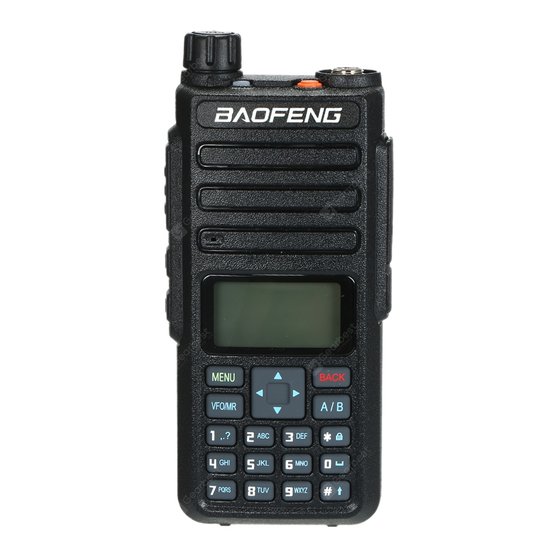
- Page 5 Familiar with this Product Contents You can familiarize yourself with the external structure and the functions Familiar with this machine 01~07 of programmable buttons of this product in this section. Status indication 08~10 Basic Operation 11~28 Antenna Menu operation 29~69 Menu seting State indicator LED Indicator...
- Page 6 [BACK]/[Clear] Clear the entered information in input state In analog mode, the DTMF dial code box pops up with a short press of #. At this time, you can manually enter the [ # ]button button In menu mode.return to the previous menu DTMF code word and press PTT to start the DTMF dial [VFO/MR] button Switch the frequency mode and channel mode...
- Page 7 Preparation before use Shortcut name Purpose Relay / offline Quickly switch between relay mode and offline mode. Charging Scan on / off Quickly turn the scan function on or off. Note: Note:Be sure to ensure that the product is off when charging. Battery into double-segment double-waiting scan does not work the charger may be charging red flashing constantly flashing, this is the Strict/normal...
-
Page 8: Battery Information
Battery information >Under normal circumstances, the charger indicator from red to green ●The first use of the battery when the battery is fully charged, at this time the battery can be Since the battery is not fully charged at the factory, please charge the removed. -
Page 9: Status Indication
3. Pay attention to the temperature and humidity of the battery storage Description of LCD Icons environment. Store the battery at room temperature in a cool, dry place Icon name Icon Description of product status to minimize self-discharge of the battery. The more signal bars, the stronger the signal is Signal strength icon The current channel transmits at high power... -
Page 10: Basic Operation
Basic Operation Icon Icon name Description of product status Power on/off The scan is on and is in normal mode To turn on the power, turn the [Power Switch / Volume Control] knob The scan stays on priority channel 1 Scan icon clockwise until you hear a "click"... - Page 11 ●When “ Off ” is selected, the machine operates in single band mode. Note: Write frequency software configuration path: open the write software ● When “ Single Wait ” is selected the machine only works on the main -> Edit -> VFO mode -> VFO A -> digital / analog data -> channel mode -> channel, and the sub channel does not receive signal.
- Page 12 ● Select from the menu: After entering the “Zone” menu, press [ ]/ [ Single call is a call from an individual two-way radio to another. to select the required zone, and then press [MENU] to switch to the 1. The LED indicator light is green selected zone.
- Page 13 6. The walkie talkie returns to the screen before receiving the call. You Start a walkie-talkie call Start a walkie-talkie call can also initiate a group call from your address book. You can choose a channel, user ID or talk group in the following ways: Channel knob Single call •...
- Page 14 1. In the channel mode, press the [ ] / [ ] to select the channel using 6. The walkie talkie returns to the screen before receiving the call. the active full call group alias or ID. 2. Hold the walkie talkie in its upright position and keep it at a distance of Analog channel call 1 to 2 inches (2.5 to 5.0 cm) from the mouth.
- Page 15 Emergency alarm function After the above configuration, press the corresponding side button, you Emergency alarm can achieve one touch DTMF launch. In the event of an emergency, you can use this feature to ask your fellow or control center for help. Emergency alarm has the highest priority, you PTT ID call can alarm whether the walkie talkie is transmitting or receiving.
- Page 16 Alarm Mode the screen displays a prompt that an emergency alert has been received, Except the alarm type “Disable” , other alarm types support the following until an acknowledgment is sent and the emergency mode exits. You will alarm modes. You can ask the dealer to select one of them (Note: The not be able to receive any other prompts or show any other calls until you following methods use “Conventional”...
- Page 17 Send emergency alert 4. Hold the walkie talkie in its upright position and keep it at a distance of This feature allows you to send an emergency alert, which belongs to a 1 to 2 inches (2.5 to 5.0 cm) from the mouth. non-voice signal and will trigger a prompt on another transceiver.
- Page 18 Note: If you press the [PTT] key during the emergency microphone and Restart emergency mode continue pressing the key after the duration of the emergency micro- It can happened in two situations: phone, the transceiver continues firing until you release the [PTT] key. •...
-
Page 19: Menu Operation
● Press the preset [Individual Operation] shortcut to enable this function. If your radio receives encrypted calls with different encryption keys or 2. If you do not operate the radio in the preset response time, the radio different key values and key IDs, you will hear the chaotic transmission will prompt before the response time is up (depending on the dealer sound (basic encryption). -
Page 20: Menu List
Menu list Level 1 menu Level 2 menu Level 3 menu Options Description of settings Remark View contacts View the contact name and number Contacts Contact list Quick configuration Configure number 0~9 to the contact, select idle state to turn off shortcut configuration Delete current contact Delete current contact... - Page 21 Level 1 menu Level 2 menu Level 3 menu Options Description of settings Remark Support Chinese and English and special characters, press the # For digital New message Edit interface button to switch input method, and press MENU key to send / save / mode clear only,...
- Page 22 Level 1 menu Level 2 menu Level 3 menu Options Description of settings Remark R CTC/DCS Change the decoding of sub audio. Setting method is same as above CTCSS/DCS T CTC/DCS Change the coding of sub audio. Setting method is same as above Strict Squelch The Software...
- Page 23 Level 1 menu Level 2 menu Level 3 menu Options Description of settings Remark Single Wait Scan main channel and sub-channel in turn; call is locked when the reception is effective; you can press PTT to talk with the other party Turn off encryption Options can Turn on encryption function, and the two sides must pair the key to...
- Page 24 Level 1 menu Level 2 menu Level 3 menu Options Description of settings Remark Input correct password to enter the setup menu; the password can be configured by default on host computer Options: On or Off / Changes boot password Options Enter password ●...
- Page 25 Level 1 menu Level 2 menu Level 3 menu Options Description of settings Remark Reception Frequency To set reception frequency; press * to clear all, press BACK to delete one Transmission Frequency To set transmission frequency; press * to clear all, press BACK to delete one Channel Name To set channel name;...
-
Page 26: Input Method
Press number button [1] to enter commonly used punctuation and Input Method You can enter user aliases, numbers and text messages via the keypad. special characters. To enter a space, press the [0] button. This product supports the English input method, Simplified Chinese Note: In the input text display area, press [ ] / [ ] / [... - Page 27 The functional description is as follows: View Contact Functional Description You can view the contact details. Call prompt Send call prompt to a contact, and the other party can call back directly Edit Contact Radio Initiate radio detection to a contact without interfering You can modify the number and alias of a contact (single call contacts detection with each other to confirm whether the other party has...
- Page 28 > For single call contacts, you can initiate single call, send text message, Receive and confirm call prompt and initiate extended function. Extended functions include: call prompt, When you receive a call alert, the screen displays a call alert, alternating radio detection, remote monitor, activation, and remote kill.
- Page 29 You can activate or remote kill any walkie-talkie in the system.For Remote monitor This function works only if the function is set and turned on by example, you might want to disable a stolen walkie-talkie, prevent the writing-frequency software. thief from using it, and enable it when recovered. Initiate remote monitor Set activation and remote kill User menu function:...
- Page 30 press [MENU] key. 4. Press [ ] key to “Radio kill” , then press [MENU] key to select 4. Press [ ] key to “Radio active”, then press [MENU] key to select 5. The screen displays “Radio kill” <User alias or ID>, the LED indicator 5.
- Page 31 channel is free for you to answer. Press the call key [PTT] to answer. If 8. You will hear a short tone; the screen shows the termination of the call. there is no voice activity during the preprogrammed group call hang-up If you release the PTT key while the walkie talkie is setting up a call, it time, the call is terminated.
- Page 32 • press the[ * ]button to delete all contents in the editing area;Press[ # ] to 3. Press the [ ]/ [ ] button, Select “Quick Text” , press the [MENU] switch input methods. button to select. 5.After finish the SMS content, press the [MENU] button to send or save 4.
- Page 33 2. The LCD shows the SMS :< User/Call group alias or ID>, confirm that [MENU] button to read this message the SMS is being sent. •When the chosen SMS opened in the inbox and this SMS was sent from 3. If the message sent successfully, a beep sound, and the screen shows Email program, and then it will appear a subject line.
- Page 34 shows the message has been sent. Note: Indicates unread message. Indicates read message. - Or if the message has not been sent, the screen shows that the message has failed to be sent. If the message fails to be sent, the radio Reply the SMS in the inbox will return to the re-send selection screen.
- Page 35 2.Press the [ ]/ [ ] button, Select “Message ” ,press the [MENU] Forward SMS button to select. Choose forward to send the SMS to another user/call group alias or ID. 3.Press the [ ]/ [ ] button to Inbox, press the [MENU] button to 1.
- Page 36 ● press the [ * ] button to delete all contents in the editing area;Press button to select. [# ] to switch input methods. 3. Press [ ]/ [ ] o send the Outbox, and then press[MENU] to select 3. After finish the SMS content, press the [MENU] button to send or save. the outbox list.
- Page 37 emergency call or an alarm. Or you receive a call alert; the radio will also 5. Press the [MENU] button when delete SMS. And choose “YES” , the exit the re-sent selection screen. The screen list will return to the re-sent screen will indicate the entire sent item is cleared.
- Page 38 Call log 3. Press [ ]/ [ ] key to missed call, then press [MENU] key to select. Your transceiver can record all dialed, picked-up and missed calls 4. Press [ ]/ [ ] key to the missed call alias or ID, then press recently.
- Page 39 The scan function helps you to receive the communication activity from 3.Press the [ ]/ [ ] button to add channel, then press the [MENU] other channels or groups call, further to know the current activity of the button to select. relative team members.
- Page 40 2.Press the [MENU] button to enter into the MENU mode; Menu setting 3.Press the [ ]/ [ ] button to scan, then press the [MENU] button to select; Radio setting 4. If the scan was stopped, the screen will indicate to open, or if the scan You can make the following settings according to your own preferences is activated, the screen will indicate to close.
- Page 41 Setting Options Description of operation Setting Options Description of operation options and Range options and Range VOX is turned off; 10.Beep Key Beep Options: Off/On. There is no prompt tone when Off is It is not necessary to press PTT when this option is on; selected 6.VOX you can speak to transmit directly;...
- Page 42 The menu functions as follows: Setting Options Description of operation options and Range 8.Press [MENU] to enter menu mode. 17.Lan- English English version, including menu, call tips, call logs and 9.Press [ ]/ [ ] o set, then press [MENU] to select. guage all other interfaces 10.Press [...
-
Page 43: Talk Around
channel, the product will beep and display “Transmission failed, Talk around In case of the repeater failure or beyond the coverage of the repeater sub-audio disabled” or “Transmission failed, color code disabled” , station, but both terminals are in the other's communication range, at this prompting that transmission is disabled at this time. - Page 44 5.Press [ ]/ [ ] tto “TOT” , then press [MENU] to select. 4.Press [ ]/ [ ] to the VOX, then press [MENU] to select. 6.The screen shows infinity, 15S, 30S... 555S option (additive increase in 5.The screen displays open, press [MENU] to enable the VOX function. the range of 15S), press [ ]/ [ ] tto the corresponding option, then...
- Page 45 After the power save function is on, the radio enters the power save 5.Press the [ ]/ [ ] button to “all tones” , then press the [MENU] mode after 10 seconds in standby mode to save battery power.The button to select. power saving ratio is 1:4.
-
Page 46: Led Indicator
2.Press [ ]/ [ ] to set, then press [MENU] to select. 8.The screen shows the keyboard unlocking and returns to the home 3.Press [ ]/ [ ] to the radio setting, then press [MENU] to select. screen. 4.Press [ ]/ [ ] to backlight, then press [MENU] to select. - Page 47 7.If the first line indicates open, press [MENU] to display the power-on In frequency mode, long press [VFO/MR] to switch between frequency password application, and then you need to type the correct password to mode and channel mode. In frequency mode, you can manually type the start the radio at the next boot.
- Page 48 4.Use the keyboard to type the correct radio configuration password CTCSS CTCSS can be set only under the simulated channel, includes: (software Settings), then press [MENU] to select. ■ CTCSS encode ■ CTCSS decode 5.Press [ ]/ [ ] to CTCSS, then press [MENU] to select. CTCSS encode 6.Press [ ]/ [...
-
Page 49: Radio Configuration
Check radio version Radio configuration Check and indicate this radio’ s Model information, serial number, CPS The product configuration is listed below: version, hardware version, firmware version, DSP version, programming Configuration Operating instructions 1.Reception To set reception frequency; press * to clear all, press BACK to time, etc information. -
Page 50: Channel Name
The radio configuration is mainly to edit the channel content. Configure 2.Press [ ]/ [ ]to set, then press [MENU] to select. paths: enter the Settings -> radio configuration menu, and select the 3.Press [ ]/ [ ] to the radio configuration, then press [MENU] to corresponding configuration items to configure. - Page 51 [MENU] to confirm. 6.The screen shows the current channel name, then press[ # ]to switch Press [ ]/ [ ] to find Color code, press [MENU] to confirm. input method to type the related letters, numbers, or Chinese characters, Press [ ]/ [ ] to select the color code, then press [MENU] to confirm.
- Page 52 4. Click “Browse” to select the file to be upgraded (provided by the manufacturer), for example: Dm-1801-V1.1.1.sgl; 5. Click “Download “and wait the download to complete. Remember that the power mustn’ t be cut off in the update process, or else the SCM will be scrapped;...
- Page 53 Main technological specification Reception VHF:136-174MHz Frequency range UHF:400-470MHz (Dual Band) -120dBm(BER≤5%) 1W Digital receive sensitivity Memory Channel 1024 Audio power <10% Frequency Stability ±1.0ppm +1 ~ -3dB Operating Temperature -30℃~+60℃ Operating Voltage DC 7.4V Demission 133*62*32mm ( no including the antenna) ansmission Weight About 268g (Include in battery and antenna)...
-
Page 54: Troubleshooting
Troubleshooting: Note: As above method still cannot solve your problem, or you meet other problem, please get contact with local distributor to get the Problem Reason Solution technological support. The battery doesn’t be Remove and re-install the installed correctly. battery. The radio The battery runs out. - Page 55 FCC Statement This device complies with Part 15 of the FCC Rules. Operation is subject to the following two conditions: (1) This device may not cause harmful interference, and (2) this device must accept any interference received, including interference that may cause undesired operation. NOTE 1: This equipment has been tested and found to comply with the limits for a Class B digital device , pursuant to part 15 of the FCC Rules.