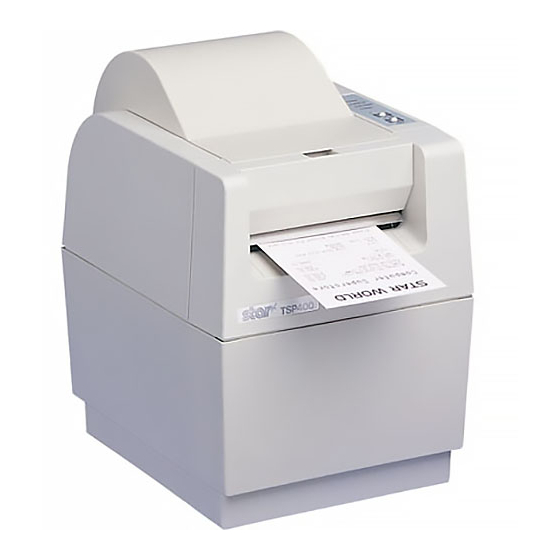
Star Micronics TSP400 Series User Manual
Star micronics thermal printer user's manual
Hide thumbs
Also See for TSP400 Series:
- Programmer's manual (136 pages) ,
- Technical manual (80 pages) ,
- Installation manual (39 pages)

Related Manuals for Star Micronics TSP400 Series


Summary of Contents for Star Micronics TSP400 Series
- Page 1 THERMAL PRINTER TSP400 SERIES USERS MANUAL GUIDE D’UTILISATION BEDIENUNGSANLEITUNG MANUALE DI ISTRUZIONI...
- Page 2 However, should any errors be detected, STAR would greatly appreciate being informed of them. The above notwithstanding, STAR can assume no responsibility for any errors in this manual. © Copyright 1995 Star Micronics Co., LTD. Radio Frequency Interference Statement Statement of Radio Interference Regulations...
-
Page 3: Table Of Contents
TABLE OF CONTENTS 1. SETTING UP ... 1 1-1. Loading the Paper Roll ... 1 1-2. Adjusting the Head Position ... 3 2. CONTROL PANEL ... 4 3. COMMAND SUMMARY ... 5 3-1. Page Mode... 6 3-2. Line Mode ... 8 APPENDIX ... -
Page 4: Setting Up
First, remove the blue semi-transparent tape from all parts. Before loading the first paper roll, be sure to remove the cardboard and the protective paper (under the tear bar) that were inserted to protect the print head during shipping. 1-1. Loading the Paper Roll Your printer accepts thermal roll paper 60mm ~ 82mm wide. - Page 5 Paper roll Fig. 1-4 Release bar Print head unit Paper guide roller shaft Fig. 1-5 Fig. 1-6 5 Temporarily place the paper roll on the printer cover. Be sure that the roll is correctly oriented for load- ing. 6 Pull on the green release bar so that it unlocks, then tilt the print head unit.
-
Page 6: Adjusting The Head Position
Fig. 1-7 1-2. Adjusting the Head Position Thick paper 0.6mm Thin paper Fig. 1-8 9 Return the print head unit to its original position and be sure that it locks into place. (The printer cover will not close unless the print head unit is locked.) 0 Move the paper roll onto the print- er’s paper-roll holder. -
Page 7: Control Panel
The buttons and indicators on the control panel operate as follows. ON LINE switch/indicator Press the button to toggle the printer online or offline. The indicator lights up to indicate that the printer is online. When the printer goes offline, it ceases printing and becomes unable to receive data from the host. -
Page 8: Command Summary
3. COMMAND SUMMARY The printer has two different software modes which can be selected using the memory switch. In order to enable changed memory switch settings, turn the printer OFF and ON again or send printer reset command (<ESC>“?”) to the printer. -
Page 9: Page Mode
3-1. Page Mode Format Definition Control codes <ESC> “C”<LF> <NUL> <ESC> “D n1n2n3n4” <LF> <NUL> <ESC> “L n1n2 ; x1x2x3x4 , y1y2y3y4, x5x6x7x8 , y5y6y7y8, d, w” <LF> <NUL> <ESC> “E n1n2” <LF>: <NUL> <ESC> “PC n1n2 ; x1x2x3x4 , y1y2y3y4, w, h, c, r1r2, d1d2”... -
Page 10: Other Commands
Other commands Control codes <ESC> “I” <LF> <NUL> <ESC> “T d n1n2” <LF> <NUL> <ESC> “B d n1n2” <LF> <NUL> <ESC> “# N, n1n2n3n4” <LF> <NUL> <ESC> “?” <LF> <NUL> <ENQ> <ESC> “N n1n2” <LF> <NUL> <ESC> “F n1n2 ; d1...d48” <LF>... -
Page 11: Line Mode
3-2. Line Mode Commands to Select Characters Hexadecimal Control codes codes <ESC> “R” n 1B 52 n <ESC> “/” “1” 1B 2F 31 <ESC> “/” <1> 1B 2F 01 <ESC> “/” “0” 1B 2F 30 <ESC> “/” <0> 1B 2F 00 <ESC>... - Page 12 Hexadecimal Control codes codes <ESC> “4” 1B 34 <ESC> “5” 1B 35 <SI> <DC2> <ESC> “ E ” 1B 45 <ESC> “ G ” 1B 47 <ESC> “ F ” 1B 46 <ESC> “ H ” 1B 48 Commands to Set the Page Format Hexadecimal Control codes codes...
- Page 13 Commands to Print Dot Graphics Hexadecimal Control codes codes <ESC> “K” n <0> 1B 4B n 00 m1 m2 m1 m2 ... <ESC> “L” n1 n2 1B 4C n1 n2 m1 m2 Print high density graphics m1 m2 ... <ESC> “k” n <0> d1 ... 1B 6B n 00 d1 ...
- Page 14 Other Commands Hexadecimal Control codes codes <CAN> <DC3> <DC1> <DC1> n 11 n <RS> <ESC> “#N, n1 n2 n3 n4” 1B 23 N 2C n1 n2 n3 n4 <LF> <NUL> 0A 00 <ESC> “@” 1B 40 <ENQ> <STX> <ETX> <ESC> “?” <LF> <NUL> 1B 3F 0A 00 Function Cancel last line &...
- Page 15 TABLE DES MATIERES 1. INSTALLATION ... 13 1-1. Chargement du rouleau de papier ... 13 1-2. Réglage de la position de la tête ... 15 2. TABLEAU DE COMMANDE ... 16 3. RESUME DES COMMANDES ... 17 3-1. Mode Page... 18 3-2.
-
Page 16: Installation
Commencer par enlever la bande bleue semi-transparente de toutes les pièces. Avant de charger le premier rouleau de papier, veiller à enlever le carton ainsi que le papier de protection (sous la barre de découpe) qui ont été insé- rés en vue de protection de la tête d’impression lors de l’expédition. - Page 17 Rouleau de papier Paper roll Fig. 1-4 Barre de déclenchement Release bar Tête d’impression Print head unit Arbre de rouleau Paper guide de guide-papier roller shaft Fig. 1-5 Fig. 1-6 5 Mettre le rouleau de papier sur le couvercle de l’imprimante à titre temporaire.
-
Page 18: Réglage De La Position De La Tête
Fig. 1-7 1-2. Réglage de la position de la tête Papier épais, 0.6mm Papier mince Fig. 1-8 9 Faire retourner la tête d’impression en position d’origine et s’assurer qu’elle se bloque en place. (Le cou- vercle d’imprimante ne fermera pas tant que la tête d’impression n’est pas bloquée). -
Page 19: Tableau De Commande
2. TABLEAU DE COMMANDE Les touches et témoins du tableau de commande fonctionnent de la manière suivante: Commutateur/Témoin ON LINE (EN LIGNE) Appuyer sur la touche pour faire passer l’imprimante du mode en ligne au mode hors ligne. Le témoin s’allume pour indiquer que l’imprimante est en ligne. Lorsque l’imprimante passe en mode hors ligne, elle s’arrête d’imprimer et elle ne peut plus recevoir de données de l’ordinateur. -
Page 20: Resume Des Commandes
3. RESUME DES COMMANDES L’imprimante a deux modes de logiciel différents et il est possible de les sélectionner en utilisant le commutateur de mémoire. Pour valider des change- ments du commutateur de mémoire, éteindre puis rallumer l’imprimante ou transmettre une commande de réinitialisation (<ESC>”?”) à l’imprimante. (Réglage en usine: Mode Page) Mode Page: Code... - Page 21 3-1. Mode Page Définition du format Codes de contrôle <ESC> “C”<LF> <NUL> <ESC> “D n1n2n3n4” <LF> <NUL> <ESC> “L n1n2 ; x1x2x3x4 , y1y2y3y4, x5x6x7x8 , y5y6y7y8, d, w” <LF> <NUL> <ESC> “E n1n2” <LF>: <NUL> <ESC> “PC n1n2 ; x1x2x3x4 , y1y2y3y4, w, h, c, r1r2, d1d2”...
- Page 22 Autres commandes Codes de contrôle <ESC> “I” <LF> <NUL> <ESC> “T d n1n2” <LF> <NUL> <ESC> “B d n1n2” <LF> <NUL> <ESC> “# N, n1n2n3n4” <LF> <NUL> <ESC> “?” <LF> <NUL> <ENQ> <ESC> “N n1n2” <LF> <NUL> <ESC> “F n1n2 ; d1...d48” <LF>...
- Page 23 3-2. Mode Ligne Commandes de sélection de caractères Codes Codes de contrôle hexadécimaux <ESC> “R” n 1B 52 n <ESC> “/” “1” 1B 2F 31 <ESC> “/” <1> 1B 2F 01 <ESC> “/” “0” 1B 2F 30 <ESC> “/” <0> 1B 2F 00 <ESC>...
- Page 24 Codes Codes de contrôle hexadécimaux <ESC> “4” 1B 34 <ESC> “5” 1B 35 <SI> <DC2> <ESC> “ E ” 1B 45 <ESC> “ G ” 1B 47 <ESC> “ F ” 1B 46 <ESC> “ H ” 1B 48 Commandes de réglage du format de page Codes Codes de contrôle hexadécimaux...
- Page 25 Commandes d’impression de graphiques en points Codes Codes de contrôle hexadécimaux <ESC> “K” n <0> 1B 4B n 00 m1 m2 m1 m2 ... <ESC> “L” n1 n2 1B 4C n1 n2 m1 m2 Impression de graphiques haute densité m1 m2 ... <ESC>...
- Page 26 Autres commandes Codes Codes de contrôle hexadécimaux <CAN> <DC3> <DC1> <DC1> n 11 n <RS> <ESC> “#N, n1 n2 n3 n4” 1B 23 N 2C n1 n2 n3 n4 <LF> <NUL> 0A 00 <ESC> “@” 1B 40 <ENQ> <STX> <ETX> <ESC>...
- Page 27 INHALTSVERZEICHNIS 1. INBETRIEBNAHME ... 25 1-1. Einlegen der Papierrolle ... 25 1-2. Einstellung der Druckkopfposition ... 27 2. BEDIENFELD ... 28 3. AUFSTELLUNG DER DRUCKERBEFEHLE ... 29 3-1. Seitenmodus ... 30 3-2. Zeilenmodus ... 32 ANHANG ... 48 Der Anhang erscheint nur im englischen Teil dieser Bedienungsanleitung...
-
Page 28: Inbetriebnahme
Entfernen Sie zunächst das halbtransparente, blaue Klebeband von allen Teilen. Stellen Sie vor dem ersten Einlegen der Papierrolle sicher, daß das Pappstück und das Papier (unter der Abreißkante) entfernt worden ist. Diese Teile dienen dem Schutz des Druckkopfes beim Transport. 1-1. - Page 29 Papierrolle Paper roll Abb. 1-4 Entriegelungshebel Release bar Druckkopfeinheit Print head unit Paper guide Papierführungs– roller shaft rollen Abb. 1-5 Abb. 1-6 5 Legen Sie die Papierrolle vorüber- gehend in den Druckerdeckel. Ach- ten Sie darauf, daß die Rolle zum Einlegen bereits richtig herum liegt.
-
Page 30: Einstellung Der Druckkopfposition
Abb. 1-7 1-2. Einstellung der Druckkopfposition Dickes Papier, 0.6mm Dünnes Papier Abb. 1-8 9 Kippen Sie den Druckkopf zurück in seine Ausgangsstellung. Verge- wissern Sie sich, daß der Druckkopf eingerastet ist. (Der Druckerdeckel kann nicht geschlossen werden, so- lange der Druckkopf nicht ein- gerastet ist.) 0 Legen Sie die Papierrolle in den Papierrollenhalter des Druckers. -
Page 31: Bedienfeld
Die Tasten und Anzeigen des Bedienfeldes arbeiten wie im folgenden beschrieben. Schalter/Anzeige ON LINE Mit dieser Taste wird zwischen den Drucker-Modi “Online” und “Offline” hin- und hergeschaltet. Die Anzeige leuchtet, wenn der Drucker online ist. Wenn der Drucker offline geht, wird der Druck gestoppt, und der Drucker kann keine Daten vom Computer empfangen. -
Page 32: Aufstellung Der Druckerbefehle
3. AUFSTELLUNG DER DRUCKERBEFEHLE Der Drucker verfügt über zwei Software-Modi, die über den Speicherschalter angewählt werden können. Um geänderte Speicherschalter-Einstellungen wirk- sam werden zu lassen, muß der Drucker aus- und wieder angeschaltet werden, oder an ihn muß der der Drucker-Reset-Befehl (<ESC>“?”) gesendet werden. (Werksvoreinstellung: Seitenmodus) Seitenmodus: Code... -
Page 33: Seitenmodus
3-1. Seitenmodus Formatdefinitionen Steuerbefehle <ESC> “C”<LF> <NUL> <ESC> “D n1n2n3n4” <LF> <NUL> <ESC> “L n1n2 ; x1x2x3x4 , y1y2y3y4, x5x6x7x8 , y5y6y7y8, d, w” <LF> <NUL> <ESC> “E n1n2” <LF>: <NUL> <ESC> “PC n1n2 ; x1x2x3x4 , y1y2y3y4, w, h, c, r1r2, d1d2”... - Page 34 Weitere Befehle Steuerbefehle <ESC> “I” <LF> <NUL> <ESC> “T d n1n2” <LF> <NUL> <ESC> “B d n1n2” <LF> <NUL> <ESC> “# N, n1n2n3n4” <LF> <NUL> <ESC> “?” <LF> <NUL> <ENQ> <ESC> “N n1n2” <LF> <NUL> <ESC> “F n1n2 ; d1...d48” <LF>...
-
Page 35: Zeilenmodus
3-2. Zeilenmodus Befehle zur Zeichenwahl Hexadezimal- Steuerbefehle Codes <ESC> “R” n 1B 52 n <ESC> “/” “1” 1B 2F 31 <ESC> “/” <1> 1B 2F 01 <ESC> “/” “0” 1B 2F 30 <ESC> “/” <0> 1B 2F 00 <ESC> “b” n1 n2 n3 n4 1B 62 n1 n2 n3 n4 d1 ... - Page 36 Hexadezimal- Steuerbefehle Codes <ESC> “4” 1B 34 <ESC> “5” 1B 35 <SI> <DC2> <ESC> “ E ” 1B 45 <ESC> “ G ” 1B 47 <ESC> “ F ” 1B 46 <ESC> “ H ” 1B 48 Befehle zum Festlegen der Seitengröße Hexadezimal- Steuerbefehle Codes...
- Page 37 Befehle zum Druck von Rastergraphiken Hexadezimal- Steuerbefehle Codes <ESC> “K” n <0> 1B 4B n 00 m1 m2 m1 m2 ... <ESC> “L” n1 n2 1B 4C n1 n2 m1 m2 Graphikdruck in hoher Auflösung m1 m2 ... <ESC> “k” n <0> d1 ... 1B 6B n 00 d1 ...
- Page 38 Weitere Befehle Hexadezimal- Steuerbefehle Codes <CAN> <DC3> <DC1> <DC1> n 11 n <RS> <ESC> “#N, n1 n2 n3 n4” 1B 23 N 2C n1 n2 n3 n4 <LF> <NUL> 0A 00 <ESC> “@” 1B 40 <ENQ> <STX> <ETX> <ESC> “?” <LF> <NUL> 1B 3F 0A 00 Funktion Letzte Zeile löschen und Drucker inizialisieren Drucker deaktivieren...
- Page 39 1. INSTALLAZIONE ... 37 1-1. Caricamento del rotolo di carta ... 37 1-2. Regolazione della posizione della testina ... 39 2. PANNELLO DI CONTROLLO ... 40 3. ELENCO DEI COMANDI ... 41 3-1. Modo Pagina ... 42 3-2. Modo Riga... 44 APPENDICE ...
-
Page 40: Caricamento Del Rotolo Di Carta
Per prima cosa, staccare il nastro adesivo semitrasparente blu da tutti i componenti. Prima di caricare il primo rotolo di carta, assicurarsi di rimuovere il car- tone ed il foglio di protezione (da sotto la barra di strappo) inseriti per proteggere la testina di stampa du- rante il trasporto. - Page 41 Rotolo di carta Paper roll Fig. 1-4 Gruppo testina di Barra di apertura Release bar Print head unit stampa Paper guide Asta del rullo roller shaft guida carta Fig. 1-5 Fig. 1-6 5 Collocare provvisoriamente il roto- lo di carta sul coperchio della stam- pante.
-
Page 42: Regolazione Della Posizione Della Testina
Fig. 1-7 1-2. Regolazione della posizione della testina Carta spessa, 0,6mm Carta sottile Fig. 1-8 9 Riportare il gruppo testina di stam- pa nella sua posizione originale ed assicurarsi che si blocchi in posizio- ne (il coperchio della stampante non si chiude fino a quando il gruppo testina di stampa non è... -
Page 43: Pannello Di Controllo
2. PANNELLO DI CONTROLLO I pulsanti e le spie luminose del pannello di controllo funzionano come descritto di seguito. Pulsante/spia ON LINE Premere il pulsante per far passare la stampante dallo stato di online a quello di offline e viceversa. La spia si illumina per indicare che la stampante è online. Quando la stampante va in offline, interrompe la stampa e non può... -
Page 44: Elenco Dei Comandi
3. ELENCO DEI COMANDI La stampante dispone di due diverse modalità software selezionabili tramite interruttore di memoria. Per rendere attive le modifiche alle impostazioni dell’interruttore di memoria, spegnere e riaccendere la stampante oppure inviare alla stampante un comando di ripristino (<ESC>“?”). (Impostazione di fabbrica: Modo Pagina) Modo Pagina: Code... -
Page 45: Modo Pagina
3-1. Modo Pagina Definizione del formato Codici di controllo <ESC> “C”<LF> <NUL> <ESC> “D n1n2n3n4” <LF> <NUL> <ESC> “L n1n2 ; x1x2x3x4 , y1y2y3y4, x5x6x7x8 , y5y6y7y8, d, w” <LF> <NUL> <ESC> “E n1n2” <LF>: <NUL> <ESC> “PC n1n2 ; x1x2x3x4 , y1y2y3y4, w, h, c, r1r2, d1d2”... - Page 46 Altri comandi Codici di controllo <ESC> “I” <LF> <NUL> <ESC> “T d n1n2” <LF> <NUL> <ESC> “B d n1n2” <LF> <NUL> <ESC> “# N, n1n2n3n4” <LF> <NUL> <ESC> “?” <LF> <NUL> <ENQ> <ESC> “N n1n2” <LF> <NUL> <ESC> “F n1n2 ; d1...d48” <LF>...
-
Page 47: Modo Riga
3-2. Modo Riga Comandi di selezione caratteri Codici Codici di controllo esadecimali <ESC> “R” n 1B 52 n <ESC> “/” “1” 1B 2F 31 <ESC> “/” <1> 1B 2F 01 <ESC> “/” “0” 1B 2F 30 <ESC> “/” <0> 1B 2F 00 <ESC>... - Page 48 Codici Codici di controllo esadecimali <ESC> “4” 1B 34 <ESC> “5” 1B 35 <SI> <DC2> <ESC> “ E ” 1B 45 <ESC> “ G ” 1B 47 <ESC> “ F ” 1B 46 <ESC> “ H ” 1B 48 Comandi di impostazione del formato pagina Codici Codici di controllo esadecimali...
- Page 49 Comandi di stampa di grafica a matrice di punti Codici Codici di controllo esadecimali <ESC> “K” n <0> 1B 4B n 00 m1 m2 m1 m2 ... <ESC> “L” n1 n2 1B 4C n1 n2 m1 m2 Stampa di grafica ad alta densità m1 m2 ...
- Page 50 Altri comandi Codici Codici di controllo esadecimali <CAN> <DC3> <DC1> <DC1> n 11 n <RS> <ESC> “#N, n1 n2 n3 n4” 1B 23 N 2C n1 n2 n3 n4 <LF> <NUL> 0A 00 <ESC> “@” 1B 40 <ENQ> <STX> <ETX> <ESC>...
-
Page 51: Appendix
General Specifications Printing system ... Line thermal dot-matrix Resolution ... 8 dots/mm (horiz.) x 8 dots/mm (vert.) Printable width ... Page Mode 80mm Printing speeds ... 50mm/sec, 25mm/sec Printable characters ... ANK, International Bar codes ... JAN, EAN, UPC, Code 39, ITF, Code 128, Character matrix ... - Page 52 Automatic paper cutter Life ... 300, 000 cuts (if paper debris is cleared) Min. cut length ... 25.4mm (1 inch) (TSP412) (TSP442) – 49 –...
-
Page 53: Paper Specifications
Paper Specifications Recommended paper-roll types: NIPPON PAPER INDUSTRIES NEW OJI PAPER Co.,Ltd. Many paper types are available. Please use paper that meets the following criteria. 1. Paper type 2. Paper width 3. Paper thickness 4. Paper rolls TF50KS-E TF62KS-E KF-730 General high-sensitivity thermal paper General high-sensitivity label paper If you use medium or low sensitivity paper,... - Page 54 5. Print area lenhth of a Length of b Line mode 3.5mm 75mm Page mode 80mm 6. Black marking Printable width Print density: Print position: Max. 36 Marked side: Back (obverse of printable side) Mark dimensions: Width 10 ~ 20mm (offset from center) Length 3mm ~ 10mm Positioning:...
- Page 55 7. Label-paper specifications Label pitch: Spacing between labels: b 3~10mm (5mm is Backing paper: – 52 – a 10~300mm preferred.) c Max. 5mm...
- Page 56 MEMO – 55 – P 1996.1...
- Page 57 HEAD OFFICE STAR MICRONICS CO., LTD. 20-10 Nakayoshida, Shizuoka, 422 Japan Tel: (054) 263-1115, Telefax: (054) 263-8714 OVERSEAS SUBSIDIARY COMPANIES STAR MICRONICS AMERICA, INC. 70-D Ethel Road West, Piscataway, NJ 08854 U.S.A Tel: (908) 572-9512, Telefax: (908) 572-5095, Telex: 299766 STAR UR STAR MICRONICS DEUTSCHLAND GMBH Westerbachstraße 59, D-60489 Frankfurt/Main 90, Germany...