Table of Contents
Advertisement
Advertisement
Table of Contents

Related Manuals for Necchi NC-103D


Summary of Contents for Necchi NC-103D
- Page 1 Instruction Manual NC-103D...
- Page 3 Important safety instructions When using an electrical appliance, basic safety should always be followed, including the following: Read all instructions before using this sewing machine. DANGER - To reduce the risk of electric shock: 1. An appliance should never be left unattended when plugged in. 2.
- Page 4 15. Never use the machine if the air vents are blocked, keep the air vents of the machine and the foot pedal free from dust, fusel and leftovers. 16. The machine must only be used with designated foot controller, in order to avoid a hazard.
-
Page 5: Table Of Contents
Contents Machine Introduction Principal parts of the machine ....................1 Accessories ..........................2 Standard ..............................2 Optional ..............................2 Connecting machine to power source ................... 3 Polarized plug information ........................3 Foot control ............................3 Foot controller with needle up and down feature ................... - Page 6 Sewing Basics Straight stitch ......................... 38 Changing the needle position ......................38 Zigzag stitch ........................... 39 Starting to sew ........................40 Useful skills ..........................42 Reverse sewing ............................ 42 Sewing curves ............................42 Sewing corners ............................ 43 Sewing stretch fabrics .......................... 43 Sewing thin fabrics ..........................
- Page 7 Scallop hem ............................68 Cording............................ 69 Single cording ............................69 Striple cording ............................69 Narrow hemming ........................70 Twin needle ..........................71 Maintenance and Trouble shooting Maintenance ........................... 74 Clean the hook ............................74 Clean the machine surface ........................74 Warning Function ........................75 Warning beeping sound ........................
-
Page 8: Machine Introduction
Machine Introduction... -
Page 9: Principal Parts Of The Machine
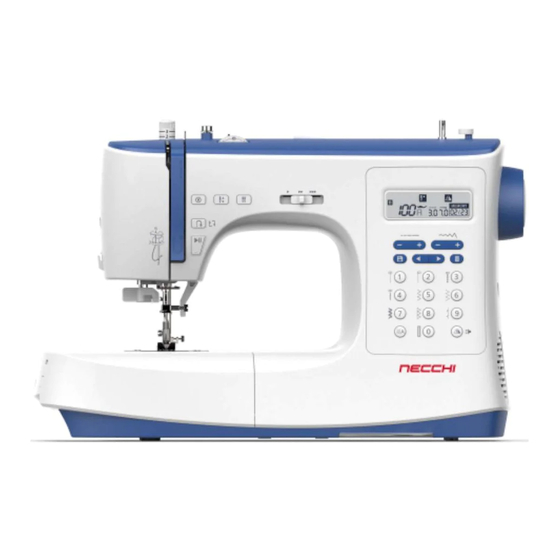
Principal parts of the machine ① Take-up lever ② Presser foot pressure dial ③ Operation buttons ④ Thread cutter ⑤ Sewing table and accessory box ⑥ Tension dial ⑦ Speed adjustment slide ⑧ Bobbin winder spindle ⑨ Bobbin winder stopper ⑩... -
Page 10: Accessories
Accessories Most accessories are stored in the accessory box. The extension table and soft cover can be found aside of the packing styrofoam. v Standard ① All purpose foot (already installed) ② Zipper foot ③ Buttonhole foot ④ Satin stitch foot ⑤... -
Page 11: Connecting Machine To Power Source
Connecting machine to power source n Attention Always make sure that the machine is unplugged from power source and the main switch is off ("O"), when the machine is not in use and before inserting or removing parts. Before connecting the power supply, make sure that the voltage shown on the rating plate is conforming with your main power. -
Page 12: Machine Setup
Machine Setup... -
Page 13: Sewing Table
Sewing table Hold the sewing table horizontally, then pull toward the left to remove it from the machine. Attach the sewing table, and then push it to the right. The inside space of the sewing table is used as an accessory box. v Free arm Free-arm sewing is convenient for sewing tubular areas such as pant hems and cuffs. -
Page 14: Install The Extension Table
Install the extension table Pull the sewing table and accessory box off by sliding it to the left. Follow the arrow, and stretch the foot of the extension table. Snap (A) of the extension table into (B) of the machine. Adjust presser foot pressure The presser foot pressure dial is on the top left of the face plate. -
Page 15: Winding The Bobbin
Winding the bobbin Please following the number order and see the corresponding illustrations below. 1. Place the thread and spool holder onto the spool pin. For better sewing quality, choose a proper size of the spool holder for the thread and attach it next to the spool. - Page 16 6. Hold the thread tail securely in one hand. Step on the foot control or press the start/ stop button to start winding the bobbin. 7. After the bobbin has wound a few rounds, stop the machine and cut the thread near the hole of the bobbin.
-
Page 17: Inserting The Bobbin
Inserting the bobbin n Attention Turn the power switch to off ("O"). When inserting or removing the bobbin, the needle and the presser foot must be fully raised. Open the bobbin cover by pushing the release button to the right. ①... -
Page 18: Threading The Upper Thread
Threading the upper thread Please following the number order and see the corresponding illustrations below. It is important to carry out the threading correctly to get a quality sewing. Otherwise several problems will occur. 1. Turn the power switch to on ("I"). Raise the presser foot lifter. - Page 19 4. Draw the thread from the spool and place the thread in between the upper thread guide. 5. Guide the thread ahead and pull the thread through the pre-tension spring as illustrated. 6. Continue to guide the thread into the silver discs to keep the thread in proper tension.
- Page 20 10. Lower the presser foot lifter. 11. Lower the needle threader lever slowly and draw the thread through the thread guide as illustrated and then to the right. ① Lever ② Hook pin 12. The needle threader automatically turns to the threading position and the hook pin passes through the needle eye.
-
Page 21: Bringing Up The Bobbin Thread
Bringing up the bobbin thread When sewing gathering or smocking stitch, bring up the bobbin thread first as below instruction. Hold the upper thread with your left hand. Turn the handwheel towards you (counter- clockwise) to lower the needle down below the needle plate then raise it to bring the bobbin thread up. -
Page 22: Replacing The Needle
Replacing the needle Change the needle regularly, especially when it shows signs of wear or if it causes problems. n Attention Turn the power switch to off ("O") when carrying out below operations! Turn the handwheel toward you to raise the needle then loosen the needle clamp screw to remove the needle. -
Page 23: Matching Needle/Fabric/Thread
Matching needle/fabric/thread NEEDLE SIZE FABRICS THREAD 65/9 - 75/11 Lightweight fabrics- Light-duty thread in cotton, nylon, polyester or cotton wrapped thin cottons, voile, serge, silk, muslin, polyester. Qiana, interlocks, cotton knits, tricot, jerseys, crepes, woven polyester, shirt & blouse fabrics. 80/12 Medium weight fabrics- Most threads sold are medium... -
Page 24: Changing The Presser Foot
Changing the presser foot n Attention Turn the power switch to off ("O"). Always use the proper foot for the selected stitch. The wrong foot can cause the needle to break. v Remove the presser foot Raise the presser foot lifter. Press the back lever to release the presser foot. -
Page 25: To Raise Or Drop The Feed Dogs
To raise or drop the feed dogs The drop feed lever can be seen on the base at the back side of the sewing machine. Sliding the drop feed lever to lower or raise the feed dogs. When lever is in raised position, the feed dog will arise automatically when you are sewing. -
Page 26: Thread Tension
Thread tension Proper tension setting is important for sewing. There is no single tension setting appropriate for all the stitch functions and fabrics. Basic thread tension setting: "4". Normal thread tension for straight stitch sewing. ① Upper thread ② Bobbin thread ③... -
Page 27: Instruction
Instruction... -
Page 28: Lcd Screen
LCD screen ① Reverse ② Auto-stop ③ Auto-lock ④ Needle up position ⑤ Needle down position ⑥ Twin needle mode ⑦ Mirror ⑧ Buttonhole lever ⑨ Bobbin winding Memory mode: ⑩ A to D Pattern Group ⑪ Stitch number ⑫ Suggested presser foot ⑬... -
Page 29: Operation Buttons
Operation buttons Start/stop button Press the start/stop button to start machine running. Press the start/stop button again to stop machine. This way you may operate the machine without foot control. Reverse button When the A-Direct Pattern Group number 1-5 or B-Regular Pattern Group number 000 is selected, the machine will sew reverse at a low speed if the reverse button is pressed. - Page 30 Repeat sewing function ( In memory program) Under the memory program, the reverse button is using for repeat sewing. The stitch combination can be sewn continuously if the icon appeared. Press the reverse button to cancel the repeat sewing, machine will sew 3 locking stitches at the end of one complete combination.
- Page 31 Needle up/down position button With the needle up/down position button, you decide whether the needle stops in the highest or in the lowest position (i.e. in the fabric) when you stop sewing. Note During sewing, press the needle up/down position button, it can not to change the needle position.
- Page 32 Stitch length adjustment button When you select a stitch, the machine will automatically set the recommended stitch length values which will be shown on the LCD screen. The stitch value display will blink 3 times while adjusting to its default setting. The stitch length can be regulated by pressing the stitch length adjustment buttons.
- Page 33 Direct stitch selection and number buttons Under A-Direct Pattern Group, press the buttons to select the direct stitches shown beside the number buttons. Under B-Regular Pattern Group and Alphabet Groups, refer to the stitch pattern plate and use the number buttons 0-9 to select the preference stitches.
- Page 34 Sound button Buzzer turn off: Press the sound button for 2 seconds and when you hear the machine delivering a short beep, the sound will be turned off. Buzzer turn on: When machine is in silent mode, press the button for 2 seconds and it will deliver two short beeps to remind you that the sound is turned on now.
-
Page 35: Selecting Stitch
Selecting stitch Select the desired stitch from those shown on the stitch pattern plate. ① Stitch pattern plate The LCD screen will be set at A-Direct Pattern Group. By pressing the pattern group switch button to select the stitch mode. ①... -
Page 36: Memory Function Buttons
Memory function buttons Memory button Press the memory button to enter the memory mode, and store the combination of stitches desired. Press the memory button again to leave the memory mode. Memory stitch selecting button Use the arrow button "left" or "right" to selected the memorized stitch. -
Page 37: Memory Program
Memory program You can save frequent-use combining stitches for future use, such as names. Since stored stitches are not lost after the sewing machine is turned off, they can be recalled at any time. Note Multiple stitches selecting from B to D Pattern Groups can be combined and sewn together. This machine has 1 program memory and each module can retain 40 units of stitches. -
Page 38: Recalling And Sewing The Memorized Stitches
Press the memory button to save the stitches combination, and return to standard sewing mode. Recall the memorized stitches and start to sew. ① Memory button n Attention The selected stitch will be cleared from the memory program after closing the machine if you do not press the memory button again when you have completed your selection. -
Page 39: Editing Stitches
v Editing stitches Use the memory stitch selecting button "left" or "right" to select the stitch to edit. ① Memory stitch selecting button The stitch length, stitch width and mirror of the stitches can be adjusted manually. ① Stitch length adjustment button ②... -
Page 40: Repeat Setting
v Repeat setting Under the memory mode, the reverse button is using for repeat sewing. The stitch combination can be sewn continuously if the icon appeared. Press the reverse button again to cancel repeat sewing function, the icon will be disappeared on LCD screen. - Page 41 Stitch Chart...
-
Page 42: Stitch Chart
Stitch chart v A-Direct Pattern Group Width(mm) Length(mm) Fuctions Presser Stitch Pattern Foot Auto Manual Auto Manual 0.0~7.0 0.0~4.5 0.0~7.0 0.0~4.5 0.0~7.0 1.0~3.0 1.0~6.0 1.0~3.0 0.0~7.0 0.3~1.0 1.0~4.5 Direct 2.0~7.0 0.3~1.0 1.0~4.5 2.5~7.0 1.0~3.0 3.5~7.0 1.0~3.0 1.0~7.0 0.5~4.5 3.0~7.0 0.3~1.0 v B-Regular Pattern Groups Width(mm) Length(mm) - Page 43 Width(mm) Length(mm) Fuctions Presser Stitch Pattern Foot Auto Manual Auto Manual 2.5~7.0 0.3~1.0 2.5~7.0 0.3~1.0 2.5~7.0 0.3~1.0 Satin 3.0~7.0 0.3~1.0 2.5~7.0 0.3~1.0 2.5~7.0 0.3~1.0 2.5~7.0 1.0~3.0 3.0~7.0 1.0~3.0 Cross 3.0~7.0 1.0~3.0 3.0~7.0 1.0~3.0 2.5~7.0 1.5~3.0 2.5~7.0 1.5~3.0 2.5~7.0 1.5~3.0 2.5~7.0 1.5~3.0 3.0~7.0 1.5~3.0...
-
Page 44: C-Alphabet Group-Block Style
Width(mm) Length(mm) Fuctions Presser Stitch Pattern Foot Auto Manual Auto Manual 3.0~7.0 2.0~3.0 3.0~7.0 1.0~3.0 2.5~7.0 1.0~4.5 2.5~7.0 1.0~3.0 2.5~7.0 1.5~3.0 3.5~7.0 1.5~3.0 2.5~7.0 1.5~3.0 2.5~7.0 1.5~3.0 3.5~7.0 1.5~3.0 2.5~7.0 1.0~3.0 Decorative 3.0~7.0 1.5~3.0 5.0~7.0 2.0~3.0 4.0~7.0 1.5~3.0 2.5~7.0 1.0~3.0 1.0~7.0 1.0~4.0 4.0~7.0... -
Page 45: Sewing Basics
Sewing Basics... -
Page 46: Straight Stitch
Straight stitch Using the all purpose foot. Set the stitch as shown in figure. The stitch length can be regulated by pressing the stitch length adjustment button. For a shorter stitch, press the "–" button. For a longer stitch, press the "+" button. Generally speaking, the thicker the fabric, thread and needle, the longer the stitch length should be. -
Page 47: Zigzag Stitch
Zigzag stitch Using the all purpose foot or satin stitch foot. Set the stitch as shown in igure. The width can be adjusted between "0.0-7.0" as you press the stitch width adjustment button "+" or "-". Press the stitch length adjustment button "+" or "-"... -
Page 48: Starting To Sew
Starting to sew Make sure you follow the needle/fabric/thread combinations and use the suggested presser foot before sewing. 1. Turn the power switch to on ("I"). 2. Press the needle up/down position button to bring the needle to highest position. 3. - Page 49 7. Slowly press down the foot control or long press the start/stop button to start sewing. Release the foot control or press the start/ stop button again to stop the machine. Note You can use reverse sewing for back tacking and reinforcing seams by pressing the reverse button.
-
Page 50: Useful Skills
Useful skills Various ways to achieve better results for your sewing projects are described below. Refer to these tips when sewing your project. The results depend on types of fabrics and stitches. Please use the same fabric of the project and do a sewing test in advance. -
Page 51: Sewing Corners
v Sewing corners Stop the sewing machine when you reach a corner. Lower the needle into the fabric. Raise the presser foot lifter. Use the needle as a pivot and turn the fabric 90°. Lower the presser foot lifter and resume sewing. -
Page 52: Sewing Heavy Fabric
v Sewing heavy fabric The black button on the right side of the presser foot will lock the presser foot in a horizontal position if you push it in before lowering the presser foot. This ensures even feeding at the beginning of a seam and helps when sewing multiple layers of fabrics such as sewing over seams when hemming jeans. -
Page 53: Utility Stitches
Utility Stitches... -
Page 54: Stretch Stitch
Stretch stitch Use this stitch with knitted tricot or other stretchy fabrics. The stitch enables your seam to stretch without breaking the thread. Good for easy to ravel and knit fabrics. It’s good for joining durable fabric such as denims. These stitches can also be used as a decorative top stitches. -
Page 55: Sewing Stretch Fabrics And Elastic Tape
Sewing stretch fabrics and elastic tape When elastic tape is attached to the cuff or waist of a piece of clothing, the finished dimensions will be that of the stretched elastic tape. Therefore, it is necessary that a suitable length of the elastic tape be used. Using the all purpose foot. -
Page 56: Overcasting Stitch
Overcasting stitch Sewing overcasting stitches along the edge of fabric to prevent it from fraying. v Using the all purpose foot 2.0~3.0 2.5~5.0 Attach the all purpose foot. Sewing the overcasting along the edge of the fabric so that the needle drops over the edge of the fabric on the right side. -
Page 57: Blind Hem
Blind Hem Secure the bottom of skirts and pants with a blind hem, this stitch will sew with invisible stitch on the right side of the fabric. Using the blind hem foot. 9: Blind hem/lingerie for firm fabrics. 1.0~2.0 2.5~4.0 001: Blind hem for stretch fabrics. -
Page 58: Buttonhole Stitch
Buttonhole stitch Buttonholes can be adapted to the size of the button. For stretch fabric or thin fabric, it is recommended to use a stabilizer for a better buttonhole sewing. Slightly reduce upper thread tension to produce better results. Using the buttonhole foot. 0/009: For thin or medium fabric 012/013: For suits or overcoats 011 012 013... - Page 59 Pull the buttonhole lever all the way down and position it behind the bracket on the buttonhole foot. ① Buttonhole lever ② Bracket Slightly hold the end of the upper thread and start sewing. Pull two lines together. Note Gently feed the fabric by hand. Before stopping, the machine will automatically sew a reinforcement stitch after the buttonhole is sewn.
-
Page 60: Making A Buttonhole On Stretch Fabrics
v Making a buttonhole on stretch fabrics 015: For stretch or woven fabric 016: For stretch fabric When sewing buttonholes on stretch fabric, hook heavy thread or cord under the buttonhole foot. Attach the buttonhole foot. Bring the gimp thread ends to the front of the foot and insert them into the grooves, then tie them there temporarily. -
Page 61: Bar Tack Stitch
Bar tack stitch Bar tack stitch is used to reinforce points subject to strain, such as pocket corners and openings. Using the buttonhole foot. Extend the button holder plate and set to the desire length. Adjust the stitch width and the stitch length to the desired width and density. -
Page 62: Darning Stitch
Darning stitch Darning a small hole or a tear before it becomes larger can save a garment. Choose a fine thread in a color as color as close to your garment possible. Using the buttonhole foot. Baste the upper fabric and the under fabric together. - Page 63 Pull the buttonhole lever all the way down and position it behind the bracket on the buttonhole foot. Slightly hold the end of the upper thread and start sewing. ① Buttonhole lever ② Bracket Darning stitches are sewn from the front of the presser foot to the back, as shown.
-
Page 64: Eyelet Stitch
Eyelet stitch Eyelet stitches are used for making belt holes and other similar applications. Using the satin stitch foot. Press the "+" or "-" stitch width adjustment button to select the eyelet size. ① Small: 5.0mm ② Medium: 6.0mm ③ Large: 7.0mm Lower the needle into the fabric at the beginning of the stitching, and then lower the... -
Page 65: Button Sewing
Button sewing Buttons can be sewn on with the sewing machine. Buttons with 2 or 4 holes can be attached. Using the button sewing foot. Move the drop feed lever to lower the feed dogs. ① Lowered position Put the work under the foot and place the button in desired position, then lower the foot. -
Page 66: Zipper Insertion
Zipper insertion This foot can be set to sew on each side of the zipper, the edge of the foot guides the zipper to ensure straight placement. Using the zipper foot. 1.5~3.0 n Attention Zipper foot should be used for sewing straight stitches only. -
Page 67: Inserting A Side Zipper
Stitching around the zipper. Remove the basting and press. v Inserting a side zipper Place the right sides of the fabric together. Sew a bottom seam 2cm from the right edge of the zipper bottom stop position. Sew few reverse stitches for fixed. Increase the stitch length to maximum, set the tension below 2 and baste the remaining length of the fabric. -
Page 68: Satin Stitch Sewing
Turn the fabric right side out. Attach the left pin for sewing the rightside of the zipper. Stitch across the lower end and the right side of the zipper. ① Lower end Stop the machine about 5cm from the top of the zipper. -
Page 69: Gathering
Gathering The Gathering Foot is used for gathering fabrics. Ideal for clothing as well as home decor. It works best on thin to medium weight fabrics. Using the gathering foot. v Gathered fabric Remove the presser foot holder and attach gathering foot, set the tension below 2. -
Page 70: Smocking
Smocking The decorative stitch created by stitching or embroidering over gathers is called "smocking". It is used to decorate the front of blouses or cuffs. The smocking stitch adds texture and elasticity to the fabric. Using the satin stitch foot. 004 005 Increase the stitch length to maximum, set the tension below 2 and basting lines 1cm across... -
Page 71: Free Motion Darning, Embroidery And Monogramming
Free motion darning, embroidery and monogramming v Preparation for embroidering and monogramming * Embroidery hoop is not included with the 3.5~5.0 machine. Move the drop feed lever to lower the feed dogs. ① Lowered position Remove the presser foot and the presser foot holder, and attach the darning foot to the presser foot holder bar. -
Page 72: Darning
v Darning First sew around the edges of the hole to secure the threads. Working from left to right, sew over the hole in a constant and continuous movement. Turn the work by 1/4 and sew over the first stitching moving the work slower over the hole to separate the threads and not form big gaps between the threads. -
Page 73: Quilting
Quilting Sandwich batting between the top and bottom layers of fabric is call "Quilting". The top layer is usually formed by multiple geometrically shaped pieces of materials joined together. Using the Quilting foot with edge/quilting guide. n Attension Only center straight stitches are applicable while using quilting foot. -
Page 74: Patchwork Stitching
Using the all purpose foot or satin stitch foot.. 004 005 v Patchwork stitching Place the two fabrics, right sides together and sew using a straight stitch. Open the seam allowance and press it flat. ① Wrong side Working on the right side of the fabric, place the center of the presser foot on the seam line of the joined fabrics and stitch over the seam. -
Page 75: Applique
Applique You can create and applique by cutting a different piece of fabric into a shape and using it as a decoration. Using the all purpose foot. 1.0~3.0 3.5~5.0 Cut out the applique design and baste it on the fabric. Sew slowly around the edge of the design. -
Page 76: Scallop Stitch
Scallop stitch The wave-shaped repeating stitch, that looks like shells, is called "scalloping". It is used to decorate the collar of blouses and the edges of knitting projects. Using the satin stitch foot or all purpose foot. v Scallop edging Stitch along the edge of the fabric, making sure not to sew directly on the edge of the fabric. -
Page 77: Cording
Cording Used for embellishing 1 to 3 cords or decorative threads. Sew over one strand of cording to create a pretty swirled design on a jacket or vest or sew over three strands of cording for border trims. Pearl cotton, knitting yarn, embroidery floss, lace thread, fine wool or lily yarn can be used for cording. -
Page 78: Narrow Hemming
Narrow hemming The hemmer foot is used to stitch the narrow rolled hems usually found on shirt tails, table linens and along the edge of frills. Using the hemmer foot. 1.5~3.0 3.0~3.5 Fold edge of fabric over about 3mm, then fold it over again 3mm for about 5cm along the edge of the fabric. -
Page 79: Twin Needle
Twin needle Using the all purpose foot or satin stitch foot Insert the twin needle. Please refer to "Replacing the needle" chapter for more information. (Page 14) n Attention When using the twin needle, be sure to select the twin needle setting and attach the suggested presser foot which screen appears. - Page 80 Two lines of stitching are sewn parallel to each other. Note When sewing with twin needle, always proceed slowly, and make sure to maintain a low speed to insure quality stitching. When twin needle sewing has been selected, it will remain active even the stitch is changed.
-
Page 81: Maintenance And Trouble Shooting
Maintenance and Trouble shooting... -
Page 82: Maintenance
Maintenance n Attention Disconnect the power cord from the wall socket before carrying out any maintenance, otherwise injury or electrical shock may result. v Clean the machine surface If the surface of the sewing machine is dirty, lightly soak a cloth in mild detergent, squeeze it out firmly and then wipe the surface. -
Page 83: Warning Function
Warning Function v Warning beeping sound Operate correctly: 1 beep. Operate incorrectly: 2-short beeps. When the sewing machine is in trouble and can't sew: 3-short beeps. It means that the thread may be twisted or jammed and the handwheel axle can't move. Please look through the "Trouble shooting guide"... -
Page 84: Trouble Shooting Guide
Trouble shooting guide Before calling for service, check below trouble shooting guides in advance, if problem still exist, please contact nearest dealer or local service center. Problem Cause Correction Reference 1. The machine is not threaded 1. Rethread the upper thread. correctly. - Page 85 Problem Cause Correction Reference 1. The machine is not correctly 1. Check the threading and threaded. rethread. 2. The bobbin case is not 2. Thread the bobbin case as Loose threaded correctly. illustrated. stitches 3. Needle/fabric/thread 3. The needle size must suit the combination is wrong.
- Page 86 Problem Cause Correction Reference 1. The machine is not turned on. 1. Turn on the machine. The sewing machine 2. The presser foot lifter is raised. 2. Lower the presser foot lifter. doesn't 3. The machine is not plugged in. 3. Connect the power cord to the operate electric outlet.
- Page 88 Do not dispose of electrical appliances as unsorted municipal waste, use separate collection facilities. Contact your local government for information regarding the collection systems available. If electrical appliances are disposed of in landfills or dumps, hazardous substances can leak into the groundwater and get into the food chain, damaging your health and well-being. When replacing old appliances with new ones, the retailer is legally obligated to take back your old appliance for disposal at least for free of charge.