Advertisement
Quick Links
Advertisement

Related Manuals for Electrolux SPEEDELIGHT


Summary of Contents for Electrolux SPEEDELIGHT
- Page 1 SPEEDELIGHT E E N N Installation and operating manual * 595402601- 2018.01 *Original instructions...
- Page 2 I I n n s s t t a a l l l l a a t t i i o o n n d d i i a a g g r r a a m m...
- Page 3 EI = Power cable length 2000 mm / 78.74 ″ EQ = Equipotential screw...
- Page 4 – contacting the dealer or reference customer care; – downloading the latest and up to date manual on the web site: “www.electrolux.com/professional“. • The manual must always be kept in an easily accessed place near the machine. Machine op- erators and maintenance personnel must be able to easily find and consult it at any time.
- Page 5 C C o o n n t t e e n n t t s s A SAFETY INFORMATION......................... 7 Children and vulnerable people safety....................7 General information ........................7 General safety ..........................7 Transport, handling and storage ...................... 8 Installation and assembly .......................
- Page 6 BAKING PAPER ..........................30 Precautions for use ........................30 Install the baking paper ........................ 30 K TROUBLESHOOTING .......................... 31 Remedies for appliance malfunctioning ................... 31 Suggestions for quality cooking ..................... 32 L APPLIANCE CLEANING ........................32 Precautions for cleaning....................... 32 Lid interlock device ........................
- Page 7 S S A A F F E E T T Y Y I I N N F F O O R R M M A A T T I I O O N N A A . . 1 1 C C h h i i l l d d r r e e n n a a n n d d v v u u l l n n e e r r a a b b l l e e p p e e o o p p l l e e s s a a f f e e t t y y •...
- Page 8 • Several illustrations in the manual show the machine, or parts of it, without guards or with guards removed. This is purely for explanatory purposes. Do not use the machine without the guards or with the protection devices deactivated. • Do not remove, tamper with or make illegible the safety, danger and instruction signs and labels on the machine.
- Page 9 4. This appliance must be grounded. Connect only to properly grounded outlet. See "GROUNDING INSTRUCTIONS" found on chapter G.7. 5. Install or locate this appliance only in accordance with the provided installation instructions. 6. Some products such as whole eggs and sealed containers – for example, closed glass jars –...
- Page 10 19. To reduce the risk of fire in the heating cavity. a. The appliance is designed for direct heating/cooking of sandwich. Any other use is to be considered improper. b. Do not overcook sandwiches. DO NOT place plastic or other combustible materials, cooking utensils or other item (in all materials it could be) inside the appliance.
- Page 11 • During maintenance, the cable and plug must be kept in a visible position by the operator carrying out the work. • Do not touch the appliance with wet hands or feet or when barefoot. • Do not remove the safety guards. •...
- Page 12 Hazardous any situation where an operator is Electrolux Professional spa - Viale Treviso, 15 - 33170 Pordenone (Italy) situation exposed to one or more hazards. The data plate gives the product identification and technical...
- Page 13 2450 IPX4 responsible for identifying and choosing adequate and suitable Electrolux Professional spa - Viale Treviso, 15 - 33170 Pordenone (Italy) personal protection equipment to be worn by operators, in compliance with regulations in force in the country of use.
- Page 14 S S u u m m m m a a r r y y t t a a b b l l e e o o f f t t h h e e P P e e r r s s o o n n a a l l P P r r o o t t e e c c t t i i o o n n E E q q u u i i p p m m e e n n t t ( ( P P P P E E ) ) t t o o b b e e u u s s e e d d d d u u r r i i n n g g t t h h e e v v a a r r i i o o u u s s s s t t a a g g e e s s o o f f t t h h e e m m a a c c h h i i n n e e ' ' s s s s e e r r v v i i c c e e l l i i f f e e .
- Page 15 W W A A R R N N I I N N G G C C . . 7 7 R R e e s s i i d d u u a a l l r r i i s s k k s s Extraordinary machine mainte- The machine has several risks that were not completely eliminated from a design standpoint or with the installation of...
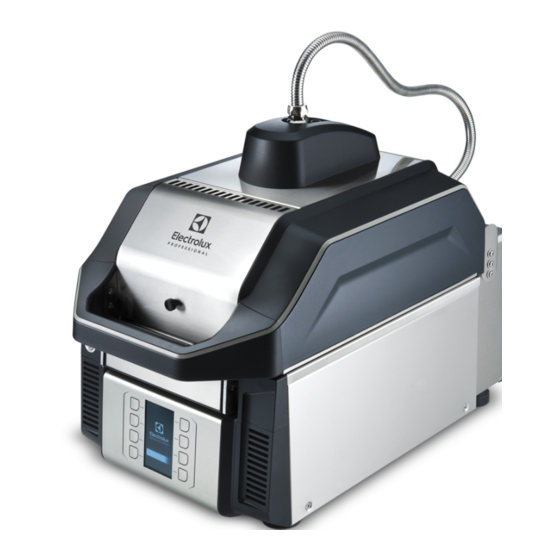
- Page 16 P P R R O O D D U U C C T T D D E E S S C C R R I I P P T T I I O O N N D D . . 1 1 A A p p p p l l i i a a n n c c e e o o v v e e r r v v i i e e w w D D .
- Page 17 T T E E C C H H N N I I C C A A L L D D A A T T A A T T A A B B L L E E E E . . 1 1 M M a a i i n n t t e e c c h h n n i i c c a a l l c c h h a a r r a a c c t t e e r r i i s s t t i i c c s s I I M M P P O O R R T T A A N N T T For overall dimension please refer to the “Installation Diagram“.
- Page 18 F F . . 2 2 T T r r a a n n s s p p o o r r t t : : I I n n s s t t r r u u c c t t i i o o n n s s f f o o r r t t h h e e c c a a r r r r i i e e r r •...
- Page 19 G G . . 4 4 . . 1 1 A A D D J J U U S S T T M M E E N N T T O O F F T T H H E E M M I I N N I I M M A A L L D D I I S S T T A A N N C C E E •...
- Page 20 I I M M P P O O R R T T A A N N T T • Repair and maintenance work must be C C A A U U T T I I O O N N carried out only by qualified personnel GROUNDING INSTRUCTIONS: This authorized by the manufacturer.
- Page 21 electrical cable sheathing, etc.) the operator for normal machine use must: • immediately deactivate the machine. O O P P E E R R A A T T I I N N G G NOTE! I I . . 1 1 S S t t a a r r t t u u p p In the case of the keyboard with the 3/4 and S buttons, the button 3/4 corresponds to the number 3...
- Page 22 I I . . 4 4 B B a a s s i i c c s s e e t t t t i i n n g g s s When the appliance is used for too long it may overheats. In this case the display shows the following icon (red triangle);...
- Page 23 U U P P L L O O A A D D / / D D O O W W N N L L O O A A D D P P R R O O G G R R A A M M S S E E T T T T I I N N G G S S I I N N T T O O / / B B R R I I G G H H T T N N E E S S S S F F R R O O M M U U S S B B K K E E Y Y NOTE!
- Page 24 T T I I M M E E S S E E T T T T I I N N G G C C O O N N N N E E C C T T I I V V I I T T Y Y 3 SIGNAL READING NIU STATUS: 06/08/2015...
- Page 25 2. Press the corresponding buttons in the correct sequence to P P R R O O G G R R A A M M S S E E T T T T I I N N G G - - S S i i n n g g l l e e P P h h a a s s e e insert the password.
- Page 26 P P R R O O G G R R A A M M S S E E T T T T I I N N G G - - S S i i n n g g l l e e P P h h a a s s e e NOTE! 17 FLEX For the next steps, please...
- Page 27 U U P P L L O O A A D D / / D D O O W W N N L L O O A A D D A A P P P P L L I I A A N N C C E E A A N N D D P P R R O O G G R R A A M M U U P P P P E E R R P P L L A A T T E E A A N N D D G G L L A A S S S S T T E E M M P P E E R R A A T T U U R R E E S S E E T T T T I I N N G G I I N N T T O O / / F F R R O O M M U U S S B B K K E E Y Y S S E E T T T T I I N N G G...
- Page 28 S S T T A A N N D D - - B B Y Y S S E E T T T T I I N N G G B B U U Z Z Z Z E E R R S S E E T T U U P P — — T T I I M M E E S S E E T T T T I I N N G G — — I I N N F F O O D D A A T T A A 30:00 0°F °...
- Page 29 R R E E S S E E T T P P A A S S S S W W O O R R D D E E X X P P E E R R T T — — U U N N E E X X P P E E R R T T S S E E T T T T I I N N G G 2 BASIC SETTINGS 2 EXPERT-UNEXPERT SELECTION...
- Page 30 NOTE! C C O O N N N N E E C C T T I I V V I I T T Y Y S S E E T T T T I I N N G G To interrupt the cycle press the buttons 7, 8 or open the lid within 9 seconds after the program start.
- Page 31 4. Help the descent of the upper heating plate by guiding the 8. Put the upper heating plate in the original position. Guide flexible tube (C). the flexible tube to avoid any damages. Respect the right position of the upper heating plate. The symbols “FRONT“...
- Page 32 K K . . 2 2 S S u u g g g g e e s s t t i i o o n n s s f f o o r r q q u u a a l l i i t t y y c c o o o o k k i i n n g g P P r r o o b b l l e e m m S S o o l l u u t t i i o o n n The sandwich is not enough or to much...
- Page 33 1. Remove the grease and burned deposit with the scraper. 2. Remove the baking paper. Do not use any razor blade or metallic tool. 2. Sweep the dirty with the Teflon brush. 3. Wipe the glass and the metallic frame with a damp cloth. HOT ü...
- Page 34 4. Help the descent of the upper heating plate by guiding the 11. Put in place the upper heating plate and push it to the flexible tube (C). highest position until the «click». 12. Respect the right position of the upper heating plate: the symbols must be in the front.
- Page 35 NOTE! M M a a i i n n t t e e n n a a n n c c e e , , i i n n s s p p e e c c t t i i o o n n s s , , F F r r e e - - R R e e s s p p o o n n - - The manufacturer declines any liability for opera-...
- Page 38 Electrolux Professional SPA Viale Treviso 15 33170 Pordenone www.electrolux.com/professional...