Sony RDR-VX530 Operating Instructions Manual
Dvd recorder/vcr combo
Hide thumbs
Also See for RDR-VX530:
- Specifications (2 pages) ,
- Quick start manual (2 pages) ,
- Service manual (139 pages)
Table of Contents
Advertisement
Video Cassette Recorder/
DVD Recorder
Operating Instructions
RDR-VX530
For customers in the U.S.A
Owner's Record
The model and serial numbers are located at the rear of the unit.
Record the serial number in the space provided below. Refer to them
whenever you call upon your Sony dealer regarding this product.
Model No. RDR-VX530
Serial No._____________
_
© 2006 Sony Corporation
For customers in Canada
If this product is not working properly, please call 1-877-602-2008 for
Peace of Mind Warranty Replacement service.
For other product related questions please contact our Customer
Information Service Centre at 1-877-899-7669 or write to us at:
Customer Information Service 115 Gordon Baker Road, Toronto,
Ontario, M2H 3R6
2-672-429-11(1) US
Advertisement
Table of Contents

Related Manuals for Sony RDR-VX530


Summary of Contents for Sony RDR-VX530
-
Page 1: Operating Instructions
The model and serial numbers are located at the rear of the unit. Record the serial number in the space provided below. Refer to them whenever you call upon your Sony dealer regarding this product. Model No. RDR-VX530 Serial No._____________ ©... -
Page 2: Warning
WARNING To reduce the risk of fire or electric shock, do not expose this apparatus to rain or moisture. To avoid electrical shock, do not open the cabinet. Refer servicing to qualified personnel only. The AC power cord must be changed only at a qualified service shop only. - Page 3 Plasma display panels and projection televisions are especially susceptible to this. If you have any questions or problems concerning your recorder, please consult your nearest Sony dealer. IMPORTANT SAFETY INSTRUCTIONS 1 Read these instructions. 2 Keep these instructions.
- Page 4 About this manual • Instructions in this manual describe the controls on the remote. You can also use the controls on the recorder if they have the same or similar names as those on the remote. • The on-screen display illustrations used in this manual may not match the graphics displayed on your TV screen.
-
Page 6: Table Of Contents
Table of Contents WARNING ............2 Precautions . - Page 7 VCR Operation VCR Playback ......... . . 72 Playing .
-
Page 8: What Is A Video Cassette Recorder/Dvd Recorder
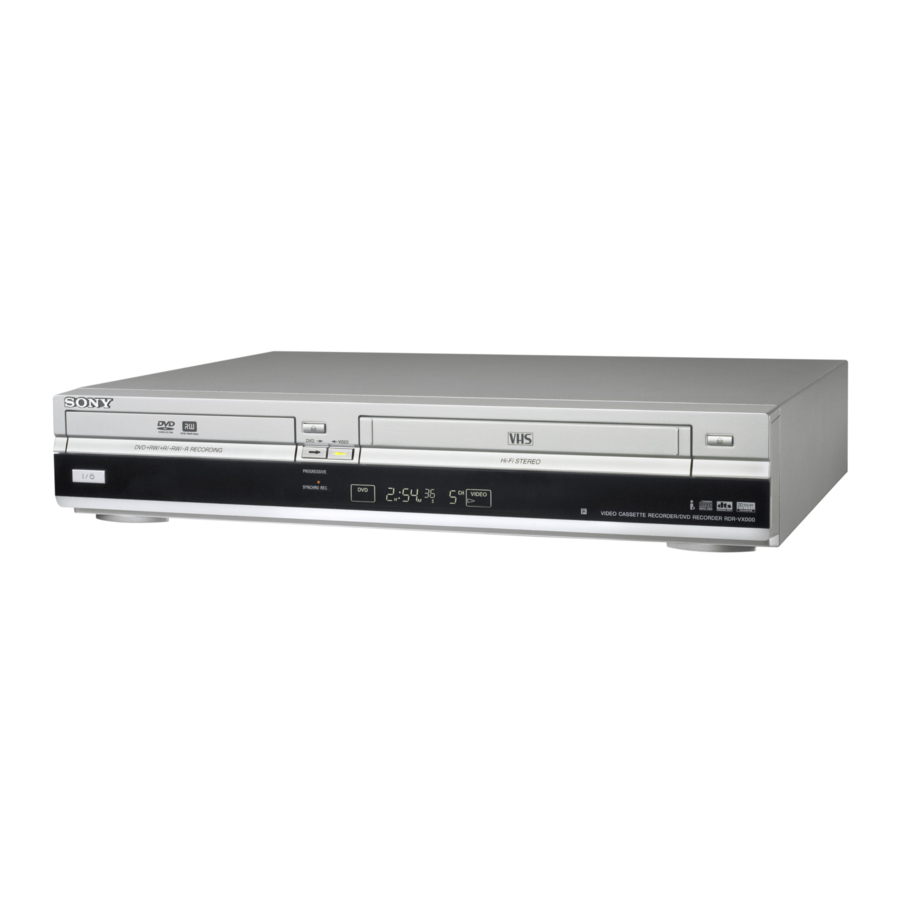
What is a Video Cassette Recorder/DVD Recorder? This is a DVD recorder with built-in VHS video deck, and allows recording/playback of DVD discs and VHS tapes. DVD editing is also possible. Recording and timer recording Record TV programs on a DVD or VHS tape, either manually or using the timer. -
Page 9: Title List
Quick access to recorded titles - Title List Display the Title List to view all titles on a disc and select a title for playback or editing. Title List (Original) Ch23 May/02/2006 08:00 PM Creating your own program - Playlist Record a program on a DVD-RW (VR mode) or DVD-R (VR mode), then erase, move or add scenes as you like without changing the original... -
Page 10: How To Use The On-Screen Menus
How to Use the On-Screen Menus The following three displays are mainly used to operate this recorder. Once you become familiar with the basic operations, you will find the recorder easy to use. SYSTEM MENU O RETURN System Menu The System Menu appears when you press SYSTEM MENU, and provides entries to all of the recorder’s main functions, such as timer recording and setup. - Page 11 Sub-menu The sub-menu appears when you select an item from a list menu (e.g., a title from the Title List menu), and press ENTER. The sub-menu displays options applicable only to the selected item. The displayed options differ depending on the situation and disc type.
-
Page 12: Hookups And Settings
Hookups and Settings Hooking Up the Recorder Follow steps 1 to 7 to hook up and adjust the settings of the recorder. Notes • Plug cords securely to prevent unwanted noise. • See the instructions supplied with the components to be connected. - Page 13 A: Cable box or satellite receiver with a video/audio output With this hookup, you can record any channel on the cable box or satellite receiver. Be sure that the cable box or satellite receiver is turned on. This connection is necessary to use the Synchro-Rec function (pages 53 and 83).
- Page 14 B: Cable box with an antenna output only With this hookup, you can record any channel on the satellite receiver or cable box. Be sure that the cable box or satellite receiver is turned on. To watch cable programs, you need to match the channel on the recorder (3ch or 4ch) to the antenna output channel on the cable box (3ch or 4ch).
- Page 15 C: Cable without cable box, or antenna only (no cable TV) Use this hookup if you watch cable channels without a cable box. Also use this hookup if you are using a VHF/UHF antenna or separate VHF and UHF antennas. With this hookup, you can record any channel by selecting the channel on the recorder.
-
Page 16: Step 3: Connecting To Your Tv
Step 3: Connecting to Your TV Connect the supplied audio/video cord to the LINE OUT (VIDEO/AUDIO L/R) jacks of the recorder. To enjoy higher quality images, connect an S video cord (not supplied) instead of the yellow (video) plug. When using this connection, be sure to connect the audio cord to the LINE OUT (AUDIO L/R) jacks. INPUT S VIDEO S video cord... - Page 17 If your TV has component video input jacks Connect the COMPONENT VIDEO OUT jacks using a component video cord (not supplied) or three video cords (not supplied) of the same kind and length. You will enjoy accurate color reproduction and high quality images.
-
Page 18: Step 4: Connecting To Your Av Amplifier (Receiver)
Step 4: Connecting to Your AV Amplifier (Receiver) Select one of the following patterns A or B, according to the input jack on your AV amplifier (receiver). This will enable you to listen to DVD audio tracks through your AV amplifier (receiver). AUDIO OUT VCR-DVD recorder [Speakers]... - Page 19 A Connecting to audio L/R jacks This connection uses a stereo amplifier’s (receiver’s) two front speakers for sound. You can enjoy the surround function that creates virtual speakers from two stereo speakers. Select from “Surround1,” “Surround2,” or “Surround3” of the surround effects (page 36). Surround 1 Surround 2 Surround 3...
-
Page 20: Step 5: Connecting The Power Cord
SET TOP BOX CONTROL DIGITAL AUDIO OUT Notes • If the supplied remote interferes your other Sony DVD recorder or player, change the command mode number for this recorder (page 26). • Use the batteries correctly to avoid possible leakage and corrosion. -
Page 21: Controlling Tvs With The Remote
Select the channel on your TV Switch your TV’s input source Select the channel on a Sony TV Switch to or from the wide mode of a Sony wide-screen TV Code number 01 (default) 12, 14 04, 22 03, 12... - Page 22 08, 12 03, 08, 14 07, 18 03, 04, 12 14, 15 TV/DVD·VIDEO switch "/1 VOL +/– Manufacturer Code number Sony 78, 79, 80, 91 Denon 84, 85, 86 Kenwood 92, 93 Onkyo 81, 82, 83 Pioneer Sansui Technics 97, 98...
-
Page 23: Step 7: Easy Setup
Step 7: Easy Setup Follow the steps below to make the minimum number of basic adjustments for using the recorder. If you do not complete Easy Setup, it will appear each time you turn on your recorder. Settings are made in the following order. OSD Language Setup Clock Setup Cable Box/Sat. - Page 24 Easy Setup No Disc Do you want to control your set top box with this recorder? (Changes to the current setting will erase all timer settings.) Select whether or not you use the cable box/satellite receiver control, and press ENTER. If you want to use the cable box/satellite receiver control (page 12), select “Yes.”...
- Page 25 “4:3 Letter Box”: For standard TVs. Displays “wide screen” pictures with bands on the upper and lower sections of the screen. “4:3 Pan Scan”: For standard TVs. Automatically displays “wide screen” pictures on the entire screen and cuts off the sections that do not fit.
- Page 26 If the supplied remote interferes with your other Sony DVD recorder or player, set the command mode number for this recorder and the supplied remote to one that differs from the other Sony DVD recorder or player. The default command mode setting for this recorder and the supplied remote is DVD 3.
- Page 27 Select “Command Mode,” and press ENTER. Options No Disc Title List Language Parental Timer Front Display : Auto DVD 1 Edit Command Mode : DVD1 No DVD 2 Dubbing Factory Setting DVD 3 Disc Setting Setup Select the command mode (“DVD 1,” “DVD 2,”...
-
Page 28: Connecting Another Vcr Or Similar Device
Connecting Another VCR or Similar Device After disconnecting the recorder’s power cord from an AC outlet, connect the other VCR or similar recording device to the LINE IN jacks of this recorder. See also the instruction manual supplied with the connected equipment. - Page 29 Connecting to the LINE 1 IN jacks You can connect a second VCR or similar device. Other VCR, etc. LINE OUTPUT AUDIO VIDEO VCR-DVD recorder : Signal flow z Hints • When the connected equipment outputs only monaural sound, connect an audio cord to the white LINE IN AUDIO L (mono) jack.
-
Page 30: Quick Guide To Disc Types
Quick Guide to Disc Types Recordable and Playable Discs Disc Disc Type Logo DVD+RW mode DVD- Video mode DVD+R DVD+R DL mode DVD- Video mode DVD- R DL Usable disc versions (as of February 2006) • 4×-speed or slower DVD+RWs •... - Page 31 Recording Features Auto Manual Rewrite Chapter Chapter (page 70) (page 51) (page 62) CPRM (Content Protection for Recordable Media) is a coding technology that protects copyrights for images. Unused DVD-RWs are automatically formatted according to the setting of “Format DVD-RW” in “Features”...
- Page 32 12 cm/8 cm discs Disc Type DVD+RW VR mode DVD-RW Video mode VR mode DVD-R Video mode DVD+R Discs that cannot be recorded on • DVD-RWs (Ver.1.0) • DVD+RWs that are not 2.4×-speed compatible • 8 cm discs • DVD-RAMs •...
-
Page 33: Playable Discs
Playable Discs Disc Type Disc Logo DVD VIDEO DVD-RAM — VIDEO CD DATA CD DATA DVD — 8 cm DVD+RW/ — DVD-RW/DVD-R “DVD VIDEO” and “CD” logos are trademarks. * A logical format of files and folders on DATA-CDs, defined by ISO (International Organization for Standardization). - Page 34 Note on playback operations of DVD VIDEOs/ VIDEO CDs Some playback operations of DVD VIDEOs/ VIDEO CDs may be intentionally set by software producers. Since this recorder plays DVD VIDEOs/VIDEO CDs according to the disc contents the software producers designed, some playback features may not be available.
-
Page 35: Dvd Playback
DVD Playback Playing - RW - RW Video Z OPEN/ CLOSE TOP MENU H PLAY Press DVD to operate the DVD recorder. Press Z OPEN/CLOSE, and place a disc on the disc tray. Playback side facing down Press Z OPEN/CLOSE to close the disc tray. -
Page 36: Playback Options
Playback Options Z OPEN/CLOSE Button OPEN/CLOSE AUDIO SUBTITLE ANGLE ZOOM Number buttons AUDIO SUBTITLE O RETURN REPLAY/ ADVANCE . PREV ZOOM ANGLE REPEAT Operation Stops playing and opens the disc tray. Selects one of the audio tracks recorded on the disc when pressed repeatedly. - Page 37 Button Operation Surround lets you enjoy surround sound effects by (surround) using sound imaging to create virtual rear speakers from a stereo TV or two front speakers (page 19). Selects one of the effects when pressed repeatedly. “Off”: No surround effect. “Surround1”: Creates one set of virtual surround speakers.
- Page 38 Button REPEAT To resume normal playback after playing at various speeds, press H PLAY. z Hints • You can change playback options, such as subtitle, audio track, angle, etc., using the TOOLS menu (page 11). • During playback or pause mode, the recorder’s m/ M buttons and the remote’s .PREV/>NEXT buttons work the same way (page 37).
- Page 39 Playing quickly with sound (Scan Audio) (DVDs with Dolby Digital soundtracks only) You can play quickly with dialog or sound during FF1 fast-forward of a DVD with Dolby Digital soundtracks. Simply press M during playback. z Hint To turn off the Scan Audio function, set “Scan Audio” of “Audio”...
-
Page 40: Playing A Title From The Title List
Locking the recorder (Child Lock) You can lock all of the buttons on the recorder so that the settings are not canceled by mistake. With the recorder turned on and stopped, hold down x on the recorder for more than ten seconds. The recorder turns off and “CHILD LOCK”... -
Page 41: Searching For A Title/Chapter/Track, Etc
Select the title, and press ENTER. The sub-menu appears. Select “Play,” and press ENTER. Playback starts from the selected title on the disc. About the Title List for DVD-RWs (VR mode) and DVD-Rs (VR mode) You can switch the Title List to show an original or Playlist. - Page 42 Note Depending on the disc, you may not be able to use the TOOLS menu to search for a title/chapter/track, or enter the time code for a playback point. Bookmarking a favorite scene (Bookmark) - RW - RW Video You can have the recorder store specific portions of a disc in memory and play them immediately whenever you want (Bookmark).
-
Page 43: Playing Mp3 Audio Tracks And Jpeg Image Files
Playing MP3 Audio Tracks and JPEG Image Files DATA CD DATA DVD You can play DATA CDs (CD-ROMs/CD-Rs/ CD-RWs)/DATA DVDs (DVD-ROMs/ DVD+RWs/DVD-RWs/DVD+Rs/DVD-Rs) that contain MP3 audio tracks or JPEG image files. TOP MENU O RETURN H PLAY REPEAT Playing MP3 audio tracks You can play MP3 audio tracks on DATA CDs or DATA DVDs. -
Page 44: Playing Jpeg Image Files
To switch between MP3 audio tracks and JPEG image files Press x STOP, and press TOP MENU. z Hint When playback of all the MP3 audio tracks within the album finishes, the recorder stops. Playing JPEG image files You can play JPEG image files on DATA CDs or DATA DVDs. - Page 45 Enjoying a slide show with sound When a disc contains both MP3 audio tracks and JPEG image files, you can enjoy a slide show with sound. Press DVD to operate the DVD recorder. Insert a DATA CD/DATA DVD containing both the MP3 audio tracks and JPEG image files.
-
Page 46: Displaying The Playing Time And Play Information
Notes • Some DATA CDs or DATA DVDs cannot be played on this recorder depending on file format. • Only one session of a multi-session DATA DVD can be played back. • Only alphabet and numbers can be used for album or track names. - Page 47 D Remaining disc space (in stop mode) Remaining time of the current title (during playback E Channel or input source F Date and time Also appears in stop mode with Resume Play activated (page 39). Title type (original or Playlist) for DVD-RWs (VR mode)/DVD-Rs (VR mode)/DVD-RAMs.
-
Page 48: Dvd Recording
DVD Recording Before Recording Before you start recording… • This recorder can record on various disc types. Select the disc type according to your needs (page 30). • Check that the disc has enough available space for the recording (page 46). For DVD+RWs or DVD-RWs, you can free up disc space by erasing titles (page 59). -
Page 49: Dvd Recording Without The Timer
SAP (Second Audio Program) When a SAP is received, the “SAP” indicator lights up in the front panel display. To record only SAP sound, set “Tuner Audio” of “Audio” to “SAP” in the “Setup” display (page 102). Unrecordable pictures Pictures with copy protection cannot be recorded on this recorder. - Page 50 Press REC MODE repeatedly to select the recording mode. The display changes on the TV screen as follows: For details about the recording mode, see page 48. Press z REC. Recording starts. Recording continues until you stop the recording or the disc is full. To stop recording Press x STOP.
-
Page 51: Dvd Timer Recording
Record 0:00:03 Rem 00:59 Ch 1 A Disc type B Recording status C Recording time D Recording mode E Remaining disc space F Channel or input source z Hint You can view the information also in the front panel display. Press TIME/TEXT repeatedly to change the display. - Page 52 Press Z OPEN/CLOSE to close the disc tray. Wait until “LOAD” disappears from the front panel display. Unused discs are automatically formatted. For the DVD-RW/DVD-R’s recording format (VR mode or Video mode), see “Formatting a new disc” on page 49. Press TIMER.
-
Page 53: Recording From Connected Equipment With A Timer (Synchro Rec)
To use the Rec Mode Adjust function If the remaining disc space is not enough for the current recording, the recorder automatically adjusts the recording mode. Select “AUTO” for “Mode” when setting the timer. z Hints • You can play the recorded program by selecting the program title in the Title List menu. - Page 54 Press REC MODE repeatedly to select the recording mode. The display changes on the TV screen as follows: For details about the recording mode, see page 48. Press SYSTEM MENU while the recorder is in stop mode. Select “Setup,” and press ENTER. Select “Features,”...
-
Page 55: Changing Or Canceling Dvd Timer Settings (Timer List)
Changing or Canceling DVD Timer Settings (Timer List) - RW - RW Video You can change or cancel timer settings using the Timer List menu. SYSTEM MENU O RETURN Press SYSTEM MENU. The System Menu appears. Select “Timer,” and press ENTER. Select “Timer List,”... -
Page 56: Recording From Connected Equipment Without A Timer
• You cannot change the timer settings for a recording currently underway. • The Timer List displays both the DVD recorder and VCR timer settings. Recording From Connected Equipment Without a Timer - RW - RW Video You can record from a connected VCR or similar device. - Page 57 Press REC MODE repeatedly to select the recording mode. The display changes on the TV screen as follows: For details about the recording mode, see page 48. Select the line input audio. Set “Line Audio Input” of “Audio” to “Stereo” or “Main/Sub” in the “Setup” display (page 104).
-
Page 58: Dvd Editing
DVD Editing Before Editing This recorder offers various edit options for various disc types. Before you edit, check the disc type in the front panel display, and select the option available for your disc (page 30). Notes • You may lose the edited contents if you remove the disc or a timer recording starts while editing. -
Page 59: Editing A Title
In this case, you can compile highlight scenes as a Playlist title. You can even rearrange the scene order within the Playlist title. See “Editing a Playlist” on page 66. The advanced edit functions available for Playlist titles are: – Renaming a title (page 63). –... - Page 60 Select an option, and press ENTER. You can select from the following: “Title Erase”: Erases the selected title. Select “OK” when asked for confirmation. “Chapter Erase” : Allows you to select a chapter in the title and erase it (see below). “Protect”...
- Page 61 Press TITLE LIST. When editing a DVD-RW (VR mode) or DVD-R (VR mode), press ORIGINAL/ PLAYLIST to switch to the “Title List (Original),” if necessary. Select a title, and press ENTER. The sub-menu appears. Select “A-B Erase,” and press ENTER. The display for setting point A and B appears.
-
Page 62: Creating Chapters Manually
Press ENTER at the point where you want to divide the title. You can use H PLAY, ./>, x STOP, and X PAUSE to find the point. “Divide” is selected. Divide Title (Original) Start 00:00:00 00:00:10 Title No. 01 End 00:00:10 May/02/2006 08:00 PM Press ENTER. -
Page 63: Changing The Name Of A Title
Notes • If a message appears and indicates that no more chapter marks can be added, you may not be able to record or edit. • You cannot add or erase chapter marks on protected titles or discs. Changing the Name of a Title - RW - RW... -
Page 64: Creating A Playlist
Select the character you want to enter using M/m/</,, and press ENTER. The selected character appears in the input row. You can only enter characters and symbols that are displayed. • To change the cursor position, select the input row using M, and press </,. •... - Page 65 Select “Edit,” and press ENTER. Edit Title List Create Playlist Edit Playlist Timer Edit Dubbing Disc Setting Setup Select “Create Playlist,” and press ENTER. The display for creating a Playlist appears. “Start” is selected. Create Playlist Scene No.01 Start 00:00:00 00:00:07 Playlist No.
-
Page 66: Editing A Playlist
Editing a Playlist - RW You can edit Playlist titles or scenes within them, without changing the actual recordings. SYSTEM MENU O RETURN ./> X PAUSE Press DVD to operate the DVD recorder. Press SYSTEM MENU while the recorder is in stop mode. - Page 67 “Move”: Allows you to change scene order (page 68). “Add”: Allows you to add other scenes before a selected scene (page 68). “Copy”: Allows you to copy a scene (page 69). To return to the previous display Press O RETURN. To turn off the display Press SYSTEM MENU.
- Page 68 Follow steps 1 to 7 of “Editing a Playlist” (page 66). The “Edit Scene” display appears. Select the scene you want to modify, and press ENTER. Select “Modify,” and press ENTER. “Start” is selected. Modify Start 00:00:00 00:00:07 Playlist No. 01 End 00:00:00 May/02/2006 03:25 PM Press ENTER at the start point.
- Page 69 Select “Add,” and press ENTER. “Start” is selected. Scene No.01 Start 00:00:00 00:00:07 Playlist No. 01 End 00:00:00 May/02/2006 03:25 PM Press ENTER at the start point. You can use H PLAY, ./>, x STOP, and X PAUSE to find the point.
-
Page 70: Formatting/Renaming/Protecting A Disc
Formatting/Renaming/ Protecting a Disc - RW - RW Video The “Disc Setting” display allows you to check the disc information or change the disc name. Depending on the disc type, you can also format or set protection. SYSTEM MENU O RETURN Press DVD to operate the DVD recorder. - Page 71 To return to the previous display Press O RETURN. z Hints • You can set protection for individual titles (page 59). • By reformatting, you can change the recording format on DVD-RWs, or record again on DVD-RWs (Video mode) that have been finalized. Notes •...
-
Page 72: Vcr Playback
VCR Playback Playing Z OPEN/ CLOSE CLEAR DISPLAY H PLAY Press VIDEO to operate the VCR. Insert a tape. Playback starts automatically if you insert a tape with its safety tab removed. Press H PLAY. The front panel display shows the playing time. - Page 73 Adjusting the picture (tracking) You can manually adjust tracking if the recording quality is too poor to be remedied by the VCR’s automatic tracking (a tracking meter appears during the automatic tracking). Press TRACKING +/–. The tracking meter appears. Press TRACKING +/– repeatedly until the distortion disappears.
-
Page 74: Playback Options
Playback Options REPLAY/ Button Operation • Fast reverses or fast forwards when pressed during stop mode. (fast reverse/fast When you hold down during fast reverse or fast forward, you can view the picture. forward) • Plays at high speed when briefly pressed during playback. When you hold down the button during playback, the high-speed play continues until you release the button. -
Page 75: Searching Using Various Functions
Searching Using Various Functions The VCR automatically marks the tape with an index signal at the point where each recording begins. You can easily find a specific point using various search functions. Note During DVD recording, you cannot use VCR search functions. -
Page 76: Displaying The Playing Time And Play Information
Displaying the Playing Time and Play Information You can check playback information, such as elapsed or remaining time, recording mode, etc., on the TV screen. DISPLAY Press DISPLAY during playback. The information display appears. Each time you press the button, the display changes as follows: Tape and disc information/date and time Tape information only... -
Page 77: Selecting The Sound During Playback
Selecting the Sound During Playback AUDIO Press AUDIO repeatedly during playback. To listen to On-screen display Stereo Hi-Fi Left channel Left Right channel Right Monaural Mono sound on the normal audio track * No indicator appears in the front panel display when you play a tape without Hi-fi recording. -
Page 78: Vcr Recording
VCR Recording Before Recording Before you start recording… • This VCR records in VHS format, not S-VHS format. • Check that the tape is longer than the recording time (page 76). Notes • Timer recordings will start with or without the recorder turned on. -
Page 79: Vcr Recording Without The Timer
VCR Recording Without the Timer DISPLAY H PLAY z REC REC MODE Press VIDEO to operate the VCR. Insert a tape with its safety tab in place. Press CH +/– or INPUT SELECT repeatedly to select the channel or input source you want to record. - Page 80 When the counter reaches “0:00,” the recorder stops recording and turns off. To cancel the Quick Timer Press z REC repeatedly until the counter appears in the front panel display. The recorder returns to normal recording mode. To stop recording Press x STOP twice.
-
Page 81: Vcr Timer Recording
VCR Timer Recording You can set the timer for a total of 12 programs together with DVD and VCR timer recording, up to one month in advance. Follow the steps below to set each timer recording items. Note Do not operate your cable box or satellite receiver just before or during a timer recording. - Page 82 Press SYSTEM MENU to turn off the menu. To stop recording Press x STOP twice. If timer settings overlap The program that starts first has priority and the second program starts recording only after the first program has finished. If the programs start at the same time, the program listed first in the menu has priority.
-
Page 83: Recording From Connected Equipment With A Timer (Synchro Rec)
Recording From Connected Equipment With a Timer (Synchro Rec) You can set the recorder to automatically record programs from connected equipment that has a timer function (such as a satellite tuner). Connect the equipment to the LINE 1 IN jacks on the rear of the recorder (page 13). -
Page 84: Changing Or Canceling Vcr Timer Settings (Timer List)
Notes • The recorder starts recording only after detecting the video signal from the connected equipment. The beginning of the program may not be recorded regardless of whether or not the recorder’s power is on or off. • To use the connected equipment during Synchro-Rec standby, cancel the standby mode by pressing SYNCHRO REC. - Page 85 Select the timer setting you want to change or cancel, and press ENTER. The sub-menu appears. Timer List No. Media Date Start Stop 04/15 09:00PM 10:00PM 04/30 09:15PM 09:45PM Ch11 --/-- --:-- --:-- ---- --/-- --:-- --:-- ---- --/-- --:-- --:-- ---- --/--...
-
Page 86: Recording From Connected Equipment Without A Timer
Recording From Connected Equipment Without a Timer You can record from a connected VCR or similar device. For connection details, see “Connecting Another VCR or Similar Device” on page 28. z REC REC MODE Press VIDEO to operate the VCR. Insert a tape with its safety tab in place. -
Page 87: Dubbing (Tape Y Dvd)
Dubbing (TAPE DVD) Dubbing From a VHS Tape to a DVD - RW - RW Video You can easily record (dub) a VHS tape to a disc. Before dubbing, make the necessary audio settings on the VCR. ◆How titles and chapters are created The recorder takes each recording on the VHS tape and automatically divides them into titles as they are dubbed to a disc. -
Page 88: Dubbing From A Dvd To A Vhs Tape
Select “Yes,” and press ENTER. Dubbing starts. z Hints • A black (no signal) screen at the end of the dubbed disc is not a malfunction. This screen is recorded if a time discrepancy exists between the disc and tape when the recording is stopped. - Page 89 Insert a source disc. Press DVD to operate the DVD recorder. Press TOP MENU or TITLE LIST to select a title. Start playing the DVD, and then press x STOP or X PAUSE at the point where you want to start dubbing. To select DVD sound, language, or subtitle, press AUDIO or SUBTITLE during playback (see page 36).
- Page 90 Select “Program Dubbing,” and press ENTER. Program Dubbing Title List Create Dubbing List Program Dubbing List Timer Edit Dubbing Disc Setting Setup Select “Create Dubbing List,” and press ENTER. If you have performed Program Dubbing before, the display asks for confirmation. To continue, select “Yes”...
-
Page 91: Finalizing A Disc (Preparing A Disc For Playback On Other Equipment)
To stop dubbing Press x STOP. Note that it may take a few seconds for the recorder to stop dubbing. z Hints • The brightness of the playback picture may differ from normal DVD playback picture. • The DVD playback time may differ slightly from the VHS tape counter value. - Page 92 SYSTEM MENU Press DVD to operate the DVD recorder. Insert a disc. Press SYSTEM MENU while the recorder is in stop mode. The System Menu appears. Select “Disc Setting,” and press ENTER. The “Disc Setting” display appears. Disc Setting Title List Disc Name Disc Protect Timer...
-
Page 93: Dv/D8 Dubbing (Dv/D8 T Dvd)
DV/D8 Dubbing (DV/D8 t DVD) Before DV/D8 Dubbing This section explains dubbing with a digital video camera via the DV IN jack on the front panel. If you want to dub by way of the LINE IN jacks, see “Recording From Connected Equipment With a Timer (Synchro Rec)”... -
Page 94: Dubbing From A Dv/D8 Format Tape To A Dvd
Dubbing From a DV/D8 Format Tape to a DVD - RW - RW Video You can record a DV/D8 format tape onto a disc. The recorder controls the digital video camera. You can fast forward, rewind, play in slow motion, and stop the tape to select the scenes using the on- screen menu. - Page 95 Select “DV/D8 Audio Input,” and press ENTER. Audio Title List Tuner Audio : Main Digital Out Timer Downmix : Dolby Surround Edit Audio DRC : Standard Dubbing Scan Audio : On Disc Setting DV/D8 Audio Input Stereo 1 Line Audio Input Stereo 2 Setup “Stereo 1”: Records original sound only.
- Page 96 Dubbing an entire DV/D8 format tape to a DVD (One Touch Dubbing) - RW - RW Video You can record the entire contents of a DV/D8 format tape onto a disc with a single press of the ONE TOUCH DUBBING button. The recorder controls the digital video camera for the whole process, and completes the recording.
-
Page 97: Settings And Adjustments
Settings and Adjustments Using the Setup Displays By using the setup displays, you can make various adjustments to items such as picture and sound, as well as select a language for the subtitles. The setup displays are used in the following way. Note Playback settings stored on the disc take priority over the setup display settings, and not all of the functions... -
Page 98: Antenna Reception Setting (Tuner Preset)
Some items display a dialog box that requires additional settings. Example: When “Parental” in “Options” setup is selected. Create the password Title List Timer Create the password. Edit Dubbing Disc Setting Setup Select an option, and press ENTER. The currently selected option is displayed next to the setup item. -
Page 99: Clock Setting (Clock Set)
Select an option, and press ENTER. Select “Auto Preset,” and press ENTER. All receivable channels are preset in numerical sequence. Auto Preset Title List Searching for receivable channels: 3 Timer Edit Scanning... Please wait. Dubbing Disc Setting Stop Setup Manual Set Presets or disables channels manually. -
Page 100: Video Settings (Video)
automatically search for a channel that carries a time signal. Clock Set CH Title List Timer Edit Select a Channel: Dubbing Disc Setting Setup ◆ Time Zone Select the time zone for your area, or select “Auto” to have the recorder automatically set your time zone. - Page 101 16:9 4:3 Letter Box 4:3 Pan Scan Note Depending on the disc, “4:3 Letter Box” may be selected automatically instead of “4:3 Pan Scan” or vice versa. Black Level Selects the black level (setup level) for the video signals output from the LINE OUT jacks (page 16).
-
Page 102: Audio Settings (Audio)
z Hint To cancel the “Progressive” setting, select “Off” in step 2 above. Or, press DVD to operate the DVD recorder, and then hold down X PAUSE on the recorder for five seconds or more. Note If you select progressive signals when you connect the recorder to a TV that cannot accept the signal in progressive format, the image quality will deteriorate. - Page 103 Digital Out Title List Dolby Digital : 4:3 Letter Box D-PCM Dolby Digital Timer Edit Dubbing Disc Setting Setup If you connect a component that does not accept the selected audio signal, a loud noise (or no sound) will come out from the speakers, and may affect your ears or cause speaker damage.
-
Page 104: Recording, Set Top Box Control, And Vcr Settings (Features)
Scan Audio (DVDs only) Outputs audio signals during FF1 fast-forward of a DVD disc with Dolby Digital soundtracks. No sound is output during FF1 fast-forward. Note Sound will be interrupted during Scan Audio. DV/D8 Audio Input Stereo 1 Records original sound only. Normally select this when dubbing a DV format tape. - Page 105 Format DVD-RW (DVD-RWs only) Selects the recording format for an unused DVD- RW, when first inserted. Automatically formats the disc in VR mode. Video Automatically formats the disc in Video mode. VCR Function Press ENTER and select “Tape Length,” “Auto Play,”...
-
Page 106: Language, Parental Control Settings/Factory Settings (Options)
◆ Mode for SET button Select “Mode 1” or “Mode 2” if your cable box or satellite receiver requires pressing an ENTER button or a SET button etc., after entering the channel number. If “Mode 1” does not work, try “Mode 2.”... - Page 107 Parental (DVD VIDEOs only) Playback of some DVD VIDEOs can be limited according to a predetermined level, such as the age of the users. Scenes may be blocked or replaced with different scenes. After step 3 above, select “Parental,” and press ENTER.
-
Page 108: Easy Setup (Resetting The Recorder)
Be sure to match the COMMAND MODE switch on the remote to the setting made here. For details, see “If you have a Sony DVD player or more than one Sony DVD recorder” on page 26. DVD 1... -
Page 109: Additional Information
Should any problem persist, consult your nearest Sony dealer. Power The power does not turn on. , Check that the AC power cord is connected securely. - Page 110 The picture does not fill the screen, even though the aspect ratio is set in “TV Type” in “Video” setup. , The aspect ratio of the disc is fixed on your DVD. Sound There is no sound. , Re-connect all connections securely. , The connecting cord is damaged.
- Page 111 The subtitle language cannot be changed or turned off. , Multilingual subtitles are not recorded on the DVD VIDEO. , The DVD VIDEO prohibits changing of the subtitles. , Try changing the subtitle using the DVD VIDEO’s menu. , The subtitles cannot be changed for the titles recorded on this recorder.
- Page 112 , Adjust the tracking by the TRACKING +/– buttons. , The video heads are dirty (see page 115). Clean the video heads using a Sony video head cleaning cassette. If a Sony cleaning cassette is not available in your area, have the heads cleaned at your nearest Sony dealer (a standard service fee will be charged).
-
Page 113: Remote Control
Others The recorder does not operate properly. , Restart the recorder. Press down "/1 on the recorder for more than ten seconds until “SONY DVD” appears in the front panel display. , When static electricity, etc., causes the recorder to operate abnormally, turn off the recorder and wait until the clock appears in the front panel display. -
Page 114: Notes About This Recorder
“CHILD LOCK” appears in the front panel display. , The recorder is locked. Cancel the Child Lock (page 40). Control by AV mouse is not possible. , Some satellite receivers may not support AV mouse. The Set Top Box Control function does not work. -
Page 115: Specifications
When the video heads are dirty, clean the video heads using a Sony video head cleaning cassette. If a Sony cleaning cassette is not available in your area, have the heads cleaned at your nearest Sony dealer (a standard service fee will be charged). Do... - Page 116 Inputs and outputs LINE 1 IN and LINE 2 IN VIDEO IN, phono jack (1 each) Input signal: 1 Vp-p, 75 ohms, unbalanced, sync negative AUDIO IN, phono jacks (2 each) Input level: 327 mVrms Input impedance: more than 47 kilohms LINE 2 IN S VIDEO, 4-pin, mini-DIN jack Y: 1.0 Vp-p, unbalanced, sync negative...
-
Page 117: About I.link
About the name “i.LINK” i.LINK is a more familiar term for IEEE 1394 data transport bus proposed by SONY, and is a trademark approved by many corporations. IEEE 1394 is an international standard standardized by the Institute of Electrical and Electronics Engineers. -
Page 118: Guide To Parts And Controls
Guide to Parts and Controls For more information, see the pages in parentheses. Front panel Buttons on the recorder have the same function as the buttons on the remote if they have the same or similar names. A "/1 (on/standby) button (23) B Disc tray (35, 49, 94) C A (open/close) button (35, 49, 94) D DVD t button (88) - Page 119 Remote For DVD functions Slide the cover Buttons with an orange dot next to them can be used with your TV when the TV/DVD·VIDEO switch is set to TV. A TV/DVD·VIDEO switch (21) B Z OPEN/CLOSE button (35, 49, 94) C DVD button (35, 49) D Number buttons* (21, 36) SET button (21)
- Page 120 Slide the cover V ?/1 (on/standby) button (23) W CH (channel) +/– buttons* (21, 49) X VOL (volume) +/– buttons (21) Y TV/VIDEO button (21) Z INPUT SELECT button (49, 56, 94) wj SUR (surround) button (36) wk SYSTEM MENU button (10) TITLE LIST button (40, 59) TIMER button (51) wl MENU button (35)
- Page 121 For VCR functions Slide the cover A TV/DVD·VIDEO switch (21) B Z OPEN/CLOSE (eject) button (72) C Number buttons* (21) SET button (21) D CLEAR button (72) E AUDIO button* (77) F DISPLAY button (76) TIME/TEXT button (76) G SYSTEM MENU button (10) H O RETURN button (23) I .
- Page 122 Front panel display RW VR VCD A DVD playing/recording status B Disc type/recording format C Audio signal indicators D STEREO indicator (48, 78) E SAP (Second Audio Program) indicator (48, 78) F VIDEO playing/recording status G Tape indicator Rear panel A AUDIO OUT L/R jacks (18) B SET TOP BOX CONTROL jack (13, 14) C DIGITAL AUDIO OUT (COAXIAL/...
-
Page 123: Glossary
Glossary Chapter (page 41) Sections of a picture or a music feature that are smaller than titles. A title is composed of several chapters. Depending on the disc, no chapters may be recorded. Copy protection signals (page 49) Copy restriction set by copyright owners, etc. These signals are included in some software or TV programs and restrict recording on this recorder. -
Page 124: Dvd Audio/Subtitle Language
Interlace format Interlace format shows every other line of an image as a single “field” and is the standard method for displaying images on television. The even number field shows the even numbered lines of an image, and the odd numbered field shows the odd numbered lines of an image. -
Page 125: Cable Box/Satellite Receiver Brand Code
Abbreviation Language Turkish Vietnamese Afrikaans Cable Box/Satellite Receiver Brand Code If more than one code number is listed, try entering them one at a time until you find the one that works with your cable box/satellite receiver. Cable box brand Code number 0033 0003, 0007, 0011, 0017,... - Page 126 Cable box brand Cable Healthcare Cable Star Cabletenna Cableview Century Citation Citizen Clearmaster ClearMax Colour Voice Comband Comtec Comtronics Comtronics Eagle Contec Coolmax Curtis Mathes Dae Ryung Eagle Daeryung Diamond Digeo Digi Director Dumont Eagle Comtronics Eastern Electricord Emerson Everquest Focus Fosgate Fujitsu...
- Page 127 0008, 0277, 0017, 0006, 0237, 0025, 0477, 0207, 0877, 0003, 0012, 0000, 0021, 1877 Seam 0510 Sears 0510 Sejin 1265 Siemens 0246 Sigma 0019 Signal 0040, 0015, 0011, 0035 Signature 0011 SkyCable 0112 Skygiant 1091 SL Marx 0040 Sony 1006 ,continued...
- Page 128 Cable box brand Spectradyne Spectravision Sprucer Standard Components Starcom Stargate Starquest StarSight Stealth Stellar One Storm Suena Madritel Supercable Supermax Sylvania Tandy Tatung Teac Technics Teknika Teleavia TeleCaption Teleview Texscan Thomson Timeless Tocom Torx Toshiba Trans PX Trinity Tristar Tusa Code number Cable box brand 0769, 0058...
- Page 129 Primestar 0361, 0627, 0869 Proscan 0392, 0566 1367 RadioShack 0869 0566, 0392, 0143, 0855 Samsung 1109, 1276 0856, 0099, 1856 Sony 0639, 1639 Star Choice 0869 Star Trak 0869, 0772 Thomson 0566, 0392 Tivo 1142, 1442 Toshiba 0790, 0749, 1749, 1285...
-
Page 130: Index
Index Words in quotations appear in the on-screen displays. Numerics 16:9 25 4:3 Letter Box 25 4:3 Pan Scan 25 “A-B Erase” 60 “Add” 67 ADVANCE 37 ANGLE 36 Antenna 14 AUDIO 36 “Audio” 106 Audio cords 18 “Audio DRC” 103 Audio settings 102 Auto Clock Set 99 “Auto Play”... - Page 131 “Language” 106 Language abbreviation 124 LINE 1 IN 29 LINE 2 IN 28 “Line Audio Input” 53 Manual Clock Set 100 “Manual Set” 99 MARKER 42 MENU 35 Menu Top menu 35 “Mode for SET button” 106 “Modify” 67 “Move” 68 MP3 audio tracks 43 NEXT 37 Number buttons 21...
- Page 132 “TV Type” 100 TV/DVD·VIDEO 21 TV/VIDEO 50 “Unfinalize” 92 Unrecordable pictures 49 “VCR Function” 105 VIDEO CD 33 Video mode 30 Video settings 100 VR mode 30 ZOOM 36 Zoom 44 Sony Corporation Printed in China AK68-00986A...