Sony VRD-MC5 Operating Instructions Manual
Multi-function dvd recorder
Hide thumbs
Also See for VRD-MC5:
- Operating instructions manual (92 pages) ,
- Quick start manual (2 pages) ,
- Product specifications (2 pages)

Related Manuals for Sony VRD-MC5


Summary of Contents for Sony VRD-MC5
- Page 1 Multi-Function DVD Recorder Operating Instructions VRD-MC5 © 2007 Sony Corporation W-273-384-11(2)
-
Page 2: Safety Regulations
Safety Regulations WARNING To reduce the risk of fire or electric shock, do not expose this apparatus to rain or moisture. To prevent fire or shock hazard, do not place objects filled with liquids, such as vases, on the apparatus. Do not install this equipment in a confined space such as a bookshelf or similar unit. - Page 3 You are cautioned that any changes or modifications not expressly approved in this manual could void your authority to operate this equipment. The manufacturer of this product is Sony Corporation, 1-7-1 Konan Minato-ku Tokyo, 108-0075 Japan. The Authorized Representative for EMC and product safety is Sony Deutschland GmbH, Hedelfinger Strasse 61, 70327 Stuttgart, Germany.
- Page 4 Owner’s Record The product label is located on the bottom of the unit. Record the serial number in the space provided below. Refer to them whenever you call upon your Sony dealer regarding this product. Model: VRD-MC5 Serial Number: ________...
-
Page 5: Table Of Contents
Table of Contents Safety Regulations ... 2 Introducing DVDirect Features ... 8 About this manual ... 9 Package Contents ... 11 Parts and Controls ... 12 Turning the Power On/Off ... 16 Navigation Display ... 17 Accessing functions from the menu ... 18 Inserting a Disc ... - Page 6 Previewing a Video DVD and a Photo DVD ...68 Setup Using the Setup Menu ...71 Rec Quality ...72 Auto Stop Timer ...72 Auto Chapter ...72 DVD Menu ...73 Slideshow Music ...73 Slideshow Creation ...74 Finalize disc ...74 Erase disc ...76 System Info ...77 Demo ...77 Color System ...77...
- Page 7 • DVDirect, Handycam, CyberShot, Memory Stick and each logos are trademarks, or registered trademarks of Sony Corporation. • “PLAYSTATION” is a registered trademark of Sony Computer Entertainment Inc. • Other system and product names used herein are registered trademarks or trademarks of their respective manufacturers, although the ™...
-
Page 8: Introducing Dvdirect
DVD without using a computer. • You can also create slideshows of the photos that will be playable on DVD players. AVCHD dubbing You can record HD (High Definition) videos taken with Sony High Definition ® Handycam (HDD/Memory Stick) as they are. For detail about compatibility of AVCHD disc, see “Notes on compatibility of AVCHD disc”... -
Page 9: About This Manual
Dubbing videos being recorded on Standard Definition image quality Dubbing videos being recorded on High Definition image quality (AVCHD format) Dubbing still images shot by a digital still camera or Sony Handycam ® * In this manual, Handycam refers to a Sony camcorder. In particular, High Definition Handycam ®... - Page 10 Dubbing videos from Handycam Create a DVD using video taken with a Handycam the DVDirect via a USB cable. Available functions: Full Dubbing Consolidation Dubbing Dubbing videos from DV digital video camera Create a DVD using video taken with a Handycam ®...
-
Page 11: Package Contents
Package Contents Please confirm that the package contains the following items. If any of these items are missing or damaged, please contact your dealer. • DVDirect • AC adapter • AC power cord • Quick Start Guide • Operating Instructions (this document) •... -
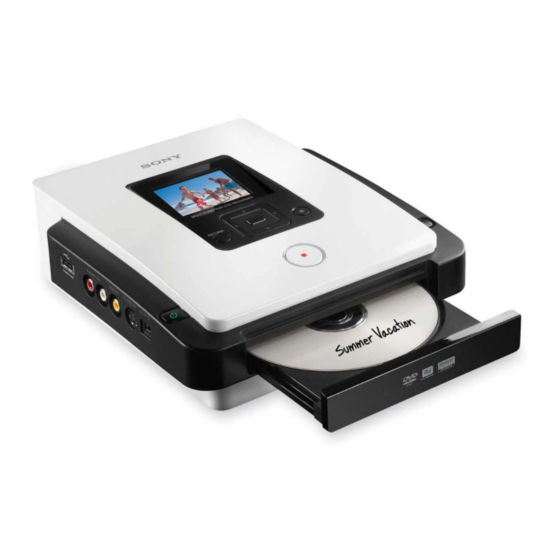
Page 12: Parts And Controls
Parts and Controls Front and rear A 1 (power) button Turns the DVDirect on or off. B Top panel The buttons and display for operating the DVDirect are located here (page 13). C Disc tray Insert a disc here with the label side up (page 19). D Z (eject) button Opens and closes the disc tray. - Page 13 Top panel RETURN A Display window Displays a menu screen, images from a playback device or memory card. B Mm<,cursor / Selects a function. (stop) button Stops recording. D RETURN button This returns the display to the menu screen or to the previous screen when operating the DVDirect.
- Page 14 Left side panel A USB connector (Type A) Connect the USB cable (not supplied) here when connecting a Handycam B AUDIO IN L/R connectors Connect the audio plugs of an AV cable (not supplied) here when connecting the DVDirect to a video device, such as a camcorder or VCR.
- Page 15 Right side panel A Memory card LED Lights amber when accessing the memory card. B Memory Stick Duo slot Insert a “Memory Stick Duo” here. C Multi memory card slot Insert a “Memory Stick,” SD Card, or xD-Picture Card here. D CompactFlash card slot Insert a CompactFlash here.
-
Page 16: Turning The Power On/Off
Introducing DVDirect Turning the Power On/Off Connect the supplied AC power cord to the AC adapter. Insert the power plug of the AC adapter into the DVDirect’s DC IN connector. Insert the power plug of the AC power cord into a power outlet. Notes •... -
Page 17: Navigation Display
Navigation Display After the power is turned on, the DVDirect automatically detects inserted memory cards and DVD discs and input signals from connected devices. A message indicating how to prepare for recording then appears in the display window. By following this message, you can automatically move on to the recording procedure you intended without complicated button operations. -
Page 18: Accessing Functions From The Menu
Accessing functions from the menu You can perform recording procedures manually by selecting options from the menu. You can also go to the setup screen (Setup menu) from the menu for various settings. Press the RETURN button to return to the menu display (You cannot go back to the menu display while recording or from some of operating status). -
Page 19: Inserting A Disc
Inserting a Disc To insert a disc, perform the following while the DVDirect is turned on. Press the Z (eject) button. The disc tray ejects. Place the disc in the disc tray with its label facing up, and press the Z (eject) button again. Note Do not touch the recording side of the disc. - Page 20 When a new disc is inserted When connecting a video device to the VIDEO IN, S VIDEO IN, or DV IN connector, and dubbing manually with a new disc (page 50), the following display appears. When recording, press M or m to select “OK,” and press the (select) button.
-
Page 21: Inserting A Memory Card
Inserting a Memory Card Insert the memory card into its corresponding memory card slot. Memory Stick Duo Memory Stick Duo Push the “Memory Stick Duo” into the slot until you hear a click. To remove, push the “Memory Stick Duo” and pull out. Memory Stick/SD Card/xD-Picture Card Push the card into the slot until you hear a click. -
Page 22: Creating A Video Dvd
Creating a Video DVD and AVCHD disc Simply by connecting your camcorder or video device to the DVDirect, you can record videos. If you connect a Sony High Definition Handycam dub High Definition (AVCHD) video in the same quality. Types of Dubbing Depending on your camcorder or type of video DVD you are creating, you can select the dubbing mode as follows. - Page 23 ® Handycam (DVD) (page 45) The entire video content of the camcorder’s 8-cm disc is recorded onto a 12- cm disc. One mini DVD ® Handycam (DV/D8) or DV digital video camera (page 49) The entire content of the DV tape or Digital 8 tape is recorded onto a single disc.
- Page 24 Consolidation Dubbing (page 46) This mode allows you to record the contents of multiple 8-cm discs from a ® Handycam (DVD) onto a single 12-cm disc. Multiple 8-cm discs Playlist Dubbing (page 40) This mode allows you to record videos within a Playlist created on your ®...
-
Page 25: About Video Dvds And Avchd Discs
Manual Dubbing (page 50) This mode allows you to create a video DVD using the (record) and (stop) buttons on the DVDirect and the play, pause, and stop buttons on the device connected to the DVDirect. You can record while watching the video you want to record on the display. - Page 26 Notes on compatibility of AVCHD disc • An AVCHD disc cannot be played on an AVCHD incompatible DVD player or recorder. • Do not insert an AVCHD disc in an AVCHD incompatible DVD player or recorder. The DVD player or recorder may fail to eject the disc and may erase its contents without warning.
-
Page 27: Camcorders/Video Devices, Recording Quality, And The Interface
When dubbing, use the input jack appropriate for the connecting device and the image quality. Since the input jack here affects the disc selection, see also “Usable disc” (page 29). Image Type of device quality ® Sony Handycam (HDD) ® Sony Handycam (Memory Stick) ® Sony Handycam (DVD) ®... - Page 28 Notes on presetting camcorders • The [USB SPEED] setting on Handycam to [AUTO]. ([AUTO] is the default setting.) • The [A/V t DV OUT] setting on Handycam [OFF]. ([OFF] is the default setting.) • When dubbing the 16:9 pictures (pictures shot with the camcorder’s setting set to 16:9) via the DV IN, VIDEO IN, or S VIDEO IN jack on the DVDirect, set the TV type setting on the camcorder to 4:3.
-
Page 29: Usable Disc
Usable disc Select according to the input jack that you are connecting the device to. Disc Type DVD+R DVD+R DL (Double layer) DVD+RW DVD-R DVD-R DL (Dual layer) DVD-RW Notes on recording on discs • When adding video to a previously recorded disc (unfinalized disc), you must use the same interface used for the previous recording. -
Page 30: About Created Video Dvds And Avchd Discs
About Created Video DVDs and AVCHD discs The contents of a disc consist of sections, called titles, and smaller sub- sections, called chapters. A DVD Menu is displayed each time a DVD is inserted into a DVD player and serves as a title page or table of contents for playing the video DVD. You can create a video DVD that display thumbnail images of titles in the DVD Menu screen. - Page 31 For video DVDs (Dubbing from Handycam Titles* are created at points in the video where the date recorded Title changes. Chapter Chapters are created for each scene* You can set the display selected from “DVD Menu” or your DVD menu favorite photo (page 73).
-
Page 32: Dubbing From A Handycam ® (Hdd/ Memory Stick) -One Touch Dubbing
Dubbing From a Handycam Memory Stick) –One Touch Dubbing– You can create video DVDs from your Handycam simply by pressing the DISC BURN button on the Handycam. As from the next dubbing, additional video can be dubbed onto a disc without dubbing the previous contents again. - Page 33 Touch [DISC BURN] on the camcorder’s LCD screen, or press DISC BURN button on the camcorder or Handycam Station. Touch [DISC BURN] or [DVD BURN]. Note Depending on camcorder type, the display that appears in the camcorder’s LCD screen or button names on the camcorder may differ. Dubbing starts, and the progress appears in the display window.
- Page 34 Dubbing is complete. When dubbing HD (High Definition) video: The disc is automatically ejected. When dubbing SD (Standard Definition) video: “Complete” appears in the display window and recording automatically stops. Z (eject) button to eject the disc, and select whether to finalize Press the the disc (page 65).
-
Page 35: Dubbing From A Handycam ® (Hdd/ Memory Stick) -Using The Dubbing Mode
Dubbing From a Handycam Memory Stick) –Using the Dubbing Mode– ® When Handycam can use one of four dubbing modes as preferred. Note When storing both HD (High Definition) video and SD (Standard Definition) video on an ® AVCHD Handycam Definition) video and records it on the disc. - Page 36 Touch [COMPUTER] on the camcorder’s LCD screen. When using a Handycam Touch [ [HDD]. When using a Handycam (Memory Stick): Touch [ Once you touch the button on the camcorder’s LCD screen, the DVDirect detects the connected camcorder, and the display window on the DVDirect changes.
-
Page 37: Full (All) Dubbing
Full (All) Dubbing You can use Full Dubbing to dub the video contents of the camcorder onto a disc or more than a disc with a single touch of a button. Press < or , until “Full” is displayed at the top right of the display window. -
Page 38: Incremental Dubbing
Change to a blank disc when the disc is full. If the contents of the camcorder do not fit onto a single disc, the disc will be finalized once it becomes full. The disc will be automatically ejected, and the following message will appear in the display window. Insert a blank disc. - Page 39 Press the (record) button to start dubbing. “Recording to disc …” appears in the display window, and the button lights up during dubbing. Change to a blank disc when the disc is full. If the contents of the camcorder do not fit onto a single disc, the disc will be finalized once it becomes full.
-
Page 40: Playlist Dubbing
Z (eject) button to eject the disc, and select whether to finalize Press the the disc (page 65). Or, press the RETURN button to go back to the menu display. Hint If you eject a disc without finalizing after videos have been dubbed, you can add videos onto the same disc later. -
Page 41: Scenes Selection Dubbing
“Recording to disc …” appears in the display window, and the button lights up during dubbing. Follow steps 3 to 4 of “Incremental Dubbing” (page 38). To stop dubbing You cannot stop a recording once it has started. You can only cancel dubbing by the (stop) button when replacing a disc. - Page 42 Press M m < , to select the thumbnail or shooting date you want to dub and press the Only the marked scenes or videos selected by shooting date is dubbed. Thumbnail: Marked scene to Hint Pressing the Press the “Recording to disc …”...
-
Page 43: Dubbing From A Handycam ® (Dvd)
Dubbing From a Handycam When a Handycam or Consolidation Dubbing, and then record. Before selecting a dubbing mode… Press the 1 (power) button to turn on the DVDirect, and insert a disc (page 19). The DVDirect starts reading the inserted disc. Hint You can also operate from the “Menu”... - Page 44 Once you touch the button on the camcorder’s LCD screen, the DVDirect detects the connected camcorder, and the display window on the DVDirect changes. Note Depending on the camcorder you are using, the above [USB SELECT] screen may not appear automatically and connection configuration may be required beforehand. And depending on camcorder type, the display appeared in the camcorder’s LCD screen or button names on the camcorder may differ.
-
Page 45: Full (All) Dubbing
Full (All) Dubbing You can use Full Dubbing to dub the video contents of an 8cm DVD onto a disc with a single touch of a button. Press < or , until “Full” is displayed in the top right of the display window. -
Page 46: Consolidation Dubbing
Consolidation Dubbing When you have multiple 8-cm discs containing video taken with a DVD camcorder, you can consolidate and dub the video onto one 12-cm disc. Press < or , until “Consolidation” is displayed in the top right of the display window. Press the During dubbing, the progress appears in the display window. - Page 47 Hints • To consolidate the video contents of another 8-cm disc onto the current disc, replace the 8-cm disc in the DVD camcorder with the new 8-cm disc, and press the (record) button on the DVDirect. • If you eject a 12-cm disc from the DVDirect without finalizing after videos have been dubbed, you can consolidate videos recorded on other 8-cm discs onto the same 12-cm disc later.
-
Page 48: Dubbing From A Handycam ® (Dv/D8) Or Dv Digital Video Camera
Dubbing From a Handycam DV digital video camera When a Handycam DVDirect via a DV (i.LINK) cable, you can select Full or Manual Dubbing. Before selecting a dubbing mode… Press the 1 (power) button to turn on the DVDirect, and insert a disc (page 19). -
Page 49: Full (All) Dubbing
The following appears in the DVDirect's display window. Type of input Rec quality You can select a dubbing mode displayed at the top right of the display window by pressing < or ,. For selecting each dubbing mode, refer to the page below. •... -
Page 50: Manual Dubbing
Press the The DVDirect starts dubbing at the same time the camcorder starts playback. When the video tape is not at its beginning, it will automatically rewind and the DVDirect starts dubbing. “Recording” appears in the display window, and the Stop dubbing automatically when dubbing is complete. - Page 51 Press the During dubbing, “Recording” appears in the display window during video playback. Press the Wait a moment until the display window changes. To dub additional video, repeat steps 1 to 3. When dubbing is complete, press the Z (eject) button to eject the disc and select whether to finalize the disc (page 65).
-
Page 52: Dubbing From Video Devices
Dubbing From Video Devices You can manually dub the portions of video you want to dub by alternating between the play and stop buttons. Press the 1 (power) button to turn on the DVDirect. A message prompting you to insert a disc appears in the display window. Insert a disc (page 19). - Page 53 For S-video cables: Connect the video device’s S-video out connector to the DVDirect’s S VIDEO IN connector using the S-video cable (not supplied). You must also connect an audio cable for audio input. To audio/S-video output Audio cable (not supplied) Hint If your video device has an S-video connector, use an S-video cable for improved picture quality (compared to video cable quality).
- Page 54 Press the “Recording” appears in the display window during video playback. Press the Wait a moment until the display window changes. To dub additional video, repeat steps 4 to 6. When you are finished dubbing, press the RETURN button to go back to the menu display.
-
Page 55: Creating A Photo Dvd
Creating a Photo DVD Creating a Photo DVD You can easily record photos taken with your digital still camera from a memory card onto a DVD. Still images stored on a Handycam recorded onto a disc. If you select to create a slideshow, you can create a DVD playable on the other DVD players. -
Page 56: About Created Photo Dvds -Types Of Photo Dvd
About Created Photo DVDs –Types of Photo DVD– The following types of photo DVD can be created with the DVDirect. Photo backup DVD Photo backup DVDs allow you to store photos (JPEG files) taken with a digital still camera or Handycam DVD created with the DVDirect in the display window or view it using the DVD drive of a computer. -
Page 57: Camcorders/Photo Devices, Recorded Media, And The Interface
Use either the USB jack or one of the memory card slots on the DVDirect, according to your device and the media on which photos are recorded. Type of device Media Built-in HDD ® Sony Handycam (HDD) Memory Stick Duo ® Sony Handycam Memory Stick Duo... -
Page 58: Usable Discs For Creating Photo Dvds
Usable Discs for Creating Photo DVDs The following discs can be used for creating a photo DVD. Disc Type DVD+R DVD+R DL (Double layer) DVD+RW DVD-R DVD-R DL (Dual layer) DVD-RW About Created Photo DVDs Slideshow DVDs The contents of a slideshow DVD consist of titles and chapters as a Video DVD (page 30). - Page 59 Storage locations on photos (JPEG files) Some folders are created on a photo DVD, and all photos (JPEG files) are stored in the folder “100VRDMC.” Hint File names are automatically created when the photo DVD is created.
-
Page 60: Dubbing Photos Stored On A Memory Card/Handycam
Dubbing Photos Stored on a Memory Card/Handycam Press the 1 (power) button to turn on the DVDirect, and insert a disc (page 19). The DVDirect starts reading the inserted disc. Hint You can also operate from the “Menu” display to record the photos. Press the RETURN button to display the “Menu,”... - Page 61 Touch the media display storing photos on your camcorder’s LCD screen. When using a Handycam Touch [ COMPUTER] or [HDD]. When using a Handycam Stick): Touch [ COMPUTER]. When using a Handycam Touch [ COMUPTER]. The display window on the DVDirect changes. Note Depending on the camcorder you are using, the above [USB SELECT] screen may not appear automatically and connection configuration may be required beforehand.
- Page 62 For Select Photo Dubbing: Press < or , until “Select Photos” displays. Press M or m to select “Thumbnail” or “Shooting Date.” Press M m < , to select the thumbnail or shooting date you want to dub and press the Thumbnail Current photo/ Number of recorded...
- Page 63 Press the (record) button to start dubbing. During dubbing, the progress appears in the display window, and the (record) button remains lit. Stop dubbing automatically when dubbing is complete. When all the photos are dubbed onto the disc, “Complete” appears in the display window and dubbing automatically stops.
- Page 64 To display only one photo Press the (stop) button when thumbnails are displayed. The photo selected is displayed in full. The photo can be rotated 90 degrees right with each press of the , button. The photo can be rotated 90 degrees left with each press of the < button.
-
Page 65: Finalizing/Viewing The Created Dvd
Finalizing/Viewing the Created DVD Removing/Finalizing the Created Disc When dubbing is complete, press the Z (eject) button to eject the disc. Then you can select whether to keep the disc unfinalized (to add videos or photos later), or to create a completed disc (finalized) (page 66). For photo DVD, you can select whether to create a slideshow. - Page 66 Select whether to create a slideshow for a photo DVD. Press to select whether to create a slideshow, and press the M or m (select) button. To complete the disc as a photo backup DVD, select “No.” To complete the disc as a slideshow DVD, select “Yes.” Note It takes a few minutes to complete finalizing for a photo backup DVD.
- Page 67 Finalize the disc • to create a disc playable on DVD players. • to create a disc readable on DVD drives of computers. • to create a disc to be distributed to others. • To create a 100% complete disc as a video DVD or photo DVD (you do not intend to add videos or photos later).
-
Page 68: Previewing A Video Dvd And A Photo Dvd
Previewing a Video DVD and a Photo You can play back and check a video DVD and a photo DVD dubbed with the DVDirect in the display window on the top of the unit. Notes • Sound cannot be heard when previewing the disc on the DVDirect. •... - Page 69 When a video DVD that has not been finalized is inserted: The first title on the disc starts to play automatically. Press < or , to select the title you want to view. To stop playback, press (stop) button. When a photo backup DVD or a photo DVD that has not been finalized is inserted: You can select a photo in a DVD manually and be displayed it.
- Page 70 When a slideshow DVD is inserted: The following display appears. Press to select “Photo Slideshow” or “Original Photos.” When “Photo Slideshow” is selected, photos on a DVD are automatically displayed in rotation. When you select a title from the DVD Menu to play as a video DVD, photos within the title are played.
-
Page 71: Setup
Setup Using the Setup Menu You can change the various settings for creating discs in the setup menu screen. The default setting is underlined in the following list. Press the 1 (power) button to turn on the DVDirect. Press the RETURN button. The “Menu”... -
Page 72: Rec Quality
Rec Quality Select the recording quality to use when creating a video DVD. Rec Quality Auto Stop Timer Select the preset time used to stop recording automatically when creating a video DVD. Setting Feature Recording automatically stops when the preset time has passed 30min to 8h after recording starts. -
Page 73: Dvd Menu
DVD Menu Select a background image to apply to the DVD Menu screen of a video DVD or a slideshow DVD. Setting Feature A, B, C, D Applies the selected image to the DVD Menu screen. Sets your favorite photo (JPEG file) for the Menu screen of a video JPEG DVD or slideshow DVD. -
Page 74: Slideshow Creation
Notes • There should only be one MP3 file saved in the top directory of Memory Card. If there are many files in the top directory of the Memory Card, the desired music may not be set as the background music. •... - Page 75 Press to select “Yes,” and press the M or m The following message appears. Press to select “OK,” and press the M or m The DVDirect starts finalization. For video DVDs The following message appears. For photo DVDs The following message appears. To complete the disc as a photo backup DVD, select “No.”...
-
Page 76: Erase Disc
Erase disc Erase videos or photos recorded on a DVD+RW or DVD-RW disc. The erased disc is reusable as a blank disc. Note Be aware that this operation erases all data. Insert a disc to erase, press (select) button. The following message appears. Press M or m The following message appears. -
Page 77: System Info
System Info You can check the system software version of the DVDirect. Press to select “System Info,” and press the the software version in the display window. Hint The system software is the built-in software that makes the DVDirect work. Demo Select whether to enable the demo. -
Page 78: Additional Information
Additional Information About Discs Compatible Writable Discs The following writable discs are compatible with the DVDirect. However, not all disc operations are supported. Disc type DVD+R DVD+R DL (Double layer) DVD+RW DVD+RW High speed DVD-R DVD-R DL (Dual layer) DVD-RW * Only use when connecting to the DV IN, VIDEO IN, or S-VIDEO IN connector. -
Page 79: About Memory Cards
Memory Stick PRO Duo Reading of data that requires MagicGate functions cannot be performed with the DVDirect. Sony “Memory Stick PRO Duo” operation is supported up to 8GB. Notes on using “Memory Stick” • If you slide the write-protect switch to LOCK with a fine-tipped object, you cannot record, edit, or delete images. -
Page 80: About The Compactflash/Sd/Xd-Picture Cards
• Insert a “Memory Stick” into the Multi memory card slot, and insert a “Memory Stick Duo” into the Memory Stick Duo slot. When inserting a “Memory Stick Duo” with an adapter into the Multi memory card slot, the DVDirect may not work correctly. •... -
Page 81: Precautions
Precautions Operation and storage conditions Avoid using or storing the DVDirect in hot or humid locations, or places where it might be subject to severe vibration or direct sunlight. Transportation • Please repack the DVDirect in its original carton when shipping by itself. •... -
Page 82: Specifications
PCs with DVD drive) • AVCHD disc * (Playable on Blu-ray Disc players/ ® recorders/Playstation3 consoles, or devices supporting AVCHD format playback) Requires a Sony High Definition ® Handycam (HDD/Memory Stick). Supported input devices • Video devices with video/audio outputs ®... - Page 83 General Power DC 12 V (supplied from the DC IN jack) Consumption Max. 2.5 A AC adapter* Type: AC-NB12A Input: 100 V - 240 V Output: DC 12 V/2.5 A * Use an AC power cord appropriate to the region or country of use. Size Approx.
- Page 84 P/N 7819901869A Sony Corporation Printed in China...