Table of Contents
Advertisement
Introduction
To avoid electric shock or injury, do not perform the performance tests or
calibration adjustment procedures unless qualified to do so.
The information provided in this document is for the use of qualified personnel
only.
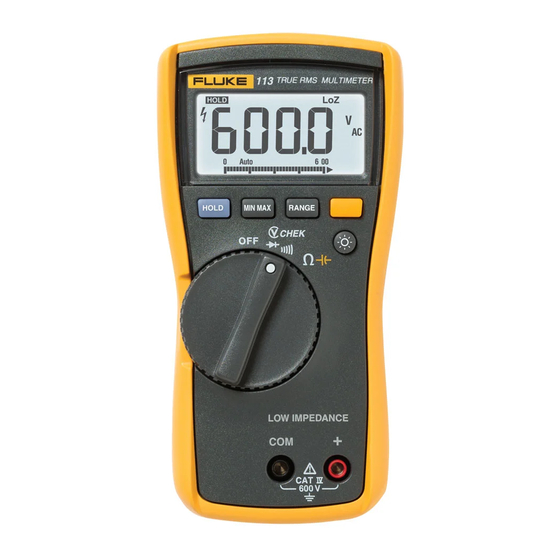
The 113 Calibration Information provides the information necessary to adjust and verify the performance of the
Fluke Model 113 Electrical Multimeter (hereafter known as the Meter).
The following information is included in this document:
•
Safety Information and International Electrical Symbols (page 2)
•
Specifications (page 3)
•
Replacing the Battery (page 5)
•
Cleaning (page 5)
•
Performance Tests (page 5)
•
Calibration Adjustment (page 7)
•
Replacement Parts and Accessories (page 11)
•
Complete Warranty (page 12)
See the 113 Users Manual for complete operating instructions.
Contacting Fluke
To contact Fluke, call one of the following telephone numbers:
USA: 1-888-99-FLUKE (1-888-993-5853)
Canada: 1-800-36-FLUKE (1-800-363-5853)
Europe: +31 402-675-200
Japan: +81-3-3434-0181
Singapore: +65-738-5655
Anywhere in the world: +1-425-446-5500
Or, visit Fluke's Web site at www.fluke.com.
To register your product, visit
April 2008
©2008 Fluke Corporation. All rights reserved. Specifications subject to change without notice.
XWWarning
http://register.fluke.com
Electrical Multimeter
Calibration Information
®
113
1
Advertisement
Table of Contents

Related Manuals for Fluke 113


Summary of Contents for Fluke 113
- Page 1 The information provided in this document is for the use of qualified personnel only. The 113 Calibration Information provides the information necessary to adjust and verify the performance of the Fluke Model 113 Electrical Multimeter (hereafter known as the Meter).
-
Page 2: Safety Information
Calibration Information Safety Information "Warning" and "Caution" Statements A “Warning" identifies hazardous conditions and actions that could cause bodily harm or death. A "Caution" identifies conditions and actions that could damage the Meter, the equipment under test, or cause permanent loss of data. XWWarnings and Precautions To avoid possible electric shock or personal injury, follow these guidelines: •... -
Page 3: International Electrical Symbols
Earth ground display.) Do not dispose of this product as unsorted municipal waste. Go to Fluke’s website for recycling information. Specifications Accuracy is specified for 1 year after calibration at operating temperatures of 18 °C to 28 °C, with relative humidity at 0 % to 95 %. Extended specifications are available at www.fluke.com. -
Page 4: Accuracy Specifications
Calibration Information Accuracy Specifications Accuracy ± ([% of Reading] + [Counts]) Function Range Resolution DC, 45 to 500 Hz 500 Hz to 1 kHz 6.000 V 0.001 V [1,2] k Chek 60.00 V 0.01 V 2.0 % + 3 4.0 % + 3 600.0 V 0.1 V Function... -
Page 5: Basic Maintenance
Electrical Multimeter Basic Maintenance Basic Maintenance Replacing the Battery XWWarning To avoid shock, injury, or damage to the Meter, remove test leads from the Meter before opening the case or battery door. To remove the battery door for battery replacement, refer to Figure 1 while performing the following: 1. - Page 6 Calibration Information Table 2. Required Equipment Recommended Equipment Measurement Function Accuracy 10 mV to 600 V ±0.125 % 5500A Multi-product Calibrator (or DC Volts equivalent) 6 mV to 600 V ±0.25 % @ 45 Hz to 1 kHz AC Volts 0 to 60 kΩ...
-
Page 7: Calibration Adjustment
Electrical Multimeter Calibration Adjustment 1. Connect the Calibrator to the + and COM input terminals on the Meter. 2. Turn the rotary switch to the function listed in each step of Table 3. 3. Apply the input level for each step listed in Table 3. 4. -
Page 8: Calibration Adjustment Password
Calibration Information The following sections present the features and Meter pushbutton functions available during the Calibration Adjustment Procedure. Should the Meter fail any of the performance tests, perform the Calibration Adjustment Procedure. Use the following steps to view the Meter’s calibration counter. 1. - Page 9 Electrical Multimeter Calibration Adjustment Short S7 to reset to Default password XBT1 erc12f.emf Figure 3. Calibration Password Reset Meter Buttons Used in the Calibration Steps When performing the Calibration Adjustment Procedure, the Meter buttons behave as follows. This may be of help determining why a calibration step is not accepted and for determining the input value without referring to Table 4.
- Page 10 Calibration Information 7. After each input value is applied, press g to accept the value and proceed to the next step (C/02 and so forth). Note After pressing g, wait until the step number advances before changing the calibrator source or turning the Meter’s rotary knob. Some adjustment steps can take up to several seconds to execute before moving to the next step.
-
Page 11: Replacement Parts
Electrical Multimeter Replacement Parts Replacement Parts Table 5 lists the Meter’s replaceable parts identified in Figure 4. 15 4 PL 2 PL erc14.eps Figure 4. Exploded View of Meter... - Page 12 FLUKE-117-2003,BATTERY DOOR 2525575 SCREW,2-28,.250,PAN,PHILLIPS,STEEL,ZINC-CHROMATE,PLASTITE 48 THREAD FORMING 2516493 SCREW,M3,4MM,PAN,PHILLIPS,STEEL,ZINC-CHROMATE 2032811 SCREW,5-14,.750,PAN,PHILLIPS,STEEL,BLACK CHROMATE,THD FORMING 832246 SCREW,M3X0.5,6MM,PAN,PHILLIPS,STEEL,ZINC-BLACK CHROMATE 2032792 BATTERY,PRIMARY,MNO2-ZN,9V,505MAH,6LR61,ALKALINE, 17X26X48MM,BULK 614487 FLUKE 12-8004,SHOCK ABSORBER 878983 FLUKE-117-2005-02, TILT STAND, 113 3093970 FLUKE-117-2010,HOLSTER 2525649 INSTRUCTION SHEET,INSTRUCTION SHEET SET, 12 LANG, FLUKE-113 3083192 Not shown...
-
Page 13: Warranty
Warranty Warranty This Fluke product will be free from defects in material and workmanship for three years from the date of purchase. This warranty does not cover fuses, disposable batteries, or damage from accident, neglect, misuse, alteration, contamination, or abnormal conditions of operation or handling. - Page 14 Calibration Information...