Table of Contents
Advertisement
Advertisement
Table of Contents

Related Manuals for Kenmore 111.7303 Series


Summary of Contents for Kenmore 111.7303 Series
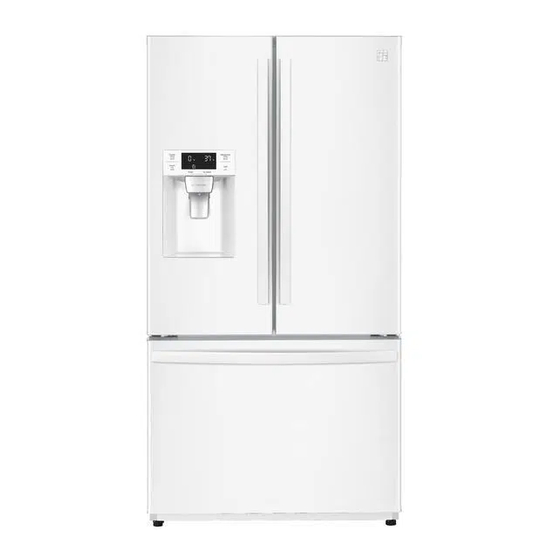
- Page 1 Use & Care Guide Manual de Uso y Cuidado English / Español Kenmore ® Bottom Freezer Refrigerator Refrigerador Congelador Inferior Models, Modelos: 111.7303* & 111.7330* * color number, número de color 60139-0021700-00 Code : F706-10 F706-10( )(Kenmore).indd 1 2019-03-04 10:40:21...
-
Page 2: Table Of Contents
Installation ............11 Removing/Replacing Your Refrigerator and Freezer Handles, Doors and Drawers ........12-17 Refrigerator Leveling & Door Adjustment ..18 Using Your Refrigerator........ 19-27 Setting the Controls ..........19 Control Panel ............20 Icemaker ...............21 Refrigerator Section ...........24 F706-10( )(Kenmore).indd 2 2019-03-04 10:40:21... -
Page 3: Warranty
*Warranty coverage applies to door bins, drawer bins and basket bins. Defects must be verified by a Sears authorized service representative. For warranty coverage details to obtain free repair or replacement, visit the web page: www.kenmore.com/warranty This warranty covers ONLY defects in material and workmanship, and will NOT pay for: 1. -
Page 4: Product Record
Have these items of information available whenever you contact Sears concerning your product. Model No.___________________ Date of Purchase ___________________ Serial No.___________________ Save these instructions and attach your sales receipt for future reference. F706-10( )(Kenmore).indd 4 2019-03-04 10:40:21... -
Page 5: Important Safety Instructions
(including children) with reduced physical, sensory or mental capabilities, or lack of experience and knowledge, unless they have been given supervision or instruction concerning use of the appliance by a person responsible for their safety. SAVE THESE INSTRUCTIONS F706-10( )(Kenmore).indd 5 2019-03-04 10:40:21... - Page 6 2 persons are required to hold it.(One to hold top back handles, the other to hold the bottom holder). If other parts are held instead, it is very dangerous and likely to slip. SAVE THESE INSTRUCTIONS F706-10( )(Kenmore).indd 6 2019-03-04 10:40:21...
- Page 7 (child entrapment and suffocation). BEFORE YOU THROW AWAY YOUR OLD REFRIGERATOR OR FREEZER: • Take off the doors. • Leave the shelves in place so that children may not easily climb inside. F706-10( )(Kenmore).indd 7 2019-03-04 10:40:21...
- Page 8 Do not use an extension cord. Where a standard two-prong wall outlet is encountered, it is your personal responsibility and obligation to have it replaced with a properly grounded three-prong wall outlet. F706-10( )(Kenmore).indd 8 2019-03-04 10:40:21...
-
Page 9: Parts And Features
17. Freezer Ice Storage Bin 7. Icemaker/Ice cube bin 18. Control and display panel for making and holding ice for through-the-door 19. Ice/Water Dispenser dispenser. 20. Freezer icemaker (*) 8. Air filter 9. Water filter F706-10( )(Kenmore).indd 9 2019-03-04 10:40:22... -
Page 10: Refrigerator Installation
Remove all cantilevered refrigerator compartment shelves and remove the protective shipping tape found on the attachment hooks at back of shelves. For shelf removal instructions, see Refrigerator Shelves in USING YOUR REFRIGERATOR section of this Use & Care Guide. F706-10( )(Kenmore).indd 10 2019-03-04 10:40:23... -
Page 11: Prior To Use
Provide the following unobstructed clearance for sufficient air flow around the refrigerator: - At least 2 inches between refrigerator back and wall. - At least 2 inches between refrigerator top and overhead surface. 2" 2" F706-10( )(Kenmore).indd 11 2019-03-04 10:40:23... -
Page 12: Removing/Replacing Your Refrigerator And Freezer Handles, Doors And Drawers
Lower the top end of the handle over the top mounting bolt. Use a 2.5 mm hex key to tighten the set screw to secure the Mounting Bolt handle in place. F706-10( )(Kenmore).indd 12 2019-03-04 10:40:23... - Page 13 • Insert the handle footprints over the door mounting fasteners and tighten the hex screws to fix the handle in place. • Check for any gap between the door and handle after the handle is fixed in place. F706-10( )(Kenmore).indd 13 2019-03-04 10:40:23...
- Page 14 3. Lift the door from the middle hinge pin and remove fall down forward. Hold the door to prevent it from the door. Place the door, inside facing up, on a non- 8. Insert and tighten the five screws. falling. scratch surface. F706-10( )(Kenmore).indd 14 2019-03-04 10:40:24...
- Page 15 8. Insert and tighten the five screws. the refrigerator door. the refrigerator door. 6. Tighten the screw. 6. Tighten the screw. 7. Realign panel. 7. Realign panel. 8. Insert and tighten the five screws. 8. Insert and tighten the five screws. F706-10( )(Kenmore).indd 15 2019-03-04 10:40:25...
- Page 16 The locking tabs are located in the freezer compartment to the rear of the main rail assembly (which is attached to main exterior freezer drawer) as shown in the illustration below. Locking Tab F706-10( )(Kenmore).indd 16 2019-03-04 10:40:25...
- Page 17 This shows that the tab is not fully locked This shows that the tab is fully in the locked position F706-10( )(Kenmore).indd 17 2019-03-04 10:40:25...
-
Page 18: Refrigerator Leveling & Door Adjustment
If the height of the refrigerator doors is uneven, turn the screw nut on the middle hinge to adjust the refrigerator door. 1. To raise a refrigerator door turn the screw counterclockwise. 2. To lower a refrigerator door turn the screw clockwise. F706-10( )(Kenmore).indd 18 2019-03-04 10:40:26... -
Page 19: Using Your Refrigerator
2. Push and hold Light button for 3 seconds to unlock Push the Refrigerator button and the temperature setting control panel. The Locked icon will disappear. changes in the sequence as shown below: >>> Sequential Temperature Change <<< F706-10( )(Kenmore).indd 19 2019-03-04 10:40:26... -
Page 20: Control Panel
5 seconds until temperature mode changes. NOTE: If the lock icon is illuminated after performing this function, press and hold Lock button for 3 seconds to turn control lock OFF. F706-10( )(Kenmore).indd 20 2019-03-04 10:40:26... -
Page 21: Icemaker
In the event of a lengthy power failure, remove ice cubes in the storage bin as the ice may melt and flow down to the ice dispenser and leak out. Place bin back in the icemaker assembly. F706-10( )(Kenmore).indd 21 2019-03-04 10:40:26... - Page 22 • To avoid personal injury, keep hands out of the ice door and passage. • Never remove the dispenser cover. • If ice or water dispenses unexpectedly, turn off the water supply and contact Sears Home Services at 1-844-469-6667. F706-10( )(Kenmore).indd 22 2019-03-04 10:40:26...
- Page 23 It is normal for several ice cubes to be joined together. If ice is not used frequently, old ice cubes will become shrunken, cloudy and taste stale. If you won't use ice frequently, shut icemaking off. F706-10( )(Kenmore).indd 23 2019-03-04 10:40:27...
- Page 24 They may consume fresh fish and shellfish break or burst if they freeze. the same day purchased. Leftovers Cover leftovers with plastic wrap or aluminum foil, or store in plastic containers with tight lids. F706-10( )(Kenmore).indd 24 2019-03-04 10:40:27...
-
Page 25: Refrigerator Section
WARNING : Do not put your fingers up the ice chute opening. Doing so can result in severe injury. CAUTION : Do not dispense ice into fine china or crystal glasses. China or crystal can break. F706-10( )(Kenmore).indd 25 2019-03-04 10:40:28... - Page 26 CAUTION : Make sure that shelves are level from one side to the other. Failure to do so may result in the shelf falling or spilling food. F706-10( )(Kenmore).indd 26 2019-03-04 10:40:28...
- Page 27 1. Pull out the deli drawer as far as bracket at the desired height and heights. possible. press down. Removing a glass shelf F706-10( )(Kenmore).indd 27 2019-03-04 10:40:29 2. Lift up the front of the deli drawer...
-
Page 28: Connecting The Water Line
Do not use with water that is microbiologically unsafe or of unknown quality without adequate disinfection before and after the system. Systems certified for cyst reduction may be used on disinfected water that may contain filterable cysts. EPA Establishment Number 10350-MN-005 F706-10( )(Kenmore).indd 28 2019-03-04 10:40:29... -
Page 29: Water Filter
NOTE: Air Filter should be changed every 6 months. six months, at the rated capacity, or if a noticeable Replacing the water filter at same time as air filter is reduction in flow rate occurs. recommended. F706-10( )(Kenmore).indd 29 2019-03-04 10:40:30... -
Page 30: Care And Cleaning
CAUTION : Make sure that shelves are level from one side to the other. Failure to do so may result in the shelf 3. Freezer & Refrigerator Bins falling or spilling food. • Hold both ends and pull up. F706-10( )(Kenmore).indd 30 2019-03-04 10:40:31... -
Page 31: Care And Cleaning
2. Clean the refrigerator, wipe it and dry well. 3. Tape rubber or wood blocks to the tops of both doors to prop them open far enough for air to get in. This stops odor and mold from building up. F706-10( )(Kenmore).indd 31 2019-03-04 10:40:31... -
Page 32: Troubleshooting Guide
The refrigerator should not be operated above 110°F. Condenser / back cover is clogged. Use a vacuum cleaner with an attachment to clean the condenser cover and vents. Do not remove the panel covering the condenser coil area. F706-10( )(Kenmore).indd 32 2019-03-04 10:40:31... - Page 33 Food is not packaged correctly. Food stored uncovered or unwrapped, and damp containers can lead to moisture accumulation within each compartment. Wipe all containers dry and store food in sealed packaging to prevent condensation and frost. F706-10( )(Kenmore).indd 33 2019-03-04 10:40:31...
- Page 34 Reverse Osmosis filtration system is Reverse osmosis filtration systems can reduce the water used. pressure below the minimum amount and result in icemaker issues. (Refer to Water Pressure section.) F706-10( )(Kenmore).indd 34 2019-03-04 10:40:31...
- Page 35 Once the ice supply in the bin has been completely exhausted, it my take up to 90 minutes before additional ice is available, and approximately 24 hours to completely refill the bin. F706-10( )(Kenmore).indd 35 2019-03-04 10:40:32...
- Page 36 Connect refrigerator to the water supply and turn the connected, the valve is not turned on water shutoff valve fully open. fully, or the valve is clogged. If the problem persists, it may be necessary to contact a plumber. F706-10( )(Kenmore).indd 36 2019-03-04 10:40:32...
- Page 37 5 minutes) to remove trapped air and contaminates from the system. Do not dispense the entire 2.5 gallon amount continuously. Depress and release the dispenser pad for cycles of 30 seconds ON and 60 seconds OFF. F706-10( )(Kenmore).indd 37 2019-03-04 10:40:32...
- Page 38 While the refrigerator is running, it is normal to hear a pulsating or highpitched sound. F706-10( )(Kenmore).indd 38 2019-03-04 10:40:32...
- Page 39 2. The Air Filter may need to be 2. To replace, see Cleanflow Air Filter information in replaced. WATER FILTER section of this Use & Care Guide. F706-10( )(Kenmore).indd 39 2019-03-04 10:40:32...
-
Page 40: Service
Kenmore ® Customer Care Hotline To schedule in-home repair service or order replacement parts Para pedir servicio de reparación a domicilio, y ordenar piezas 1-844-553-6667 www. kenmore. com ® F706-10( )(Kenmore).indd 40 2019-03-04 10:40:32... - Page 41 190228 - 수정 : 총 5p(9,12,13,20,26 _ 설명서코드 000 → F706-10)_이예진님 190304 - 수정 : 총 3p(18,2026)_이예진님 ※ 별첨 : 관련 디자인 사양서 1부 - 관련 PDF 파일 1부 상기와 같이 신규(수정)을 의뢰 합니다. 2019.01.23 대우전자 냉장고공장 생산기술파트 F706-10( )(Kenmore).indd 41 2019-03-04 10:40:32...