
Related Manuals for Aiwa AIWA NSX-V50


Summary of Contents for Aiwa AIWA NSX-V50
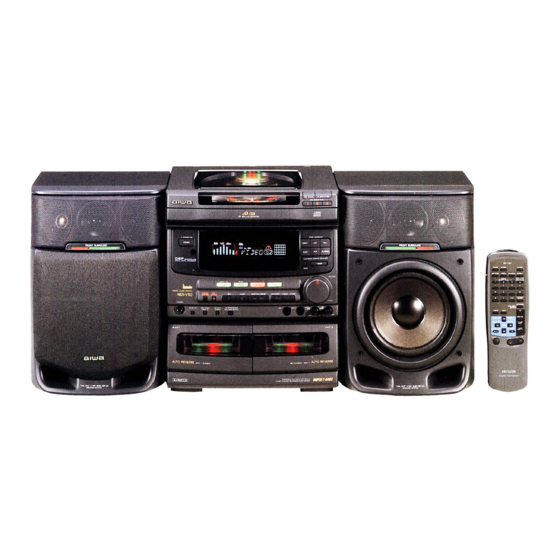
- Page 1 COMPACT DISC STEREO SYSTEM SISTEMA ESTEREO CON REPRODUCT’OR COMPACTOS CHAINE STEREO AVEC LECTEUR DE DISQUES COMFM NSX-V5(D NSX-V5ml G NSX=V52 NSX=V54 NSX-V501V51 GN52N54 NSX-V50 DE DIS iCTS (ilK3iE DIGITAL AUDIO dlm3iE [ GRAPHICS ]...
-
Page 2: Product View And Parts
ml,”m,m .-.. w--- , . . .-..”---- ~+=. =-=:=_— ~..%. —,- ~.--=y~,:s--- : ~=>-+..--—.-=, .=-a,.-— -. OWNER’S RECORD For your convenience, record the model number and serial number (you will find them on the rear of your set) in the space provided below. - Page 3 afi?w!wzzah A%uc%%s%”’250/ %S?9W5Z[VS4 Enhorabuena por haber adquirido un sistema estereo Aiwa. F%raoptimizar Ias prestaciones de este sistema, tome el tiempo necesario para leer este manual de instrucciones y familiarizarse ccm Ios procedimientos de funcionamiento. Acerca de su sistema sistema NSX-V50/NSX-V51 G/NSX-V52/NSX-V54 cc)mpuesto de Ias unidades @ y @, y ha sido suministrado con 10saccesorios @ a @ siguientes: +...
-
Page 4: Table Of Contents
TABLE OF CONTENTS PREPARATIONS Precautions ... 6 CONNECTIONS ... 8 BEFORE OPERATION ...l2 SETTING THE CLOCK ... 14 SOUND ADJUSTING THE SOUND ... 16 GRAPHIC EQUALIZER ... 16 FRONT SURROUND SYSTEM ... 18 RADIO RECEPTION MANUAL TUNING ... 20 PRESETTING STATIONS ... 22 PRESET NUMBER TUNING ... - Page 5 INDICE F)~EpAF~AT]vos — PRECAUCIONES ... 7 CONE)(IONES ... 9 ANTES DE LA OPEFIACION ... 13 PUESTA EN I-IORA DEL RELOJ ... 15 AJUSTE DEL. SONIDO ...m ... 17 ECUAL.IZADOR GRAFICO ... 17 SISTEMA DELANTERO DE SONIDO AMBIENTAL ...19 FU5CEPCION DE LA RADIO SINTONIZACION MANUAL ...
-
Page 6: Precautions
(2 inches) PRECAUTIONS Follow the advice below for safe and correct operation. voltage Before connecting the AC cord, check that the rated voltage shown on the rear panel matches your local voltage. placement Do not use the system in places which are extremely hot, cold, dusty or humid. -
Page 7: Precauciones
PRECAUCIONES Siga consejos dados a continuation funcionamiento sea seguro y correcto. Acerca de la tension de CA Antes de conectar el cable de alimentacion de CA, compruebe si la tensi6n nominal mostrada en el panel trasero concuerda ccm la tension de su Iocalidad. Acerca del Iugar de instaiacion INo utilice et sistema en lugares extremadamente fries, polvorientos o htimedos,... -
Page 8: Connections
CONNECTIONS IMPORTANT Connect the AC cord after connecting speakers, antennas, and all optional equipment. The speaker marked R is the right speaker, and marked L is the left speaker. Connect the SX-FNV50 right speaker Connect the surround speaker cord @ to the SURROUND SPEAKERS R terminal, and speaker... -
Page 9: Cone)
CONEXI(DNES IIVIPORTANTE Conecte el cable de alimentacion de CA despues de haber conectado Ios altavoces, Ias antenas y todos 10sdemas equipos opcionales. El altavoz marcado con la Ietra R es el altavoz derecho, y el marcado con la Ietra L es el altavoz izquierdo. Conecte el altavoz derecho SX-FNV50 a la unidad. - Page 10 CONNECTIONS To stand the AM antenna on a surface + Fix the claw to the slot. To position the antennas AM loop antenna: Position to find the best direction and position for radio reception. FM feeder antenna: Extend this antenna horizontally in a T-shape and fix its ends to the wall with cellophane tape, etc.
- Page 11 P’ara poner la antena de AM en posici6n vertical sobre ulna superficie + Fije el gancho en la ranura. P’ara colocar Ias antenas Amtena de cuadlro de AM: Fongala en la direccion y en la position que ofrezcan la mejor recepcion de la radio.
-
Page 12: Before Operation
POWER PHONES ~?>=- -..— ...= VI —-‘- .._ ~~~~~~~~ ~~~~~~ ---! BEFORE OPERATION turn Press one of the function buttons (TAPE, TUNER, VIDEO/AUX, CD). Playback of the inserted disc or tape begins, or the previously CLEAR tuned station is received (Direct Play Function). DEMO The POWER button is also available. -
Page 13: Antes De La Opefiacion
ANTES DE LA OPERACION Para encender la unidad Pulse uno de Ios botones de funcion (TAPE, TUNER, VIDEO/ AUX, CD). Li~reproduction cfel disco ode la cinta insertada empezara o se rx?cibira la emisora previamente sintonizada reproduction directs). Tambien podra utilizarse el boton POWER. El compartimiento de discos puede abrirse o cerrarse para reponer la unidaci... -
Page 14: Setting The Clock
f4DOWN UPbFf ‘m SETTING THE CLOCK When the AC cord is connected for the first time, the II SET button flashes. Set the time as follows while the power is off. Press the II SET button. The hour flashes. Press DOWN or H designate the hour. -
Page 15: Puesta En I-Iora Del Reloj
PUESTA EN HORA DEL RELOJ Cuando el cable de alimentacion de CA se conecte por primers W?Z,el boton II SET parpadeara. Ponga la hors como se indica a continuation, allimentacion este desconectada. Pulse el boton II SET. La hors parpadeara. Pulse el boton WI DOWN o H la hors. -
Page 16: Sound
“n “D”””“ VOLUME .,UAX T-BASS 7EEE ELECTRONIC GRAPHIC EQUALIZER “EEEJ ELECTRONIC GRAPHIC EQUALIZER ADJUSTING THE SOUND VOLUME CONTROL + El Turn the VOLUME control @l on the main unit, or press the VOLUME buttons @on the remote control. SUPER T-BASS SYSTEM + EI The T-BASS system enhances the realism of low-frequency sound. -
Page 17: Ajuste Del Sonido
AJUSTE DEL SONIDO CONTROL DE VOLUMEN ~ Gire el control VOLUME @ de la unidad principal o pulse ICE botones VOLUME @ del control remoto. SISTEMA SUPER T-BASS + sistema T-BASS realza el realismo del sonido de baja frscuencia. Pulse el boton T-BASS. Cada vez que 10pulse, T-BASS se encendera AJUSTE DEL SONIDO DURANTE LA GRABACION... -
Page 18: Front Surround System
FRONT SURROUND 1=1=1=1 (.5,) FRONT SURROUND FRONT SURROUND SYSTEM + The front surround system is processed with the DSP (Digital Signal Processor) to enhance the simulated surround sound effect for your listening pleasure. The front surround speakers are equipped inside the cabinet of your speaker system and are directed outward at an angle of 35°... -
Page 19: Sistema Delantero De Sonido Ambiental
SISTEMA DELANTERO DE SONIDO AMBIENTAL -+ E4sonido del sistema delantero de sonido ambiental se process rmediante el DSP (procesador de sefial digital), para realzar el efecto del sonido ambiental simulado y aumentar su placer al escuchar la reproduction, Los altavoces delanteros de sonido ambiental se encuentran en el interior de Ias cajas de sus sistemas de altavoces, y estan clirigidos hacia el exterior con un angulo de 35°... -
Page 20: Manual Tuning
BAND MANUAL TUNING Press the TUNER/BAND button to select the band repeatedly. If the power is turned off, the previously tuned station will be played (Direct Play Function). Press the 1+ DOWN or W UP button to select a station. Each time the button is pressed, the frequency changes. -
Page 21: Sintonizacion Manual
Pulse repetidamente el boton TUNER/BAND seleccionar la banda. Si la alimentacion esta desconectada se recibira la emisora previamente sintonizada (funcion de reproduction directs). F~ulse el boton DOWN seleccionar una ernisora. Cada vez que pulse 6?1 b oton, la frecuencia cambiara. Cuando se reciba una emisora, “TUNE se visualizara durante 2 segundos. -
Page 22: Presetting Stations
--—. —.. .—— _ 0000 0000 PRESETTING STATIONS + The unit can store a total of 32 preset stations. When a station is stored, a preset number is assigned to the station. preset number to tune into a preset station directly. .—... -
Page 23: Preajuste De Emisoras
PIWAJUSTE IDE EMISORAS + IEI E%taunidad puecle alm.acenar un total de 32 emisoras. Cuando almacene una emisora, a esa emisora se Ie asignara un numero de preajuste. Utilice el ntimero de preajuste para sintonizar directamente una emisora preajustada. Pulse el boton TUNER/BAND una banda, y puke DOWN o Hi :;eleccionar una emisora. -
Page 24: Basic Operations
rDISC CHANGE DISCDIRECT PLAY BASIC OPERATIONS LOADING DISCS + El Press the CD button, then press the A OPEN/CLOSE button to open the disc compartment. with the label side up. To play one or two discs, place the discs on tray 1 and 2. To play three discs, press the DISC CHANGE button to rotate the trays after placing two discs. -
Page 25: Repro
INTRODUCTION DE DISCOS -+ E! Pulse el boton CD, y Iuego pulse el boton A C)PEN/ CLOSE para iabrir ei compartimiento Introdr.rzca el(los) disco(s) con el Iado de la etiqueta hacia arriba. Para reproducer uno o dos discos, ponga Ios discos en Ias bandejas 1 y 2. - Page 26 0000 0000 Selecting a track with the remote control + 1 Press one of the DISC DIRECT PLAY buttons to select a disc. 2 Press the numeric buttons and the +1O button to select a track. Example: @To select the 25th track, press the +10, +1Oand 5 buttons. @To select the 10th track, press the +1O and O buttons.
-
Page 27: Operations De Base
OPERACIONES Seleccion de una cancion con el control remoto -+ Pulse uno de Ios botones DISC DIRECT seleccionar un disco. Pulse Ios botones numericos y el boton +1O para seleccionar una cancion. Ejemplo: @ Para seleccionar la cancion ntimero 25, pulse Ios botones +lo, +loy5. - Page 28 PRGM DISC ~ DIRECT PLAY 1 0000 0000 DIRECTION < } PRESET BASIC OPERATIONS PROGRAMMED PLAY Up to 30 tracks can be programmed from any of the inserted discs. Use the remote control. Press the PRGM button twice in stop mode. The PRGM indicator flashes on the display.
- Page 29 OPERA C1ONES BASICAS REPRIODUCCION PROGRAMADA Se podra programar un miiximo de 30 canciones de cualquiera de Ios discos introducidos, Utilice ei control remoto. Pulse dos veces b oton PRGM estando en el IE?I modo de parada. El indicador PRGM palrpadeara en el visualizador. Cuando se pulse una vez el boton PRGM en el paso 1, la unidad se pondra en el modo KARAOKE PROGRAM (pagina 53).
-
Page 30: Cd Graphics (Nsx-V51G Only)
..- -- .– -- opEN/cLosE DiRECTION/PRESET CD GRAPHICS (NSX-V51G On[v a TV with the VIDEO input iack can be connected to view graphics. Connect the VIDEO OUT jack of the unit to the video input jack of the TV with the supplied connection cord ~. PLAYING CD GRAPHICS DISCS 1 Turn on the TV and select the video input of TV. -
Page 31: (Nsx-V51G Solamente)
DISCOS COMIPACTOS CON GRAFICOS (NSX-V51G SOLAMENTE) CONEXION A UNITELEVISOR Solo un televisor aue ter!aa toma de entrada VIDEO poctra ser conectado ~ara ver arafil~ toma VIDEO unidad a la tounade Conecte la OUT de la entrada de video del televisor empleando el cable de conexi6n suministrado @l. -
Page 32: Basic Operations
...- ‘“ BASIC OPERATIONS INSERTING TAPES On deck 1, tapes are always played back on both sides. On deck 2, you can select a reverse mode to play back one or both sides. Use normal (type I), CrOz (type or metal (type playback, Press theTAPE button and press the A EJECT mark to open the cassette holder. -
Page 33: Repro
INSERCION DE CINTAS En la platina 1, Ias cintas se reproduce caras. En la platina 2, podra seleccionar el modo de inversion para reproducer una o dos caras. Utilice cintas normales (tipo de CrOz (tipo (tipo para la reproduction. Pulse el boton TAPE y la marca A EJECT para abrir el portacassette. -
Page 34: Continuous Play
BASIC OPERATIONS MUSIC SENSOR If there is a 4-second or longer blank between each track, the search for the beginning of the current or next track during playback can be easily made. When the F of the 4P button is illuminated, button to move to the next track or the 44 button to move to the beginning of the current track. -
Page 35: Reprc)Duccion Continua
U2PERAC/OfVES BASICAS SENSOR MUSICAL Si hay un espacio sin gra.lbarde 4 segundos o mas entre cada cancion, la busqueda del principio de la cancion que este siendo reproducida o de la siguiente cancion podra realizarse facilmente. Cuando el indicador F del boton 4> este encendido, pulse el boton W para pasar a la siguiente cancion o el boton - para pasar al principio de ki cancion que este siendo reproducida,... -
Page 36: Basic Recording
DOLBY NR REC/ REC MUTE BASIC RECORDING This section explains how to record from the tuner, CDs, or external equipment. On recording from tapes, see pages 38 to Preparation Wind up the tape to the point where recording will start. Use normal (type I) and CrOp (type 11)tapes for recording. -
Page 37: Grabac1On Basica
GRABACION BASICA Esta seccion explica como grabar del sintonizador, compactos o equipos exteriors, Para grabar de cintas, consulte Ias paginas 39 a 41. Preparation Bobine la cinta hasta el punto donde vaya a empezar la grabaci6n. Utilice cintas normales (tipo I) y cintas de Cr02 (tipo hater la grabacion. -
Page 38: Dubbing The Tape Manually
REC/ REC MUTE DUBBING THE TAPE MANUALLY Pre~aration W;nd up the tape to the point where recording will start. Note that recording will be completed on one side of the tape only. Press the TAPE button. Insert the original tape into deck 1 and the tape to be recorded on into deck 2. -
Page 39: Copiado Manual De Cintas
COPIADO MANUAL DE CINTAS Preparaci6n Bobine la cinta hasta el punto donde vaya a empezar la grabacion. Tenga en cuenta que la grabacion se completara en una cara de la cinta solamente. Pulse el boton TAPE. Inserte la cinta original en la platina 1 y la cinta que vaya a grabar en la platina 2. -
Page 40: Dubbing The Whole Tape
DUBBING THE WHOLE TAPE This function allows you to make exact copies of both sides of the original tape. The reverse side of both tapes will start simultaneously as soon as the longer tape has been reversed. Dubbing does not start from a point halfway in the tape. The reverse mode is automatically set to =>. -
Page 41: Copiado De Toda La Cinta
COPIADO DE TODA LA CINTA Esta funcion Ie permitiri hater copias exactas de ambas caras de la cinta original. La cara de inversion de ambas cintas empezara a moverse al mismo tiempo, tan pronto como termine de invertirse la cinta mas Iarga. -
Page 42: Al Edit Recording
DISC DIRECT PLAY 1 ‘m IiM3 Al EDIT RECORDING The Al EDIT function enables CD recording without worrying about tape length and track length. When a CD is inserted, the unit automatically calculates track lengths. If necessary, the order of tracks is rearranged so that no track is cut short. Al EDIT recording will not start from a point halfway into the tape. -
Page 43: Grabacion Con Edicion Al
GRABACION CON EDICION Al La funcion Al EDIT (edition Al) permite grabar discos compactos sin preocuparse de la duration de la cinta y de Ias canciones. Cuando se inserte un disco compacto, automaticamente la duration de Ias canciones. En caso de ser necesario, el orden de Ias canciones podra cambiarse para que ninguna cancion quede cortada. -
Page 44: Programmed Edit Recording
Al EDIT RECORDING To check the order of the programmed Before recording, press the EDIT/CHECK to select side A or B, and press the _ or * button repeatedly. + DISPLAY @)Tape side @ Program number @ Programmed track numbers @ Track number To add tracks from other discs to the edit program If there is any time remaining on the tape after step 5 of page 42,... -
Page 45: Grabacion Con Edicion Programada
GRABACIOIV CON EDICION Al Para comprobar el orden de Ios numeros canciones programadas Antes de grabar, pulse el boton EDIT/CHECK para seleccionar A o la B, y pulse repetidamente el boton + ciwa + ~~ VISUALIZATION @ Cara de la cinta @ Ntimero del programa @ Ntimeros de Ias canciones programadas @l Numero de cancion... - Page 46 ‘Bl EDIT/CHECK REC/REC M UTE DIRECTION < } PRESET PROGRAMMED Press the numeric buttons to designate the tape length. 10 to 99 minutes can be specified. , Example: When using a 60-minute tape, press the 6 and O buttons. DISPLAY @ Tape length @ Tape side A (front side) @ Maximum recording time for side A...
- Page 47 GRABACION PROGRAMADA — F+.rise Ios botones numericos cluracion de la cinta. puede especificar una duration de 10 a 99 minutes. Ejemplo: Cuando utilice cintas de 60 minutes, pulse Ios botones 6 y O. VISUALIZATION (~ Duration de la cinta @ Cara A de la cinta (cara delantera) @ Tiempo maximo de grabacion para la cara A FWse uno de Ios botones DISC DIRECT PLAY para seleccionar...
-
Page 48: Microphone Mixing
Ivllc 1 _Mlc2_ DECK112 BAND ““”- MIN* DIGITAL ‘c’- MIN. MICROPHONE MIXING Two microphones can be connected to this unit, allowing you to sing along to music sources. Use a microphone with a mini plug (03.5 mm, NSX-V51 G: Microphone is supplied. NSX-V50/V52/V54: Microphone is not supplied. -
Page 49: Mezcl,A Microfonica
MIEZCLA MICROFONICA A esta unidad podran conectarse dos microfonos, permitiendole asi cantar con el acompaiiamiento de Ias fuentes musicales. Utilice un microfono con miniclavija (3,5 mm 0). NSX-V51G: Se suministra microfono. NSX-V50/V52iV54: No se suministra microfono. Antes de conectar un microfono Ponga el control MIC MIXING en MIN. -
Page 50: Vocal Fader/Multiplex Function
KARAOKE VOCAL F ADER/MULTIPLEX VOCAL FADER/MULTIPLEX FUNCTION This unit can use discs or tapes as Karaoke sources. VOCAL FADEfUAUTO VOCAL FADER function The VOCAL FADER function makes the singer’s voice on ordinary discs or tapes softer than the accompaniment. In the AUTO VOCAL FADER function, the VOCAL FADER operates only while there is audio input through a microphone. -
Page 51: Funcion Vocal Fader/Multiplex
FUNCION VOCAL FADER/ MULTIPLEX Esta unidad puede utilizar discos o cintas como fuentes de karaoke. Furlcion VOCAL FADER/AUTO VOCAL FADER La ‘uncion VOCAL FADER hate que la discos cintas normales suene acompafiamiento. En la funcion AUTO VOCAL FADER, VOCAL FADER solo funcionara mientras haya entrada de audio a traves de m microfono. -
Page 52: Karaoke Program
DISC 0000 ~ DIRECTPLAY= m~oooo DIRECTION < } PRESET KARAOKE PROGRAM Before or during CD play, you can reserve up to 15 tracks to be played after the current track. Each reservation is cleared when it finishes playing. Use the remote control. Press the PRGM button once. -
Page 53: Progfiama De Karaoke
PHOGRAMA DE KARAOKE Antes o durante la reproduction de un disco compacto, usted pod ‘a reservar un maximo de 15 canciones para reproducirlas desl)ues de la cancion que este siendo reproducida. reswva se borrara cuando termine de reproducirse la cancion. Utili :e el control remoto. -
Page 54: Setting The Timer
TIMER SETTING THE TIMER The unit can be turned on at the specified time every day with the built-in timer. Preparation Make sure the clock is set correctly. (See page 14.) Press the TIMER button on the remote control once to display 0, and press the II SET button within 4 seconds. -
Page 55: Temporizador
AJUISTE DEL TEMPORIZADOR La unidad podra encenderse a la hors especificada todos Ios alias gracias al temporizador incorporado. Preparation Asegtirese de que la hors del reloj sea la corrects. (Consulte la pagina 15). Pulse una wez el boton TIMER del control remoto pal’a visualizer 0, y pulse el boton II SET antes c&que pasen 4 sectundos. -
Page 56: Setting The Sleep Timer
To cancel timer standby mode temporarily Press the TIMER button on the remote control so that 0 or disappears on the display. T& restore the timer standby mode, press again to display ~ or Using the unit while the timer is set You can use the unit normally after setting the timer. -
Page 57: Ajuste Del.temporizador Para Dormir
AJUSTE DEL TEMPORIZADOR .— Para cancelar temporalmente el modo de espera temporizador Pulse el boton TIMER del control remoto para que @ o ~?c desapa rezca del visual izador. Para reponer el rnodo de espera del temporizador, pulse de nuevo el boton para visualizer 0 0 R~C. -
Page 58: Connecting Optional Equipment
1- . CONNECTING OPTIONAL EQUIPMENT + Refer to the operating instructions of the connected equipment for details. . The connecting cords are not supplied. Obtain the necessary connecting cords. Consult your local Aiwa dealer for adequate optional equipment. VIDEO/AUX JACKS This unit can input the sound signal through the jacks. -
Page 59: Conexion De Un Equipo Optional
UN E(IUIPO CONEXIOIN DE OPCIONAL -+ Consulte el manual de instrucciones del equipo conectado para tener mas detalles. Los cables de conexion no estan suministrados. Obtenga Ios cables de conexion necesarios. Consulte con su concesionario Aiwa local en cuanto al equipo optional adecua.do. -
Page 60: Care And Maintenance
..=” CARE AND MAINTENANCE Occasional care and maintenance of the unit and the software are needed to optimize the performance of your unit. To clean the cabinet Use a soft cloth lightly moistened with mild detergent solution. Do not use strong solvents, such as alcohol, benzine or thinner. To clean the heads and tape paths+ After every 10 hours of use, clean the heads and tape paths with a head cleaning cassette or cotton swab moistened with cleaning... -
Page 61: Cuidaidos Y Mantienimiento
CUIDADOS Y MANTENIMIENTO El mantenimiento y el cuidado ocasional de la unidad y del software resultan necesarios para optimizar Ias prestaciones de su unidad. Para Iimpiar la caja Utilice un patio blando humedecido un poco en una solution de detergence suave No utilice nunca disolventes fuertes tales como alcohol, bencinas diluyente. -
Page 62: Specifications
SPECIFICATIONS Main unit CX-NV50/CX-NV51 G/CX-NV52/CX-NV54 FM tuner section Tuning range 87.5 MHz to 108 MHz Usable sensitivity(lHF) 13.2 dBf Antenna terminals 75 ohms (unbalanced) AM tuner section Tuning range 530 kHz to 1710 kHz (10 kHz step) 531 kHz to 1602 kHz (9 kHz step) Usable sensitivity 350 pV/m Antenna... -
Page 63: Especificaiciones
ESPECJFIICACIONES Unidad principal CX-NV50/CX-NV51 G/CX-NV52/CX-NV54 Seccion del sintonizador de FM Gama de sintoni:zacion 87,5 MHz a 108 MHz Sensibilidad util (IHF) 13,2 dBf Terminals de antena 75 ohmios (desequilibrada) Seccion del sintonizador de AM Gama de sintoni:zacion 530 kHz a 1710 kHz (pasos de 10 kHz) 531 kHz a 1602 kHz (pasos de 9 kHz) - Page 64 SPECIFICATIONS SPEAKER SYSTEM SX-FNV50/SX-FNV54 Cabinet type way, bass reflex with surround speaker (Magnetism sealed type) Speaker WOOfer: 140 mm type Tweeter: type Super tweeter: ceramic type Surround speakec 80 mm (31/tin.) cone type Impedance Front speaker: 6 ohms Surround speakec Output sound pressure level dBIW/m Dimensions...
- Page 65 ESPECIFICACIOIVES SISTEMA DE ALTAVOCES SX-FNV50/SX-FNV54 Tipo de caja vtas, reflejo altavoz de sonido ambiental (tipo hermetico al magnetism) Altavoces Altavoz para graves: 140 mm, tipo Altavoz para agudos: 80 mm, tipo conico Superaltavoz 50 mm, tipo ceramico Altavoz de sonido ambiental: 80 mm, tipo conico Impedancia Altavoces delanteros: 6 ohmios...
-
Page 67: Guia Piara La Solujcion De Averias
Si la unidad no funciona como se describe instrucciones, compruebe la gu(a siguiente: GENERALIDADES No hay sonido. LEsta bien conectado el cable de alimentacion de CA? LHay alguna conexion mal hecha? (+ pagina 9) LHay un corfocircuito en Ios terminals del altavoz? + Desconecte el cable de alimentacion de CA, Iuego corrija Ias conexiones del altavoz. -
Page 68: Parts Index
PARTS INDEX General parts description are given on the pages shown below. -
Page 69: Indice De Las Partes
INDICE DE LAS PARTES descripci&r general de Ias partes nostradas abajo. ~P,$fREV MODE [DECK 2] RECIREC MUTE Deck 1 * ,* +,*,& ~$$~~ CD EDIT/CHECK ~!~l VOCAL FADER/MULTIPLEX -:,j.g:.; VI[)EOIAUX ,;. >.,> .,, , ~“;~$$~ = OF’EN/CLOSE %;~~i: DISC DIRECT PLAY FRONT SURROUND :“’:g~:: .m$’ti$~ =ECTRONIC... - Page 72 DOLBY NR Dolby noise reduction manufactured under license from Dolby Laboratories Licensing Corporation. “DOLBY” and the double-D symbol 00 are trademarks of Dolby Laboratories Licensing Corporation. Reduccion de ruido Dolby fabricado bajo Iicencia de Dolby Labo- ratories Licensing Corporation. DOLBY y el simbolo de la D doble Dtl son marcas de Dolby Laboratories Licensing Corporation.