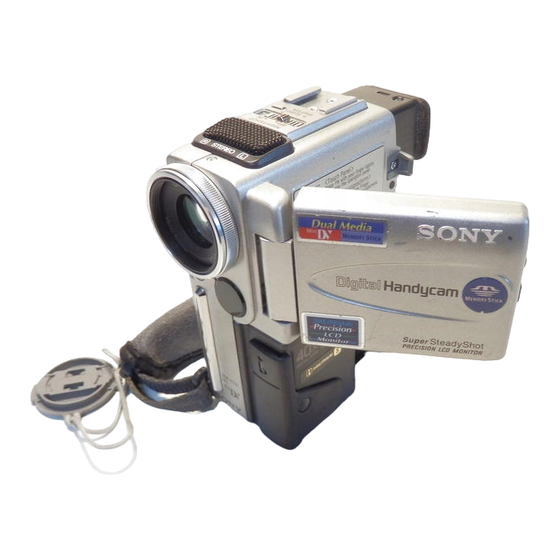
Sony Handycam DCR-PC3E Operating Instructions Manual
Digital video camera recorder
Hide thumbs
Also See for Handycam DCR-PC3E:
- Service manual (56 pages) ,
- Service manual (173 pages) ,
- Operating instructions manual (164 pages)
Table of Contents
Advertisement
Quick Links
3-866-966-52 (1)
Digital
Video Camera
Recorder
Operating Instructions
Before operating the unit, please read this manual thoroughly,
and retain it for future reference.
ИНСТРУКЦИЯ ПО ЭКСПЛУАТАЦИИ
Перед эксплуатацией аппарата внимательно
прочтите, пожалуйста, данное руководство
и сохраняйте его для дальнейших справок.
DCR-PC3E
©1999 by Sony Corporation
Advertisement
Table of Contents

Related Manuals for Sony Handycam DCR-PC3E


Summary of Contents for Sony Handycam DCR-PC3E
-
Page 1: Digital Video Camera
Recorder Operating Instructions Before operating the unit, please read this manual thoroughly, and retain it for future reference. ИНСТРУКЦИЯ ПО ЭКСПЛУАТАЦИИ Перед эксплуатацией аппарата внимательно прочтите, пожалуйста, данное руководство и сохраняйте его для дальнейших справок. DCR-PC3E ©1999 by Sony Corporation... -
Page 2: Memory Stick
English Welcome! Congratulations on your purchase of this Sony Digital Handycam camcorder. With your Digital Handycam you can capture life’s precious moments with superior picture and sound quality. Your Digital Handycam is loaded with advanced features, but at the same time it is very easy to use. -
Page 3: Table Of Contents
Usable cassettes ... 131 Troubleshooting ... 134 Self-diagnosis display ... 139 Warning indicators and messages ... 140 Using your camcorder abroad ... 150 Maintenance information and precautions ... 151 Specifications ... 157 Quick Reference Identifying the parts and controls ... 159 Quick Function Guide ... - Page 4 Русский Оглавление Проверка прилагаемых принадлежностей ... 5 Руководство по быстрому запуску ... 8 Подготовка к эксплуатации Использование данного руководства ... 10 Пункт 1 Подготовка источника питания ... 12 Зарядка батарейного блока ... 12 Установка батарейного блока ... 15 Подсоединение к сетевой розетке ... 16 Пункт...
-
Page 5: Checking Supplied Accessories
Checking supplied accessories Make sure that the following accessories are supplied with your camcorder. 1 RMT-811 Wireless Remote Commander (1) (p. 164) 2 AC-VF10 power adaptor (1), Mains lead (1) (p. 12) 3 NP-FS11 battery pack (1) (p. 12, 15) 4 R6 (Size AA) battery for Remote Commander (2) (p. -
Page 6: Quick Start Guide
English Quick Start Guide Connecting the mains lead Use the battery pack when using your camcorder outdoors (p. 15). AC adaptor (supplied) DK connecting cord (supplied) Inserting a cassette Slide OPEN/Z EJECT in the direction of the arrow and open the lid. - Page 7 POWER Press OPEN to open the LCD panel. NOTE Do not pick up your camcorder by holding the viewfinder, the LCD panel or the battery pack. (p. 20) Set the POWER switch to CAMERA while pressing the small green button.
-
Page 8: Руководство По Быстрому Запуску
Русский Руководство по быстрому запуску Подсоединение провода электропитания При пользовании видеокамерой вне помещения используйте батарейный блок (стр. 15). Адаптер переменного тока (прилагается) Соединительная пластина Соединительный шнур DK (прилагается) Установка кассеты Передвиньте переключатель OPEN/Z EJECT в направлении стрелки и откройте крышку. В... - Page 9 Запись изображения Снимите крышку объектива. Видоискатель Когда панель ЖКД закрыта, вытащите видоискатель так, чтобы он защелкнулся. Используйте видоискатель, прислонив Ваш глаз к окуляру. Установите переключатель START/STOP MODE в положение START/STOP MODE ANTI GROUND SHOOTING Контроль воспроизводимого изображения на экране ЖКД Установите...
-
Page 10: Getting Started
Note on Cassette Memory Your camcorder is based on the DV format. You can only use mini DV cassettes with your camcorder. We recommend that you use a tape... -
Page 11: Precautions On Camcorder Care
60°C (140°F), such as in a car parked in the sun or under direct sunlight [b]. •Do not place your camcorder so as to point the viewfinder or the LCD screen toward the sun. The inside of the viewfinder or LCD screen may be damaged [c]. -
Page 12: Step 1 Preparing The Power Supply
Use the battery pack after charging it for your camcorder. Your camcorder operates only with the “InfoLITHIUM” battery pack (S series). “InfoLITHIUM” is a trademark of Sony Corporation. (1) Connect the mains lead to the AC adaptor. (2) Align the hooks of the battery pack with the AC adaptor. - Page 13 * Approximate continuous recording time at 25°C (77°F). The battery life will be shorter if you use your camcorder in a cold environment. ** Approximate number of minutes when recording while you repeat recording start/ stop, zooming and turning the power on/off.
- Page 14 This unit is compatible with the “InfoLITHIUM” battery pack (S series). Your camcorder operates only with the “InfoLITHIUM” battery. “InfoLITHIUM” S series battery packs have the mark. “InfoLITHIUM” is a trademark of Sony Corporation. Пункт 1 Подготовка источника питания Для снятия батарейного блока...
-
Page 15: Installing The Battery Pack
Step 1 Preparing the power supply Installing the battery pack Install the battery pack to use your camcorder outdoors. (1) While sliding BATT RELEASE in the direction of the arrow 1, slide the battery terminal cover in the direction of the arrow 2. -
Page 16: Connecting To The Mains
Note Keep the AC adaptor away from your camcorder if the picture is disturbed. Using a car battery Use Sony DC Adaptor/Charger (not supplied). Пункт 1 Подготовка источника питания Подсоединение к сетевой розетке Если Вы собираетесь использовать видеокамеру длительное время, рекомендуется... -
Page 17: Step 2 Inserting A Cassette
When you use mini DV cassette with cassette memory Read the instruction about cassette memory to use this function properly (p. 131). To prevent misoperation of your camcorder Set the POWER switch to OFF when you insert and eject a cassette. To prevent accidental erasure Slide the write-protect tab on the cassette to expose the red mark. -
Page 18: Step 3 Using A Touch Panel
Step 3 Using a touch panel Your camcorder has operation buttons on the LCD screen. Touch the LCD panel directly to operate each function. In the recording/playback mode (1) Prepare the power supply (p. 12). (2) Set the POWER switch to CAMERA (in the recording mode)/VTR (in the playback mode) while pressing the small green button. - Page 19 •If FN is not on the LCD screen, touch the LCD screen lightly to make it appear. You can control the display with DISPLAY/TOUCH PANEL on your camcorder. •When operation buttons do not work even if you press them, an adjustment is required (CALIBRATION) (p.
-
Page 20: Recording - Basics
(4) Set the POWER switch to CAMERA while pressing the small green button. The power lamp under the POWER switch flashes, and then your camcorder is set to the standby mode. (It takes about five seconds.) (5) Press START/STOP. Your camcorder starts recording. - Page 21 LCD panel is closed. Note on Recording mode Your camcorder records and plays back in the SP (standard play) mode and in the LP (long play) mode. Select SP or LP in the menu settings (p.
-
Page 22: Adjusting The Viewfinder
LCD screen (Mirror mode). When closing the LCD panel, set it vertically until it clicks, and swing it into the camcorder body. Note Shooting with the LCD screen makes battery life shorter than using the viewfinder. -
Page 23: Adjusting The Brightness Of The Lcd Screen
Recording a picture Adjusting the brightness of the LCD screen (1) In the standby/recording mode, press FN and select PAGE2 (p. 18). (2) Press LCD BRT. The screen to adjust the brightness of the LCD screen appears. (3) Adjust the brightness of the LCD screen using –/+. -
Page 24: Using The Zoom Feature
Recording a picture Indicators in the mirror mode The STBY indicator appears as Xz and REC as z. Some of the other indicators appear mirror- reversed and others are not displayed. When you press FN does not appear on the LCD screen or in the viewfinder. -
Page 25: Start/Stop Mode Setting
Recording starts when you press START/ STOP, and stops when you press it again (default setting). ANTI GROUND SHOOTING Your camcorder records only while you press START/STOP. Use this mode to avoid recording unnecessary scenes. 5SEC: When you press use this mode to START/ STOP, your camcorder records for 5 seconds and then stops automatically. - Page 26 Recording a picture Indicators displayed in the recording mode The indicators are not recorded on tape. Cassette memory indicator/Индикатор кассетной памяти This appears when using a tape with cassette memory. / Этот индикатор появляется при использовании кассетной памяти. Recording mode indicator / Индикатор режима записи STBY/REC indicator / Индикатор...
-
Page 27: Shooting Backlit Subjects (Back Light)
While your camcorder is in the standby mode, slide NIGHTSHOT to ON. and “NIGHTSHOT” indicators flash on the LCD screen or in the viewfinder. To cancel the NightShot function, slide NIGHTSHOT to OFF. - Page 28 Notes •Do not use the NightShot function in bright places (ex. outdoors in the daytime). This may cause your camcorder to malfunction. •When you keep NIGHTSHOT set to ON in normal recording, the picture may be recorded in incorrect or unnatural colours.
-
Page 29: End Search
Recording a picture The +SLOW SHUTTER button does not work: – while the fader function is set or in use – while the digital effect function is in use – when NIGHTSHOT is set to OFF – in the MEMORY mode NightShot Light NightShot Light rays are infrared and so are invisible. -
Page 30: Playback - Basics
You can monitor the playback picture on the LCD screen. You can control playback using the Remote Commander supplied with your camcorder. (1) Install the power source and insert the recorded tape. (2) Press OPEN to open the LCD panel. - Page 31 Playing back a tape When monitoring on the LCD screen You can turn the LCD panel over and move it back to the camcorder body with the LCD screen facing out. If you leave the power on for a long time Your camcorder gets warm.
- Page 32 Playing back a tape To control the display of the screen indicators Press DISPLAY/TOUCH PANEL on your camcorder or DISPLAY on the Remote Commander supplied with your camcorder. The indicators disappear on the LCD screen. To make the indicators appear, press DISPLAY/ TOUCH PANEL again.
-
Page 33: Various Playback Modes
•The tape was recorded by a camcorder without the date and time set. Data code When you connect your camcorder to the TV, the data code also appears on the TV screen (p. 35). Various playback modes To operate video control buttons, set the POWER switch to VTR. - Page 34 Press END SEARCH in the stop mode. The last 5 seconds of the recorded section plays back and stops. Control buttons Marks on your camcorder are different from those on the Remote Commander supplied with your camcorder. Your camcorder Remote Commander : N, X, m, M In the various playback modes Sound is muted.
-
Page 35: Viewing The Recording On Tv
Viewing the recording on TV Connect your camcorder to your TV or VCR with the A/V connecting cable supplied with your camcorder to watch the playback picture on the TV screen. You can operate the playback control buttons in the same way as when you monitor playback pictures on the LCD screen. -
Page 36: Viewing The Recording On Tv
(video) plug of the A/V connecting cable. Connect the S video cable (not supplied) to the S video jacks on both your camcorder and the TV or the VCR. This connection produces higher quality DV format pictures. -
Page 37: Advanced Recording Operations
765 pictures in the LP mode on a 60- minute tape. Besides the operation described here, your camcorder can record still pictures on “Memory Stick”s (p. 107). (1) Set the POWER switch to CAMERA. (2) In the standby mode, keep pressing PHOTO lightly until a still picture appears. - Page 38 To use the photo recording function using the Remote Commander Press PHOTO on the Remote Commander. Your camcorder records a picture on the LCD screen or in the viewfinder immediately. To use the photo recording function during normal CAMERA recording Press PHOTO deeper.
-
Page 39: Printing The Still Picture
You can print a still picture by using the video printer (not supplied). Connect the video printer using the A/V connecting cable supplied with your camcorder. Connect it to the AUDIO/VIDEO jack and connect the yellow plug of the cable to the video input of the video printer. -
Page 40: Using The Wide Mode
DIG EFFT and the bounce function with FADER. During recording You cannot select or cancel the wide mode. When you cancel the wide mode, set your camcorder to the standby mode and then set 16:9WIDE to OFF. Использование широкоэкранного режима... -
Page 41: Using The Fader Function
Using the fader function You can fade in or out to give your recording a professional appearance. NORMAL FADER M.FADER (mosaic) / (мозаика) BOUNCE* (Fade in only) / (Только введение изображения) OVERLAP (Fade in only) / (Только введение изображения) MONOTONE When fading in, the picture gradually changes from black-and-white to colour. - Page 42 FADER To cancel the fader function After the fade in/out is carried out : Your camcorder automatically returns to the normal mode. Before the fade in/out is carried out : Before pressing START/STOP, press to PAGE1/PAGE2, and press EXIT to return to Использование...
- Page 43 – NightShot +Slow shutter – Photo recording When the OVERLAP indicator appears Your camcorder automatically stores the image recorded on a tape. As the image is being stored, the OVERLAP indicator flashes fast, and the playback picture is displayed.
-
Page 44: Using Special Effects - Picture Effect
While using the picture effect function You cannot select the old movie mode with DIG EFFT. When you turn the power off Your camcorder automatically returns to the normal mode. If you select the picture effect mode in the recording mode Pictures processed by the picture effect function Использование... -
Page 45: Using Special Effects - Digital Effect
OLD MOVIE You can add an old movie type atmosphere to pictures. Your camcorder automatically sets the wide mode to ON and picture effect to SEPIA. Still picture / Неподвижное... - Page 46 Using special effects – Digital effect (1) In the standby mode, press FN to display PAGE1 (p. 18). (2) Press DIG EFFT. The screen to select a desired digital effect mode. (3) Select a desired digital effect mode. (4) Press –/+ to adjust the effect. Items to adjust STILL The rate of the still picture you...
- Page 47 Using special effects – Digital effect Notes •The following functions do not work during digital effect: – Fader – Low lux mode of PROGRAM AE – Photo recording – NightShot +Slow shutter •The following function does not work in the slow shutter mode: –...
-
Page 48: Adjusting The White Balance Manually
Adjusting the white balance manually You can manually adjust and set the white balance. This adjustment makes white subjects look white and allows more natural colour balance. Normally white balance is automatically adjusted. (1) In the standby/recording mode, press FN to display PAGE1 (p. - Page 49 Your camcorder may not adjust the white balance correctly in the n indoor mode. In the automatic white balance mode Point your camcorder at white subject for about 10 seconds after setting the POWER switch to CAMERA to get better adjustment when: •You detach the battery for replacement.
-
Page 50: Using The Program Ae Function
Landscape mode This mode is for when you are recording distant subjects such as mountains and prevents your camcorder from focusing on glass or metal mesh in windows when you are recording a subject behind glass or a screen. Low lux mode This mode makes subjects brighter in insufficient light. - Page 51 •In the spotlight, sports lesson and beach & ski modes, you cannot take close-ups. This is because your camcorder is set to focus only on subjects in the middle to far distance. •In the sunset & moon and landscape modes, your camcorder is set to focus only on distant subjects.
-
Page 52: Adjusting The Exposure Manually
When you adjust the exposure manually, the backlight function does not work. If you change the PROGRAM AE mode or slide NIGHTSHOT to ON Your camcorder automatically returns to the automatic exposure mode. Регулировка экспозиции вручную Вы можете отрегулировать и установить... -
Page 53: Focusing Manually
When you press FOCUS down to INFINITY. The lens focuses on and indicator appears. When you release FOCUS, your camcorder returns to the manual focus mode. Use this mode when your camcorder focuses on near objects even though you are trying to shoot a distant object. - Page 54 Focusing manually Not to make subjects out of focus when using zoom function Focus after forcusing at the “T” (telephoto) position. It will be harder to focus on when using digital zoom function. Shooting in relatively dark places or shooting fast-moving subjects in relatively bright places Shoot at the “W”...
-
Page 55: Advanced Playback Operations
•You cannot process externally input scenes using the picture effect function. •To record pictures that you have processed using the picture effect function, record the pictures on the VCR using your camcorder as a player. Pictures processed by the picture effect function Pictures processed by the picture effect function are not output through the DV IN/OUT jack. -
Page 56: Playing Back A Tape With Digital Effects
•To record pictures that you have processed using the digital effect, record the pictures on the VCR using your camcorder as a player. Pictures processed by the digital effect function Pictures processed by the digital effect function are not output through the DV IN/OUT jack. -
Page 57: Quickly Locating A Scene Using The Zero Set Memory Function
Quickly locating a scene using the zero set memory function Your camcorder goes forward or backward to automatically stop at a desired scene having a tape counter value of “0:00:00”. You can do this with the Remote Commander. Use this function, for example, to view a desired scene later on during playback. -
Page 58: Searching A Recording By Date - Date Search
PHOTO SEARCH t PHOTO SCAN t no indicator (5) Press . or > on the Remote Commander to select the date for playback. Your camcorder automatically starts playback at the beginning of the selected date. DATE SEARCH 5 / 9 / 99... -
Page 59: Searching For The Date Without Using Cassette Memory
Your camcorder automatically starts playback at the point where the date changes. Each time you press . or >, your camcorder searches for the previous or next date. To stop searching Press x on the Remote Commander or on your camcorder. -
Page 60: Searching The Boundaries Of Recorded Tape By Title - Title Search
PHOTO SEARCH t PHOTO SCAN t no indicator (5) Press . or > on the Remote Commander to select the title for playback. Your camcorder automatically starts playback of the scene having the title that you selected. TITLE SEARCH HELLO! -
Page 61: Searching For A Photo - Photo Search/Photo Scan
(5) Press . or > on the Remote Commander to select the date for playback. Your camcorder automatically starts playback of the photo having the date that you selected. PHOTO SEARCH 5 / 9 / 99 1 7 : 30... -
Page 62: Searching For A Photo Without Using Cassette Memory
(5) Press . or > on the Remote Commander to select the photo for playback. Each time you press . or >, your camcorder searches for the previous or next photo. Your camcorder automatically starts playback of the photo. -
Page 63: Scanning Photo
Each photo is played back for about 5 seconds automatically. SEARCH MODE To stop scanning Press x on the Remote Commander or on your camcorder. Поиск фото – Фотопоиск/ Фотосканирование Сканирование фото (1) Установите переключатель POWER в положение VTR. (2) Нажимайте повторно кнопку SEARCH MODE на... -
Page 64: Editing
: Signal flow / Передача сигнала When you have finished dubbing a tape Press x on both your camcorder and the VCR. When you dub a tape Turn off indicators displayed on the LCD screen by pressing following buttons. Otherwise, those indicators will be also recorded. - Page 65 (video) plug of the A/V connecting cable. Connect an S video cable (not supplied) to the S video jacks of both your camcorder and the VCR. This connection produces higher quality DV format pictures. Using the i.LINK cable (DV connecting...
-
Page 66: Editing Partially On A Dv Tape - Dv Synchro-Editing
DV product. (2) Connect your camcorder to the DV product with an i.LINK cable (DV connecting cable). (3) Set the POWER switch on your camcorder to VTR. (4) Set the input selector to DV input on the DV product. - Page 67 DV product automatically set to pause mode. 8,10 Notes •If you use other than Sony equipment with the DV jack, you cannot perform DV synchro- editing. •If a tape has a blank portion between recorded portions, DV synchro-editing may not work correctly.
-
Page 68: Recording Video Or Tv Programmes
When you have finished dubbing a tape Press x on both your camcorder and the VCR. Using the Remote Commander In the step 6 above, press z REC and the button on its right simultaneously, then immediately press X. - Page 69 (video) plug of the A/V connecting cable. Connect an S video cable (not supplied) to the S video jacks of both your camcorder and the VCR. This connection produces higher quality DV format pictures. Запись видео или телевизионных...
- Page 70 When you have finished dubbing a tape Press x on both your camcorder and the VCR. Using the Remote Commander In the step 6 press z REC and the button on its right simultaneously, then immediately press X.
- Page 71 When you dub a picture in digital form The colour of the display may be uneven. However this does not affect the dubbed picture. You can also use your camcorder as a player You can use your camcorder as a player or recorder without changing the connection.
-
Page 72: Inserting A Scene From A Vcr
Inserting a scene from a VCR Replacing recording on a tape – Insert Editing You can insert a new scene from a VCR onto your originally recorded tape by specifying the insert start and end points. Use the Remote Commander for this operation. Connections are the same as on page 64 or 65. - Page 73 [a], then press X to set the VCR to the playback pause mode. (3) On your camcorder, locate the insert end point [c] by pressing m or M. Then press X to set it to the playback pause mode.
- Page 74 If you insert scenes on the tape recorded with other camcorder (including other DCR-PC3E) The picture and sound may be distorted. We recommend that you insert scenes on a tape recorded with your camcorder.
-
Page 75: Audio Dubbing
Audio dubbing You can record an audio sound to add to the original sound on a tape by connecting audio equipment or a microphone. If you connect the audio equipment, you can add sound to your recorded tape by specifying starting and ending points. -
Page 76: Dubbing With The Audio/Video Jack
Audio dubbing Dubbing with the AUDIO/VIDEO jack AUDIO/ VIDEO : Signal flow / Передача сигнала Note The picture is not output from the AUDIO/ VIDEO jack. Check the recorded picture on the LCD screen or in the viewfinder, as well as check the recorded sound by using a speaker or headphones. -
Page 77: Adding An Audio Sound On A Recorded Tape
The new sound is recorded in stereo 2 (ST2) during playback. During recording new sound, the red appears on the LCD screen. (6) Press x on your camcorder or on the Remote Commander at the point where you want to stop recording. AUDIO DUB... - Page 78 If you add new sound on a tape recorded with another camcorder (including other DCR-PC3E), the sound quality may become worse. To add new sound more precisely Press ZERO SET MEMORY at the point where you want to stop recording later in the playback mode.
-
Page 79: Superimposing A Title
Superimposing a title If you use a tape with cassette memory, you can superimpose the title while recording or after recording. When you play back the tape, the title is displayed for five seconds from the point where you superimposed it. You can select one of eight preset titles and two custom titles (p. - Page 80 If the tape has a blank portion in the middle of the recorded parts The title may not be displayed correctly. The titles superimposed with your camcorder •They are displayed by only the DV video equipment with index titler function.
-
Page 81: Erasing A Title
Superimposing a title Erasing a title (1) Set the POWER switch to VTR. (2) Press to FN to display PAGE1 (p. 18). (3) Press MENU to display the menu. (4) Select with r/R, and then EXEC. (5) Select TITLEERASE with r/R, and then EXEC. The screen to erase a title appears. -
Page 82: Making Your Own Titles
Making your own titles You can make up to two titles and store them in Cassette Memory. Each title can have up to 20 characters. (1) In the standby/playback/playback pause mode, press FN, and select PAGE2 (p. 18). (2) Press TITLE. (3) Select with r/R, and press EXEC. - Page 83 CAMERA again, then complete your title. We recommend setting the playback or playback pause mode or removing the cassette so that your camcorder does not automatically turn off while you are entering title characters. To erase the title Press C. The last character is erased.
-
Page 84: Labeling A Cassette
Labeling a cassette If you use a tape with cassette memory, you can label a cassette. The label can consist of up to 10 characters and is stored in cassette memory. When you insert the labeled cassette and set the POWER switch to VTR, the label is displayed for about 5 seconds. - Page 85 Labeling a cassette To return to FN Press EXIT. To erase a character Select C in step 6. The last character is erased. To change the label you have made Insert the cassette to change the label, and operate in the same way to make a new label. If you set the write-protect tab of the tape to lock You cannot label the tape.
-
Page 86: Customizing Your Camcorder
Changing the menu settings To change the mode settings in the menu settings, select the menu items with r/R dial. The default settings can be partially changed. First, select the icon, then the menu item and then the mode. (1) In the standby, VTR or MEMORY mode, press FN to display PAGE1 (p. -
Page 87: Selecting The Mode Setting Of Each Item
To cancel the SteadyShot function. Natural pictures are produced when shooting a stationary object with a tripod. To use the NightShot Light function (p. 28) To cancel the NightShot Light function appears. Your camcorder prevents excessive compensation for POWER switch CAMERA MEMORY... - Page 88 To adjust the balance between the stereo 1 and stereo 2 (p. 77) To playback a tape recorded on your camcorder on a PAL system TV To playback a tape recorder in the NTSC colour system on a TV with the NTSC 4.43 mode...
- Page 89 Changing the menu settings Icon/item Mode CONTINUOUS z OFF MULTI SCRN QUALITY z FINE STANDARD FLD./FRAME z FIELD FRAME SLIDE SHOW DELETE ALL FORMAT PHOTO SAVE CM SEARCH z ON TITLEERASE TITLE DSPL z ON TAPE TITLE ERASE ALL Meaning Not to record continuously To record 3 or 4 pictures continuously (p.
- Page 90 When you play back the tape on other camcorders or VCRs, noise may occur in pictures or sound. •When you record in the LP mode, we recommend using a Sony Excellence/Master mini DV cassette so that you can get the most out of your camcorder. Noise may occur in pictures and sound when you record image on other than a Sony Excellence/Master mini DV cassette.
- Page 91 If you press DISPLAY/TOUCH PANEL with “DISPLAY” set to “V-OUT/LCD” in the menu settings, the picture from a TV or VCR will not appear on the LCD screen even when your camcorder is connected to outputs on the TV or VCR.
- Page 92 Изменение установок меню Русский Выбор установок режима по каждому пункту Пункты меню отличаются в зависимости от положения переключателя POWER. Экран ЖКД показывает только те пункты, которыми Вы можете управлять на данный момент. Пиктограмма/пункт Режим PROGRAM AE P EFFECT WHT BAL z ON AUTO SHTR D ZOOM...
- Page 93 Изменение установок меню Пиктограмма/пункт Режим HiFi SOUND z STEREO AUDIO MIX NTSC PB z ON PAL TV NTSC 4.43 LCD B. L. z BRT NORMAL BRIGHT LCD COLOUR VF BRIGHT Прримечание к NTSC PB Когда Вы воспроизводите ленту на мультисистемном телевизоре выберите наилучший режим, просматривая...
- Page 94 Изменение установок меню Пиктограмма/пункт Режим z OFF CONTINUOUS MULTI SCRN QUALITY z FINE STANDARD FLD./FRAME z FIELD FRAME SLIDE SHOW DELETE ALL FORMAT PHOTO SAVE CM SEARCH z ON TITLEERASE z ON TITLE DSPL TAPE TITLE ERASE ALL Предназначение Чтобы не выполнять запись непрерывно Для...
- Page 95 воспроизводить ленту на Вашей же видеокамере. При воспроизведении ленты на других видеокамерах или КВМ, изображение и звук могут быть с помехами. • При выполнении записи в режиме LP рекомендуется использовать кассеты Sony Excellence/ Master mini DV, так чтобы получить максимальную отдачу от Вашей видеокамеры. Помехи...
- Page 96 Изменение установок меню Пиктограмма/пункт Режим CLOCK SET z ON DEMO MODE WORLD TIME z MELODY BEEP NORMAL z ON COMMANDER z LCD DISPLAY V-OUT/LCD z ON REC LAMP DV EDITING Примечания по режиму DEMO MODE • Вы не можете выбрать команду DEMO MODE, если кассета вставлена в Вашу видеокамеру. •...
-
Page 97: Resetting The Date And Time
Australia and New Zealand models, to Tokyo time for the models sold in Japan, and to Hong Kong time for other models. If you do not use your camcorder for about three months, the date and time settings may be released (bars may appear) because the vanadium-lithium battery installed in your camcorder will have been discharged. - Page 98 “– –:– –:– –” is recorded on the data code of the tape and the “Memory Stick”. Note on the time indicator The internal clock of your camcorder operates on a 24-hour cycle. Переустановка даты и времени Год изменяется следующим образом: 1999 ˜...
-
Page 99: Memory Stick" Operations
Serial port adaptor for “Memory Stick” supplied with your camcorder or MSAC-PC1 PC card adaptor for “Memory Stick” (not supplied). Using a “Memory Stick” When you use a “Memory Stick”... - Page 100 “Memory Stick” on your camcorder following the steps on page 106. Note that all images on the “Memory Stick” will be deleted if you format it. “Memory Stick” is a trademark of Sony Corporation. Использование “Memory Stick” –Введение Типичное имя файла данных изображения...
- Page 101 Slide MEMORY RELEASE in the direction of the arrow. When the ACCESS lamp is lit or flashing Never shake or strike your camcorder. Do not turn the power off , eject a “Memory Stick” or remove the battery pack. Otherwise, the image data breakdown may occur.
-
Page 102: Using A Touch Panel
Using a “Memory Stick” –introduction Using a touch panel Your camcorder has operation buttons on the LCD screen. Press the LCD panel directly to operate each function. (1) Set the POWER switch to MEMORY while pressing the small green button. Make sure that the LOCK is set to the right (unlock) position. - Page 103 •If FN is not on the LCD screen, touch the LCD screen lightly to make it appear. You can control the display with DISPLAY/TOUCH PANEL on your camcorder. •When operation buttons do not work even if you press them, an adjustment (CALIBRATION) is required (p.
-
Page 104: Selecting Image Quality Mode
Using a “Memory Stick” –introduction Selecting image quality mode You can select image quality mode in still picture recording. If you do not make any selection, the unit automatically records in FINE mode. (1) Set the POWER switch to MEMORY. Make sure that the LOCK is set to the right (unlock) position. - Page 105 Using a “Memory Stick” –introduction Differences in image quality mode Recorded images are compressed in JPEG format before being stored into memory. The memory capacity allotted to each image varies depending on the selected image quality mode. Details are shown in the table below. (The number of pixels is 640 480, regardless of image quality mode.
- Page 106 Sample images are stored in the supplied “Memory Stick”. Note that these sample images will be deleted if you format the “Memory Stick”. (1) Insert a “Memory Stick” into your camcorder. (2) Set the POWER switch to MEMORY while pressing the small green button. Make sure that the LOCK is set to the right (unlock) position.
-
Page 107: Recording Still Images On "Memory Stick"S - Memory Photo Recording
You can select the FIELD or FRAME mode in still picture recording. Your camcorder compensates for camera-shake when recording moving subjects in the FIELD mode. Your camcorder records still images in high quality in the FRAME mode. Select the FIELD or FRAME in the menu settings (p. -
Page 108: Recording Images Continuously
•When recording fast-moving subjects in the FRAME mode, the recorded image blurry. •When recording in the FRAME mode, your camcorder may not correct camera-shake. We recommend that you shoot objects with a tripod. When the POWER switch is set to MEMORY The following functions do not work: wide TV mode, digital effect, picture effect, title. - Page 109 Meaning (indicator on the screen) Your camcorder shoots one image at a time. (no indicator) Your camcorder shoots 3 or 4 still images at about 0.8 sec intervals. MULTI SCRN Your camcorder shoots 9 still images at about 0.3 sec intervals and displays the images on a single page divided into 9 boxes.
-
Page 110: Superimposing A Still Picture In A "Memory Stick" On A Moving Picture - Memory Mix
Superimposing a still picture in a “Memory Stick” on a moving picture – MEMORY MIX You can superimpose a still picture you have recorded on a “Memory Stick” on top of the moving picture you are recording. M. CHROM (Memory chromakey) You can swap a blue area of a still picture such as an illustration or a frame with a moving picture. - Page 111 “Memory Stick” on a moving picture – MEMORY MIX Before operation Insert a recorded “Memory Stick” on your camcorder. (1) Set the POWER switch to CAMERA while pressing the small green button. (2) In the standby mode, press FN to display PAGE1 (p.
- Page 112 – For C. CHROM: 4 images (such as a background) DSC00027~DSC00030 Sample images Sample images stored in the “Memory Stick” supplied with your camcorder are protected (p. 124). If you format the “Memory Stick” Sample images will be deleted. To record a still picture which is added no effect on a mini DV tape Press –/+ on the left corner to increase the bars to...
-
Page 113: Recording An Image From A Mini Dv Tape As A Still Image
Your camcorder can read moving picture data recorded on a mini DV tape and record it as a still image on a “Memory Stick”. Your camcorder can also take in moving picture data through the input connector and record it as a still image on a “Memory Stick”. -
Page 114: Recording An Image From A Mini Dv Tape As A Still Image
” appears on the LCD screen or in the viewfinder The inserted “Memory Stick” is incompartible with your camcorder because its format does not comform with your camcorder. Check the format of the “Memory Stick”. If you press PHOTO lightly in the playback mode Your camcorder stops momentarily. - Page 115 With this connection, you do not need to connect the yellow (video) plug of the A/V connecting cable. Connect an S video cable (not supplied) to the S (S1) video jacks of both your camcorder and the VCR/TV. This connection produces higher quality DV format pictures.
-
Page 116: Copying Still Images From A Mini Dv Tape - Photo Save
Before operation •Insert a recorded mini DV tape and rewind the tape. •Insert a “Memory Stick” into your camcorder. (1) Set the POWER switch to VTR while pressing the small green button. (2) Press FN to display PAGE1 (p. 18). - Page 117 “Memory Stick” and repeat the procedure from step 2. When the ACCESS lamp is lit or flashing Never shake or strike your camcorder. As well do not turn the power off, eject a “Memory Stick” or remove the battery pack. Otherwise, the image data breakdown may occur.
-
Page 118: Viewing A Still Picture - Memory Photo Playback
(2) Press PLAY to set the memory playback mode (p. 102). The last recorded image is displayed. (3) Press –/+ on your camcorder or the Remote Commander to select the desired still image. – : to see the previous image... -
Page 119: Viewing A Still Picture – Memory Photo Playback
Viewing a still picture – Memory photo playback To play back recorded images on a TV screen •Connect your camcorder to the TV with the A/V connecting cable supplied with your camcorder before the operation. •When operating memory photo playback on a TV or the LCD screen, the image quality may appear to have deteriorated. - Page 120 (1) Set the POWER switch to MEMORY. Make sure that the LOCK is set to the right (unlock) position. (2) Press INDEX on your camcorder or the Remote Commander to display the index screen. A red B mark appears above the image that is displayed before changing to the index screen mode.
- Page 121 – Memory photo playback Viewing the recorded images using a personal computer The image data recorded with your camcorder is compressed in the JPEG format. If you use the application software, “PictureGear 3.2Lite” supplied with your camcorder, you can see images recorded on a “Memory Stick”...
-
Page 122: Playing Back Images In A Continuous Loop - Slide Show
(3) Press MENU, then select SLIDE SHOW in in the menu settings (p. 86). And press EXEC. READY apppears on the LCD screen. (4) Press START. Your camcorder plays back the images recorded on a “Memory Stick” in sequence. SLIDE SHOW DSC00001 –... -
Page 123: Playing Back Images In A Continuous Loop – Slide Show
Playing back images in a continuous loop – SLIDE SHOW To view the recorded images on TV Connect your camcorder to a TV with the A/V connecting cable supplied with your camcorder before operation. If you change the “Memory Stick” during operation The slide show does not operate. -
Page 124: Preventing Accidental Erasure - Image Protection
Make sure that the LOCK is set to the right (unlock) position. (2) Press INDEX on your camcorder or the Remote Commander to display the index. (3) Press “- MARK.” The screen to protect the image appears. -
Page 125: Deleting Images
Deleting selected images on the single screen Before operation Insert a “Memory Stick” into your camcorder. (1) Set the POWER switch to MEMORY while pressing the small green button. Make sure that the LOCK is set to the right (unlock) position. -
Page 126: Deleting Selected Images On The Index Screen
Make sure that the LOCK is set to the right (unlock) position. (2) Press INDEX on your camcorder or the Remote Commander to display the index. (3) Press DEL. Then press the image you want to delete. -
Page 127: Deleting All The Images
You can delete all the unprotected images in a “Memory Stick”. Before operation Insert a “Memory Stick” into your camcorder. (1) Set the POWER switch to MEMORY while pressing the small green button. Make sure that the LOCK is set to the right (unlock) position. -
Page 128: Writing A Print Mark - Print Mark
Make sure that the LOCK is set to the right (unlock) position. (2) Press INDEX on your camcorder or the Remote Commander to display the index. (3) Press MARK. The screen to write a print mark appears. -
Page 129: Additional Information
(1) Pull out the viewfinder until it clicks, and then turn the LCD panel over and move it back to your camcorder body with the LCD screen facing out (p. 22). The same display as the LCD screen appears in the viewfinder. - Page 130 Using the viewfinder Notes •Do not touch the LCD screen with wet hands. •Do not press them with sharp objects such as pens. After a while disappears. Press the LCD screen to display again. When you press the two points on the LCD screen simultaneously does not move.
-
Page 131: Usable Cassettes
Tapes with cassette memory have Memory) mark. Sony recommends that you use a tape with mark to enjoy your camcorder fully. - Page 132 When you record You cannot record software on your camcorder that contains copyright control signals for copyright protection of software. “COPY INHIBIT”appears on the LCD screen, in the viewfinder or on the TV screen if you try to record such software.
- Page 133 Be sure to affix a label only on the locations as illustrated below [a] so as not to cause malfunction of your camcorder. After using the mini DV cassette Rewind the tape to the beginning, put the cassette in its case, and store it in an upright position.
-
Page 134: Troubleshooting
If you run into any problem using your camcorder, use the following table to troubleshoot the problem. If the problem persists, disconnect the power source and contact your Sony dealer. If “C:ss:ss” appears on the LCD screen or in the viewfinder, the self-diagnosis display function has worked. - Page 135 • The television’s video channel is not adjusted correctly. c Adjust it. (p. 35) • The video head may be dirty. c Clean the heads using the Sony DVM12CL cleaning cassette (not supplied). (p. 152) • The volume is turned to minimum.
- Page 136 Use a charged battery pack. (p. 12, 15) • Moisture condensation has occurred. c Remove the cassette and leave your camcorder for at least 1 hour to acclimatize. (p. 151) • The gold-plated connector of the tape is dirty or dusty.
- Page 137 Troubleshooting When operating using the “Memory Stick” Symptom The “Memory Stick” does not function. Recording does not function. The image cannot be deleted. You cannot format the “Memory Stick”. Deleting all the images cannot be carried out. You cannot protect the image. You cannot write a print mark on the still image.
- Page 138 • DISPLAY is set to V-OUT/LCD in the menu settings. c Set it to LCD. (p. 86) • Moisture condensation has occurred. c Remove the cassette and leave your camcorder for at least 1 hour to acclimatize. (p. 151) • Some troubles have occurred in your camcorder.
-
Page 139: Self-Diagnosis Display
Disconnect the power cord of the AC adaptor or remove the battery pack. After reconnecting the power source, operate your camcorder. • A malfunction that you cannot service has occurred. c Contact your Sony dealer and inform them of the 5-digit code. (example: E:61:10) C:21:00... -
Page 140: Warning Indicators And Messages
The indicators and messages are displayed in yellow. Warning indicators The video heads are dirty Slow flashing: •You need to clean the heads using the Sony DVM12CL cleaning cassette (not supplied) (p. 152). The battery is dead or nearly dead Slow flashing: •The battery is nearly dead. - Page 141 Warning indicators and messages Warning messages •CLOCK SET Reset the date and time (p. 97). •For “InfoLITHIUM” Use an “InfoLIHIUM” battery pack (p. 14). BATTERY ONLY • CLEANING CASSETTE The video heads are dirty (p. 152). • FULL The tape cassette memory is full. •...
-
Page 142: Поиск И Устранение Неисправностей
Если у Вас возникла какая-либо проблема при использовании видеокамеры, воспользуйтесь следующей таблицей для отыскания и устранения проблемы. Если проблема не устраняется, то следует отсоединить источник питания и обратиться в сервисный центр Sony. Если на экране ЖКД или в видоискателе появится индикация “С:ss:ss”, это значит, что сработала... - Page 143 Отрегулируйте его надлежащим образом. (стр. 35) • Возможно, загрязнены видеоголовки. c Почистите видеоголовки с помощью очистительной кассеты Sony DVM12CL (не прилагается). (стр. 152) • Громкость установлена на минимальную величину. c Повысьте громкость. (стр. 30) • Команда AUDIO MIX установлена в положение ST2 в...
- Page 144 Поиск и устранение неисправностей Возможная причина Не слышен новый звук, добавленный на записанную ленту. Не отображается титр. Звук приглушен или изображение не появляется во время просмотра изображения по телевизору. В режимах записи и воспроизведения. Возможная причина Не включается питание. Не работает функция поиска конца...
- Page 145 Поиск и устранение неисправностей При эксплуатации с “Memory Stick” Возможная причина Не функционирует “Memory Stick. ” Не функционирует запись. Не удаляется изображение. Вы не можете отформатировать “Memory Stick” . Не может быть выполнено удаление всех изображений. Вы не можете защитить изображение.
- Page 146 Установите селектор в положение входного сигнала DV. Если Вы используете другую видеокамеру DV, установите переключатель питания в положение VTR. • Видеокамера подсоединена к аппаратуре DV, не относящейся к изделиям фирмы Sony. c Выполните обычный монтаж. • Сделана попытка установки программы на незаписанную часть ленты.
-
Page 147: Индикация Самодиагностики
С:22:ss С:31:ss С:32:ss E:61:ss E:62:ss Если Вы не можете самостоятельно устранить неполадку даже после опробования соответствующих методов устранения несколько раз, обратитесь к Вашему дилеру Sony. Видоискатель (или экран ЖКД) Индикация самодиагностики • С:ss:ss Вы можете выполнить обслуживание Вашей видеокамеры самостоятельно. -
Page 148: Предупреждающие Индикаторы И Сообщения
См. страницу в круглых скобках “( )” для более подробной информации. Индикаторы и сообщения отображаются желтым цветом. Предупреждающие индикаторы Загрязнились видеоголовки Быстрое мигание: • Вам нужно почистить головки с помощью очистительной кассеты Sony DVM12CL (не прилагается). (стр.152). Батарейный блок разрядился или почти разрядился Медленное мигание: •... - Page 149 Предупреждающие индикаторы и сообщения Предупреждающие сообщения • CLOCK SET Повторно установите дату и время (стр. 97) • For “InfoLITHIUM” Используйте батарейный блок “InfoLITHIUM” (стр. 14) BATTERY ONLY • CLEANING CASSETTE Загрязнились видеоголовки. (стр. 152) • FULL Кассетная память память переполнена. •...
-
Page 150: Using Your Camcorder Abroad
Using your camcorder abroad Using your camcorder abroad You can use your camcorder in any country or area with the AC adaptor supplied with your camcorder within 100 V to 240 V AC, 50/60 Hz. Your camcorder is a PAL system based camcorder. -
Page 151: Maintenance Information And Precautions
How to prevent moisture condensation When you bring your camcorder from a cold place into a warm place, put your camcorder in a plastic bag and tightly seal it. Remove the bag when the air temperature inside the plastic bag has reached the surrounding temperature (after about 1 hour). -
Page 152: Maintenance Information And Precautions
LCD screen or in the viewfinder. If the above problem, [a] or [b] occurs, clean the video heads for 10 seconds with the Sony DVM12CL cleaning cassette (not supplied). Check the picture and if the above problem persists, repeat cleaning. - Page 153 Even if the vanadium-lithium battery is not charged, it will not affect the camcorder operation. To retain the date and time, etc., charge the battery if the battery is discharged.
- Page 154 •If any solid object or liquid get inside the casing, unplug your camcorder and have it checked by a Sony dealer before operating it any further. •Avoid rough handling or mechanical shock. Be particularly careful of the lens.
- Page 155 Maintenance information and precautions •If your camcorder is used in a cold place, a residual image may appear on the LCD screen. This is not a malfunction. •While using your camcorder, the back of the LCD screen may heat up. This is not a malfunction.
- Page 156 •If the liquid get into your eyes, wash your eyes with a lot of water and then consult a doctor. If any problem occurs, unplug your camcorder and contact your nearest Sony dealer. Информация по уходу за аппаратом и меры предосторожности...
-
Page 157: Specifications
English Specifications Video camera recorder System Video recording system 2 rotary heads Helical scanning system Audio recording system Rotary heads, PCM system Quantization: 12 bits (Fs 32 kHz, stereo 1, stereo 2), 16 bits (Fs 48 kHz, stereo) Video signal PAL colour, CCIR standards Usable cassette Mini DV cassette with the... -
Page 158: Технические Характеристики
Русский Технические характеристики Видеокамера Система Система видеозаписи 2 вращающиеся головки Система наклонной механической развертки Система аудиозаписи Вращающиеся головки, система ИКМ Дискретизация: 12 битов (Сдвиг частоты 32 кГц, стерео 1, стерео 2), 16 битов (Сдвиг частоты 48 кГц, стерео) Видеосигнал Цветовой сигнал PAL, стандарт МККР... -
Page 159: Quick Reference
6 LOCK (p. 16) 7 POWER switch (p. 20) 8 START/STOP button (p. 20) This mark indicates that this product is a genuine accessory for Sony video products. When purchasing Sony video products, Sony recommends that you purchase accessories with this “GENUINE VIDEO ACCESSORIES”... - Page 160 Your camcorder is equipped with a Carl Zeiss lens which can reproduce a fine image. The lens for your camcorder was developed jointly by Carl Zeiss, in Germany, and Sony Corporation. It adopts the MTF* measurement system for video camera and offers a quality as the Carl Zeiss lens.
- Page 161 Identifying the parts and controls qk DV IN/OUT jack (p. 65) This “i.LINK” mark is a trademark of Sony Corporation and indicates that this product is in agreement with IEEE 1394-1995 specifications and their revisions. The DV IN/OUT jack is i.LINK compatible.
- Page 162 MEMORY RELEASE lever (p. 101) e; RESET button (p. 138) ea i (headphones) jack When you use headphones, the speaker on your camcorder is silent. Обозначение частей и регуляторов wd Лампочка питания (стр. 7, 20) wf Переключатель STRAT/STOP (стр. 25) wg Кнопка...
- Page 163 Make sure that the length of the tripod screw is less than 6.5 mm (9/32 inch). Otherwise, you cannot attach the tripod securely and the screw may damage your camcorder. ra BATT (battery) RELEASE lever (p. 15) Обозначение частей и...
-
Page 164: Стр
Identifying the parts and controls Remote Commander The buttons that have the same name on the Remote Commander as on your camcorder function identically to the buttons on your camcorder. 1 PHOTO button (p. 37, 107) 2 DISPLAY button (p. 32) 3 Memory control buttons (p. - Page 165 VTR 2. Commander modes 1, 2 and 3 are used to distinguish your camcorder from other Sony VCRs to avoid remote control misoperation. If you use another Sony VCR in the Commander mode VTR 2, we recommend changing the commander mode or covering the sensor of the VCR with black paper.
-
Page 166: Operation Indicators
Identifying the parts and controls Operation indicators 1 Cassette memory indicator (p. 131) 2 Remaining battery time indicator (p. 26) 3 Zoom indicator (p. 24)/Exposure indicator (p. 52)/Data file name indicator (p. 99) 4 Digital effect indicator (p. 46)/MEMORY MIX indicator (p. 111) 5 FLD./FRAME indicator (p. - Page 167 Identifying the parts and controls qg NIGHTSHOT indicator (p. 27) qh Warning indicators (p. 140) qj Tape counter indicator (p. 26)/5SEC mode indicator (p. 25)/Time code indicator (p. 26)/Self-diagnosis indicator (p. 139)/ Photo mode indicator (p. 37)/Image number indicator (p. 131) qk Remaining tape indicator (p.
-
Page 168: Quick Function Guide
English Quick Function Guide Functions to adjust exposure (in the recording mode) •In a dark place •In insufficient light •In dark environments such as sunset, fireworks, or general night views •Shooting backlit subjects •In spotlight, such as at the theater or a formal event •In strong light or reflected light, such as at a beach in midsummer or on a ski slope Functions to give images more impact (in the recording mode) -
Page 169: Руководство По Быстрым Функциям
Русский Руководство по быстрым функциям Функции для регулировки экспозиции (в режиме записи) • В темном месте • При недостаточном освещении • В темных окружающих условиях, например, заход солнца, фейерверки или общие ночные виды • Съемка объектов с задней подсветкой • При прожекторном освещении, например, в театре или... -
Page 170: Index
English Index A, B AC adaptor ... 12 Adjusting viewfinder ... 22 ANTI GROUND SHOOTING ... 25 Audio dubbing ... 75 AUDIO MIX ... 77 Audio mode ... 90 AUTO SHTR ... 87 A/V connecting cable ... 35, 69, 76 BACK LIGHT ... -
Page 171: Алфавитный Указатель
Русский Алфавитный указатель А, Б, В, Г Адаптер последовательного порта ... 121 Аудиоперезапись ... 75 Аудиорежим ... 90 баланс белого ... 48 Батарейный блок ... 12 Батарейный блок “InfoLITHIUM” ... 14 Вариообъектив ... 24 Введение/выведение изображения ... 42 Внешний микрофон (не... - Page 172 Sony Corporation Printed in Japan...