Table of Contents
Advertisement
Advertisement
Table of Contents
Troubleshooting

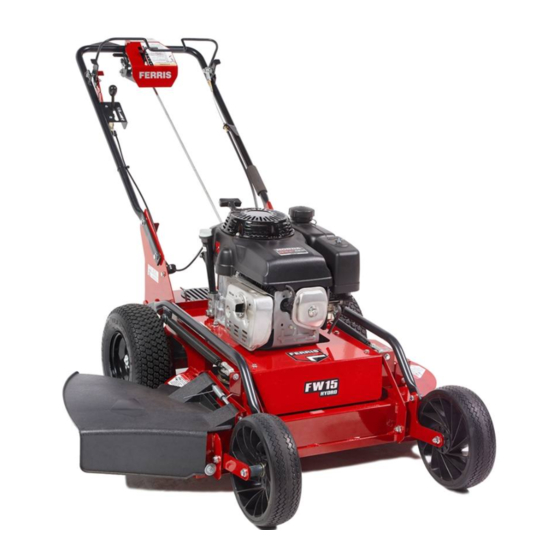
Related Manuals for Ferris FW15HON1032


Summary of Contents for Ferris FW15HON1032
-
Page 2: Table Of Contents
Table of Contents: Troubleshooting Common Cutting Problems....28 Specifications..............28 Products Covered by This Manual........3 Warranty................29 Identification Tag Location..........3 Warranty Statement............29 Operator Safety..............3 California Proposition 65..........3 Operating Safely...............3 Safety Rules and Information...........5 Safety Decals..............8 Safety Icons..............9 Safety Alert Symbol and Signal Words......10 Safety Interlock System..........10 Features and Controls............10 Control Locations &... -
Page 3: Products Covered By This Manual
Thank you for purchasing this quality-built Ferris Commercial Walk Behind Mower. We’re pleased that you’ve placed your confidence in the Ferris brand. When operated and maintained according to the manuals, your Ferris product will provide many years of dependable service. - Page 4 Be sure to completely read the Safety Rules and Information The safety alert triangle ( ) in text signifies important found on the following pages. Also completely read the cautions or warnings which must be followed. Operation section. Operating Safety Children Tragic accidents can occur with children.
-
Page 5: Safety Rules And Information
Thrown Objects Fuel and Maintenance Always disengage all drives, shutoff the engine and remove the key before doing any cleaning, refueling or servicing. Gasoline and its vapors are extremely flammable. Do not This unit has spinning mower blades. These blades can pick smoke while operating or refueling. - Page 6 • Never let children or untrained people operate or service • Never leave a running unit unattended. Always disengage the equipment. Local regulations may restrict the age of the PTO, set the parking brake, stop the engine, and the operator. remove keys before dismounting.
- Page 7 • Never allow children to operate the unit. Slope Operation • Use extra care when approaching blind corners, shrubs, trees, or other objects that may obscure vision. Slopes are a major factor related to loss-of-control and tip- over accidents, which can result in severe injury or death. All Emissions slopes require extra caution.
-
Page 8: Safety Decals
• Never over-fill the fuel tank. Replace gas cap and tighten or disconnecting from battery. Wear protective clothes securely. and use insulated tools. • Use extra care in handling gasoline and other fuels. They • Grass catcher components are subject to wear, damage, are flammable and vapors are explosive. -
Page 9: Safety Icons
C.) Part Number: 5061245 - Decal, Pinch Point D.) Part Number: 5103665 - Decal, Fire Hazard A.) Part Number: 84002376 - Decal, Main Safety Safety Icons B.) Part Number: 84002375 - Decal, Danger Discharge Callout Hazard Meaning Alert Read the manual Go across slopes, not up and down... -
Page 10: Safety Alert Symbol And Signal Words
Control Locations Callout Hazard Meaning Rollover hazard Fire hazard Amputation - hand in blade Amputation - foot in blade Thrown objects Pinch point Safety Alert Symbol and Signal Words The safety alert symbol ( ) is used to identify safety information about hazards that can result in personal injury. - Page 11 Throttle Control and Engine Shut Down Lever: The throttle Icon Control Name control and engine shut down lever controls the engine speed Maximum Forward Speed Control and shuts down the engine. Move the throttle forward to Lever increase the engine speed and back to decrease engine speed.
-
Page 12: Operation
Operation Before First Time Use Cut Height Adjustment Lever: The cut height adjustment lever (K, Figure 3) allows the operator to raise or lower the • Be sure to read all information in the Operator height of the cutting blades into eight different positions. Safety and Operation sections before attempting to The hole identified as "1"... -
Page 13: Checks Before Starting
Checks Before Starting 3. Move the throttle control and engine shut down lever to the OFF position. 1. Check that the engine crankcase is filled to the full 4. Move the fuel shut off valve to the OFF position. mark on the dipstick (A, Figure 9). See the engine operator's manual for engine oil fill instructions and oil Driving the Mower recommendations. -
Page 14: Cutting Height Adjustment
Cutting Height Adjustment 5. Move the throttle control and engine shut down lever to the OFF position to stop the engine. The cutting height of the mower is adjustable in eight (8) different positions as identified by the cut height decal Mowing Recommendations (Figure 11) on the unit. - Page 15 Don’t cover the grass surface with a heavy layer of clippings. Consider using a grass collection system and starting a compost pile. Where possible, make one or two passes around the outside of the area discharging the grass INTO the lawn to keep the cut grass off fences and walks.
-
Page 16: Pushing The Unit By Hand
Mulching Mulching consists of a mower deck which cuts and re-cuts clippings into tiny particles and which then blows them down INTO the lawn. These tiny particles decompose rapidly into by-products your lawn can use. UNDER PROPER CONDITIONS, your mulching mower will virtually eliminate noticeable clippings on the lawn surface. -
Page 17: Maintenance Schedule
safe place. Be sure the spark plug opening is protected 7. Start the engine and let it run slowly. DO NOT run at high from foreign objects with a suitable cover. speed immediately after starting. Be sure to run engine only outdoors or in well ventilated area. -
Page 18: Checking Tire Pressures
Checking Tire Pressures manufacturer's national service organization at the following numbers: Tire pressure should be checked periodically, and maintained at the levels shown in the Specifications chart. Note that American Honda: (800) 426-7701 these pressures may differ slightly from the "Max Inflation" stamped on the side-wall of the tires. -
Page 19: Servicing The Mower Blades
The mower is equipped with two (2) deck lift linkage bars (A, Figure 20) and they should be oiled at their mounting points. 2. Using a wrench, remove the bolt securing the blade to the spindle. Inspecting the Mower Blades DANGER Thrown objects hazard Avoid injury: a worn or damaged mower blade can break and a piece of the blade could be thrown into the operator's... - Page 20 Balancing the Mower Blades CAUTION Thrown objects hazard An unbalanced mower blade can create excessive vibration and damage the unit, or cause mower blade failure resulting in thrown debris. Be sure blade is balanced before installing. 1. Clean the mower blade to remove any dried grass or other debris.
-
Page 21: Adjusting The Height Of The Handle Bars
5. Check that the blades are installed so that the left blade (D, Figure 28) that is installed to the trim side spindle (C) is aligned perpendicular to the right blade (B) that is installed to the discharge side spindle (A). 6. -
Page 22: Operating The Front Caster Locks
1. Align the front tires so they are facing front to back. 2. Remove the upper handle bar bolts (B). 2. Remove the locking pin (A, Figure 30 ). 3. Move the handle bars up or down to the desired height. 3. -
Page 23: Neutral Adjustment
3. Start the engine and adjust the throttle control to the SLOW position. See Starting the Engine section for proper starting instructions. 4. Loosen the jam nuts (B) that are tightened against the ball joints (C). 5. Using a wrench, turn the double nut assembly (D) on the neutral linkage rod in whatever direction is necessary to slow the rotation of the tire. -
Page 24: Deck Lift Assist Springs
5. From underneath the handle bar observe the forward speed control mechanism (C) as an assistant sets the forward speed control lever in each numbered position and then presses the forward motion control lever down and forward. There are four (4) positions (labelled as D, E, F, and G in Figure 33) on the forward speed control mechanism that the forward motion lever stop (H) can press against. -
Page 25: Changing The Transaxle Drive Belt
10. Have an assistant release the blade engagement lever lockout and depress the blade engagement lever. This will pull the blade brake (K) away from the discharge side spindle pulley (L). 11. Remove the spindle drive belt from the trim side spindle sprocket (M) and then the discharge side spindle sprocket (N) and then remove the belt from the unit. -
Page 26: Adjusting The Differential Drive Chain
11. Install the transaxle fan guard using the two (2) screws. 12. Install the mower deck drive belt. See Changing the Mower Deck Drive Belts. Adjusting the Differential Drive Chain 1. Release the blade engagement lever to stop the blades and move the throttle control and engine shut down lever to the OFF position to stop the engine. -
Page 27: Troubleshooting Charts
repairs yourself. If you prefer, all of these procedures can be Problem: Engine runs but mower will not engage. performed for you by your local authorized dealer. Differential drive chain is broken. Replace Differential drive chain. Differential drive chain is out of Adjust chain. -
Page 28: Troubleshooting Common Cutting Problems
Problem: Mower deck drive belt slips or fails to drive. Problem: Stepped Cutting Cause Remedy Idler pulley spring broken or not Repair or replace as needed. properly attached. Mower drive belt is broken. Replace mower drive belt. Problem: Mower (blades) does not engage. Cause ... -
Page 29: Warranty
ENGINE available to the Authorized Service Dealer for inspection and testing. For complete engine specifications see the engine There is no other express warranty. Implied warranties, manufacturer's operator's manual included with your unit. including those of merchantability and fitness for a Fits models: 5901736 &... - Page 30 Briggs & Stratton products. ABOUT YOUR WARRANTY Warranty service is available only through Ferris Authorized Service Dealers. This warranty only covers defects in materials or workmanship. It does not cover damage caused by improper use or abuse, improper maintenance or repair, normal wear and tear, or stale or unapproved fuel.
- Page 31 Notes...