Table of Contents
Advertisement
Advertisement
Table of Contents
Troubleshooting

Related Manuals for Ferris FW35 Series


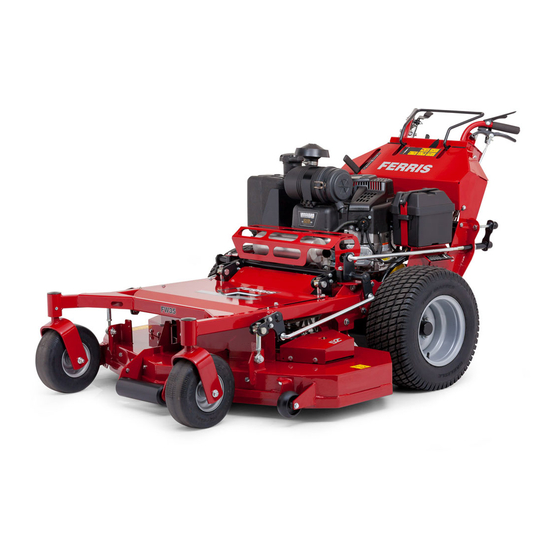
Summary of Contents for Ferris FW35 Series
-
Page 2: Table Of Contents
Transmission Drive Belt Replacement......31 Table of Contents: Parking Brake Adjustment..........32 Products Covered by This Manual........3 Battery Maintenance............33 Identification Tag Location...........3 Battery Service...............33 Product Identification Tag (Stamped).........3 Troubleshooting..............34 Operator Safety..............3 Troubleshooting Charts..........35 Operator Safety..............4 Troubleshooting Common Cutting Problems....36 Safety Decals..............9 Specifications..............37 Safety Alert Symbol and Signal Words......9 Warranty................38 Safety Icons..............9... -
Page 3: Products Covered By This Manual
Copyright © Briggs & Stratton Corporation, Milwaukee, WI, USA. All rights reserved. Ferris is a trademark of Briggs & Stratton Power Products Group, PRODUCT REFERENCE DATA Unit Model Number: Briggs & Stratton Power Products Group, LLC. -
Page 4: Operator Safety
Read the Manual Operator Safety WARNING U.S.A. Models: The engine exhaust from this product contains chemicals known to the State of California to cause cancer, birth defects, or other reproductive harm. WARNING Battery posts, terminals, and related accessories contain lead and lead compounds, chemicals known to the State The operator’s manual contains important safety information of California to cause cancer and birth defects or other you need to be aware of BEFORE you operate your unit as well... - Page 5 do not have adequate footing and unit traction (and control) can immediately if the system does not pass all the safety interlock cause you to lose control and possibly slip and fall or roll the system tests found in this manual. unit over.
- Page 6 • All operators and mechanics should be trained. The owner • Be aware of the mower discharge direction and do not point is responsible for training the users. it at anyone. Do not operate the mower without either the entire grass catcher or the deflector in place. •...
- Page 7 • Do not mow on wet grass. Reduced footing or traction could • OSHA regulations may require the use of hearing protection cause sliding. when exposed to sound levels greater than 85 dBA for an • Do not mow excessively steep slopes. 8 hour time period.
- Page 8 • Keep all hardware, especially blade attachment bolts, tight and keep all parts in good working condition. Replace all Safe Handling of Gasoline worn or damaged decals. • Never tamper with safety devices. Check their proper DANGER operation regularly. Fire and explosion hazard •...
-
Page 9: Safety Decals
pin holes or nozzles that eject hydraulic fluid under high pressure. Use paper or cardboard, and not hands, to search for leaks. Make sure all hydraulic fluid connections are tight and all hydraulic hoses and lines are in good condition before applying pressure to the system. -
Page 10: Safety Icons
Safety Icons Mower blades and mower drive belt should come to a complete stop within seven (7) seconds after electric PTO switch is turned OFF (or operator releases the operator presence handles). If the mower drive belt does not stop within seven (7) seconds, see your dealer. - Page 11 Operator Presence Handles: These handles are a major factor in the safety interlock system of the mower. Both handles are tied together so depressing one handle depresses both. The operator must depress the handles in order to activate the PTO (Power Take Off) switch.
- Page 12 parking brake must be released before moving the forward speed control lever out of the NEUTRAL position or the engine Choke: Close the choke for cold starting. Open the choke will stop. S/N: 2016973574 & Above: The forward speed control once the engine starts.
-
Page 13: Operation
mower deck cutting height crank: the cutting height adjustment Control Locations & Functions - Left Side of handle counter-clockwise. Mower Operation Before First-Time Use • Be sure to read all information in the Safety and Operation sections before attempting to operate this unit. •... -
Page 14: Checks Before Starting
a minute before engaging the PTO switch or driving the mower. Checks Before Starting 5. After warming the engine, ALWAYS operate the unit at FULL THROTTLE when mowing. In the event of an emergency the engine can be stopped by simply turning the ignition switch to STOP. Use this method only in emergency situations. -
Page 15: Driving The Mower
2. Once the unit is stopped, firmly depress the neutral return pedal (B) to place the transmission in neutral. 3. Disengage the PTO by pushing down on the PTO switch (C). 4. Engage the parking brake by pulling the parking brake lever To Move Backward (D) fully up and rearward towards the handle bars. -
Page 16: Cutting Height Adjustment
Cutting Height Adjustment Height of Grass Often cutting height is a matter of personal preference. Typically, The cutting height indicator (A, Figure 9) will help you identify you should mow the grass when it is between three and five the cutting height. inches high. - Page 17 Where possible, make one or two passes around the outside When and How Often to Mow of the area discharging the grass INTO the lawn to keep the cut The time of day and condition of the grass greatly affect the grass off fences and walks.
-
Page 18: Pushing The Unit By Hand
Mulching consists of a mower deck which cuts and re-cuts clippings into tiny particles and which then blows them down INTO the lawn. These tiny particles decompose rapidly into by-products your lawn can use. UNDER PROPER CONDITIONS, your mulching mower will virtually eliminate noticeable clippings on the lawn surface. -
Page 19: Maintenance Schedule
and have not drained the fuel system, follow all safety instructions and storage precautions in this manual to WARNING prevent the possibility of fire from the ignition of gasoline Never store the unit, with gasoline in engine or fuel tank, in a fumes. -
Page 20: Maintenance Procedures
Checking / Adding Fuel ENGINE MAINTENANCE Every 50 Hours Inspect / Clean spark arrester.** WARNING Fuel and its vapors are extremely flammable and Every 100 Hours explosive. Check fuel filter. Refer to engine owner's manual Fire or explosion can cause severve burns or death. Service air filter. -
Page 21: Engine Maintenance
Change Engine Oil & Filter CAUTION This series of mower has three different engine options: Briggs & Stratton Vanguard Series (A, Figure 15), Briggs & Stratton Do not disconnect or reconnect ECU wiring harness connector EFI Series (B), and Kawasaki FX Series (C). Please reference or any individual components with the ignition switch in the as the location of the components for this procedure may vary "ON"... -
Page 22: Lubrication
Lubrication This unit is equipped with twenty four (24) different grease fittings that must be lubricated on this unit. They must be lubricated at the intervals as specified in the Maintenance Chart . Grease fitting Location Qty of Fittings Forward Speed Control Lever Rod (A, Figure 17) Drive Lever Pivots (B) Grease-able Ball Joints (C) Forward Speed Indicator Pivot (A, Figure 18) -
Page 23: Lubricating The Front Casters
3. Remove the 1/4-28 grease fitting and re-install the 1/4-28 bolt. 4. Repeat process for the other side of the machine. Servicing the Mower Blades Removing the Mower Blades CAUTION Laceration hazard Mower blades are sharp. Always wear gloves when handling, or working near, mower blades. - Page 24 Inspecting the Mower Blades Sharpening the Mower Blades DANGER WARNING Thrown objects hazard Thrown objects and fire hazard Avoid injury: a worn or damaged mower blade can break and Grinding mower blades throws sparks and fine metal particles a piece of the blade could be thrown into the operator's area that are capable of igniting gasoline and gasoline vapors, and or bystander's area resulting in serious personal injury or that can injure unprotected eyes.
-
Page 25: Check / Fill Transmission Oil
COLD” mark (B). If the oil is below this level, proceed to step 2. 3. Check the balance of the mower blade. If either end of the mower blade moves downward is heavier than the other. Sharpen the heavy end until balance is achieved. See Sharpening the Mower Blades for sharpening instructions. -
Page 26: Neutral Adjustment & Tracking Adjustment
3. Apply a film of new oil to the gasket of the new replacement filter. After the oil has drained, thread the new filter onto the filter base until the gasket makes contact, then tighten 3/4 of a turn more. 4. -
Page 27: Drive Levers - Control Responsiveness Adjustment
If machine veers to the LEFT: 1. Loosen the jam nuts (A, Figure 30) that are tightened against the ball joints (B). 2. Turn the LEFT adjustment linkage rod 1/8 - 1/4 turn counter-clockwise. 3. Turn the RIGHT adjustment linkage rod 1/8 - 1/4 turn clockwise. -
Page 28: Drive Levers - Placement Adjustment
and record this measurement. This measurement should not be longer than 7-1/4" (18.4 cm). Limiting the Maximum Forward Speed 5. Tighten the wing nut against the black adjustment knob. The operator can control the maximum forward speed of the 6. Repeat this process for the other side of the unit. The unit. -
Page 29: Deck Lift Rods
5. Push the forward speed control lever forward (E) until the forward speed indicator is located in relation with the forward speed indicator icon that you identified as your preferred maximum forward speed. 6. Position the bolt so that it contacts the forward speed control lever and then tighten both jam nuts. -
Page 30: Mower Deck Drive Belt Replacement
3. Turn the hex adjusters (D) on the front deck linkages so 6. Install the drive belt (A, Figures 38 & 39) on the PTO pulley, that the measurements from the bottom edge of the mower the spindle pulleys (B), the front stationary idler pulley(s) deck to the ground equals 1"... -
Page 31: Transmission Drive Belt Replacement
the measurement as indicated in the chart. If the measurement does not equal the measurement as indicated in the chart, perform the Adjusting the Mower Belt Idler Tensioner Spring Length procedure. Adjusting the Mower Belt Idler Tensioner Spring Length 1. Loosen the jam nut (C, Figure 40) on the eye bolt (D). 2. -
Page 32: Parking Brake Adjustment
engine deck and secure using hardware previously Jam Nut removed. Spring Anchor Eyebolt 15. Reconnect the PTO clutch wire harness to the PTO clutch. Adjustment Nut 16. Using a new wire tie, secure the PTO clutch wire harness Spring in the same manner as it was previously installed, ensuring Transmission Drive Belt that it cannot contact the moving components. -
Page 33: Battery Maintenance
3. With the parking brake engaged, measure the compressed 6. Reinstall the battery box cover and rubber strap. spring length (B) of the parking brake springs. The parking brake springs should measure 1-3/4" (4.4 cm) when Battery Service compressed. If not, position the adjustment nut (C) until the compressed spring length measures 1-3/4"... -
Page 34: Troubleshooting
per hour. The battery is fully charged when the cells are 3. Wear safety glasses and shield eyes and face from batteries gassing freely at low charging rate and less than 0.003 at all times. Be sure vent caps are tight. Place damp cloth change in specific gravity occurs over a three hour period. -
Page 35: Troubleshooting Charts
This troubleshooting guide lists the most common problems, Problem: Excessive oil consumption. their causes and remedies. Cause Remedy Refer to Regular Maintenance for instructions on how to perform Engine running too hot. Clean engine fins, blower screen, and most of these minor adjustments and service repairs yourself. air cleaner. -
Page 36: Troubleshooting Common Cutting Problems
Problem: Engine stalls easily with mower deck engaged. Problem: Scalping Engine speed too slow. Set to full throttle. Ground speed to fast. Decrease ground speed. Cutting height set too low. Cut tall grass at maximum cutting height during first pass, and then at the desired cutting height for the second pass. -
Page 37: Specifications
J1995 test standard. The gross power curves and more Problem: Stingers information can be viewed at www.kawasaki-criticalpower.com. Blades are worn down too far. Replace your blades. Engine speed is too slow. Always mow at full throttle. *Power Ratings: The gross power rating for individual gasoline Ground speed is too fast. -
Page 38: Warranty
Warranty service is available only through including those of merchantability and fitness for a Ferris Authorized Service Dealers. Most warranty repairs are particular purpose, are limited to one year from purchase, handled routinely, but sometimes requests for warranty service or to the extent permitted by law . - Page 39 Improper Maintenance or Repair - This product must be maintained according to the procedures and schedules provided in the Operator's Manual, and serviced or repaired using genuine Briggs & Stratton parts or equivalent. Damage caused by lack of maintenance or use of non-original parts is not covered by warranty.