Table of Contents
Advertisement
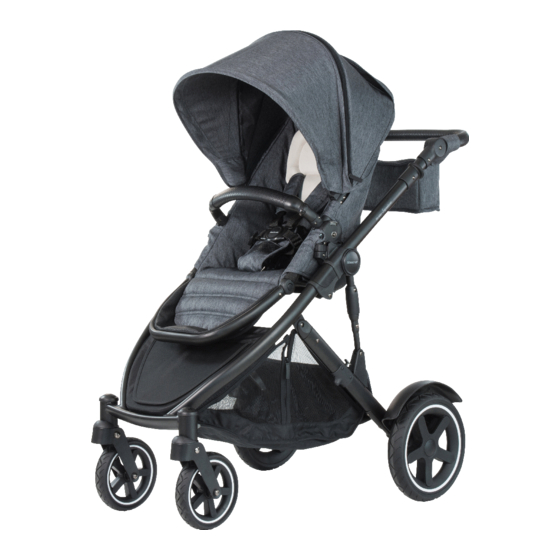
STRIDER SIGNATURE
TRAVEL SYSTEM STROLLER
Suitable for use with the Strider Signature Second Seat, Strider Signature
Bassinet, Steelcraft Baby Capsule or Britax Unity Baby Capsule.
(All products are sold separately)
IMPORTANT: KEEP THIS BOOKLET IN A SAFE PLACE FOR FUTURE REFERENCE
www.britax.com.au
Series HA8343
Advertisement
Table of Contents

Related Manuals for Britax STEELCRAFT STRIDER SIGNATURE


Summary of Contents for Britax STEELCRAFT STRIDER SIGNATURE
- Page 1 STRIDER SIGNATURE TRAVEL SYSTEM STROLLER Suitable for use with the Strider Signature Second Seat, Strider Signature Bassinet, Steelcraft Baby Capsule or Britax Unity Baby Capsule. (All products are sold separately) IMPORTANT: KEEP THIS BOOKLET IN A SAFE PLACE FOR FUTURE REFERENCE www.britax.com.au...
-
Page 2: Table Of Contents
Adjusting the backrest ..............Adjusting the leg rest..............Adjusting the pivotal handle ............Securing your child in the harness ..........Adjusting the harness ..............Opening the harness ..............Adjusting the shoulder harness height ........Using the storage basket ............www.britax.com.au... - Page 3 Removing the Second Seat from the stroller frame ......BABY CAPSULE Baby Capsule Warnings & Important Notes ......Attaching the Steelcraft Baby Capsule to the stroller frame ... Removing the Steelcraft Baby Capsule from the stroller frame ..CARE AND MAINTENANCE ..........NOTES ................... www.britax.com.au...
-
Page 4: Stroller Section Stroller Warnings And Important Notes
• THE MAXIMUM WEIGHT OF THE CHILD USING THIS STROLLER IS NOT TO EXCEED 20 KG. 9KG FOR THE STRIDER SIGNATURE BASSINET, 9KG FOR THE STEELCRAFT BABY CAPSULE, 12KG FOR THE BRITAX UNITY BABY CAPSULE OR 17KG FOR THE SECOND SEAT. - Page 5 • DO NOT PLACE MORE THAN 12 KG IN THE BASKET AT SINGLE MODE OR 4 KG AT DOUBLE MODE, OR 1KG IN THE SEAT POCKET (IF SUPPLIED), 1KG IN THE BASSINET POCKET (IF SUPPLIED), 1 KG IN THE CUP/BOTTLE HOLDER OR 1.5 KG IN THE ORGANISER BAG IF SUPPLIED. www.britax.com.au...
-
Page 6: Manual Handling Techniques
• Change direction by turning your feet and not your back. • To set the load down, squat down, keep your head up and • Let your legs do the work. Remember to ‘THINK TALL ’ chest lifted, shoulders relaxed, chin tucked in and head level. www.britax.com.au... -
Page 7: Stroller Parts List
PARTS LIST 1x Stroller Frame & Basket 1x Stroller Seat 1x Canopy 1x Arm Bar 2x Front Wheels 2x Rear Wheels www.britax.com.au... - Page 8 PARTS LIST 2x Wheel Guards 1x Boot Cover 1x Head pillow + 1x Newborn insert + 2x Shoulder Harness Pads Back Support Wedge 1x Shade Cover 1x Rain Cover www.britax.com.au...
- Page 9 PARTS LIST 1x Stroller Organiser bag 1x Cup/Bottle holder www.britax.com.au...
-
Page 10: Stroller Features
STROLLER FEATURES Canopy Pick-a-boo window Pivotal handle Folding lever Arm bar Seat release button Frame socket Leg rest adjuster button Front wheel release knob Wheel guard Rear wheel release button Swivel lock button Front basket access Side basket access www.britax.com.au... - Page 11 STROLLER FEATURES Backrest recline lever Organiser bag Cup/Bottle holder Tether strap Second Seat safety Frame lock release button Lower mounting brackets Brake www.britax.com.au...
-
Page 12: Stroller Configurations
It is recommended to use the extension receivers (supplied with the Second Seat). There are various positions available for double mode, please adjust seat positions and do not use the positions if there is not enough space for the lower occupant. www.britax.com.au... -
Page 13: Stroller Assembly
YOUR HANDS. KEEPING YOUR HANDS ON THE HANDLE IS THE BEST WAY TO UNFOLD THE STROLLER. OPENING THE STROLLER FRAME CAUTION Push the release on the frame lock Lift handle until frame locks into and open the frame. upright position. www.britax.com.au... -
Page 14: Attaching The Wheel Guards
Please ensure It is locked. www.britax.com.au... -
Page 15: Attaching Or Removing The Front Wheels
Slide the front wheel mounting pins To remove the front wheels, turn into the housing on the frame until the front wheel release knob to the they lock into place. left and pull the wheel out of the Please ensure it is locked. housing. www.britax.com.au... -
Page 16: Attaching The Stroller Seat
CAUTION CAUTION Hold the stroller seat over Push down the seat until both the frame and align the seat stroller seat connectors have connectors with frame sockets. locked into the frame sockets. Please ensure the seat is locked. www.britax.com.au... -
Page 17: Attaching The Canopy
To expand the canopy unzip the centre To expose mesh and the window section of the canopy. unzip the mesh cover and lift the window cover. www.britax.com.au... -
Page 18: Attaching The Arm Bar
Press and hold the bar and pull the arm bar out. Rotate button underneath the arm bar the arm bar for easy access. sockets then slide the arm bar pins into the sockets until It is locked. Please ensure It is locked. www.britax.com.au... -
Page 19: Installing The Newborn Comfort Insert
To use the newborn back support Place the insert on the stroller seat wedge, place the newborn back and thread the harness waist straps support wedge firmly in the seat. through the button holes in the back of the seat insert. www.britax.com.au... -
Page 20: Attaching The Boot Cover
ATTACHING THE BOOT COVER Fit the boot cover over the leg rest and pull the top flap under the arm bar and over then secure with fastener. www.britax.com.au... -
Page 21: Attaching The Organiser Bag
DO NOT PLACE HOT DRINKS IN THE CUP/BOTTLE HOLDER. The cup/bottle holder can only fit on the right hand side of the frame. Push the cup/bottle holder attachment lever to the frame tube until the pin is locked into the hole on the cup/bottle holder attachment lever. www.britax.com.au... -
Page 22: Removing The Cup/Bottle Holder
B To reveal the mesh window, fold Hook the front elastic section of the fabric cover on top of the the shade cover over the leg rest. canopy. Ensure the mesh cover fits snugly over the canopy and is securely fitted to the stroller seat. www.britax.com.au... -
Page 23: Installing The Rain Cover
Ensure the rain cover fits snugly cover with the zipper attachment. over the canopy and is securely fitted to stroller seat. PLEASE NOTE: The rain cover is not design to fit over two Baby Capsules. www.britax.com.au... -
Page 24: Stroller Operation
The swivel wheels should only be locked when the wheels are in the trailing position (wheels under frame). To lock the front wheels into the fixed position, press the grey swivel lock down on both wheels until they lock into position. www.britax.com.au... - Page 25 PLEASE NOTE: There are four backrest positions. A Lift the recline lever on the back of the seat and hold while raising or lowering the backrest to the desired position. www.britax.com.au...
- Page 26 PLEASE NOTE: The pivotal handle has 7 positions. Press the two release buttons on the inside of the handle and hold while raising or lowering the handle to the desired position. When the desired height has been achieved let go of both release buttons. www.britax.com.au...
- Page 27 ‘click’. Thread the waist strap buckle Repeat the procedure on the tongues through the shoulder straps other side. tongue guides. Please ensure it is locked. www.britax.com.au...
- Page 28 DO NOT SLIDE 3 BAR SLIDER OVER THE SEWN TAB ON SHOULDER HARNESS. OPENING THE HARNESS Release the harness by pressing the centre button in on the crotch buckle while pulling the waist tongues out of the crotch buckle. www.britax.com.au...
- Page 29 To change the shoulder harness Select the appropriate shoulder height, push the shoulder harness height and pull each harness tongue out of the shoulder harness tongue current harness slot and through through the harness slot. the back of the seat. www.britax.com.au...
-
Page 30: Using The Tether Strap
A wrist tether strap is provided on the handle grip. Slide your hand through the tether strap loop whenever you use the stroller. Only remove your hand from the tether strap loop when the brakes have been applied to the stroller wheels. www.britax.com.au... -
Page 31: Removing And Reversing The Stroller Seat
Turn the seat facing opposite direction and then attach the stroller seat to the frame in the rearward facing position. www.britax.com.au... -
Page 32: Using The Stroller
• Do not run with the stroller. • Whenever you stop, always apply the brakes before you leave the stroller. • Do not hang bags or goods unless it is supplied from the handle. Use the storage basket. www.britax.com.au... -
Page 33: Folding The Stroller
• Remove the bassinet or Baby Capsule if connected to the frame prior to folding. • The Second Seat can either be removed or folded up prior to folding. • The rain cover must also be removed if fitted. www.britax.com.au... - Page 34 Continue folding all the way down until frame is Pull up the folding levers fully folded and frame lock is engaged. Ensure (1 & 2) and begin to the frame is securely locked. push the handle down to fold. www.britax.com.au...
-
Page 35: Lifting And Carrying The Stroller
LIFTING AND CARRYING THE STROLLER PLEASE REFER TO PAGE 6 FOR SMART LIFTING TECHNIQUES IMPORTANT NOTE: • TO AVOID INJURY: BEND YOU KNEES WHEN OPENING, LIFTING, CAR- RYING, FOLDING, UNFOLDING OR ADJUSTING THE STROLLER OR ANY ACCESSORIES. www.britax.com.au... -
Page 36: Bassinet
• IT IS UNSAFE TO USE ACCESSORIES NOT APPROVED FOR USE WITH THIS STROLLER • DO NOT USE ANY ACCESSORIES OTHER THAN THOSE APPROVED FOR USE WITH THIS STROLLER BY BRITAX. • THE MAXIMUM WEIGHT OF THE CHILD USING THE PRODUCT IS NOT TO EXCEED 9KGS. -
Page 37: Attaching The Bassinet To The Stroller Frame
REMOVING THE BASSINET FROM THE STROLLER FRAME A Firmly lift and hold the bassinet B Lift the bassinet completely out of locking lever up to release the the stroller frame. bassinet from the stroller frame socket and same time lift the bassinet up with handle. www.britax.com.au... -
Page 38: Second Seat
• SECURE THE CHILD IN THE HARNESS AT ALL TIMES. • DO NOT USE ANY ACCESSORIES OTHER THAN THOSE APPROVED FOR USE WITH THIS STROLLER BY BRITAX. • IT IS UNSAFE TO USE ACCESSORIES NOT APPROVED FOR USE WITH THIS STROLLER. -
Page 39: Attaching The Second Seat To The Stroller Frame
Line up the arrow 1) on the stroller frame then support bars on the Second Seat pull downwards (as indicated by with the lower mounting brackets arrow 2). on the inside of the stroller frame (located on rear wheel housing). www.britax.com.au... -
Page 40: Removing The Second Seat From The Stroller Frame
REMOVING THE Second Seat. fold the canopy back, then fully lift the recline lever and lower the Second Seat to the lowest position. While still holding the recline lever, press the Second Seat safety release button and continue to lower the seat. www.britax.com.au... - Page 41 Second Seat. While holding the button, lift Lift the Second Seat up and away the seat up and forward to from the stroller frame. release the seat. www.britax.com.au...
-
Page 42: Baby Capsule
• THE MAXIMUM WEIGHT OF THE CHILD USING THE STEELCRAFT BABY CAPSULE IS NOT TO EXCEED 9KGS. IMPORTANT NOTES: • THE STEELCRAFT BABY CAPSULE, BRITAX SAFE N SOUND UNITY NEOS BABY CAPSULE OR BRITAX SAFE N SOUND UNITY BABY CAPSULE ISOFIX COMPATIBLE ARE THE ONLY COMPATIBLE BABY CAPSULES DESIGNED TO FIT THE STRIDER SIGNATURE STROLLER, THE UNITY BABY CAPSULE TO BE USED WITH CLICK N GO RECEIVERS (SOLD SEPARATELY). -
Page 43: Attaching The Steelcraft Baby Capsule To The Stroller Frame
Capsule should be Push down the locked into the frame. Baby Capsule until If the handle indicator connectors have is RED, the Baby locked into frame Capsule handle is sockets. not in locked position, repeat steps. Please ensure It is locked. www.britax.com.au... -
Page 44: Removing The Steelcraft Baby Capsule From The Stroller Frame
Lift and remove the latches in to release the until it returns to the Baby Capsule away locks. The indicator will upright position. Release from the stroller. now be RED. the latches, the handle indicator should now be GREEN. www.britax.com.au... - Page 45 THE STRIDER CLICK N GO RECEIVERS MUST BE ATTACHED TO THE STROLLER FRAME BEFORE ATTEMPTING TO INSTALL THE BRITAX SAFE N SOUND UNITY CLICK & GO BABY CAPSULE OR THE BRITAX SAFE N SOUND UNITY BABY CAPSULE. INSTALLING AND REMOVING THE CLICK N GO RECEIVERS...
-
Page 46: Notes
BABY CAPSULE OPERATION ATTACHING THE BRITAX UNITY BABY CAPSULE PLEASE NOTE: THESE INSTRUCTIONS ARE FOR INSTALLING AND REMOVING THE BABY CAPSULE ON THE STROLLER ONLY. FOR INSTALLING AND PROPER USE OF THE BABY CAPSULE IN THE CAR, PLEASE FOLLOW THE INSTRUCTIONS MANUAL PROVIDED WITH THE BABY CAPSULE. -
Page 47: Care And Maintenance
- tighten if required. To maintain the safety of your nursery product, seek prompt repairs for bent, torn, worn or broken parts. Use only those parts and accessories approved by Steelcraft. THIS PRODUCT IS NOT INTENDED FOR COMMERCIAL USE. www.britax.com.au... - Page 48 CUSTOMER SERVICE 1300 303 330 - Australia 0508 688 822 - New Zealand Due to our continuing program of development, Britax reserves the right to alter the specifications, color or design without any further notice. The Steelcraft trademark is the property of Britax Childcare Pty.Ltd - Australia.