Table of Contents
Advertisement
1. PRECAUTIONS FOR USE .................................................................................................... 25
2. RECYCLING INSTRUCTIONS - OUR ENVIRONMENT POLICY ......................................... 26
3. SAFETY PRECAUTIONS ...................................................................................................... 27
4. INTENDED USE .................................................................................................................... 27
5. GETTING TO KNOW YOUR COOKER ................................................................................. 28
6. BEFORE INSTALLATION ..................................................................................................... 28
7. DESCRIPTION OF FRONT PANEL CONTROLS ................................................................ 29
8. USING THE HOB .................................................................................................................. 31
9. USING THE OVEN ................................................................................................................ 32
10. AVAILABLE ACCESSORIES ............................................................................................. 34
11. ELECTRONIC PROGRAMMER ......................................................................................... 35
12. CLEANING AND MAINTENANCE ...................................................................................... 37
13. EXTRAORDINARY MAINTENANCE .................................................................................. 38
14. INSTALLING THE APPLIANCE .......................................................................................... 39
15. ADAPTATION TO DIFFERENT TYPES OF GAS .............................................................. 41
16. FINAL OPERATIONS ......................................................................................................... 43
INSTRUCTIONS FOR THE USER: these contain user advice, description of the commands and the
correct procedures for cleaning and maintenance of the appliance.
INSTRUCTIONS FOR THE INSTALLER: these are intended for the qualified technician who must carry
out a meticulous check of the gas circuit, install the appliance, set it functioning and carry out an
inspection test.
@
Further information about the products can be found at www.smeg.com
24
Table of contents
Advertisement
Table of Contents

Related Manuals for Smeg C92GMX


Summary of Contents for Smeg C92GMX
-
Page 1: Table Of Contents
INSTRUCTIONS FOR THE INSTALLER: these are intended for the qualified technician who must carry out a meticulous check of the gas circuit, install the appliance, set it functioning and carry out an inspection test. Further information about the products can be found at www.smeg.com Table of contents... -
Page 2: Precautions For Use
Precautions for use 1. PRECAUTIONS FOR USE THIS MANUAL IS AN INTEGRAL PART OF THE APPLIANCE. TAKE GOOD CARE OF IT AND KEEP IT TO HAND THROUGHOUT THE COOKER'S LIFE CYCLE. WE URGE YOU TO READ THIS MANUAL AND ALL THE INFORMATION IT CONTAINS CAREFULLY BEFORE USING THE APPLIANCE. ALSO KEEP ALL THE NOZZLES PROVIDED IN A SAFE PLACE. -
Page 3: Recycling Instructions - Our Environment Policy
The environment - Recycling instructions 2. RECYCLING INSTRUCTIONS - OUR ENVIRONMENT POLICY Our household appliances are only packaged using non-pollutant, environment-friendly, recyclable materials. Please help by disposing of the packing correctly. Find the addresses of collection, recycling and disposal centres from your retailer or from the competent local organisations. Never leave all or part of the packaging lying around. -
Page 4: Safety Precautions
Safety precautions 3. SAFETY PRECAUTIONS ELECTRICAL CONNECTION: REFER TO THE INSTALLATION INSTRUCTIONS WITH REGARD TO GAS, ELECTRICITY SUPPLY AND VENTILATION REQUIREMENTS. IN YOUR INTEREST AND TO ENSURE YOUR SAFETY, BY LAW ALL GAS-FIRED HOUSEHOLD APPLIANCES MUST ONLY BE INSTALLED AND SERVICED BY QUALIFIED STAFF, IN ACCORDANCE WITH THE RELEVANT REGULATIONS. -
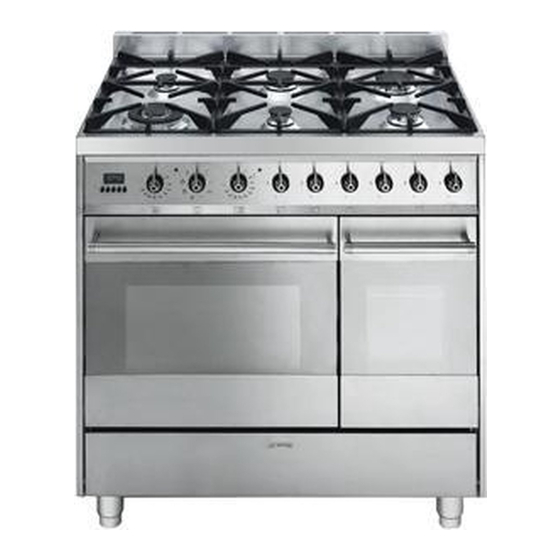
Page 5: Getting To Know Your Cooker
5. GETTING TO KNOW YOUR COOKER CONTROL PANEL OVEN/MAIN OVEN AUXILIARY OVEN FOOD WARMER COMPARTMENT 6. BEFORE INSTALLATION Never leave packaging residues unattended in the home. separate the various waste packaging materials by type and consign them to the nearest separate disposal centre. The inside of the appliance should be cleaned to remove all manufacturing residues. -
Page 6: Description Of Front Panel Controls
Instructions for the user 7. DESCRIPTION OF FRONT PANEL CONTROLS All the control and monitoring devices are clearly in view on the front panel. The symbols used are described in the table below. OVEN THERMOSTAT FUNCTION SELECTOR KNOB FRONT LEFT-HAND BURNER FRONT LEFT-HAND BURNER REAR LEFT-HAND BURNER Before using the oven/main oven, check that the display is showing the symbol... - Page 7 The cooking temperature is selected by turning the knob clockwise to the required setting, between 50° and 260°C. The light comes on to indicate that the oven is heating up. This light goes out when the set temperature is reached. It flashes at regular intervals to indicate that the temperature inside the oven is being kept constantly at the set level.
-
Page 8: Using The Hob
Instructions for the user 8. USING THE HOB 8.1 Lighting the hob burners Before lighting the hob burners, check that the flame-spreader crowns are correctly in place with their respective burner caps, making sure that the holes A in the flame-spreaders are aligned with the plugs and thermocouples. -
Page 9: Using The Oven
Instructions for the user 9. USING THE OVEN Before using the oven, check that the display is showing the symbol. The appliance becomes very hot during use. oven gloves should always be worn. 9.1 Precautions and general advice When the oven and grill are used for the first time, they should be heated to the maximum temperature for long enough to burn off any oily residues left by the manufacturing process, which might contaminate foods with unpleasant smells. - Page 10 Instructions for the user Flat, thin pieces of meat Rolled roasts Poultry 9.5 Attention • Grilling processes must never last more than 60 minutes. • In models with electric oven, the oven door must be closed during grill and grill + rotisserie cooking operations.
-
Page 11: Available Accessories
Instructions for the user 10. AVAILABLE ACCESSORIES The oven features 4 runners for placing trays and shelves at different heights. Oven shelf: for cooking food on plates, small cakes or roasts or foods requiring light grilling. Tray grid: for placing on top of a tray for cooking foods which may drip. -
Page 12: Electronic Programmer
Instructions for the user 11.ELECTRONIC PROGRAMMER On appliances with double oven, the electronic programmer only controls the main oven. LIST OF FUNCTIONS TIMER BUTTON END OF COOKING BUTTON COOKING DURATION BUTTON VALUE DECREASE BUTTON VALUE INCREASE BUTTON 11.1 Setting the time When the oven is used for the first time, or after an interruption in the electricity supply, the display flashes at regular intervals, showing press the... -
Page 13: Minute Minder
Instructions for the user 11.4 End of cooking At the end of the cooking time the oven will switch off automatically and simultaneously a buzzer will start to sound in on-off mode. After the buzzer is stopped, the display will return to showing the current time together with the symbol, indicating that the oven is again ready for use in manual mode. -
Page 14: Cleaning And Maintenance
Instructions for the user 12. CLEANING AND MAINTENANCE Before performing any operations requiring access to powered parts, switch off the power supply to the appliance. Never use a jet of steam for cleaning the appliance. 12.1 Cleaning stainless steel To keep stainless steel in good condition, it must be cleaned regularly, after each use of the cooker, after allowing it to cool. -
Page 15: Extraordinary Maintenance
Instructions for the user 13. EXTRAORDINARY MAINTENANCE The oven may require extraordinary maintenance or replacement of parts subject to wear such as seals, bulbs, and so on. The following instructions describe how to carry out these minor maintenance operations. Before performing any operations requiring access to powered parts, switch off the power supply to the appliance. -
Page 16: Installing The Appliance
Instructions for the installer 14.INSTALLING THE APPLIANCE It is the law that all gas appliances are installed by competent persons. This appliance may be installed next to a wall which is higher than the appliance, with a minimum distance of 5 cm from the side of the appliance, as shown in drawings A and B showing the correct installation conditions. -
Page 17: Ventilation Requirements
For operation on 380-415V 3N~: use an H05V2V2-F type five-core cable (5 x 1.5 mm For operation on 380-415V 3N~: use an H05V2V2-F type four-core cable (4 x 1.5 mm For operation on 220-240V~: use an H05V2V2-F type three-core cable (3 x 2.5 mm The earth wire (yellow-green) must be at least 20 mm longer than the other wires at the end for connection to the appliance. -
Page 18: Adaptation To Different Types Of Gas
Instructions for the installer 15. ADAPTATION TO DIFFERENT TYPES OF GAS Before performing any operations requiring access to powered parts, switch off the power supply to the appliance. The cooker hob is preset for natural gas G20 (2H) at a pressure of 20 mbar. In the case of operation with other types of gas the burner nozzles must be changed and the minimum flame adjusted on the gas taps. - Page 19 15.2 Burner and nozzle characteristics table Rated heating Burner capacity (kW) Auxiliary 1.05 Semi rapid Rapid Ultra-rapid Rated heating Burner capacity (kW) Auxiliary 1.05 Semi rapid Rapid Ultra-rapid 15.3 Arrangement of the burners on the hob Instructions for the installer LPG –...
-
Page 20: Final Operations
Instructions for the installer 16. FINAL OPERATIONS After replacing the nozzles, reposition the flame-spreader crowns, the burner caps and the grids. Following adjustment to a gas other than the preset one, replace the gas adjustment label fixed to the appliance with the one corresponding to the new gas. This label is in the packet together with the nozzles.