Table of Contents
Advertisement
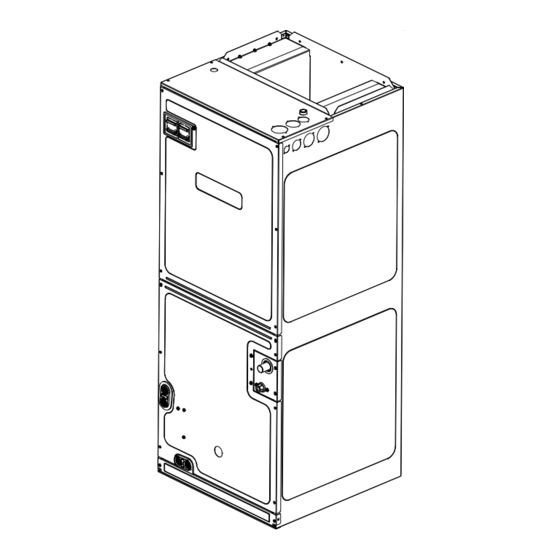
ARUF**14** / ASPT**14**
AIR HANDLERS INSTALLATION & OPERATING INSTRUCTIONS
Contents
1 Important Safety Instructions ................................... 1
2 Shipping Inspection ............................................... 3
2.1 Parts .......................................................... 3
2.2 Handling ...................................................... 3
3 Codes & Regulations .............................................. 3
4 Replacement Parts ................................................ 3
5
Pre-Installation Considerations ................................ 3
5.1 Preparation .................................................. 3
5.2 System Matches ............................................. 3
5.3 Interconnecting Tubing ..................................... 3
5.4 Clearances ................................................... 4
5.5 Horizontal Applications .................................... 4
6
Installation Location ............................................. 4
6.1 Upflow Installation ......................................... 4
6.2 Horizontal Left Installation ............................... 4
6.3 Downflow ..................................................... 4
6.4 Horizontal Right Installation .............................. 5
7 Refrigerant Lines .................................................. 7
7.1 Tubing Size ................................................... 7
7.2 Tubing Preparation ......................................... 7
7.3 Special Instructions ......................................... 7
7.4 Tubing Connections for Flowrator Model ............... 7
7.5 Tubing Connections for TXV Models ...................... 8
8 Condensate Drain Lines .......................................... 8
9 Ductwork ............................................................ 9
9.1 Return Ductwork ............................................ 9
10 Return Air Filters ................................................ 9
11 Electric Heat ...................................................... 9
12 Electrical and Control Wiring ............................... 11
12.1 Building Electrical Service Inspection ................ 11
12.2 Wire Sizing ............................................... 11
12.3 Maximum Overcurrent Protection (MOP) ............ 11
12.4 Electrical Connections - Supply Voltage ............. 12
12.4.3 Air Handler With Circuit Breaker Heat Kit ........ 12
12.5 Low Voltage Connections ............................... 12
12.5.1 Thermostats .......................................... 12
12.6 Speed Tap Adjustment .................................. 12
13 Achieving 1.4% Low Leakage Rate ......................... 13
14 Start-Up Procedure ............................................ 13
15 Regular Maintenance .......................................... 13
16
Airflow Data .................................................... 14
21
Wiring Diagrams ................................................ 20
IO-901
Prior to installation, thoroughly familiarize yourself with this Installation Manual.
2/2015
Observe all safety warnings. During installation or repair, caution is to be observed.
It is your responsibility to install the product safely and to educate the customer on its safe use.
Keep this literature in a safe place for future reference.
ATTENTION INSTALLING PERSONNEL
RECOGNIZE THIS SYMBOL
AS A SAFETY PRECAUTION.
1 Important Safety Instructions
The following symbols and labels are used throughout this
manual to indicate immediate or potential safety hazards.
It is the owner's and installer's responsibility to read and
comply with all safety information and instructions accom-
panying these symbols. Failure to heed safety information
increases the risk of personal injury, property damage, and/
or product damage.
Advertisement
Table of Contents

Related Manuals for Amana ARUF**14 Series


Summary of Contents for Amana ARUF**14 Series
-
Page 1: Table Of Contents
ARUF**14** / ASPT**14** AIR HANDLERS INSTALLATION & OPERATING INSTRUCTIONS Contents 1 Important Safety Instructions ........1 2 Shipping Inspection ..........3 2.1 Parts ............3 2.2 Handling ............3 3 Codes & Regulations ..........3 4 Replacement Parts ..........3 Pre-Installation Considerations ........ - Page 2 HIGH VOLTAGE! Disconnect ALL power before servicing. Multiple power sources may be present. Failure to do so may cause property damage, personal injury or death. Installation and repair of this unit should be performed ONLY by individuals meeting the requirements of an “entry level technician”...
-
Page 3: Shipping Inspection
2 Shipping Inspection Always transport the unit upright; laying the unit on its side or top during transit may cause equipment damage. The installer should inspect the product upon receipt for shipping damage and subsequent investigation is the responsibility of the carrier. -
Page 4: Clearances
5.4 Clearances The unit clearance from a combustible surface may be 0". However, service clearance must take precedence. A minimum of 24" in front of the unit for service clearance is required. Additional clearance on one side or top will be required for electrical wiring connections. -
Page 5: Horizontal Right Installation
6.4 Horizontal Right Installation Side drainpan extension must be removed for all models except : ARUF47D14**, ARUF61D14**, ASPT61D14**. Refer to Figure 6 and 7 for the location of the components referenced in the following steps. 1. Before inverting the air handler, remove blower access panel and coil access panel. The coil access panel and tubing panel may remain screwed together during this procedure. - Page 6 Blower Access Panel Secondary Drain Port Horizontal Application Tubing Panel Secondary Drain Port for Upflow/Downflow Application INTERNAL PART TERMINOLOGY EXTERNAL PART TERMINOLOGY Figure 6 Figure 7 Coil Slides on the downflow bracket IMPORTANT NOTE: ACCESS PANEL CONFIGURATION FOR DOWNFLOW Ensure coil slides on the rails along the groove provided on the drain pan side OR HORIZONTAL RIGHT walls.
-
Page 7: Refrigerant Lines
7 Refrigerant Lines NOTE: Refrigerant tubing must be routed to allow adequate This product is factory-shipped with R410A and dry access for servicing and maintenance of the unit. nitrogen mixture gas under pressure. Use appropriate Do not install the air handler in a location that violates service tools and follow these instructions to prevent the instructions provided with the condenser. -
Page 8: Tubing Connections For Txv Models
8. AFTER THE TAILPIECE HAS COOLED, confirm position of the white PLASTIC or BRASS CAP Teflon seal and hand tighten the 13/16 nut. ® 9. Torque the 13/16 nut to 7-25 ft-lbs. or tighten 1/6 turn. 13/16” NUT TAILPIECE Excessive torque can cause orifices to stick. Use the PISTON WHITE proper torque settings when tightening orifices. -
Page 9: Ductwork
A drain trap in a draw-through application prevents air from being drawn back through the drain line during fan opera- tion thus preventing condensate from draining, and if connected to a sewer line to prevent sewer gases from being drawn into the airstream during blower operation. - Page 10 NOTE: The Temperature Rise Tables can also be used to estimate the air handler airflow delivery. When using these tables for this purpose set the room thermostat to maximum heat and allow the system to reach steady state conditions. Insert two thermometers, one in the return air and one in the supply air. The temperature rise is the supply air temperature minus the room air temperature.
-
Page 11: Electrical And Control Wiring
12 Electrical and Control Wiring Nominal Input Minimum Voltage Maximum Voltage IMPORTANT: All routing of electrical wiring must be made 208-240 through provided electrical knockouts. Do not cut, punc- ELECTRICAL VOLTAGE ture or alter the cabinet for electrical wiring. Table 6 12.1 Building Electrical Service Inspection This unit is designed for single-phase electrical supply only. -
Page 12: Electrical Connections - Supply Voltage
12.4 Electrical Connections – Supply Voltage Top of IMPORTANT NOTE: USE COPPER CONDUCTORS ONLY. Cabinet Knockouts are provided on the air handler top panel and sides of the cabinet to allow for the entry of the supply voltage conductors, as shown in Figure 13. If the knockouts on the cabinet sides are used for electrical conduit, an adapter ring must be used in order to meet UL1995 safety requirements. -
Page 13: Achieving 1.4% Low Leakage Rate
13 Achieving 1.4% Low Leakage Rate Ensure all the gaskets remain intact on all surfaces as shipped with the unit. These surfaces are areas between the upper tie plate and blower access panel, blower access and coil access panels, and between the coil access and filter access panels. -
Page 14: Airflow Data
16 Airflow Data Static Pressure (in w.c) Airflow (CFM) Blower Model Speed ARUF25B14 M ED HIGH 1255 1225 1130 1090 ARUF29B14 M ED HIGH 1255 1225 1130 1090 ARUF31B14 M ED HIGH 1235 1185 1130 1060 1120 1085 1040 1000 ARUF37C14 M ED 1425... - Page 15 Air Handler Low Voltage Connections The following composite wiring diagrams detail various configurations in which the air handlers can be used. Examples include single-stage cooling and heat pump with single or two-stage electric heating. All these configurations can be applied with convenient connections to outdoor thermostat applications. The following sections are detailed: •...
- Page 16 HIGH VOLTAGE! DISCONNECT ALL POWER BEFORE SERVICING. WARNING MULTIPLE POWER SOURCES MAY BE PRESENT. FAILURE TO DO SO MAY CAUSE PROPERTY DAMAGE, PERSONAL INJURY OR DEATH. #18 GA. 5 WIRES WITH COOLING 4 WIRES WITHOUT AIR HANDLER CONDENSING UNIT 24V CONNECTION COOLING UNIT WITH OPTIONAL HEAT KITS OF 15 kW AND ABOVE AND ROOM THERMOSTAT WITH TWO STAGES OF HEAT #18 GA.
- Page 17 HIGH VOLTAGE! DISCONNECT ALL POWER BEFORE SERVICING. WARNING MULTIPLE POWER SOURCES MAY BE PRESENT. FAILURE TO DO SO MAY CAUSE PROPERTY DAMAGE, PERSONAL INJURY OR DEATH. #18 GA. 7 WIRE AIR HANDLER HEAT PUMP UNIT WITH OPTIONAL HEAT KITS OF 15 kW AND ABOVE NOTES: NOMENCLATURE: COLOR CODES...
- Page 18 HIGH VOLTAGE! DISCONNECT ALL POWER BEFORE SERVICING. WARNING MULTIPLE POWER SOURCES MAY BE PRESENT. FAILURE TO DO SO MAY CAUSE PROPERTY DAMAGE, PERSONAL INJURY OR DEATH. ELECTRONIC BLOWER TIME DELAY RELAY TSTAT 120/240VAC SYSTEM XFMR-R PARK TERMINAL TRANSFORMER MOTOR NEUTRAL 24 VAC B13707-35 XFMR-C...
- Page 19 THIS PAGE LEFT INTENTIONALLY BLANK...
-
Page 20: Wiring Diagrams
21 Wiring Diagrams HIGH VOLTAGE! DISCONNECT ALL POWER BEFORE SERVICING. WARNING MULTIPLE POWER SOURCES MAY BE PRESENT. FAILURE TO DO SO MAY CAUSE PROPERTY DAMAGE, PERSONAL INJURY OR DEATH. ARUF**14** 208/240 SEE NOTES 2 & 6 TERMINAL BLOCK SHOWN VOLTS EQUIPMENT GROUND FOR 50HZ MODELS ONLY USE COPPER WIRE... - Page 21 Wiring Diagrams HIGH VOLTAGE! DISCONNECT ALL POWER BEFORE SERVICING. WARNING MULTIPLE POWER SOURCES MAY BE PRESENT. FAILURE TO DO SO MAY CAUSE PROPERTY DAMAGE, PERSONAL INJURY OR DEATH. ASPT**14** 208/240 VOLTS L G N SEE NOTE 1 NOTE 4 FUSE HOLDER (OPTIONAL) NOTE 1...
- Page 22 HIGH VOLTAGE! DISCONNECT ALL POWER BEFORE SERVICING. WARNING MULTIPLE POWER SOURCES MAY BE PRESENT. FAILURE TO DO SO MAY CAUSE PROPERTY DAMAGE, PERSONAL INJURY OR DEATH. 3-Phase Heat Kit Wiring is subject to change. Always refer to the wiring diagram on the unit for the most up-to-date wiring.
- Page 23 SPLIT SYSTEMS AIR CONDITIONING AND HEAT PUMP HOMEOWNER’S ROUTINE MAINTENANCE RECOMMENDATIONS We strongly recommend a bi-annual maintenance checkup be performed before the heating and cooling seasons begin by a qualified servicer. REPLACE OR CLEAN FILTER IMPORTANT NOTE: Never operate unit without a filter installed as dust and lint will build up on internal parts resulting in loss of efficiency, equipment damage and possible fire.
- Page 24 NOTE: SPECIFICATIONS AND PERFORMANCE DATA LISTED HEREIN ARE SUBJECT TO CHANGE WITHOUT NOTICE Visit our website at www.daikincomfort.com, www.goodmanmfg.com or www.amana-hac.com for information on: Products • Customer Services • Contractor Program and Training • • Warranties • Parts • Financing Options 5151 San Felipe, Suite 500, Houston, TX 77056 ©...