
Related Manuals for AEG LAVAMAT 11842 VIT


Summary of Contents for AEG LAVAMAT 11842 VIT
- Page 1 LAVAMAT 11842 VIT EN WASHER DRYER USER MANUAL LAVAMAT 12843 VIT ES LAVADORA-SECADORA MANUAL DE INSTRUCCIONES...
- Page 2 Please spend a few minutes reading to get the very best from it. ACCESSORIES AND CONSUMABLES In the AEG webshop, you’ll find everything you need to keep all your AEG appliances looking spotless and working perfectly. Along with a wide range of accessories...
-
Page 3: Table Of Contents
Contents CONTENTS 4 Safety information 6 Product description 8 Control panel 10 First use 11 Personalization 11 Daily use 15 Use - Drying only 16 Use - Washing and Drying 17 Washing programmes 20 Drying Programmes 21 Helpful hints and tips 23 Drying Hints 24 Care and cleaning 30 What to do if…... -
Page 4: Safety Information
Safety information SAFETY INFORMATION Read carefully & keep for future reference. • The safety of Your appliance complies with the industry standards and with legal re- quirements on the safety of appliances. However, as manufacturers, we feel it is our duty to provide the following safety notes. -
Page 5: Child Safety
Safety information • After having installed the appliance, check that it is not standing on the inlet and drain hose and the worktop is not pressing the electrical supply cable against the wall. • If the machine is situated on a carpeted floor, please adjust the feet in order to allow air to circulate freely under the appliance. -
Page 6: Product Description
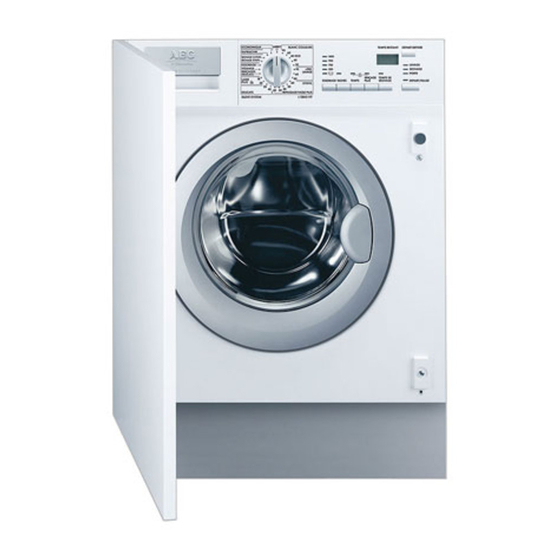
Product description been given supervision or instruction concerning use of the appliance by a person re- sponsible for their safety. • Children should be supervised to ensure that they do not play with the appliance. • The packaging components (e.g. plastic film, polystyrene) can be dangerous to children - danger of suffocation! Keep them out of children's reach. - Page 7 Product description Detergent dispenser drawer Control panel Door opening handle Rating plate Drain pump Adjustable feet Detergent dispenser drawer Compartment for prewash phase or stain re- mover. The prewash detergent is added at the beginning of the wash programme. The stain remover is added during the STAIN-Ac- tion phase in the main wash.
-
Page 8: Control Panel
Control panel CONTROL PANEL Below is a picture of the control panel. It shows the programme selector dial as well as the buttons and the pilot lights. These are presented by relevant numbers on the following pa- ges. 9 10 Programme selector dial SPIN button STAIN button... - Page 9 Display Push buttons symbols SPIN REDUCTION START/PAUSE RINSE HOLD DOOR LOCKED STAIN DRYING PHASE TIME WASHING PHASE (Time Saving) EXTRA RINSE DELAY START CHILD SAFETY LOCK DISPLAY (Time to end) DRYING TIME DISPLAY Duration of selected programme After selecting a programme, the duration is displayed in hours and minutes (for example 2.05).
-
Page 10: First Use
Delay Start The selected delay (20 hours max) set by means of the relevant button appears on the dis- play for about 3 seconds, then the duration of the previously set programme is displayed. The delay time value decreases by one unit every hour. When only 1 hour remains, the time decreases every minute. -
Page 11: Personalization
Personalization PERSONALIZATION Acoustic signals The machine is provided with an acoustic device, which sounds in the following cases: • at the end of the cycle • in the event of operating problems. By pressing the 3 and 4 buttons simultaneously for about 6 seconds, the acoustic signal is deactivated (except for the events of operating problems). - Page 12 Daily use Pull out the dispenser drawer until it stops. Measure out the amount of de- tergent required, pour it into the main wash compartment and, if you wish to carry out the prewash phase or to perform the stain function, pour the de- tergent or the stain remover into the compartment marked If required, pour fabric softener into the...
-
Page 13: Programme Option Buttons
Daily use Press this button repeatedly to change the spin speed, if you want your laundry to be spun at a speed different from the one proposed by the washing machine. The relevant light will light up. RINSE HOLD: by selecting this option the water of the last rinse is not emptied out to pre- vent the fabrics from creasing. -
Page 14: Altering An Option Or A Running Programme
Daily use To interrupt a programme which is running, press the button 8: the corresponding red pilot light starts blinking. To restart the programme from the point at which it was interrupted, press the button 8 again. If an incorrect option is selected, the yellow pilot light of the button 8 blinks for 3 times the message Err is displayed for about 2 seconds. -
Page 15: Use - Drying Only
Cancelling a programme Turn the selector dial to to cancel a programme which is running. Now you can select a new programme. Opening the door after the programme has started When the machine is working and through the delay time, the door is locked. If, for any reason, it is necessary to open it, set firstly the machine to pause by pressing the button 8. -
Page 16: Use - Washing And Drying
Use - Washing and Drying It is also possible to dry up to 4 kg of cotton items (see the «Drying Programme » table). The water tap must be open and the drain hose must be positioned in the sink or con- nected to the drain pipe. -
Page 17: Washing Programmes
Washing programmes CAUTION! Do not use a dosing device/ball when carrying out a washing and drying programme. Load the laundry. Add detergent and fabric softener. Switch the machine on: turn the selector dial to the required washing programme/fab- ric. Press the relevant buttons to set the required options. If possible, do not set a spin speed lower than that proposed by the appliance to avoid too long a drying time therefore saving energy. - Page 18 Washing programmes Programme Maximum and Minimum Temperature Cycle Description Detergent Options Maximum Spin Speed Compartment Maximum Fabrics Load Type of Laundry SYNTHETICS SPIN REDUCTION 60°- 30° RINSE HOLD Main wash - Rinses - Short spin STAIN Maximum spin speed 1200 rpm TIME SAVING Max.
- Page 19 Washing programmes Programme Maximum and Minimum Temperature Cycle Description Detergent Options Maximum Spin Speed Compartment Maximum Fabrics Load Type of Laundry DRAIN Draining of water Max. load 6 kg For emptying out the water of the last rinse in pro- grammes with the Rinse Hold option selected.
-
Page 20: Drying Programmes
Drying Programmes Programme Maximum and Minimum Temperature Cycle Description Detergent Options Maximum Spin Speed Compartment Maximum Fabrics Load Type of Laundry COTTON ECO SPIN REDUCTION 40° RINSE HOLD Main wash - Rinses - Long spin STAIN Spin at the maximum speed EXTRA RINSE Max. -
Page 21: Helpful Hints And Tips
Helpful hints and tips Suggested Degree of Drying Type of Fabric Max Load Spin Speed drying time in Mins 120-140 1400 80-90 50-60 In compliance with EC directive EN 50229 the cotton reference programme for the data entered in the Energy Label must be tested dividing the maximum washing load by two equal parts and drying with DRYING TIME each of them. -
Page 22: Laundry Weights
Helpful hints and tips Laundry weights The following weights are indicative: The following weights are indicative: bathrobe 1200 g quilt cover 700 g man’s work shirt 600 g sheet, man’s pyjamas 500 g tablecloth 250 g pillow case, towelling towel, night dress, man’s shirt 200 g tea cloth, ladies’... -
Page 23: Drying Hints
Drying Hints All commonly available washing machine detergents may be used in this appliance: • powder detergents for all types of fabric • powder detergents for delicate fabrics (60°C max) and woollens • liquid detergents, preferably for low temperature wash programmes (60°C max) for all types of fabric, or special for woollens only. -
Page 24: Care And Cleaning
Care and cleaning • Avoid drying dark clothes with light coloured fluffy items such as towels as these can attract the fluff. • Remove the laundry when the appliance has finished drying. • To avoid a static charge when drying is completed, use either a fabric softener when you are washing the laundry or a fabric conditioner specifically for tumble dryers. -
Page 25: After Each Wash
Care and cleaning Descaling The water we use normally contains lime. It is a good idea to periodically use a water soft- ening powder in the machine. Do this separately from any laundry washing, and according to the softening powder manufacturer's instructions. This will help to prevent the forma- tion of lime deposits. -
Page 26: Washing Drum
Care and cleaning Flush it out under a tap, to remove any traces of accumulated powder. Having removed the drawer, use a small brush to clean the recess, ensuring that all washing powder residue is removed from the upper and lower part of the recess. -
Page 27: Drain Pump
Care and cleaning Drain pump The pump should be inspected regularly and particularly if: • the appliance does not empty and/or spin; • the appliance makes an unusual noise during draining due to objects such as safety pins, coins etc. blocking the pump; •... -
Page 28: Cleaning The Water Inlet Filters
Care and cleaning Remove foreign bodies and fluff from the filter seat and from the pump im- peller. Check carefully whether the pump im- peller rotates (it rotates jerkily). If it doesn’t rotate, please contact your Serv- ice Centre. Put the cap back on the emergency emptying hose and place the latter back in its seat. -
Page 29: Emergency Emptying Out
Care and cleaning Turn off the water tap. Unscrew the hose from the tap. Clean the filter in the hose with a stiff brush. Screw the hose back onto the tap. Make sure the connection is tight. Unscrew the hose from the machine. Keep a towel nearby because some wa- ter may flow. -
Page 30: Frost Precautions
What to do if… is full, put the cap back on the hose. Empty the bowl. Repeat the procedure until water stops flowing out; clean the pump if necessary as previously described; replace the emergency emptying hose in its seat after having plugged it; screw the pump again. - Page 31 What to do if… Problem Possible cause/Solution The door has not been closed. E40 • Close the door firmly. The plug is not properly inserted in the power socket. • Insert the plug into the power socket. There is no power at the socket. •...
- Page 32 What to do if… Problem Possible cause/Solution Too much detergent or unsuitable detergent (creates too much foam) has been used. • Reduce the detergent quantity or use another one. Check whether there are any leaks from one of the inlet hose fit- tings.
- Page 33 What to do if… Problem Possible cause/Solution The electronic unbalance detection device has cut in because the laundry is not evenly distributed in the drum. The laundry is redis- tributed by reverse rotation of the drum. This may happen several times before the unbalance disappears and normal spinning can resume.
-
Page 34: Technical Data
Technical data TECHNICAL DATA Dimensions Width 60 cm Height 82 cm Depth 54 cm Electrical connection Information on the electrical connection is given on the rating Voltage - Overall power - Fuse plate, on the inner edge of the appliance door. Water Supply Pressure Minimum 0,05 MPa... - Page 35 Installation After removing all the packaging, care- fully lay machine on it’s back to remove the polystyrene base from the bottom. Remove the power supply cable and the draining and inlet hose from the hose holders on the rear of the appliance. Unscrew the three bolts with the key supplied with the appliance.
-
Page 36: Positioning And Levelling
Installation Slide out the relevant plastic spacers. Fill the smaller upper hole and the two large ones with the corresponding plas- tic plug caps supplied in the bag con- taining the instruction booklet. Positioning and levelling Install the machine on a flat hard floor. Make sure that air circulation around the machine is not impeded by carpets, rugs etc. -
Page 37: Water Inlet
Installation Carefully level by screwing the adjustable feet in or out. Never place cardboard, wood or similar materials under the machine to compensate for any unevenness in the floor. After having levelled the appliance, tighten the lock nuts. Water inlet An inlet hose is supplied and can be found inside the machine drum. -
Page 38: Water Drainage
Installation Set the hose correctly by loosening the ring nut. After positioning the inlet hose, be sure to tighten the ring nut again to prevent leaks. Connect the hose to a tap with a 3/4” thread. Always use the hose supplied with the appliance. -
Page 39: Electrical Connection
Electrical connection This could be done by tying it to the tap with a piece of string or attaching it to the wall. In a sink drain pipe branch. This branch must be above the trap so that the bend is at least 60 cm above the ground. -
Page 40: Building-In
Building-in WARNING! Should the appliance power supply cable need to be replaced, this must be carried out by a Service Centre. BUILDING-IN This appliance has been designed to be built into the kitchen furniture. The recess should have the dimensions shown in picture A. min. -
Page 41: Environment Concerns
Environment concerns The required dimensions are given in the picture C. The hinges will be fixed to the door by means of screws for wood (2-Fig. B) supplied with the appliance. • Mounting the door Fix the hinges (1) to the machine by means of the M5x15 screws (3-Fig. B). The hinges can be adjusted to compensate for possible uneven thickness of the door. -
Page 42: Packaging Materials
Environment concerns please contact your local council, your household waste disposal service or the shop where you purchased the product. Packaging materials The materials marked with the symbol are recyclable. >PE<=polyethylene >PS<=polystyrene >PP<=polypropylene This means that they can be recycled by disposing of them properly in appropriate collec- tion containers. - Page 43 ACCESORIOS Y CONSUMIBLES En la página web de AEG, encontrará todo lo necesario para la perfecta limpieza y funcionamiento de todos sus electrodomésticos AEG. Junto con una amplia gama de accesorios diseñados y fabricados conforme a los...
- Page 44 Índice de materias ÍNDICE DE MATERIAS 45 Información sobre seguridad 47 Descripción del producto 49 Panel de control 51 Primer uso 52 Personalización 52 Uso diario 57 Uso - Secado solo 58 Uso - Lavado y secado 58 Programas de lavado 61 Programas de secado 62 Consejos útiles 65 Consejos de secado...
- Page 45 Información sobre seguridad INFORMACIÓN SOBRE SEGURIDAD Lea las instrucciones atentamente y téngalas a mano para consultarlas en caso necesario. • La seguridad de su aparato cumple las normas industriales y los requisitos legales sobre seguridad de los electrodomésticos. No obstante, como fabricantes, nos sentimos en la obligación de facilitar las siguientes advertencias de seguridad.
- Page 46 Información sobre seguridad Instalación • Este aparato es pesado. Por tanto, se debe tener cuidado al transportarlo. • Al desembalar el aparato, compruebe que no esté dañado. Si tiene alguna duda, no lo utilice y póngase en contacto con el centro de servicio técnico. •...
- Page 47 Descripción del producto • No tire del cable eléctrico para desenchufar el aparato. Sujete siempre el cable por la cla- vija para sacarlo de la toma. • No utilice el aparato nuevo si el cable de alimentación, el panel de mandos, la superficie superior o la base presentan daños, de modo que pueda accederse al interior del aparato.
- Page 48 Descripción del producto Depósito dosificador de detergente Panel de mandos Palanca de apertura de la puerta Placa de datos técnicos Filtro Patas ajustables Depósito dosificador de detergente Compartimento de la fase de prelavado o del quitamanchas El detergente de prelavado se deposita al principio de programa de lavado.
-
Page 49: Panel De Control
Panel de control PANEL DE CONTROL En la siguiente figura se muestran los elementos del panel de control con el selector de pro- gramas, así como los botones y los pilotos indicadores. Aparecen representados por núme- ros en las páginas siguientes. 9 10 Selector de programas Botón RPM... - Page 50 Pantalla Símbolos de los botones CENTRIFUGADO INICIO/PAUSA PROLONGACIÓN DE ACLA- PUERTA BLOQUEADA RADO MANCHAS FASE DE SECADO Tiempo FASE DE LAVADO (Ahorro de tiempo) ACLARADO EXTRA INICIO DIFERIDO BLOQUEO DE SEGURIDAD PANTALLA PARA NIÑOS (Tiempo restante) TIEMPO DE SECADO PANTALLA Duración del programa seleccionado Tras seleccionar un programa, la duración del mismo se visualiza en horas y minutos (por ejemplo 2.05) La duración se calcula automáticamente sobre la base de una carga máxima...
-
Page 51: Primer Uso
Cuando se elige una opción incompatible con el programa de lavado seleccionado, aparece el mensaje Err durante unos 2 segundos y el piloto amarillo del botón 8 comienza a parpa- dear Inicio diferido El intervalo de retardo seleccionado (20 horas máx.) mediante el botón correspondiente aparece en la pantalla durante unos 3 segundos;... - Page 52 Personalización PERSONALIZACIÓN Señales acústicas La máquina incorpora un dispositivo acústico que suena en los siguientes casos: • al final del programa • en caso de producirse problemas de funcionamiento. Al presionar los botones 3 y 4 simultáneamente durante unos 6 segundos se desactiva la señal acústica (excepto en caso de problemas de funcionamiento).
- Page 53 Uso diario Tire del depósito dosificador hasta el to- pe. Mida la dosis de detergente necesa- ria y viértala en el compartimento de la- vado principal y si desea llevar a ca- bo la fase de prelavado o realizar la fun- ción manchas, vierta el detergente o el quitamanchas en el compartimento marcado con...
- Page 54 Uso diario Seleccione la velocidad de CENTRIFUGADO o la opción AGUA EN LA CUBA (tecla 2) Una vez que selecciona el programa deseado, la lavadora propone de forma automática la velocidad de centrifugado máxima que puede alcanzar dicho programa. Presione este botón varias veces para cambiar la velocidad de centrifugado si desea aplicar a la colada una distinta a la propuesta por la lavadora.
- Page 55 Uso diario El aparato realiza algunos aclarados adicionales. Seleccione INICIO/PAUSA (tecla 8). Para iniciar el programa seleccionado, pulse la tecla 8; el piloto rojo correspondiente deja de parpadear. El piloto 10.1 se enciende para indicar que la lavadora se pone en marcha. El piloto 10.2 se enciende para indicar que la puerta está...
- Page 56 Interrupción de un programa Pulse la tecla 8 para interrumpir el programa en marcha; el piloto correspondiente empieza a parpadear. Vuelva a presionar el botón para reiniciar el programa. Cancelación de un programa Gire el mando de programas hasta para cancelar un programa en marcha. Después pue- de seleccionar otro programa.
- Page 57 Uso - Secado solo USO - SECADO SOLO Sólo secado La carga máxima recomendada es de 3 kg para tejidos de algodón y lino y de 2 kg para sintéticos. También es posible secar hasta 4 kg de tejidos de algodón (consulte la tabla «Programas de secado»).
-
Page 58: Programas De Lavado
Uso - Lavado y secado USO - LAVADO Y SECADO Programa SIN PAUSAS: Lavado y secado por tiempo La carga máxima recomendada es de 3 kg para tejidos de algodón y de 2 kg para sintéticos. También es posible secar hasta 4 kg de tejidos de algodón (consulte la tabla «Programa de secado»). - Page 59 Programas de lavado Programa Temperaturas máxima y mínima Descripción del ciclo Compartimento Opciones Velocidad de centrifugado máxima de detergente Carga máxima Tipo de prenda CENTRIFUGADO ALGODÓN PRELAVADO PROLONGACIÓN DE 95° - 40° ACLARADO Prelavado - Lavado principal - Aclarados - Centrifuga- MANCHAS do largo Centrifugado a máxima velocidad...
- Page 60 Programas de lavado Programa Temperaturas máxima y mínima Descripción del ciclo Compartimento Opciones Velocidad de centrifugado máxima de detergente Carga máxima Tipo de prenda ACLARADO DEL CENTRIFUGADO Aclarados - Centrifugado largo PROLONGACIÓN DE Velocidad de centrifugado máx. 1200 rpm ACLARADO Carga máxima 6 kg ACLARADO EXTRA Permite aclarar y centrifugar prendas de algodón la-...
-
Page 61: Programas De Secado
Programas de secado Programa Temperaturas máxima y mínima Descripción del ciclo Compartimento Opciones Velocidad de centrifugado máxima de detergente Carga máxima Tipo de prenda ALGODÓN ECO CENTRIFUGADO 60° PROLONGACIÓN DE Lavado principal - Aclarados - Centrifugado largo ACLARADO Centrifugado a máxima velocidad MANCHAS Carga máxima 6 kg ACLARADO EXTRA... - Page 62 Consejos útiles Tiempo de Velocidad de secado su- Grado de secado Tipo de tejido Carga máx. centrifuga- gerido en minutos 150-170 1400 100-110 65-75 Adecuado para prendas que Tejidos sintéticos y 2 kg 100-110 pueden guardarse sin plan- mezclas 1 kg 60-70 char 140-160...
- Page 63 Consejos útiles Asegúrese de quitar todos los objetos metálicos de la ropa (como pinzas para el pelo, imperdibles, alfileres, etc.). Abotone las fundas de almohada y cierre las cremalleras, ganchos, broches, etc. Ate las co- rreas o cintas largas. Quite las manchas difíciles antes de lavar la ropa. Frote las zonas particularmente sucias con un detergente especial o en pasta.
- Page 64 Consejos útiles Hierba: utilice un poco de jabón y aplique lejía (prendas blancas y de colores sólidos sola- mente). Tinta y pegamento: humedezca con acetona , extienda la prenda sobre un paño suave y quite la mancha. Pintalabios: humedezca con acetona, como en el caso anterior, y luego quite la mancha con alcohol desnaturalizado.
- Page 65 Consejos de secado Grados de dureza del agua Nivel Tipo °dH alemán °T.H. francés blanda 0-15 intermedia 8-14 16-25 dura 15-21 26-37 muy dura > 21 > 37 CONSEJOS DE SECADO Preparación del ciclo de secado Como secadora, la máquina funciona según el principio de condensación. Por lo tanto, el grifo debe estar abierto y la manguera de desagüe debe colocarse en la pila o en la tubería de descarga, incluso durante el ciclo de secado.
-
Page 66: Mantenimiento Y Limpieza
Mantenimiento y limpieza • = no admite secadora Duración del ciclo de secado El tiempo de secado puede variar dependiendo de: • la velocidad del centrifugado final • el grado de secado necesario (seco plancha, seco armario) • el tipo de prenda •... -
Page 67: Limpieza Del Exterior
Mantenimiento y limpieza Limpieza del exterior Limpie la carcasa exterior del electrodoméstico con agua y jabón únicamente y, a continua- ción, séquelo completamente. No utilice alcohol desnaturalizado, disolventes ni otros productos similares para limpiar la carcasa. Depósito dosificador de detergente El depósito dosificador de detergente debe limpiarse con regularidad. - Page 68 Mantenimiento y limpieza Tambor de lavado La presencia de cuerpos extraños oxidantes en el lavado y el agua corriente con contenido en hierro pueden dar lugar a la formación de depósitos de óxido en el tambor. No limpie el tambor con desincrustantes ácidos, desengrasantes que contengan cloro, ni la- na de hierro o de acero.
- Page 69 Mantenimiento y limpieza Coloque un recipiente cerca de la puerta del filtro para recoger el líquido que pueda derramarse. Saque la manguera de descarga de emergencia (B), colóquela en el recipien- te y quite el tapón. Cuando deje de salir agua, desenrosque la tapa del filtro (A) girándola hacia la izquierda y retire el filtro.
- Page 70 Mantenimiento y limpieza Vuelva a colocar el filtro en la bomba in- sertándolo correctamente en las guías especiales. Enrosque la tapa de la bomba firmemente girándola hacia la derecha. ADVERTENCIA Cuando la lavadora está en marcha, depen- diendo del programa seleccionado, puede ha- ber agua caliente en el filtro.
- Page 71 Mantenimiento y limpieza Vuelva a enroscar la manguera a la má- quina y asegúrese de que la conexión queda bien apretada. Abra el grifo. Descarga de emergencia Si la lavadora no descarga, proceda de la siguiente manera para vaciarla: desconecte la clavija de la toma de corriente; cierre la toma de agua;...
- Page 72 Qué hacer si… QUÉ HACER SI… Algunos problemas, que pueden deberse sencillamente a falta de mantenimiento o a des- cuidos, pueden resolverse sin necesidad de llamar al servicio técnico. Antes de ponerse en contacto con el Centro de servicio técnico local, realice las comprobaciones indicadas en la lista siguiente.
- Page 73 Qué hacer si… Problema Causa y soluciones posibles La manguera de desagüe está doblada o retorcida. E20 • Compruebe la conexión de la manguera de desagüe. El filtro de descarga está obstruido. E20 La máquina no desagua, no • Limpie el filtro de descarga. centrifuga o no hace ningu- Se ha seleccionado una opción o programa que finaliza con agua na de las dos cosas:...
- Page 74 Qué hacer si… Problema Causa y soluciones posibles No se han quitado los pasadores ni el material de embalaje utiliza- dos para transportarla. • Compruebe la correcta instalación del aparato. No se han ajustado las patas El aparato vibra o hace mu- •...
-
Page 75: Valores De Consumo
Datos técnicos Si no puede identificar o resolver el problema, póngase en contacto con nuestro Centro de servi- cio técnico. Antes de llamar al centro, anote el modelo, el número de serie y la fecha de compra del aparato; el centro de servicio técnico le pedirá esta información. - Page 76 Instalación Programa Consumo energético Consumo de agua (li- Duración del programa (KWh) tros) (minutos) Lana/ Lavado a mano 0.25 30° 1) " Algodón Eco " a 60 °C con una carga de 6 kg es el programa de referencia para los datos de la etiqueta energética según las normas 92/75 CEE.
- Page 77 Instalación Retire el cable de alimentación y la manguera de entrada y descarga de los soportes de manguera situados en la parte trasera de la máquina. Suelte los tres pernos con la llave sumi- nistrada con la máquina. Deslice los separadores de plástico para quitarlos.
- Page 78 Instalación Tape el orificio superior más pequeño y los dos más grandes con los tapones de plástico incluidos en la bolsa con el ma- nual de instrucciones. Situación y nivelado Instale la máquina en el suelo sobre una superficie plana y rígida. Asegúrese de que el aire circula correctamente alrededor de la lavadora aunque haya mo- queta, alfombras, etc.
- Page 79 Instalación Después de haber nivelado la máquina, apriete las tuercas de seguridad. Entrada de agua Se suministra una manguera de entrada de agua que hallará en el interior del tambor de la máquina. Este electrodoméstico debe conectarse a un suministro de agua fría. No utilice la manguera de su máquina anterior para conectar el suministro de agua.
- Page 80 Instalación es la presión de agua necesaria para que el electrodoméstico funcione de forma segura en el capítulo "Datos técnicos". Dispositivo antifuga La manguera de entrada de agua se suministra con un dispositivo antifuga que protege contra el daño causado por las fugas de agua de la man- guera que pueden producirse por el envejecimien- to natural de esta última.
- Page 81 Conexión eléctrica La manguera de descarga debe extenderse hasta un máximo de 4 metros. En el centro de servicio técnico local encontrará disponibles una manguera de descarga y una pieza de unión adicionales. CONEXIÓN ELÉCTRICA Los datos de la conexión eléctrica se indican en la placa de datos técnicos, situada en el borde interno de la puerta de la lavadora.
- Page 82 Empotrado EMPOTRADO Este electrodoméstico está diseñado para empo- trarse en los muebles de cocina. El hueco de insta- lación debe tener las dimensiones que se indican min. en la figura A. min. Preparación y montaje de la puerta 176,5 La lavadora viene preparada para montar la puer- ta de manera que se abra de derecha a izquierda.
-
Page 83: Aspectos Medioambientales
Aspectos medioambientales • Montaje de la puerta Utilice 15 tornillos M5 para fijar las bisagras (1) a la lavadora (3 - Fig. B). Para compensar cualquier posible variación de grosor de la puerta se puede ajustar las bisagras. Para alinear bien la puerta es preciso aflojar el tornillo (3-Fig. B), ajustar la puerta y apre- tar de nuevo el tornillo. - Page 84 Materiales de embalaje Los materiales que llevan el símbolo son reciclables. >PE<= polietileno >PS<= poliestireno >PP<= polipropileno Esto significa que se pueden reciclar si se desechan correctamente en contenedores especí- ficos. Consejos ecológicos A continuación ofrecemos algunos consejos para ahorrar agua y energía y ayudar a prote- ger el medio ambiente: •...
- Page 88 132938760-B-092011...