Table of Contents
Advertisement
Available languages
Available languages
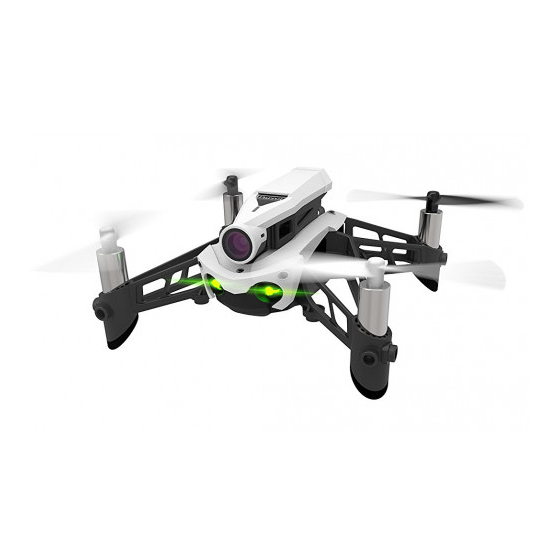
Your Parrot Mambo FPV™ contains the following:
1.
One Parrot Mambo FPV™ drone;
2.
One Parrot Flypad™ joystick. You can fly your Parrot
Mambo FPV with the Parrot Flypad or by downloading the
Freeflight Mini™ app to your smartphone or tablet. This
app is free of charge but might contain In-App Purchase
offers. It also allows you to calibrate your Parrot Mambo
FPV;
3.
One mini-HD Wi-Fi camera;
4.
One high capacity battery.
4
Advertisement
Table of Contents

Related Manuals for Parrot Mambo FPV


Summary of Contents for Parrot Mambo FPV
- Page 1 One Parrot Mambo FPV™ drone; One Parrot Flypad™ joystick. You can fly your Parrot Mambo FPV with the Parrot Flypad or by downloading the FreeFlight Mini™ app to your smartphone or tablet. This app is free of charge but might contain In-App Purchase offers.
- Page 2 WARNING Parrot Mambo FPV IS NOT A TOY. It should not be used or handled by a child under the age of 14 years. BEFORE ANY USE of the Parrot Mambo FPV: (A) READ CAREFULLY this User Guide and all information and documentation available at www.parrot.com, which may...
- Page 3 PRESENTATION OF THE PARROT MAMBO FPV Hull Connector Hull lights Charging Micro port Stud Battery location On/Off button Camera...
- Page 4 INTRODUCING THE PARROT FLYPAD On/Off button LED light Charging Micro-USB connector Smartphone holder location...
- Page 5 PARROT COCKPITGLASSES Smartphone installation cover Interpupillary distance adjustment cursors The Parrot Cockpitglasses 2 can be used with a smartphone and the Parrot Flypad. Never leave the Parrot Cockpitglasses 2 in the sun when not in use. This could damage your phone.
- Page 6 PRESENTATION OF THE HD CAMERA Micro-SD port LED light...
- Page 7 OF THE PARROT MAMBO 1. Place the battery in the slot provided for this purpose. 2. With the micro-USB cable, connect the Parrot Mambo to a computer or a USB power adapter. The charging LED is solid red during charging.
- Page 8 2. Connect the USB port to a computer or a USB power adapter. turns during charging. The charging time is approximately 2 hours with a 2.1A charger. When charging is complete, the LED turns green. The Parrot Flypad has a battery life of approximately 6 hours.
- Page 9 Insert the battery into the compartment provided or press the On/Off switch. > The Parrot Mambo lights up. 1. Place the Parrot Mambo on a flat surface with the propellers facing upwards. 2. Wait for the LED lights to start flashing green.
- Page 10 CONNECTING THE CAMERA TO THE PARROT MAMBO FPV 1. Connect the Camera to the Parrot Mambo FPV. 2. Launch FreeFlight Mini on the smartphone and connect the app to the drone. > On iOS: the app prompts you to enable Wi- Fi to connect the smartphone to the Parrot Mambo FPV.
- Page 11 USING THE PARROT COCKPITGLASSES FreeFlight Mini in FPV mode must be enabled before placing the smartphone in the Parrot Cockpitglasses. 1. Unfold the Parrot Cockpitglasses 2. Launch the FreeFlight Mini app on the smartphone, connect the drone and activate FPV mode 3.
- Page 12 Make sure the front cover is securely closed and the smartphone is firmly in position. INTERPUPILLARY DISTANCE ADJUSTMENT 1. Adjust the Parrot Cockpitglasses strap before putting it on. 2. Make sure the lenses are at your eye level by adjusting the position of the Parrot Cockpitglasses on your nose.
- Page 13 YOU SHOULD NOT POINT THE PARROT COCKPITGLASSES 2 TOWARDS THE SUN OR ANY OTHER LIGHT SOURCES. SERIOUS EQUIPMENT DAMAGE AND/OR PERSONAL INJURY, ESPECIALLY OCULAR, MAY RESULT IF YOU DIRECT THE PARROT COCKPITGLASSES 2 TOWARDS THE SUN OR ANY OTHER LIGHT SOURCES.
- Page 14 TAKING OFF 1. Place the Parrot Mambo on a flat surface with the propellers facing upwards. 2. Press the button on the Parrot Flypad. > Parrot Mambo takes off and stabilises at 1 metre from the ground while commands are pending.
- Page 15 FLYING LEFT CONTROL STICK RIGHT CONTROL STICK Forward Climb Rearward Descend Move to the left Turn left Move to the Turn right right...
- Page 16 Acrobatics 4 Acrobatics 2 Acrobatics 3 Take a photo This configuration is the default configuration. You can modify and customise the commands of the Parrot Flypad with the FreeFlight Mini app. Acrobatics are not available with all Parrot Mambo accessories.
- Page 17 FreeFlight Mini app. ACCESSORIES HULLS Attach the hulls to the arms of the Parrot Mambo. Make sure that the hulls are securely fastened to the Parrot Mambo studs by pressing downwards. Remove the hulls: gently remove the hulls from the...
- Page 18 WARNING LIGHT INDICATIONS PARROT MAMBO FPV Solid The Parrot Mambo is starting up. orange Flashing The Parrot Mambo is starting up. green Solid The Parrot Mambo is green ready for use. The Parrot Mambo Flashing battery is low. > Recharge the battery.
- Page 19 PARROT FLYPAD The Parrot Flypad is connected to the Green Parrot drone or your smartphone. Flashing The Parrot Flypad is green starting up. The Parrot Flypad is waiting to connection Flashing connect but its battery is low. > Charging the Parrot Flypad's battery.
- Page 20 Keep the Parrot Mambo away from high voltage power lines, buildings or any other potentially hazardous areas. Do not use this device near liquids. Do not place the Parrot Mambo on water or on a wet surface as this could cause irreparable damage.
- Page 21 This will help to foster the sustainable re-use of material resources. Please contact your retailer or inquire at your local town hall to find out where and how the Parrot Mambo can be recycled.
- Page 22 TRADEMARKS Parrot and the Parrot logo are trademarks of Parrot SA, used under licence. Parrot Mambo FPV, Parrot Flypad and its logo are trademarks of Parrot Drones SAS. App Store is a trademark of Apple Inc.
- Page 23 II equipment marked with the symbol opposite. MANUFACTURER INFORMATION The Parrot Mambo FPV/Parrot Flypad is manufactured by: PARROT DRONES SAS - 174 Quai de Jemmapes - 75010 Paris (France) - Corporate and Trade Register Paris 808 408 074 FCC ID: 2AG6IDELOS3 www.parrot.com...
- Page 24 Votre Parrot Mambo FPV™ contient les éléments suivants : Un drone Parrot Mambo FPV™ ; Une manette Parrot Flypad™. Vous pouvez piloter votre Parrot Mambo FPV avec le Parrot Flypad ou en téléchargeant sur votre smartphone ou tablette l’application FreeFlight Mini™. Cette application est gratuite mais peut contenir des In-App Purchase.
- Page 25 AVERTISSEMENT Parrot Mambo FPV N’EST PAS UN JOUET. Il ne doit donc pas être utilisé ou manipulé par un enfant âgé de moins de 14 ans. AVANT TOUTE UTILISATION du Parrot Mambo FPV: (a) LISEZ ATTENTIVEMENT ce Guide Utilisateur ainsi que toutes les informations et documentations disponibles sur www.parrot.com, qui peuvent être mises à...
- Page 26 PRÉSENTATION DU PARROT MAMBO FPV Carène Connecteur Carène Voyants lumineux Port micro- charge Plot Languette Emplacement de la batterie Bouton On/Off Caméra...
- Page 27 PRÉSENTATION DU PARROT FLYPAD Bouton On/Off Voyant lumineux LED de charge Prise micro-USB Fixations du support pour smartphone...
- Page 28 Curseurs de réglage de la distance inter- pupillaire Les Parrot Cockpitglasses 2 s’utilisent avec un smartphone et le Parrot Flypad. Ne laissez jamais les Parrot Cockpitglasses 2 au soleil lorsque vous ne les utilisez pas. Cela pourrait endommager votre téléphone.
- Page 29 PRÉSENTATION DE LA CAMERA HD Port micro-SD Voyant lumineux...
- Page 30 DU PARROT MAMBO FPV 1. Insérez la batterie dans l’emplacement prévu à cet effet. 2. Avec le câble micro-USB, connectez le Parrot Mambo à un ordinateur ou à un adaptateur secteur USB. La LED de charge est rouge fixe pendant la charge.
- Page 31 USB. La LED passe au rouge pendant la charge. Le temps de charge est d’environ 2 heures avec un chargeur 2,1A. Lorsque la charge est terminée, la LED passe au vert. Le Parrot Flypad a une autonomie d’environ 6 heures.
- Page 32 Insérez la batterie dans l’emplacement prévu à cet effet ou appuyez sur le switch On/Off. > Le Parrot Mambo s’allume. 1. Posez le Parrot Mambo sur une surface plane, les hélices vers le haut. 2. Attendez que les voyants lumineux passent au vert clignotant.
- Page 33 CONNECTER LA CAMERA AU PARROT MAMBO FPV 1. Branchez la Camera sur le Parrot Mambo FPV. 2. Lancez FreeFlight Mini sur le smartphone et connectez l’application au drone. > Sur iOS : l’application invite à activer le Wi-Fi afin de connecter le smartphone au Parrot Mambo FPV.
- Page 34 UTILISER LES PARROT COCKPITGLASSES FreeFlight Mini en mode FPV doit être activé avant de placer le smartphone dans les Parrot Cockpitglasses. 1. Dépliez les Parrot Cockpiglasses 2. Lancez l’application FreeFlight Mini sur le smartphone, connectez le drone et activez le mode FPV 3.
- Page 35 1. Ajustez la sangle des Parrot Cockpitglasses avant de le porter. 2. Assurez-vous que les lentilles soient à la hauteur de vos yeux en ajustant la pose du Parrot Cockpitglasses sur le nez. 3. Ajustez l’écartement des lentilles par rapport à...
- Page 36 PRECAUTIONS EN PORTANT LES PARROT COCKPITGLASSES 2 VOUS NE DEVEZ PAS DIRIGER LES PARROT COCKPITGLASSES 2 VERS LE SOLEIL OU TOUTES AUTRES SOURCES LUMINEUSES. DE GRAVES BLESSURES MATERIELLES ET/ CORPORELLES NOTAMMENT OCULAIRES PEUVENT SURVENIR SI VOUS DIRIGEZ LES PARROT COCKPITGLASSES 2 VERS LE SOLEIL OU TOUTES AUTRES SOURCES LUMINEUSES.
- Page 37 1. Posez le Parrot Mambo sur une surface plane, les hélices vers le haut. 2. Appuyez sur le bouton du Parrot Flypad. > Parrot Mambo décolle et se stabilise à 1 mètre du sol en attente de commandes. ATTERRIR Pour faire atterrir le Parrot Mambo, appuyez sur le bouton >...
- Page 38 PILOTER COMMANDE GAUCHE COMMANDE DROITE Avancer Monter Reculer Descendre Déplacement Tourner à vers la gauche gauche Déplacement Tourner à vers la droite droite...
- Page 39 Acrobatie 2 Acrobatie 3 Prendre une photo Cette configuration est la configuration par défaut. Vous pouvez modifier et personnaliser les commandes du Parrot Flypad avec l’application FreeFlight Mini. Les acrobaties ne sont pas disponible avec tous les accessoires du Parrot Mambo.
- Page 40 FreeFlight Mini. ACCESSOIRES CARÈNES Fixez les carènes sur les bras du Parrot Mambo. Assurez-vous que les carènes sont bien fixées sur les plots du Parrot Mambo en appuyant dessus. Retirer les carènes : retirez délicatement les carènes...
- Page 41 COMPORTEMENT DES VOYANTS LUMINEUX PARROT MAMBO FPV Le Parrot Mambo Orange est en cours de fixe démarrage. Le Parrot Mambo Vert est en attente de clignotant connexion. Vert Le Parrot Mambo est fixe prêt à être utilisé. La batterie du Parrot Rouge Mambo est faible.
- Page 42 PARROT FLYPAD Le Parrot Flypad est connecté au drone Vert Parrot ou à votre smartphone. Vert Le Parrot Flypad est en clignotant attente de connexion. Le Parrot Flypad est en attente de connexion Rouge mais sa batterie est faible. clignotant >...
- Page 43 Parrot Mambo. Utilisez uniquement les accessoires spécifiés par Parrot Drones SAS. Si du sable ou de la poussière pénètre dans le Parrot Mambo , celui-ci peut ne plus fonctionner correctement, de manière irréversible. N’utilisez pas le Parrot Mambo dans des conditions météorologiques défavorables (pluie, vent fort, neige) ou lorsque les conditions de visibilité...
- Page 44 Vous favoriserez ainsi la réutilisation durable des ressources matérielles. Nous vous invitons à contacter votre revendeur ou à vous renseigner auprès de votre mairie afin de savoir où et comment le Parrot Mambo peut être recyclé.
- Page 45 Pour assurer la conformité, l’utilisation à une distance inférieure n’est pas recommandée. MARQUES Parrot et le logo Parrot sont des marques de Parrot SA utilisées sous licence. Parrot Mambo FPV, Parrot Flypad et son logo sont des marques de Parrot Drones SAS.
- Page 46 être connecté au matériel de classe II por- tant le symbole ci-contre. INFORMATIONS FABRIQUANT Le Parrot Mambo FPV / Parrot Flypad est fabriqué par : PARROT DRONES SAS - 174 Quai de Jemmapes - 75010 Paris (France) - RCS Paris 808 408 074 www.parrot.com...