Axminster Trade Series Manual
Fixed speed / deluxe variable speed sharpening systems
Hide thumbs
Also See for Trade Series:
- Original instructions manual (36 pages) ,
- Manual (32 pages) ,
- Instruction manual (28 pages)

Related Manuals for Axminster Trade Series


Summary of Contents for Axminster Trade Series
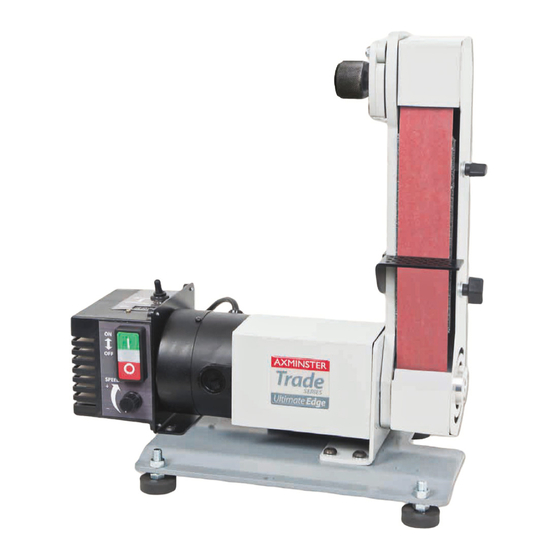
- Page 1 Code 103473 Code 103474 Original Instructions Ultimate Edge (P-50) Sharpening Systems 103473 Fixed Speed System 103474 Deluxe Variable Speed System AT&M: 11/12/2018 BOOK REF : APT007333...
-
Page 2: Eu Declaration Of Conformity
Exploded Diagrams/List 20-21-22-23 Wiring Diagrams 24-25 EU Declaration of Conformity Cert No: P-50 EU Declaration of Conformity Axminster Tools & Machinery Ltd This machine complies with the following directives: Axminster Devon EX13 5PH UK axminster.co.uk 2006/42/EC 2014/35/EU declares that the machinery described:-... -
Page 3: What's Included
What’s Included Model Number Ultimate Edge (P-50) Model Number Ultimate Edge (P-50) Quantity Item Part Quantity Item Part Ultimate Edge (Fixed Speed) Ultimate Edge (Deluxe Variable Speed) Abrasive Belt (Fitted) Adjustable Rubber Feet Work Table with two Caphead Screws Graphite Pad (Self Adhisive) Long Hex Key 4mm Butterfly Threaded Knobs with Washers Sanding Belt Access Plate... -
Page 4: Specification
General Instructions for 230 Machines The following will enable you to observe good working • Carry out a final checks to the machine. practices, keep yourself and fellow workers safe and maintain • Ensure you are comfortable before you start work, your tools and equipment in good working order. - Page 5 Assembly Threaded Rubber Feet Locate the four ‘Rubber Feet’ (C), remove one nut from each of the threaded feet and place aside. Slot each threaded foot through the four pre-drilled holes to each corner of the units base. Replace the nuts, stand the unit upright and adjust each foot in turn until the machine is level, see fig 01-02.
- Page 6 Assembly Fig 09 2. Rotate the lever (2) to the side of the linisher, see fig 10-11. Press down the lever to release the belt tension, see fig12. Fig 10-11 Fig 12 Graphite Pad NOTE: IF YOU PREFER NOT TO USE THE ‘GRAPHITE PAD’...
- Page 7 Assembly 3. Remove the belt and place safely aside, see fig 13. Fig 13 Note: After a period of time the ‘Graphite Pad’ will become worn and we recommend fitting the optional ‘Slip Plate’ , code 105676, see picture below. 4.
-
Page 8: Illustration & Parts Description
Illustration & Parts Description Belt tension mechanism Belt tracking control knob Linisher guarding Locking pin Belt access plate Belt Clamping knob Work table Dust extraction outlet Elongated slots Motor allowing access to pivot the linisher Power takeoff for attaching accessories Base plate NVR Control switch Adjustable rubber foot... - Page 9 Illustration & Parts Description NVR ON/OFF switch (Green ON) & (Red OFF) Work Table Locking pin for tension mechanism (A), Tracking control knob The linisher can be pivoted to the required (B), Operating lever (C) too release the tenstion to the belt angleby adjusting the two Hex screws (H) 25mm Dust extraction outlet (F) Belt tension mechanism...
- Page 10 Illustration & Parts Description Belt tension mechanism Linisher guarding Locking pin Belt tracking control knob Motor brush access cap Main ON/OFF switch Belt access plate Belt Clamping knob Dust extraction outlet Work table Motor Elongated slots allowing access to pivot the linisher Power takeoff for attaching accessories...
- Page 11 Illustration & Parts Description Main ON/OFF switch Foward/Reverse selector switch Speed digital readout Heat sink air vents Speed control dial ON/OFF buttons...
- Page 12 Setup/Adjustment Tracking the Belt (Variable Speed Model Only) KEEP WORK AREA AS UNCLUTTERED AS IS Switch ON PRACTICAL. UNDER NO CIRCUMSTANCES SHOULD CHILDREN BE ALLOWED IN WORK AREAS. CONNECT THE MACHINE TO THE MAINS SUPPLY! 1. Press the main ON/OFF on switch to the ‘ON’ postion, see fig 18.
- Page 13 Setup/Adjustment 5. Turn the ‘Tracking Control Knob’ until the belt is centred on (Fixed Speed Model) the platen, see fig 24-25-26. To power on the ‘Ultimate Edge’ fixed speed model press the ‘Green’ “ON” button, see fig 27 then proceed to step 5 as NOTE: Don’t make sudden adjustments otherwise you described on the opposite page.
- Page 14 Operating Instructions NVR Control Box (Variable Speed Model) The control box comprises of a main ON/OFF switch to the rear that isolates the power to the machine, a Forward/Reverse switch to change the belts direction, ‘Variable Speed Control Switch ON Dial’...
-
Page 15: Changing The Belt
Changing the Belt DISCONNECT THE MACHINE FROM THE MAINS SUPPLY! Remove old belt Remove the belt ‘Access Plate’ Clean linisher Continues over... - Page 16 Changing the Belt Press down the lever and hold in place, pull the locking pin out and raise the roller assembly to re-tension the linisher belt. Press down Place a new belt on the drive rollers and centre. Pull locking pin NOTE: Make sure the arrows on the reverse side of the...
-
Page 17: Changing Motor Brushes
3. If they are in good condition, re-fit. If they were worn to the ‘Line’ replace with new brushes. For after sales enquires, call 03332 406406. Line Email: cs@axminster.co.uk Website: axminster.co.uk 4. Replace the new brushes and brush caps, re-connect to mains supply and run the machine off load for approx. 20 minutes to allow the brushes to bed in. - Page 18 Tormek ® Jigs for Gouges (code 102132) platter both horizontally and vertically. Axminster Honing Guide Assembly (code 105281) Many of the Tormek® jigs work amazingly well on the 12mm bar of the Ultimate Edge and provide the user with extremely sharp and accurately ground tools.
- Page 19 Ultimate Edge Accessories The unique “Twist n Fix” multipurpose arbor allows for the Universal Edge Gauge Setting (code 103730) virtually instant change of different mops, felt wheels and profiling wheels. Supplied with mounting screws and one “Twist n Fix” arbor additional arbors can be purchased singularly or in a set of 3.
- Page 20 (belt traveling away from the blade tip) • Never use the belt in a anti-clockwise direction (belt traveling towards the Axminster Polishing & Honing Accessories blade tip) A variety of 12mm bore polishing wheel mops both stitched, loose leaf and sisal. Description Code 4”...
- Page 21 Ultimate Edge Accessories Description Code Nylon Abrasive Wheel for Ultimate Edge - Soft 105581 Nylon Abrasive Wheel for Ultimate Edge - Medium 105582 Nylon Abrasive Wheel for Ultimate Edge - Hard 105583 Felt Wheel for Ultimate Edge - Hard 105580 Felt Wheel for Ultimate Edge - Medium 105579 Felt Wheel for Ultimate Edge - Soft...
- Page 22 Exploded Diagrams/List...
- Page 23 Exploded Diagrams/List Part No Description Specification Q’ty Bush Cable Gland Shaft Switch Box Washer Bush Live Wheel Buttom Head Screw M6x12 Buttom Head Screw M10x15 Power Cord Stop Rod Motor Cord Washer Motor Lock Nut M6x15 Base Plate Washer 1/4” Rubber Foot Buttom Head Screw l/4”x1”...
- Page 24 Exploded Diagrams/List...
- Page 25 Exploded Diagrams/List Part No Description Specification Q’ty Flat Head Screw M6x18 Control Box Knob Round Head Screw #10-24*5/16” Set Screw M5x12 Strain Relief Bushing 6P-4 Spring #10-24 Shaft VR Knob Lock Pin Set Round Head Sheet Metal M3X20MM 1/2”-13UN- Screw Cx8t PC Board Nylon Nut...
-
Page 26: Wiring Diagram
Wiring Diagram... - Page 27 Wiring Diagram...
- Page 28 The Axminster guarantee is available on Craft, Trade, Engineer, Air Tools & CNC Technology Series machines Buy with confidence from Axminster! So sure are we of the quality, we cover all parts and labour free of charge for three years! For more information visit axminster.co.uk/3years...