Makita DSC102 Instruction Manual
Cordless threaded rod cutter
Hide thumbs
Also See for DSC102:
- Instruction manual (81 pages) ,
- Instruction manual (44 pages) ,
- Instruction manual (77 pages)
Table of Contents
Advertisement
Quick Links
Advertisement
Table of Contents

Related Manuals for Makita DSC102


Summary of Contents for Makita DSC102
- Page 1 INSTRUCTION MANUAL Cordless Threaded Rod Cutter DSC102 Read before use.
-
Page 2: Specifications
SPECIFICATIONS Model: DSC102 Cutting capacities Mild steel W3/8, M10, M8, M6 Stainless steel W3/8, M8, M6 Overall length 199 mm Rated voltage D.C. 18 V D.C. 14.4 V Net weight 2.8 - 3.2 kg • Due to our continuing program of research and development, the specifications herein are subject to change without notice. • Specifications may differ from country to country. - Page 3 Electrical Safety Do not let familiarity gained from frequent use of tools allow you to become complacent and Power tool plugs must match the outlet. Never ignore tool safety principles. A careless action can modify the plug in any way. Do not use any cause severe injury within a fraction of a second.
- Page 4 Keep handles and grasping surfaces dry, Do not put the tool on the chips of the work- clean and free from oil and grease. Slippery piece. Otherwise it can cause damage and handles and grasping surfaces do not allow for trouble on the tool. safe handling and control of the tool in unexpected Always be sure you have a firm footing.
- Page 5 12. Use the batteries only with the products specified by Makita. Installing the batteries to non-compliant products may result in a fire, exces- sive heat, explosion, or leak of electrolyte. SAVE THESE INSTRUCTIONS. CAUTION: Only use genuine Makita batteries. Use of non-genuine Makita batteries, or batteries that have been altered, may result in the battery bursting causing fires, personal injury and damage. It will also void the Makita warranty for the Makita tool and charger. Tips for maintaining maximum battery life Charge the battery cartridge before completely discharged.
-
Page 6: Parts Description
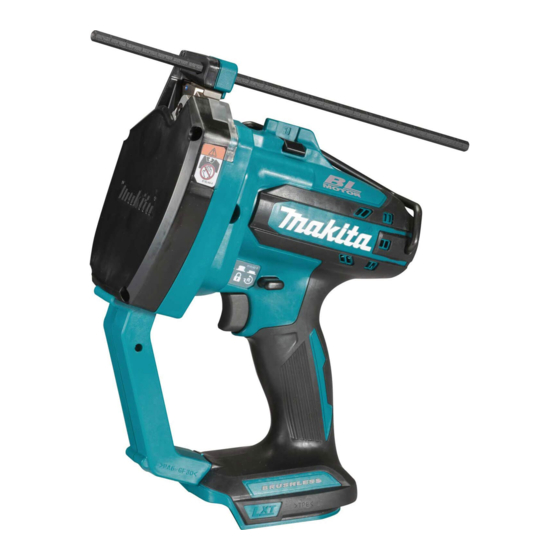
PARTS DESCRIPTION Stationary mount Movable mount Cutting die Bolt Hook Shoulder strap base Hex Wrench Lamp (inside) (for optional accessory) Front face Switch trigger Reversing switch lever Rod guide Guide scale Clamping screw Cover 6 ENGLISH... -
Page 7: Functional Description
Tool / battery protection system FUNCTIONAL DESCRIPTION The tool is equipped with a tool/battery protection sys- tem. This system automatically cuts off power to the motor to extend tool and battery life. The tool will auto- CAUTION: matically stop during operation if the tool or battery is Always be sure that the tool is placed under one of the following conditions. switched off and the battery cartridge is removed before adjusting or checking function on the tool. Overload protection Installing or removing battery When the tool is operated in a manner that causes it to... - Page 8 Indicator lamps Remaining capacity Lighted Blinking 75% to 100% 50% to 75% 25% to 50% 0% to 25% Charge the ► 1 . Stationary mount 2. Cutting die 3. Movable mount battery. The battery NOTICE: Do not operate the tool at no-load may have unnecessarily. malfunctioned.
- Page 9 Guide scale Use the guide scale if you wish to cut threaded rods in the same length. Insert the guide scale into the hole as shown in the figure. ► 1 . Guide scale 2. Clamping screw ► 1 . Reversing switch lever 2. Cutting position 3. Lock position 4. Reversing position Align the value of your desired length on the guide scale with the cutting line. Then tighten the clamping screw. NOTICE: When the reversing switch lever is in the reversing position, run the tool only as needed.
- Page 10 There are two rod guide positions. Hex wrench storage Position Size of threaded rod When not in use, store the hex wrench as shown in the W3/8, M10 figure to keep it from being lost. M8, M6 Hook CAUTION: Never hook the tool on a windy location or a potentially unstable surface.
- Page 11 ► 1 . Reversing switch lever Unscrew the bolts with the supplied hex wrench. CAUTION: Use only the Makita wrench pro- vided with the tool. Using other wrenches may result in overtightening or insufficient tightening which causes personal injury. ► 1 . Arrow 2. Cutting die 3. Thin side 4. Thick side...
-
Page 12: Operation
OPERATION CAUTION: Make sure that the correct size of the cutting dice are installed to the tool. Check the cutting capacity written on the the cutting dice before cutting. CAUTION: Before pulling the switch trigger, be sure to set the threaded rod so that its thread fits with those of cutting dice. -
Page 13: Maintenance
The cover has markings to indicate its position. Cutting loose threaded rods Depending on the size of the threaded rod, put the cover in the position as shown in the table as well as the When cutting a loose threaded rod on the floor or a rod guide. work table, follow the procedure below : Position Size of threaded rod W3/8, M10... -
Page 14: Optional Accessories
OPTIONAL ACCESSORIES CAUTION: These accessories or attachments are recommended for use with your Makita tool specified in this manual. The use of any other accessories or attachments might present a risk of injury to persons. Only use accessory or attachment for its stated purpose. If you need any assistance for more details regard- ing these accessories, ask your local Makita Service ► 1 . Cutting edge 2. Thin side 3. Thick side Center. - Page 16 Makita Corporation 885631-4 20171109 www.makita.com...