Beko WM 6133 S Installation & Operating Instructions And Washing Guidance
Beko washer user manual
Hide thumbs
Also See for WM 6133 S:
Table of Contents
Advertisement
Advertisement
Table of Contents

Related Manuals for Beko WM 6133 S


Summary of Contents for Beko WM 6133 S
- Page 1 Automatic washing machine WM 6143 S WM 6133 W WM 6143 W WM 6133 S...
- Page 2 Dear Customer, We hope that your product which has been manufactured in modern facilities and passed through a strict quality control procedure will give you the best results. Therefore, we advise you to read through this manual carefully before using your product and keep it for future reference.
-
Page 3: Table Of Contents
TABLE OF CONTENTS 1 Your Washing Machine Overview ..... . .4 Specifications ....5 2 Warnings General Safety. -
Page 4: Your Washing Machine
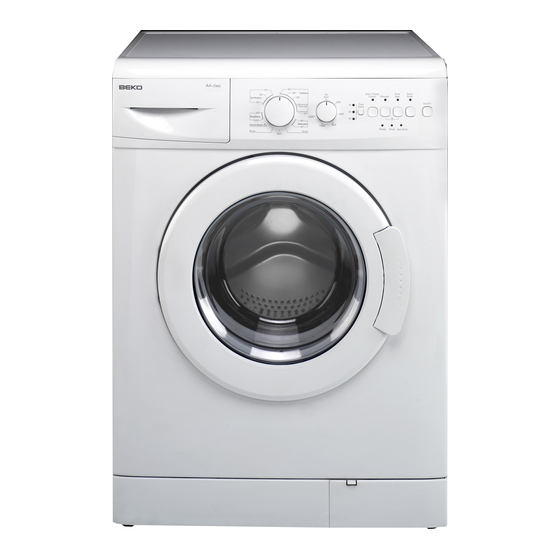
Overview � � 1 - Detergent Drawer 2 - Door 3 - Top Lid 4 - Control Panel 5 - Filter Cap 6 - Height-adjustable feet � � � �... -
Page 5: Specifications
Specifications Models Maximum dry laundry capacity (kg) Height (cm) Width (cm) Depth (cm) Net Weight (kg) Electricity (V/Hz.) Total Current (A) Total Power (W) Spinning cycle (rpm max.) Specifications of this appliance may change without notice to improve the quality of the product. Figures in this manual are schematic and may not match your product exactly. Values stated on the machine labels or in the documentation accompanying it are obtained in laboratory in accordance with the relevant standards. -
Page 6: Warnings
Warnings Please read the following information. Otherwise, there may be the risk of personal injury or material damage. Moreover, any warranty and reliability commitment will become void. General Safety • Never place your machine on a carpet covered floor. Otherwise, lack of airflow from below your machine may cause electrical parts to overheat. This may cause problems with your washing machine. • If the power cable or mains plug is damaged you must call Authorized Service for repair. -
Page 7: If There Are Children In Your House
risk of flooding and possible injury due to the hot water. • Never force open the locked door! The door will be ready to open just a few minutes after the washing cycle comes to an end. • Unplug the machine when it is not in use. • Never wash down the appliance with a water hose! There is the risk of electric shock! Always disconnect from the mains by unplugging before cleaning. - Page 8 proceed as follows: 1 Connect the green - yellow or green (earth) wire to the terminal in the plug marked ‘E’ or with the symbol f or coloured green and yellow or green. 2 Connect the blue (neutral) wire to the terminal in the plug marked ‘N’ or coloured black. 3 Connect the brown (live) wire to the terminal in the plug marked ‘L’ or coloured red.
-
Page 9: Installation
Installation Removing packaging reinforcement Tilt the machine to remove the packaging reinforcement. Remove the packaging reinforcement by pulling the ribbon. Opening the transportation locks C Transportation safety bolts must be removed before operating the washing machine! Otherwise, the machine will be damaged! 1. Loosen all the bolts with a spanner until they rotate freely (“C”) 2. -
Page 10: Connecting To The Water Supply
Connecting to the water supply. Important: • The water supply pressure required to run the machine must be 1-10 bar (0,1 – 1 MPa). (Practically, it is necessary to have 10 – 80 liters of water flowing from the tap in one minute to have your machine run smoothly.) Attach a pressure- reducing valve if the water pressure is higher. • Connect the special hose supplied with the machine to the water intake valves on the machine. -
Page 11: Electrical Connection
machine, and to allow for easy discharge, the end of the hose must not be submerged in the drain water. The end of the hose must be able to take in air. The hose should be pushed into the drainage for more than 15 cm. -
Page 12: Initial Preparations For Washing
Initial preparations for washing Sorting the laundry • Sort the laundry according to type of fabric, color, and degree of soiling and permissible water temperature. Always follow the advice on the garment labels. Washing water Wash with Non machine washable temperature sensitive, short programs. Bleach can be Do not use Dry-cleanable used... -
Page 13: Correct Load Capacity
Correct load capacity • The maximum load capacity depends on the type of laundry, the degree of soiling and the washing program you wish to use. C The machine adjusts the amount of water according to the amount of laundry placed inside. C Please follow the information in the "Program Selection Table". Washing results will degrade when the machine is overloaded. -
Page 14: Liquid Detergent
excessive foam, poor rinsing, financial savings and finally, environmental protection. • Use small amounts of detergent at a suitable measure for small amounts of laundry or for only slightly soiled laundry. • Use exact measures for highly concentrated detergents. Detergent quantity for prewashing 1/2 measure for main washing 1 measure an additional 1/2 with hard water measure... -
Page 15: Selecting A Program And Operating Your Machine
Selecting a Program and Operating Your Machine Control panel Figure 2 1 - On / Off Button 2 - Temperature Adjustment Knob * 3 - Program Follow-up Indicator * 4 - Child-proof Lock Indicator * 5 - Spin Speed Adjustment Knob * 6 - Program Selection Knob 7 - Time Delaying Button * 8 - Auxiliary Function Keys 9 - Start/Pause/Cancel Button * According to your machine’s model... -
Page 16: Turning The Machine On
Turning the machine on Prepare the machine for program selection by pressing the “On/Off” button. When “On/Off” button is pressed, “Ready” light illuminates indicating that the door is ready to be opened. Press the “On/Off” button again to shut down the machine. C Pressing the “On/Off” button does not necessarily mean the program has started. Press “Start/Pause/Cancel” button to allow the machine start the program. Program selection Select the appropriate program from the program table and the following washing temperature table according to type, amount and degree of soiling of the... -
Page 17: Spin Speed Selection
washing movements without damaging your clothes. Additional programs For special cases, there are also extra programs available: C Additional programs may differ according to the model of your machine. • Baby Increased hygiene is provided by a longer heating period and an additional rinse cycle. -
Page 18: Program Selection And Consumption Table
Program selection and consumption table Programme Cottons Cottons 60** Cottons Intensive Synthetics Synthetics Delicate Woollens Hand wash • : Selectable * : Automatically selected, not cancellable. **: Energy Label programme (EN 60456) Water and power consumption and program duration may differ from the table subject to changes in water pressure, water hardness and temperature, ambient temperature, type and amount of laundry, selection of auxiliary functions, and changes in electric voltage. -
Page 19: Auxiliary Functions
Auxiliary functions Auxiliary function selection keys Select the required auxiliary functions before starting the program. C Auxiliary function buttons may differ according to the model of your machine. Auxiliary function selection If an auxiliary function that should not be selected together with a previously selected function is chosen, the first selected function will be cancelled and the last auxiliary function selection will... -
Page 20: Starting The Program
program is started by pressing the “Start/Pause/Cancel” button after making the time delay selection. C More laundry may be loaded/ removed during the time delay period. Changing and canceling the time delay. 1. Press the “Start/Pause/Cancel” button to switch the machine to “Pause” mode. 2. Press “Start/Pause/Cancel” button to start the program after making the new time delay selection. -
Page 21: Child-Proof Lock
“Start/Pause/Cancel” button and switch the machine to “Pause” mode in order to change the spin speed or temperature. New spin speed or temperature can be selected. Adding/removing laundry in standby mode If you want to add more laundry into the machine after the washing cycle has started, put the machine into “Pause” mode by pressing the “Start/Pause/ Cancel” button. The “Ready” lamp on the program follow-up indicator will light... -
Page 22: Quick Instructions For Daily Use
Quick instructions for daily use Preparation 1. Turn the tap on completely. Check if the hoses are connected tightly. 2. Place the laundry in the machine. 3. Add detergent and softener. Starting 1. Press the “On/Off” button. 2. Select the programme and the temperature. 3. If required (according to your machine’s model): – select any auxiliary function, – adjust the spin speed, – set the time delay, 4. - Page 23 After the program is finished 1. “Ready” lamp will light up on the program follow-up indicator. Open the loading door and take out the clothes. 2. Press the “On/Off” button. 3. Turn the water tap off. 4. Eliminate any folding of the rubber seal on the loading door and check for impurities. 5. Leave the loading door and detergent drawer open to dry.
-
Page 24: Cleaning And Care
Cleaning and care Detergent drawer Remove any powder residue buildup in the drawer. To do this; 1. Press the dotted point on the siphon in the softener compartment and pull towards you until the compartment is removed from the machine. C If more than a normal amount of water and softener mixture starts to gather in the softener compartment, the siphon must be cleaned. -
Page 25: Draining Any Remaining Water And Cleaning The Pump Filter
under streaming water. • Replace the gaskets and filters carefully and tighten the hose nuts by hand. Draining any remaining water and cleaning the pump filter Filter system in your machine prevents solid items such as buttons, coins and fabric fibers clogging the pump propeller during discharging of the washing water. - Page 26 filter to receive water flowing from the filter. • Loosen pump filter (anticlockwise) until water starts to flow out of it. Direct the flowing water into the container you have placed in front of the filter. You can use a piece of cloth to absorb any spilled water. • When there is no water left, turn the pump filter until it is completely loose and remove it.
-
Page 27: Troubleshooting
Troubleshooting Problem Cause Machine may have Program switched to self cannot be protection mode due to started or an infrastructure problem selected. (such as line voltage, water pressure, etc.). There may be some water in your machine when you Water in the receive it. This is from the machine. - Page 28 No water can This is not a problem. The be seen in the water level is not visible machine during from the outside of the washing. machine. Water level might be above the lower level of the door. Machine might be heating up the water or it may be at The door is the spinning cycle.
- Page 29 In the case of a paused countdown while taking in water: Timer will not countdown until the machine is filled with the correct amount of water. In the case of a paused countdown at the heating step: It continuously Time will not count washes.
- Page 30 Insufficient amount of detergent used. Washing Excessive laundry loaded performance is into machine poor: Stain could not Wrong program and be removed, temperature might have not cleaned. been selected. Laundry Improper detergent may could not be have been used. whitened. Wrong type of detergent used.
- Page 31 Insufficient amount of detergent used. Clothes The detergent may have stiffened. been placed into the wrong compartment; the detergent may be mixed with the softener. Insufficient amount of detergent used. Clothes do not smell like the The detergent may have softener. been placed into the wrong compartment; the detergent may be mixed with the softener.
- Page 32 You may have added too much softener. The detergent dispenser might be problematic. Water may be siphoned (pulling the softener into the washer early) during the fill or rinse cycles. There might be problems with the valves. Plug should be checked. Fuse should be checked. Power should be checked. This button must be pressed.
-
Page 33: Guarantee
• Beko disclaims any liability for incidental or consequential damages. • The guarantee does not in anyway diminish your statutory or legal rights. Should you experience any difficulty in obtaining service please contact the Beko Customer Help-Line. Tel: 0845 600 4911 e-mail:service@beko.co.uk... -
Page 34: Service
Should you experience any difficulty in obtaining service please contact the Beko Customer Help-Line. Tel: 0845 600 4911 e-mail:service@beko.co.uk 0845 600 4903 0845 600 4902 0845 600 4905 0845 600 4906...