BKI BLF-F Service Manual
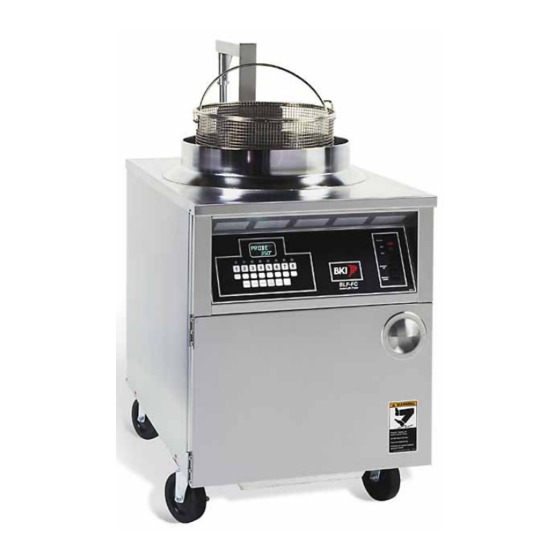
Electric auto-lift fryer
Hide thumbs
Also See for BLF-F:
- Service manual (56 pages) ,
- Installation & operation manual (42 pages) ,
- Installation and operation manual (32 pages)

Related Manuals for BKI BLF-F


Summary of Contents for BKI BLF-F
- Page 1 Electric Auto-Lift Fryer MODELS BLF-F & BLF-FC Service Manual Serial Numbers 811000 and higher CS-TM-010.03 Revised 10/01/18...
- Page 3 Warranty is in lieu of all other warranties, expressed or implied, and all other obligations or liabilities on the manufacturer’s part. BKI shall in no event be liable for any special, indirect or consequential damages, or in any event for damages in excess of the purchase price of the unit.
-
Page 4: Table Of Contents
Scheduled Maintenance ......................... 28 Troubleshooting ............................29 Filter Pump Reset: ..........................29 Replacement Parts ............................ 30 Assemblies .............................. 30 Components............................42 Accessories ............................. 44 Wiring Diagrams ............................45 Notes ................................51 BKI Worldwide is a wholly owned subsidiary of Standex International Corporation... -
Page 5: Introduction
PERFECTION IN FRYING! The BKI name and trademark on this unit assures you of the finest in design and engineering -- that it has been built with care and dedication -- using the best materials available. Attention to the operating instructions regarding proper installation, operation, and maintenance will result in long lasting dependability to insure the highest profitable return on your investment. -
Page 6: Specific Precautions
These sparks could cause serious injury, damage, or fire. BKI provides an Equipotential ground terminal for the connection of a bonding conductor after the installation of the appliance per lEC60417-1. This terminal is located on the inside of the Power Entry Supply box near the Earth connection and is marked with this symbol. -
Page 7: Safe Work Practices
Electric Auto-Lift Fryer Introduction Safe Work Practices Keep The Casters Locked To avoid spilling shortening, keep the casters locked. If any shortening spills near your fryer, clean it up immediately. Noncombustible Floors Only Make sure your floor is noncombustible. Do not operate your fryer on floors that are wood, carpeted or have rubber mats. - Page 8 If you lose or damage your mitts, you can buy new ones at your local restaurant equipment supply store or from your local BKI Distributor. Always wear non-skid shoes when working around the fryer or any other equipment that uses shortening. Never wear loose clothing such as neckties or scarves while operating your fryer.
- Page 9 Electric Auto-Lift Fryer Introduction Keep this manual with the Equipment This manual is an important part of your equipment. Always keep it near for easy access. If you need to replace this manual, contact: Technical Services Department 2812 Grandview Drive Simpsonville, S.C.
- Page 10 Electric Auto-Lift Fryer Introduction Be Prepared for Emergencies Be prepared for fires, injuries, or other emergencies. Keep a first aid kit and a fire extinguisher near the equipment. You must use a 40-pound Type BC fire extinguisher and keep it within 25 feet of your equipment.
-
Page 11: Safety Labels
Electric Auto-Lift Fryer Introduction Safety Labels... -
Page 12: Installation
Electric Auto-Lift Fryer Installation Installation For installation information, refer to Electric Auto-Lift Fryer, MODELS BLF-F & BLF-FC, Installation and Operation Manual. -
Page 13: Operation
Refer to the figure and table below for an explanation of the fryer’s controls and indicators. BASKET BASKET FILTER FILTER BASKET BASKET 2 3 4 5 6 7 8 DOWN DOWN BLF-F N0683 BLF-FC TEMP BOIL PROG SCAN ENTER HOLD IDLE... - Page 14 Electric Auto-Lift Fryer Operation Item # Description Function Computer Used to program the cooking computer and activate the programs. BASKET UP – Momentarily touching the button causes the lift Capacitive Touch Switch Basket Up/ mechanism to rise. This is enabled only when the FILTER/OFF/FRY Basket Down switch is in the FRY position.
-
Page 15: Care Of The Shortening
6. DO NOT HOLD SHORTENING AT HIGH TEMPERATURE when the fryer is not in use. If you expect an elapsed time of one hour or more between cooking, press the “0” button on the BLF-FC model. On the BLF-F, set the thermostat to 150º F, see Product Programming to change the set temperature. -
Page 16: Blf-F Operation
Electric Auto-Lift Fryer Operation BLF-F Operation System Programming The controller must be configured with its basic operating parameters before using. These parameters are the operational mode (cooking or frying), the temperature units, and the control hysteresis. You may also display the current temperature and test the output relays in this configuration mode. To access these parameters, press and hold the [5] button, apply the AC operating power by touching the FRY... - Page 17 Electric Auto-Lift Fryer Operation Temperature Display, Temperature Adjustment & Relay Check – Once you press the [3SET] button again the unit displays the current temperature. The following features are available in this mode: Temperature Offset: The control can apply small temperature adjustments to compensate for probe location within the equipment.
-
Page 18: Product Programming
Electric Auto-Lift Fryer Operation Product Programming The product programs must be set before cooking can begin. To enter editing mode press and hold the [3SET] button for two seconds until the controller emits a double chirp, then the controller first displays the frying temperature. To change the temperature, use the [2] button to increase the highlighted digit value, to decrease that digit press the [5] button. -
Page 19: Start-Up (Blf-F)
Electric Auto-Lift Fryer Operation Start-Up (BLF-F) 1. Make sure the main drain valve is closed. Risk of fire exists if the oil level drops below the minimum oil level. The level of oil within the pot must not fall below 5mm of the maximum oil level. -
Page 20: Cooking (Blf-F)
3. The shortening will heat and begin to reach the fill mark inside the pot. Add more shortening as required to reach the fill mark. Cooking (BLF-F) 1. Ensure that the Start-Up procedures have been performed. 2. When frying chicken, lower the basket into the shortening by touching the BASKET DOWN button on the basket switch. - Page 21 Electric Auto-Lift Fryer Operation 7. Remove basket from the lift and empty carefully. 8. Return the basket to the lift. 9. Remember to filter the shortening at least every third frying cycle load. Refer to the procedure in this manual. Also filter the shortening and clean the fryer at the end of each day. If you do not plan to use the fryer for an hour or more, turn the thermostat down to 150.
-
Page 22: Blf-Fc Operation
Electric Auto-Lift Fryer Operation BLF-FC Operation System Programming Use the following figure and table to set options that apply to each product programs. READY STATE PROG PROGRAM CODE (INPUT 1712) ENTER PROG PROGRAM SYSTEM ENTER PROGRAM DEGREES TOGGLE/CLEAR (SELECT SYSTEM TEMPERATURE °F °C SCALE OPTION) - Page 23 Electric Auto-Lift Fryer Operation Table 1. System Programming Procedure STEP ACTION DISPLAY COMMENTS On the FILTER/OFF/FRY Is Fry Pot Full? switch, touch to FRY. YES Press Enter Press ENTER IDLE HEAT SET 275°F Press PROG on the keypad. PROGRAM CODE Input 1712 and ENTER.
- Page 24 Electric Auto-Lift Fryer Operation STEP ACTION DISPLAY COMMENTS product programs before product programs before enabling filter lockout. filtering the shortening. Press ENTER. PROGRAM BOIL This command allows you 20:00 to specify the boil out time. The time displayed may be a previously programmed value.
-
Page 25: Product Programming
Electric Auto-Lift Fryer Operation Product Programming Use the following figure and table to set a maximum of eight product programs. The product programs must be set before cooking can begin. READY STATE PROG PROGRAM CODE (INPUT 1724) ENTER PROG PROGRAM PRODUCT # (SELECT PROGRAM #, 1-8) ENTER PROGRAM TIMEX... - Page 26 Electric Auto-Lift Fryer Operation Table 2. Product Programming Procedure STEP ACTION DISPLAY COMMENTS On the FILTER/OFF/FRY switch, touch the FRY button. Press PROG on the keypad. PROGRAM CODE Input 1724 and press ENTER. PROGRAM PRODUCT # Select the program product PROGRAM PRODUCT X X refers to the program number (1-8).
- Page 27 Electric Auto-Lift Fryer Operation STEP ACTION DISPLAY COMMENTS Press TOGGLE/CLEAR until the PROGRAM VALVE1 X refers to the solenoid desired option is displayed. valve option selected. OPEN is used for Models ALF and BLF Automatic Lift fryers. If your program requires the solenoid valve to be closed while cooking, choose the...
-
Page 28: Start-Up (Blf-Fc)
Electric Auto-Lift Fryer Operation Start-Up (BLF-FC) 1. Make sure the main drain valve is closed. Risk of fire exists if the oil level drops below the minimum oil level. The level of oil within the pot must not fall below 5mm of the maximum oil level. Use of oil/shortening older than the manufacturers recommendations for life of the oil is prone to surge boiling and flash fires. -
Page 29: Cooking (Blf-Fc)
Electric Auto-Lift Fryer Operation 1. On the FILTER/OFF/FRY switch, press the FRY button. The question “Is the Fry Pot filled – If yes press ENTER” will appear on the computer display. The computer will display IDLE and will heat to 275°F. Press one of the recipe buttons to preheat the oil to the setpoint temperature. The shortening will heat and begin to reach the fill mark inside the pot. - Page 30 Electric Auto-Lift Fryer Operation 12. To escape the idle mode, press the 0 button again and the fryer will heat to its original temperature. 13. When you have finished frying for the day, on the FILTER/OFF/FRY switch, touch the OFF button.
-
Page 31: Maintenance
Failure to comply with the maintenance below could result in a serious accident. Your fryer will need periodic maintenance and servicing. We strongly suggest that you use only a service company that is authorized by BKI to do this work. The restraining device must always be connected when the appliance is in service. -
Page 32: Troubleshooting
Electric Auto-Lift Fryer Maintenance Troubleshooting Filter Pump Reset: If the filter pump overheats the lights next to FILTER and OFF buttons will alternate back and forth indicating the pump has tripped. Once the pump has cooled the light next to the FILTER button will flash indicating the pump is ready to be reset. -
Page 33: Replacement Parts
Use the information in this section to identify replacement parts. To order replacement parts, call your local BKI sales and service representative. Before calling, please note the serial number, model number and voltage on the rating tag affixed to the unit. - Page 34 Electric Auto-Lift Fryer Replacement Parts Figure 3. Door Assembly Table 3. Door Assembly Parts ITEM # PART # DESCRIPTION FB19114805 OUTSIDE DOOR, FORMED CORNERS, FKM/BLF FB19114905 INSIDE DOOR, NO WELD FKM/BLF H0222 HANDLE, RECESSED PULL, BLACK F0083 THREAD INSERT 10-24 STEEL AVK ALS4-1024-130 H0009 HINGE, DOOR, RH, PIN SIDE, FRYER DOORS H0010...
- Page 35 Electric Auto-Lift Fryer Replacement Parts Figure 4. Relay Enclosure Assembly 16 15 14 Table 4. Relay Enclosure Assembly Parts ITEM # PART # DESCRIPTION FB16022903 ENCLOSURE, RELAYS MB55150900 DIN RAIL, 35mm x 6.50 in. SCR383 SCREW, 10-24 x 1/2" TR HR, SS NUT286 NUT, #10-24 KEPS, ZINC PLATED STL FN0058...
- Page 36 Electric Auto-Lift Fryer Replacement Parts Figure 5. Drain/Motor/Piping Assembly...
- Page 37 Electric Auto-Lift Fryer Replacement Parts Table 5. Drain/Motor/Piping Assembly Parts ITEM # PART # DESCRIPTION AB15507900 ASSEMBLY, PUMP DISCONNECT, FILTER VAT, FKG/BLG FT0312 ELL, STREET 1/2 90 DEG BLACK FT0619 NIPPLE, 1/2" x 1-1/2" LG, SS 304 SCR463 SCREW, 1/4-20 X 5/8, HEX SER FLNGD FT0153 CONNECTOR, BOX 3/8 X 90 LPFFA035...
- Page 38 Electric Auto-Lift Fryer Replacement Parts Figure 6. Front Panel BLF-F Table 6. Front Panel BLF-F Parts ITEM # PART # DESCRIPTION FB16021505 CONTROL PANEL BLF-F, CAPACITIVE TOUCH CP0066 CONTROL, TIME & TEMPERATURE 6 RECIPE, 200-250V 50/60 Hz N0683 DECAL, CONTROL PANEL, BLF-F, CAPACITIVE TOUCH...
- Page 39 Electric Auto-Lift Fryer Replacement Parts Figure 7. Front Panel BLF-FC Table 7. Front Panel BLF-FC Parts ITEM # PART # DESCRIPTION FB16021705 CONTROL PANEL, BLF-FC, CAPACITIVE TOUCH SP0052 SPACER, #10 ID x 1/4" 5/16" OD, ALUMINUM S0707 SWITCH, CAPACITIVE TOUCH 3 BUTTON FRYER S0708 SWITCH, CAP.
- Page 40 Electric Auto-Lift Fryer Replacement Parts Figure 8. Rear Panel BLF-F Table 8. Rear Panel BLF-F Parts ITEM # PART # DESCRIPTION FB16023110 CONTROL PANEL ELECTRIC FRYERS TB0011 TERM BLOCK, ALF SCR194 SCREW, 6-32 x 1" RND HD, ZINC SLOTTED NUT253...
- Page 41 Electric Auto-Lift Fryer Replacement Parts Figure 9. Rear Panel BLF-FC Table 9. Rear Panel BLF-FC Parts ITEM # PART # DESCRIPTION FB16023110 CONTROL PANEL ELECTRIC FRYERS TB0011 TERM BLOCK, ALF SCR194 SCREW, 6-32 x 1" RND HD, ZINC SLOTTED NUT253 NUT, #6-32, NYLON LOCK, SSTL R0196 RELAY, DPDT, 230V, 15A 3/16"...
- Page 42 Electric Auto-Lift Fryer Replacement Parts Figure 10. Oil Vat Assembly Table 10. Oil Vat Assembly Parts...
- Page 43 Electric Auto-Lift Fryer Replacement Parts ITEM # PART # DESCRIPTION AN19313000 FILTER SCREEN ASSY,FKG WB16010600 WELDMENT, FILTER VAT QUICK DISCONNECT WB16022100 WELDMENT, FILTER TUBE, BLF FS0002 FILTER SCREEN, INTERCEPTOR FS0003 FILTER SCREEN, TOP FS0001 FILTER SCREEN, BOTTOM SB7659 FILTER SCREEN FITTING SPOTWELD FC0004 NUT SCREEN RETAINING FKM-F &...
- Page 44 Electric Auto-Lift Fryer Replacement Parts Figure 12. Storage Cover Assembly (Optional) Table 12. Storage Cover Assembly Parts ITEM # PART # DESCRIPTION FB16009303 HANGER, FRY POT COVER BLF SCR303 SCREW, 10-32 X 1/2 PHIL TRUSS N0358 DECAL, BLF COVER CAUTION H0217 HANDLE, STORAGE COVER, BLF FB16007003...
-
Page 45: Components
Electric Auto-Lift Fryer Replacement Parts Components Description Component # Figure # Item # BASKET LIFT ARM WELD, LINEAR ACTUATOR WB16015800 Figure 13 CASTER, W/TOP PLATE 5" C0406 Figure 13 CAPACITOR, 7.5 MFD 370 VAC CP0102 Figure 13 FILTER BAG CLIP FKM-F ST0015 Figure 13 HINGE, SLIP WING RH... - Page 46 Electric Auto-Lift Fryer Replacement Parts...
-
Page 47: Accessories
BRUSH, POT SCRUBBER, HIGH TEMP., WHITE B1102 Figure 14 CLEANER, FRYER, OSG BOIL OUT COMPOUND LC0006 Figure 14 FILTER HOSE, FEMALE SOCKET SB2332 Figure 14 FILTER VAT DOLLY BLF-F SB7650 Figure 14 GLOVE, NEOPRENE G0089 Figure 14 FILTER, FKM-F 13.5 X 20.5 FI0007 Figure 14... -
Page 48: Wiring Diagrams
THE COMBINATION OF FACTS, DATA, DESIGN ELEMENTS, ENGINEERING DATA, MANUFACTURING DATA AND ASSEMBLY DATA WHICH MAY BE PHASE NO. of WIRES CONTAINED IN THIS DRAWING ARE OF A PROPRIETARY NATURE TO BKI. 37.5 14.3 3 + Gnd THESE MATERIALS ARE NOT TO BE USED OR COPIED WITHOUT PRIOR WRITTEN PERMISSION FROM STANDEX CSG. - Page 49 Electric Auto-Lift Fryer Wiring Diagrams LADDER DIAGRAM DESCRIPTION DATE 18-090 PRODUCTION RELEASE 07/20/18 COMPONENT LEGEND F1- FU010UK FUSE, 500 mA CP1- CP0066 CONTROL, TIME & TEMP FN1- FN0058 COOLING FAN, 230V H1\C0030 CALROD, 5675W@208V H2-C0031 CALROD, 5675W@230V M1-M0121 MOTOR/PUMP, 208-230V M2-M0084 LIFT MOTOR, 208-230V R1-R0150 CONTACTOR, 50A 4P R2-R196 RELAY, DPDT 220/240V...
- Page 50 THE COMBINATION OF FACTS, DATA, DESIGN ELEMENTS, ENGINEERING DATA, MANUFACTURING DATA AND ASSEMBLY DATA WHICH MAY BE PHASE NO. of WIRES CONTAINED IN THIS DRAWING ARE OF A PROPRIETARY NATURE TO BKI. 37.5 14.3 3 + Gnd THESE MATERIALS ARE NOT TO BE USED OR COPIED WITHOUT PRIOR WRITTEN PERMISSION FROM STANDEX CSG.
- Page 51 THE COMBINATION OF FACTS, DATA, DESIGN ELEMENTS, ENGINEERING DATA, MANUFACTURING DATA AND ASSEMBLY DATA WHICH MAY BE PHASE NO. of WIRES CONTAINED IN THIS DRAWING ARE OF A PROPRIETARY NATURE TO BKI. 37.5 14.3 3 + Gnd THESE MATERIALS ARE NOT TO BE USED OR COPIED WITHOUT PRIOR WRITTEN PERMISSION FROM STANDEX CSG.
- Page 52 Electric Auto-Lift Fryer Wiring Diagrams DESCRIPTION DATE LADDER DIAGRAM 18-090 PRODUCTION RELEASE 07/20/18 COMPONENT LEGEND CP1- CP0039 CONTROL, COMPUTER FN1- FN0058 COOLING FAN, 230V H1\C0030 CALROD, 5675W@208V H2-C0031 CALROD, 5675W@230V M1-M0121 MOTOR/PUMP, 208-230V M2-M0084 LIFT MOTOR, 208-230V R1-R0150 CONTACTOR, 50A 4P R2-R196 RELAY, DPDT 220/240V R3- R0174 RELAY, SPDT, 20A, 24VDC R5- R0131 RELAY, 3PDT, 230V...
- Page 53 THE COMBINATION OF FACTS, DATA, DESIGN ELEMENTS, ENGINEERING DATA, MANUFACTURING DATA AND ASSEMBLY DATA WHICH MAY BE PHASE NO. of WIRES CONTAINED IN THIS DRAWING ARE OF A PROPRIETARY NATURE TO BKI. 37.5 14.3 3 + Gnd THESE MATERIALS ARE NOT TO BE USED OR COPIED WITHOUT PRIOR WRITTEN PERMISSION FROM STANDEX CSG.
-
Page 54: Notes
Electric Auto-Lift Fryer Notes Notes... - Page 55 Electric Auto-Lift Fryer Notes...
- Page 56 2812 Grandview Dr., Simpsonville, S.C. 29680, USA http://www.bkideas.com Made and printed in the U.S.A CS-TM-010.03 Revised 10/01/18...