Table of Contents
Advertisement
Available languages
Available languages
OWNER'S MANUAL • MAnUAL dEL USUArIo
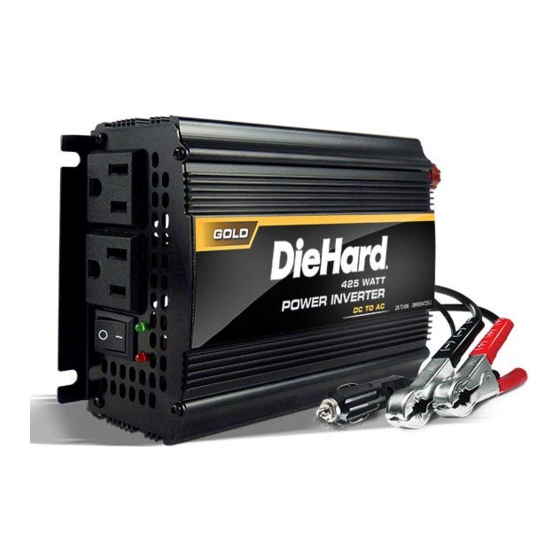
425 Watt Power Inverter
425 Watt Convertidor de Energía
Model / Modelo
71496
Read all Safety Rules and Operating Instructions,
and follow them with each use of this product.
ATENCIÓN
Lea todas las Instrucciones de Operación y Reglas de Seguridad,
así mismo aplíquelas a cada uso del producto.
Sears Brands Management Corporation, Hoffman Estates, IL 60179 U.S.A.
00-99-001101/00
Advertisement
Table of Contents

Related Manuals for DieHard 71496


Summary of Contents for DieHard 71496
- Page 1 OWNER’S MANUAL • MAnUAL dEL USUArIo 425 Watt Power Inverter 425 Watt Convertidor de Energía Model / Modelo 71496 Read all Safety Rules and Operating Instructions, and follow them with each use of this product. ATENCIÓN Lea todas las Instrucciones de Operación y Reglas de Seguridad, así...
-
Page 3: Table Of Contents
1 year from the date of purchase, return it to any DieHard outlet in the United States for free replacement. This warranty gives you specific legal rights, and you may also have other rights which vary from state to state. - Page 4 Cuando se opere o maneje con las debidas precauciones de acuerdo a las instrucciones, si el DieHard falla en alguno de sus componentes de fabricación durante el 1 año contados a partir de la fecha de compra, regresarlo al autoservicio diehard en los estados unidos para reemplazar el aparato sin costo alguno.
-
Page 5: Important Safety Instructions
IMPorTAnT: rEAd And SAVE THIS SAfETY And InSTrUCTIon MAnUAL. SAVE THESE InSTrUCTIonS – The 71496 offers a wide range of features to accommodate your needs. This manual will show you how to use your inverter safely and effectively. Please read, understand and follow these instructions and precautions carefully, as this manual contains important safety and operating instructions. -
Page 6: Features
Do not place the inverter on or near heating vents, radiators or other sources of heat or flammable materials. Do not place the inverter in direct sunlight. The ideal air temperature for operation is between 50° and 80°F. Only connect the power inverter to a 12-volt accessory outlet or 12-volt airplane power outlet. - Page 7 When you turn on a device or a tool that runs on a motor, the device basically goes through two stages: Start Up – Requiring an initial surge of power (commonly known as the “starting or peak load”). Continuous Operation – Power consumption drops (commonly known as the “continuous load”).
-
Page 8: Fastening The Inverter To A Flat Surface
fASTEnIng THE InVErTEr To A fLAT SUrfACE For convenience your inverter can be fastened to a flat surface, horizontally or vertically. The area where the inverter is to be fastened must be dry, well ventilated and away from any combustible material or fumes. -
Page 9: Operating Instructions
nEgATIVE groUndEd SYSTEM Keep hands, hair, clothing and jewelry clear of battery terminals. Wear eye protection and clothing protection. For a negative-grounded vehicle, connect the POSITIVE (RED) clip from the inverter to the POSITIVE (POS, P, +) ungrounded post of the battery. Connect the NEGATIVE (BLACK) clip to the vehicle chassis or engine block away from the battery. -
Page 10: Power Source
noTE: If more than one device is to be powered, start one device at a time to avoid a power surge and overloading the inverter. The surge load of each device should not exceed the inverters Continuous Operation wattage rate. If you are using the power inverter to operate a battery charger, monitor the temperature of the battery charger for about 10 minutes. -
Page 11: Led Indicator And Shutdown Protection
LEd IndICATor And SHUTdoWn ProTECTIon The LED glows GREEN automatically when plugged into a 12-volt DC source and will not glow under the following conditions: When the power input from the vehicle’s battery drops to approximately 10.5-volts, low battery shutdown occurs and inverter shuts off. Solution: Recharge or Replace the battery. When the power input from the vehicle’s battery exceeds 15-volts, high voltage overload protection occurs. -
Page 12: Troubleshooting
TroUBLESHooTIng ProBLEM rEASon SoLUTIon Red LED is on, audible Poor contact at terminals. Unplug and reinsert the alarm is on, and/or inverter 12-volt plug or check does not function. connections at power supply. Fuse Blown. See “IF THE INVERTER FUSE BLOWS” section. Inverter shutdown. -
Page 13: Replacement Parts
rEPLACEMEnT PArTS 12V Accessory Plug with Cables 38-99-002175 Battery Cable with Clips 38-99-001512 • 9 •... -
Page 14: Instrucciones Importantes De Seguridad
IMPorTAnTE: LEA Y gUArdE ESTE MAnUAL dE InSTrUCCIonES Y SEgUrIdAd. gUArdE ESTAS InSTrUCCIonES: El 71496 ofrece una amplia gama de características para satisfacer sus necesidades. Este manual le mostrará cómo utilizar su convertidor en forma segura y efectiva. Por favor, lea, comprenda y siga estas instrucciones y precauciones cuidadosamente, ya que este manual contiene instrucciones operativas y de seguridad de importancia. -
Page 15: Características Del Convertidor
• NO OPERE el convertidor si usted, el convertidor, el dispositivo a ser operado o cualquier otra superficie que puede entrar en contacto con cualquier fuente de energía está húmeda. El agua y muchos otros líquidos pueden conducir electricidad, lo cual puede llevar a una lesión seria o la muerte. -
Page 16: Antes De Usar Su Convertidor De Energía
AnTES dE USAr SU ConVErTIdor dE EnErgÍA noTA: Este inversor está diseñado para ser usado con una sola batería, de hasta el tipo del grupo 31 (de medida chica o de 130h). noTA: No utilice el inversor con un producto que absorba mayor cantidad de watts que el inversor pueda proveer, esto podría causar daño al inversor y al producto. -
Page 17: Para Sujetar El Convertidor A Una Superficie Plana
Hornos de microondas Lámparas flourescentes y de alta intensidad (con balastra); y Cargadores de Baterías sin tranformador. Al hacerlo, podría operar el aparato bajo intenso calor y sobrecalentarlo. PArA SUJETAr EL ConVErTIdor A UnA SUPErfICIE PLAnA Por comodidad su convertidor puede ser sujetado a una superficie plana, horizontal o verticalmente. - Page 18 PArA ConECTAr LoS CABLES dEL ConVErTIdor A UnA BATErÍA dE 12V o UnA fUEnTE dE EnErgÍA dE 12V (máxima salida del inversor): rIESgo dE ConTACTo Con EL áCIdo dE LA BATErÍA. EL áCIdo dE LA BATErÍA ES Un áCIdo SULfúrICo ALTAMEnTE CorroSIVo.
-
Page 19: Instrucciones De Operación
InSTrUCCIonES dE oPErACIÓn Conecte el convertidor (ver la sección “PARA CONECTAR LOS CABLES DEL CONVERTIDOR”). Cambie el interruptor del convertidor a la posición de ENCENDIDO (ON) (I). La luz del indicador LED debe brillar VERDE verificando que el convertidor está recibiendo energía. -
Page 20: Fuente De Energía
noTA: Usted puede escuchar un sonido de “zumbido” siendo emitido de sistemas de sonido baratos cuando son operados con el convertidor. Esto es debido a filtros inefectivos en el abastecimiento de energía del sistema de sonido. Lamentablemente, este problema solamente puede ser resuelto comprando un sistema de sonido con una calidad más alta de abastecimiento de sonido o un filtro de más alta calidad. -
Page 21: Si Se Quema El Fusible Del Convertidor
SI SE QUEMA EL fUSIBLE dEL ConVErTIdor Su convertidor de corriente está equipado con un fusible, que no tendría que ser reemplazado bajo condiciones normales de operación. Un fusible quemado es causado usualmente por una polaridad inversa como un cortocircuito dentro del dispositivo o equipo siendo operados. Si el fusible se quema: Desconecte el dispositivo o equipo inmediatamente. -
Page 22: Especificaciones
ProBLEMA CAUSA PoSIBLE SoLUCIon La luz LED roja está La Clavija Accesoria de Verifique la posible encendida y la luz verde no. 12V o Los ganchos no se presencia de una conexión encuentran bien conectados defectuosa a la batería o a la batería.