Table of Contents
Advertisement
Operation/Repair/Parts
HVLP EDGE II
For the application of architectural paints and coatings. The HVLP Edge II Gun is not
intended to be used on an external compressor. For professional use only.
Models: 17P481, 17P483, 17P484, 17P653, 17P654
10 psi (0.07 MPa, 0.7 bar) Maximum Air Working Pressure
50 psi (0.35 MPa, 3.5 bar) Maximum Fluid Working Pressure
Important Safety Instructions
Read all warnings and instructions in this manual and your sprayer instruction
manual. Be familiar with the controls and the proper usage of the equipment.
Save these instructions.
Related Manuals:
3A4967
Graco FinishPro
HVLP Sprayer
www.graco.com/techsupport
™
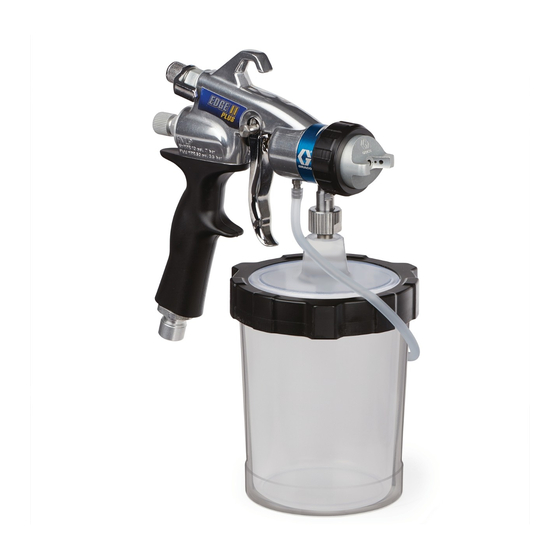
/EDGE II Plus Gun
ti30935a
3A4980B
EN
Advertisement
Table of Contents

Related Manuals for Graco HVLP EDGE II


Summary of Contents for Graco HVLP EDGE II
- Page 1 HVLP EDGE II /EDGE II Plus Gun For the application of architectural paints and coatings. The HVLP Edge II Gun is not intended to be used on an external compressor. For professional use only. Models: 17P481, 17P483, 17P484, 17P653, 17P654 10 psi (0.07 MPa, 0.7 bar) Maximum Air Working Pressure...
-
Page 2: Table Of Contents
Graco Standard Warranty ......35 Graco Information ........36... -
Page 3: Models
• Independent fluid and air flow controls. • Additional pattern size control. • Compatible with SmartStart feature on Graco FinishPro HVLP ProContractor and ProComp sprayers • FlexLiner System Allows user to spray gun at any angle without cup adjustment. •... -
Page 4: Warnings
Warnings Warnings The following warnings are for the setup, use, grounding, maintenance, and repair of this equipment. The exclamation point symbol alerts you to a general warning and the hazard symbols refer to procedure-specific risks. When these symbols appear in the body of this manual or on warning labels, refer back to these Warnings. - Page 5 Do not kink or over-bend the hose. • Do not expose the hose to temperatures or to pressures in excess of those specified by Graco. • Do not use the hose as a strength member to pull or lift the equipment.
-
Page 6: Know Your Spray Gun
Know Your Spray Gun Know Your Spray Gun EDGE II ti30936a FlexLiner Cover Edge II Air Cap FlexLiner Ring Retaining Ring Cup Fitting Fluid Nozzle Material Strainer Fluid Needle Siphon Cup Fluid / Air Flow Control Knob Quick Clean Check Valve EasyGlide™... -
Page 7: Edge Ii Plus
Know Your Spray Gun EDGE II Plus ti30937a FlexLiner Edge II Air Cap FlexLiner Cover Retaining Ring / Pattern Size Control FlexLiner Ring Fluid Nozzle Cup Fitting Fluid Needle Material Strainer Fluid Flow Control Knob Siphon Cup Air Flow Control Knob Quick Clean Check Valve EasyGlide™... -
Page 8: Pressure Relief Procedure
Disconnect spray gun from air hose. Unlatch cup cover, loosen or remove cup from cover to relieve pressure. ti30757a NOTE: If using a remote cup, refer to manual provided with cup. If using with a Graco FinishPro HVLP ProComp sprayer, reference sprayer manual. ti30628a 3A4980B... -
Page 9: Setup
Setup Setup • Most material manufacturers provide Fluid and Work Piece recommendations for their materials. Follow these recommendations. Preparation • For proper adhesion, ensure surface of work piece is completely clean. • Strain fluids before spraying. This includes colors, reducers and hardeners. -
Page 10: Fluid Set Replacement
Setup Fluid Set Replacement Move trigger slide from SPRAY position (A) to NEEDLE REMOVAL position (B). Removal NEEDLE SPRAY Perform Pressure Relief Procedure, REMOVAL Position page 8. Position Remove retaining ring and air cap. Trigger the gun and remove fluid nozzle. NOTICE Trigger the gun whenever removing or installing the fluid nozzle. - Page 11 Setup Installation Trigger the gun and install air cap guide with spring (Edge II Plus only), and fluid Insert needle and move trigger slide from nozzle. NEEDLE REMOVAL position (B) to Install air cap and retaining ring. SPRAY position (A). ti30940a ti30939a 3A4980B...
-
Page 12: Startup
Startup Startup Fill FlexLiner System Loosen ring from cup. Remove cover and ring from cup. Verify FlexLiner remains in cup upon removal of cover Disconnect gun from FlexLiner System. and ring. ti30706a ti30707a Fill FlexLiner with material to “MAX FILL” line. - Page 13 Startup Install cover and ring onto cup. Tighten Connect air hose to inlet fitting of gun. ring securely. ti30683a Verify trigger slide is in SPRAY position (A). ti30709a Connect FlexLiner System to gun. ti30945a With HVLP sprayer powered ON, point gun into a waste area.
-
Page 14: Fill Siphon Cup
Startup Fill Siphon Cup Tighten nut. Unlatch cup cover and remove from siphon cup. ti30628a Fill siphon cup with material. ti30942a Latch cup cover to siphon cup. ti30941a Verify siphon tube is positioned in ideal location for desired spray orientation. If adjustment is necessary: Loosen nut, rotate cup cover to attain desired siphon tube position. - Page 15 Startup Connect sprayer air hose to air inlet of Verify trigger slide is in SPRAY position gun. (A). ti30945a ti30944a You are now ready to spray. Reference How to Spray, page 16. 3A4980B...
-
Page 16: How To Spray
How to Spray How to Spray Adjust Flow and Pattern Size Edge II The turbine motor generates sparks. Fluid/Air Control: These sparks can ignite flammable fumes. Flow and pattern size is determined by adjustment to the Fluid/Air control knob. Set •... -
Page 17: Spray Techniques
How to Spray Fluid Control: Pattern Size Control: Set knob to OFF. Increase fluid until desired Additional control of the pattern size is flow is attained. available by rotation of the air cap retaining ring. Start with the fluid nozzle flush with the center surface of the air cap. -
Page 18: Triggering Gun
How to Spray Triggering Gun Refilling FlexLiner Pull trigger after starting stroke. Release Perform Pressure Relief Procedure, trigger before end of strike. Gun must be page 8. moving when trigger is pulled and released. Reference Fill FlexLiner System, page Refilling Siphon Cup Perform Pressure Relief Procedure, page 8. -
Page 19: Cleanup
Cleanup Cleanup Loosen ring (1) from cup (5). Remove ring (1) and cover (2) from cup. Verify FlexLiner (4) remains in cup upon removal of cover and ring. When cleaning gun with solvents, read all fire and explosion hazard warnings on page 4. - Page 20 Cleanup It is recommended to dispose of the used Fill the FlexLiner (4) approximately FlexLiner (4) and install a new one. If half-full with cleaning fluid (warm water reusing, clean by wiping all excess fluid or appropriate solvent). from FlexLiner (4). Remove and clean material strainer (3) by flushing with cleaning fluid.
- Page 21 Cleanup Cleaning Siphon Cup 10. Cover cup fitting (2a) with a rag, shake the entire FlexLiner System for a Perform Pressure Relief Procedure, minimum of ten seconds. page 8. Disconnect gun from siphon cup. ti30779a 11. Wipe clean and dry all components of FlexLiner System.
- Page 22 NOTICE Disconnect check valve from gun tubing Strong solvents, such as lacquer thinner, can damage parts of the HVLP Edge II gun. Do NOT immerse parts of the HVLP Edge II gun in solvent. Remove retaining ring and air cap.
- Page 23 Cleanup Move trigger slide from SPRAY position Wipe or flush fluid from nozzle and (A) to NEEDLE REMOVAL position (B). needle. If necessary, clean retaining ring, air cap, air cap guide, and spring. NOTICE NEEDLE SPRAY REMOVAL Do not use metal tools to clean the fluid Position Position nozzle or air cap holes as this may scratch...
-
Page 24: Troubleshooting
Troubleshooting Troubleshooting Problem Cause Solution • Orange peel finish - Paint Paint droplets too large Adjust fluid control knob on surface not smooth gun to reduce fluid. • Spray further from work piece. • Keep turbine air filters clean to allow full air flow. •... - Page 25 Troubleshooting Problem Cause Solution • Solvent pops or bubbles Sprayed surface drying before Apply fluid in lighter coats to solvent gas can be released allow for proper evaporation. • Use the recommended thinners. • Follow the solutions for Orange Peel Finish, Paint Droplets Too Large in this Troubleshooting Table.
- Page 26 Gun leaking air Verify use of Edge II Plus gun. If SmartStart functions when air valve at end of hose is closed, clean gun. See Cleaning HVLP Edge II Gun, page 22. Verify fluid valve is tight. See page 31 (ref. 16).
-
Page 27: Edge Ii
Damaged connection between cup and air fitting. Verify fitting is fully installed. If necessary, replace FlexLiner System. See separate HVLP Edge II gun manual. Fluid leaking between cup Cup filled too full Verify cup is not filled above “MAX and ring FILL”... -
Page 28: Parts
Parts Parts EDGE II Ref. Torque 60-80 in-lb (6.8 - 9.0 N•m) 140-150 in-lb (15.8 - 16.9 N•m) ti30995a 20-30 in-lb (2.3 - 3.4 N•m) Apply adhesive, Ref. 50 3A4980B... -
Page 29: Parts List - Edge Ii
Parts List - EDGE II Parts List - EDGE II Ref Part Description Ref Part Description 14 280545 PIN, slide, trigger, 256858 BODY, gun w/ball 188493 PACKING, u-cup, 15 15V848 NUT, slide, trigger, 17P715 HOUSING, nozzle 16 17S237 VALVE, fluid 192348 NUT, head 256960 KIT, packing (includes 17) -
Page 30: Parts
Parts Parts EDGE II Plus ref 49 Ref. Torque 60-80 in-lb (6.8 - 9.0 N•m) 140-150 in-lb (15.8 - 16.9 N•m) ti30996a 20-30 in-lb (2.3 - 3.4 N•m) Apply adhesive, Ref. 50 3A4980B... -
Page 31: Parts List - Edge Ii Plus
Parts List - EDGE II Plus Parts List - EDGE II Plus Ref Part Description Ref Part Description 15 15V848 NUT, slide, trigger, 17H061 BODY, gun 188493 PACKING, u-cup, 16 17P718 VALVE, fluid (includes 17, 18) 17P716 HOUSING, nozzle 17 17S202 LABEL, fluid 17P563 GUIDE, air cap, 18 110073 O-RING assembly... -
Page 32: Parts
Parts Parts FlexLiner System & Siphon Cup Assembly FLEXLINER SYSTEM SIPHON CUP ASSEMBLY ti30998a 3A4980B... -
Page 33: Parts List
Parts List Parts List FlexLiner System Siphon Cup Assembly Ref Part Description Ref Part Description 33 17R462 KIT, FlexLiner Sys- 21 196468 FITTING, adapter 22 244130 CUP, 1qt, under tem (includes 34, 35, (includes 22a, 22b, 36, 37, 39, 40, 42) 35 17P222 COVER 22a M70424 CUP, gasket 36 17P237 RING... -
Page 34: Technical Specifications
Technical Specifications Technical Specifications EDGE II / EDGE II Plus Metric Sprayer Maximum working air pressure 10 psi 0.07 MPa, 0.7 bar Maximum working fluid pressure 50 psi 0.35 MPa, 3.5 bar Air inlet Quick - disconnect Fluid Inlet FlexLiner System 5/8-16 UN-2A Siphon/Remote Cup 3/8-18 npsm... -
Page 35: Graco Standard Warranty
Graco’s written recommendations. This warranty does not cover, and Graco shall not be liable for general wear and tear, or any malfunction, damage or wear caused by faulty installation, misapplication, abrasion, corrosion, inadequate or improper maintenance, negligence, accident, tampering, or substitution of non-Graco component parts. -
Page 36: Graco Information
For the latest information about Graco products, visit www.graco.com. For patent information, see www.graco.com/patents. TO PLACE AN ORDER, contact your Graco distributor or call 1-800-690-2894 to identify the nearest distributor. All written and visual data contained in this document reflects the latest product information available at the time of publication.