Table of Contents
Advertisement
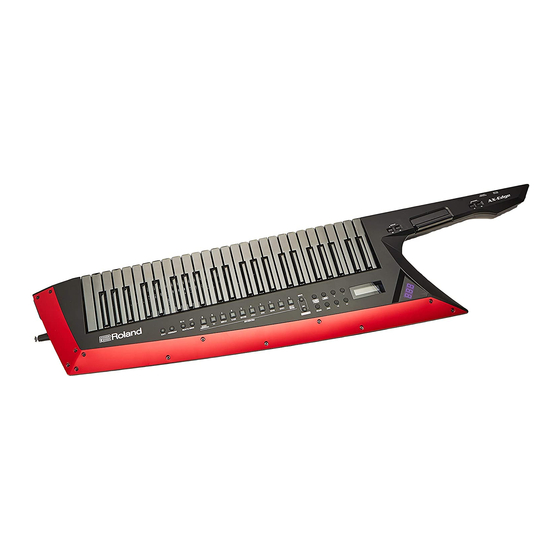
About the AX-Edg
Owner's Manual
Read this first. It explains the basic things you need to know in order to use the AX-Edge.
Parameter Guide
This explains all parameters of the AX-Edge.
Sound List
This is a list of the sounds built into the AX-Edge.
MIDI Implementation
This is detailed information about MIDI messages.
Before using this unit, carefully read "USING THE UNIT SAFELY" and "IMPORTANT NOTES" (the leaflet "USING THE UNIT SAFELY" and the Owner's Manual (p. 22)). After
reading, keep the document(s) where it will be available for immediate reference.
© 2018 Roland Corporation
e's manuals
,
(This document)
(The latest version of the PDF is available on the web.)
Owner's Manual
To obtain the PDF manual
1
Access
https://www.roland.com/support/
2
In the Support menu, choose "Owner's Manual"
3
Choose "AX-Edge"
Advertisement
Table of Contents

Related Manuals for Roland AX-EDGE


Summary of Contents for Roland AX-EDGE
- Page 1 Owner’s Manual (This document) (The latest version of the PDF is available on the web.) Read this first. It explains the basic things you need to know in order to use the AX-Edge. Parameter Guide To obtain the PDF manual This explains all parameters of the AX-Edge.
-
Page 2: Table Of Contents
: Rear Panel : Using the AX-Edge as a Master Keyboard .......... -
Page 3: Introduction
You can also edit tones by using an editor app (AX-Edge Editor) on your smartphone. Effect The AX-Edge is equipped with a multi-effect for each tone (MFX), a multi-effect that can be specified for each program (IFX), and reverb, chorus/delay, compressor, and EQ effects that are applied to the final output (system effects). -
Page 4: Panel Descriptions
[EDGE LEAD]–[VOCODER/VOICE] buttons [0]–[9] buttons page OCTAVE [–] [+] buttons ([S4], [S5] buttons) Select the category of sounds (programs). These buttons are used to transpose the AX-Edge’s keyboard in [FAVORITE] button [BANK] button When the or the is lit, these steps of one octave. -
Page 5: Bottom Panel
Strap pins Installing the Batteries Attach the included strap here. Eight AA batteries are required to run the AX-Edge on battery Choose two pin locations as appropriate for your performing power. We recommend the use of rechargeable AA-type Ni-MH style. -
Page 6: Rear Panel
You can connect a USB flash drive here. though you’ll be powering it with the AC adaptor. That way, you’ll be Connect or disconnect the USB flash drive while the AX-Edge is able to continue a performance even if the cord of the AC adaptor gets powered-off. -
Page 7: Connecting External Equipment
Connecting a computer or sequencer Wireless transmitters If you want to connect the AX-Edge to a computer in which you’ve installed sequencer software or a software sound module, and use the AX-Edge as a master keyboard to record or perform, make * The shape of the connector depends on the wireless transmitter that you’re using. -
Page 8: Turning The Ax-Edge On
The AX-Edge comes with one replacement blade panel. Power-on the equipment in the order of AX-Edge 0 connected devices. * In order to protect its circuitry, the AX-Edge waits for a while after Blade panel being powered-on before it begins operating. -
Page 9: Playing
Playing Owner’s Manual Selecting a Sound Recalling a Favorite (Program) The sounds (programs) of the AX-Edge are organized into ten Press the FAVORITE [ON] button to make it light. category, with 32 programs in each category. [0]–[9] buttons act as Favorite select buttons. -
Page 10: Using The Performance Functions
Using the Performance Functions The AX-Edge provides numerous functions that you can use to make Smoothly Changing the Pitch (Portamento) your performance more expressive, shift the pitch, etc. Portamento is a function that smoothly changes the pitch from that Using the Buttons and Controllers of the first-played key to that of the next-played key. -
Page 11: Layering The Same Tone To Thicken The Sound (Unison)
[HOLD] * You can assign a function other than to this button. For details The AX-Edge lets you use various controllers to modify the sound “Assigning the on how to assign a function to this button, refer to while you perform. -
Page 12: Using The Control Buttons And Knob
If you want to save the setting, execute the System Write Further Pressure to the Key (Aftertouch) operation. & The keyboard of the AX-Edge is equipped with an aftertouch sensor. “Saving the System Settings (System Write)” (p. 20) You can modify the sound by applying pressure to the keyboard. MEMO... -
Page 13: Using Other Performance Functions
You can copy an audio file (MP3 or WAV) from your computer to a “arpeggio” is a performance technique in which the notes of a USB flash drive, and perform on the AX-Edge while that audio file chord are played at different times. plays back. -
Page 14: Using The Vocoder
[K] [J] buttons to select a parameter, and NOTE use the [–] [+] buttons to edit the value. The AX-Edge supports only dynamic microphones. It does not support condenser microphones. Menu Parameter Value [SHIFT] + cursor [K] [J] Cursor [K] [J] [–] [+]... -
Page 15: Using The Ax-Edge As A Master Keyboard
Keyboard For each part within a program, you can make settings for con- trolling an external MIDI sound module. This lets you use a single AX-Edge to independently control the unit itself and an external sound module. Press the [MENU/WRITE] button. -
Page 16: Editing The Sound
Saving a Program (Program Write) Here you can edit tone-related parameters. To save the changes, hold down the [SHIFT] button Tone edit is not possible on the AX-Edge itself. Use the dedicated press the [MENU/WRITE] button. smartphone app “AX-Edge Editor”... -
Page 17: Connecting External Equipment
Attaching the Ferrite Core Locate the AX-Edge near the mobile device that you want to connect. If you use a USB cable to connect the AX-Edge to your computer, you must attach the included ferrite core. This is for the purpose of MEMO preventing electromagnetic interference;... -
Page 18: Other Functions
Checking the Remaining Battery Convenient Functions (UTILITY) Charge Here you can back up the AX-Edge’s data to a USB flash drive, or restore data from a USB flash drive back into the AX-Edge. You can also use the “UTILITY” functions to return the AX-Edge to its Remaining battery charge indication factory-set condition, or format a USB flash drive. -
Page 19: Backing Up Data To Usb Flash Drive (Backup)
5 All user data are rewritten when you execute the restore operation. If 5 All program data (including vocoder and arpeggio settings) your AX-Edge contains important data, assign it a different name and back it up to an USB flash drive before you restore. -
Page 20: Formatting A Usb Flash Drive
When formatting is complete, the screen indicates “Com- Viewing the Program Version pleted!” (VERSION INFO) Here’s how to view the version of the AX-Edge’s system program. The folder structure of a USB flash drive Press the [MENU/WRITE] button. Use the... -
Page 21: Main Specifications
(including Band for fastening the core) Stand for AX-Edge (ST-AX2), Pedal switch: DP series, Expression pedal (EV-5) Options * This document explains the specifications of the product at the time that the document was issued. For the latest information, refer to the Roland website. -
Page 22: Using The Unit Safely
Bluetooth such as when the memory section is physically SIG, Inc. and any use of such marks by Roland is damaged, restoration of the stored content under license.