Table of Contents
Advertisement
Contents
. . . . . . . . . . . . . . . . . . . . . . . . . . . . . . . . . . . .
. . . . . . . . . . . . . . . . . . . . . . . . . . . . . . . . . . . . . . . . . . .
. . . . . . . . . . . . . . . . . . . . . . . . . . . . . . . . . . . . .
. . . . . . . . . . . . . . . . . . . . . . . . . . . . . . . . . . . . . . . . . . . . .
. . . . . . . . . . . . . . . . . . . . . . . . . . . . . . . . . . . . . . .
. . . . . . . . . . . . . . . . . . . . . . . . . . . . . . . . . .
. . . . . . . . . . . . . . . . . . . . . . . . . . . . . . .
. . . . . . . . . . . . . . . . . . . . . . . . . . . . . . . . . . . . . . . .
. . . . . . . . . . . . . . . . . . . . . . . . . . . . . . . . . . . . .
. . . . . . . . . . . . . . . . . . . . . . . . . . . . . . . . . . . .
. . . . . . . . . . . . . . . . . . . . . . . . . . . . . . . . . . . . . .
. . . . . . . . . . . . . . . . . . . . . . . . . . . . . . . . . . . . . . . . 10
. . . . . . . . . . . . . . . . . . . . . . . . . . . . . . . . 10
. . . . . . . . . . . . . . . . . . . . . . . . . . . . . . . . . . 10
. . . . . . . . . . . . . . . . . . . . . . . . . . . . . . . . . . . . . 10
. . . . . . . . . . . . . . . . . . . . . . . . . . . . . . 11
. . . . . . . . . . . . . . . . . . . . . . . . . . . . . . . . . . . 11
Owner's Manual
(this document)
Read this first. It explains the basic things you need to know in order to use the JUNO-DS.
PDF manual
(download from the Web)
5 Parameter Guide
(English)
This explains all parameters of the JUNO-DS.
5 MIDI Implementation
(English)
This is detailed information about MIDI messages.
Before using this unit, carefully read "USING THE UNIT SAFELY" and "IMPORTANT NOTES" (leaflet "USING THE UNIT SAFELY" and Owner's Manual (p. 20)). After reading, keep the document(s) including
those sections where it will be available for immediate reference.
© 2015 ROLAND CORPORATION
. . . . . . . . . . . . . . . . . . .
. . . . . . . . . . . . . . . . . . . . . . . . . .
. . . . . . . . . . . . . . . . . . . . . . . .
. . . . .
. . . . . . . . . . . . . . . . . . . . .
. . . . . . . . .
. . . . . . . . . . . . . . . . .
. . . . . . . . . .
. . . . . . . . . . . . . . . . . . . . . . . . . . .
. . . . . . . . . . . . . . . . . . . . . . . . .
. . . . . . . . . . . . . . . . . . . . . . . . . . .
. . . . . . . . . . . . . . . . . . . . . . . . . . . . .
. . . . . . . . . . . . . . . . . . . . . . . . . . . . . 10
. . . . . . . . . . . . . . . . . . . . 11
2
2
3
3
4
. . . . . . . . . . . . . . . . . . . . . . . . . . . . . . . . . . . . . . 13
4
4
. . . . . . . . . . . . . . . . . . . . . . . . . . . . . . . . . . . . 13
. . . . . . . . . . . . . . . . . . . . . . . . . . . . . . . . . . . . . . 15
5
. . . . . . . . . . . . . . . . . . . . . . . . . . . . . . . . . . . . . . . . 15
5
5
5
7
7
7
7
. . . . . . . . . . . . . . . . . . . . . . . . . . . . . . . . . . . . . . . . . 16
7
8
8
9
9
. . . . . . . . . . . . . . . . . . . . . . . . . . . . . . . . . . . . . . . . . . . . . 19
9
. . . . . . . . . . . . . . . . . . . . . . . . . . . . . . . . . . . . . . 19
9
. . . . . . . . . . . . . . . . . . . . . . . . . . . . . . . . . . . . . . . 19
9
. . . . . . . . . . . . . . . . . . . . . . . . . . . . . . . . . . . . 20
. . . . . . . . . . . . . . . . . . . . . . . . . . . . . . . . . . . . . . . . . . 22
. . . . . . . . . . . . . . . . . . . . . . . . . . . . . . . . . . . . 22
To obtain the PDF manual
1.
Enter the following URL in your computer.
http://www.roland.com/manuals/
2.
Choose "JUNO-DS" as the product name.
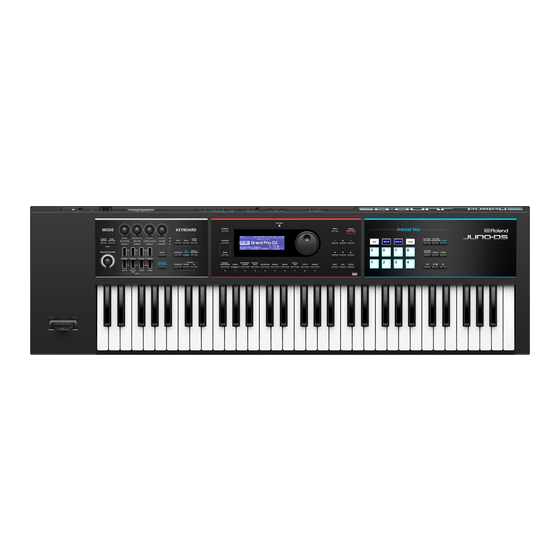
Synthesizer
Owner's Manual
. . . . . . . . . . . . . . . . . . . . . . 12
. . . . . . . . . . . . . . 12
. . . . . . . . . . . . . . . . . . . . . . . . . . . . . . . . 12
. . . . . 13
. . . . . . . . . . . . . . . . . 13
. . . . . . . . . . . . . . . . . . . . . . 16
. . . . . . . . . . . . . . . . . . . . . . . . . . . . . 16
. . . . . . . . . . . . . . . . . . . . . . . . 16
. . . . . . . . . . . . . . . . . . . . . . . . . . . . 16
. . . . . . . . . . . . . . . . . . . . . . . . . . 16
. . . . . . . . . . . . . . . . . . . 16
. . . . . . . . . . . . . . . . . . . . . . . . . . 16
. . . . . . . . . . . . . . . . . . 16
. . . . . . . . . . . . . . . . . 17
. . . . . . . . . . . . . . . . . . . . . . . . . . 17
. . . . . . . . . . . . . . . . . . . . . . . . . . . . . . . . 18
. . . . . . . . . . . . . . . . . . . . . . . . . . . . . . . 20
I
Advertisement
Table of Contents

Related Manuals for Roland JUNO-DS


Summary of Contents for Roland JUNO-DS
-
Page 1: Table Of Contents
........11 Changing the Tempo Owner’s Manual (this document) Read this first. It explains the basic things you need to know in order to use the JUNO-DS. To obtain the PDF manual PDF manual (download from the Web) Enter the following URL in your computer. -
Page 2: Panel Descriptions
Changes a value. * If you press one of these buttons while holding [SAMPLE IMPORT] button Used to import an audio file (sample) into the JUNO-DS. p. 9 down the other, the value changes more rapidly. If [–] [+] buttons p. -
Page 3: Rear Panel (Connecting Your Equipment)
This turns the power on/off. p. 5 5 The BATTERY indicator will light when the batteries run low. 5 If you continue using the JUNO-DS, the indicator will blink; please replace the Ground terminal Refer to “Ground Terminal” (p. 20). -
Page 4: Overview
Overview How the JUNO-DS Is Organized Controller section JUNO-DS The performance information generated when you press/release a key or press a hold pedal are transmitted to the sound generator section. This section consists of a keyboard, pitch bend/modulation lever, the panel buttons... -
Page 5: Playing The Juno-Ds
Bank Explanation A screen like the following appears. These are the particularly recommended patches of the JUNO-DS. DS (DS Tone) The edited result is saved in the user bank. These patches cannot be rewritten. The edited result is saved in PRST (Preset) the user bank. - Page 6 Playing the JUNO-DS Adjusting the volume Playing Different Tones with Your Right and Left Hands (SPLIT) You can use the [UPPER] LEVEL slider and [LOWER] LEVEL slider to adjust the upper Press the [SPLIT] button to make it light. (part 1) and lower (part 2) volume (LEVEL). The “LEVEL” values in the screen change The Split screen appears.
-
Page 7: Changing The Key Touch (Key Touch)
Playing the JUNO-DS Changing the Key Touch (KEY TOUCH) Using the Control Knobs to Vary the Sound Sets the keyboard’s touch. You can use the Control knobs to control the sound in real time. You can control a total of 12 Press the [KEY TOUCH] button. -
Page 8: Playing Arpeggios (Arpeggio)
Playing the JUNO-DS Recalling a Favorite Editing Arpeggios Press the [FAVORITE] button to make it light. Press the [ARPEGGIO] button to make it light. The ARPEGGIO screen appears. Press the [0]–[9] button to select a favorite. Move the cursor to the item that you want to edit, and use the value dial to edit the setting. -
Page 9: Importing A Sample And Playing It On The Keyboard (Sample Import)
Importing a Sample and Playing It on the Keyboard (SAMPLE IMPORT) Audio files that you’ve imported from a USB flash drive into the JUNO-DS (referred to as “samples”) can be assigned to the keyboard and played. In Performance mode, you can assign up to 16 audio files (16 parts). -
Page 10: Editing Sounds
Editing Sounds MEMO For details on the parameters that you can edit, refer to “Parameter Guide (English)” (PDF). Editing a Patch/Drum Kit Saving Your Settings (Write) If ou turn the power off or select another tone, the changed settings are lost. Select a patch or drum kit that you want to edit. -
Page 11: Playing Rhythm Patterns
Playing Rhythm Patterns A rhythm pattern is a fixed phrase played by rhythm instruments such as drums or percussion. The JUNO-DS can play back rhythm patterns assigned to pads [1]–[8] while you use the keyboard to perform along with the rhythm patterns. -
Page 12: Playing Audio Files (Audio Player)
001.mp3 The [LOOP] button lights. Connect the USB flash drive to the 002.mp3 Setting the Start point: JUNO-DS, and turn on the power. 003.mp3 While the file plays, hold down the [SHIFT] button and press the 004.aif [LOOP] button. 005.aif... -
Page 13: Playing/Recording Patterns (Pattern Sequencer)
Press the [t] button. Measures specified by PATTERN Selected track LENGTH The [t] button blinks, and the JUNO-DS is in record-ready mode. Patch that is used to play/record the Gray exterior frame: selected track Make settings for the pattern that you want to record. - Page 14 Playing/Recording Patterns (PATTERN SEQUENCER) MEMO Parameter Value/Explanation 5 By holding down the [SHIFT] button and pressing the [LOOP] button you can Specifies whether quantize will be applied during recording. turn LOOP REC on/off. * Quantize: Automatically corrects inaccuracies in the timing of your keyboard Record to the specified measure length, and then switch from recording to Input Quantize playing, so that the timing is more accurate.
-
Page 15: Saving A Pattern
5 Only SMF format 0 is supported. When you’ve specified the pattern name, press the [ENTER] button. 5 Only the tracks (parts) used by the JUNO-DS are imported. The PATTERN WRITE screen appears. 5 The first eight measures of SMF data can be imported. Subsequent data is not Use the value dial to select the save-destination. -
Page 16: Overall Settings For The Juno-Ds
Set a higher value for Q to narrow the range to be affected. EQ Mid Q 0.5, 1.0, 2.0, 4.0, 8.0 Settings that are shared by the entire JUNO-DS are called “system settings. ” Frequency of the high range. EQ High Freq 2000, 4000, 8000 [Hz] Press the [MENU] button. -
Page 17: Assigning The Function Of The Control Knobs
Value/Explanation Convenient Functions (UTILITY) KNOB These functions let you back up the JUNO-DS’s internal data to a USB flash drive, or Assigning the Function of the Control Knobs to restore data from a USB flash drive into the JUNO-DS. Other utility functions let you return the JUNO-DS to its factory-set state, or initialize Specifies the function that is assigned to each knob when the parameter Knob 1–4 Assign... -
Page 18: Playing The Demo Songs
Turn the power of the JUNO-DS off, then on again. Returning to the Factory Settings (FACTORY RESET) Enter the file name. You can return all of the JUNO-DS’s user settings to the state when the instrument was shipped from the factory (Factory Reset). MEMO For more about entering a name, refer to “Saving Your Settings (Write)”... -
Page 19: Appendix
Appendix Troubleshooting If the JUNO-DS does not function in the way you expect, first check the following points. If this does not resolve the problem, consult your dealer or a nearby Roland service center. Problem Cause/Action Page Make sure that the JUNO-DS’s AC adaptor is correctly connected to an AC outlet and to the rear panel power connector, and that the adaptor itself and p. -
Page 20: Using The Unit Safely
When using the unit with a stand recommended by Roland, the stand must be carefully placed so it is level and sure to remain stable. If not using a stand, you still need to make sure that any location you choose for placing the unit provides a level surface that will properly support the unit, and keep it from wobbling. -
Page 22: Shortcut List
(sold separately) Expression pedal: EV-5 *2: Use USB flash memory (supports USB 2.0 Hi-Speed flash memory) sold by Roland. We cannot guarantee operation if other products are used. USB flash memory (*2) * In the interest of product improvement, the specifications and/or appearance of this unit are subject to change without prior notice.