Table of Contents
Advertisement
Advertisement
Table of Contents

Related Manuals for Roland AX-Synth


Summary of Contents for Roland AX-Synth
- Page 1 r® Owner’s Manual...
- Page 2 Model Name : AX-Synth Type of Equipment : Shoulder Synthesizer Responsible Party : Roland Corporation U.S. Address : 5100 S. Eastern Avenue, Los Angeles, CA 90040-2938 (323) 890-3700 Telephone : IMPORTANT: THE WIRES IN THIS MAINS LEAD ARE COLOURED IN ACCORDANCE WITH THE FOLLOWING CODE.
- Page 3 DAW, to control samplers, etc. To avoid confusion, let’s agree to… • …use the word “button” for all keys on the front panel, and only use “key” when referring to the AX-Synth’s key- board. • …use “sequencer” when referring to both hardware sequencers and computers with sequencer software.
-
Page 4: Using The Unit Safely
Roland distributor, as listed on the “Informa- tion” page. • If you do not use the AX-Synth as a shoulder keyboard, make sure you always have it placed so it is level and sure to remain stable. Never place it on stands that could wobble, or on inclined surfaces. - Page 5 • Never expose Ni-MH batteries to excessive heat such as sunshine, fire or the like. r AX-Synth Owner’s Manual • The AX-Synth and the AC adaptor should be located so that their location or position does not interfere with its proper ventilation.
-
Page 6: Important Notes
Maintenance • For everyday cleaning wipe the AX-Synth with a soft, dry cloth or one that has been slightly dampened with water. To remove stub- born dirt, use a mild, non-abrasive detergent. Afterwards, be sure to wipe the instrument thoroughly with a soft, dry cloth. - Page 7 Strap holder precaution • Never unscrew the strap pins to avoid damaging the AX-Synth’s plastic housing, which eventually compromises overall stability and safety. • To avoid dropping the unit and damaging it or causing injuries to...
-
Page 8: Table Of Contents
Grouping frequently-used Tones (FAVORITE) ......... 19 5. Using the AX-Synth’s performance functions ....... 21 Master Tune . -
Page 9: The Ax-Synth In A Nutshell
Convenient studio operation An AC adaptor and the USB port allow the AX-Synth to be used with a computer. Dedicated editor and librarian software is also available. The “AX-Synth Editor”... -
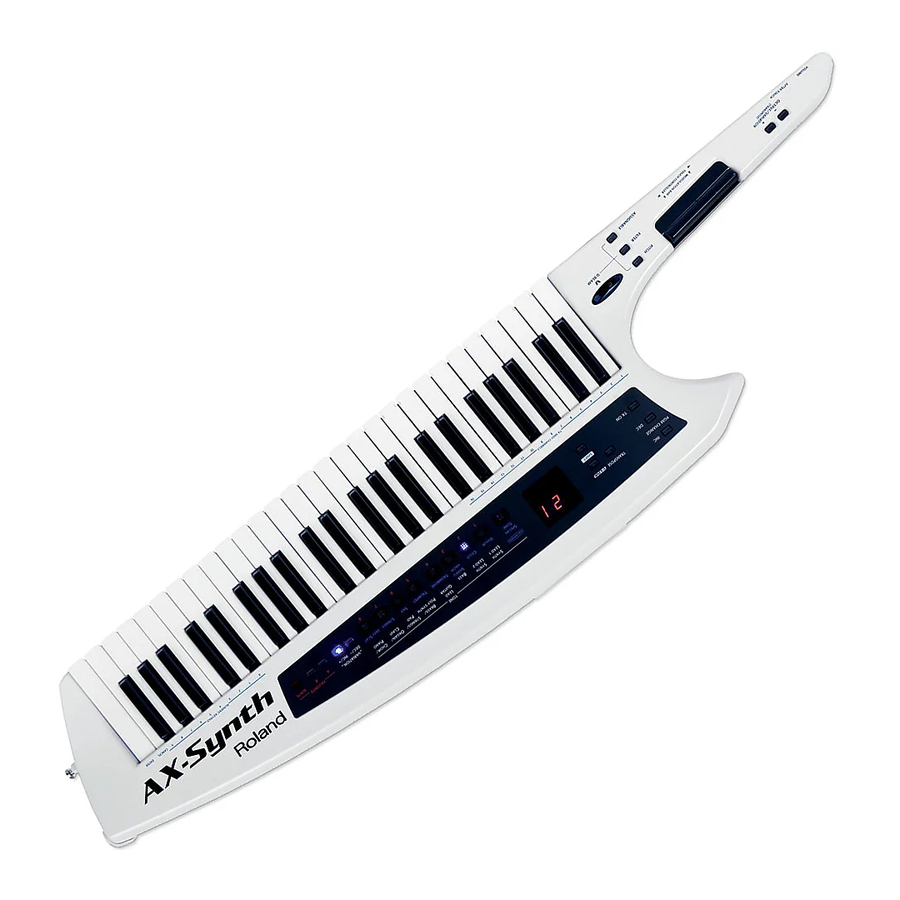
Page 10: Panel Descriptions
ATION [+]/[–] buttons allows you to set the interval in semi-tone steps. D V-LINK button Press this button to activate the AX-Synth’s V-LINK control function (see p. 33). E SHIFT button Pressing this button allows you to select the second- ary (hidden) function of some of the other buttons. -
Page 11: Bottom Panel
‘Neck’ (control) section Front view Rear view K VOLUME knob This knob allows you to set the AX-Synth’s overall output volume. L AFTER TOUCH knob This knob sends channel aftertouch messages for the notes you are playing (see p. 23). -
Page 12: Connection Panel (Rear)
Note: Be sure to only use wireless transmitters that comply with local radio regulations. V ATT ON/OFF switch If you are using 1/4” cables to connect the AX-Synth to an amplifier, etc., slide this switch to the “OFF” position. If you notice distortion while using a wireless system, slide this switch to the “ON”... -
Page 13: Making Connections
Note: If batteries are installed, disconnecting or reconnecting the AC adaptor’s power cord or the adaptor plug from the AX-Synth’s DC IN socket while the power is on will cause the AX-Synth to turn off. You must turn off the power before con- necting or disconnecting the power cord or AC adaptor. -
Page 14: Connecting The Ax-Synth
Connecting the AX-Synth Connecting the AX-Synth to an amplifier, mixer, etc., using cables The AX-Synth needs to be connected to audio equip- ment, such as a keyboard amplifier, a mixing console, active speakers, etc. (1) Connect the OUTPUT jacks on the AX-Synth’s rear panel to the input jacks of your external device. - Page 15 Note: Do not forget to connect the module, synthesizer, etc., to an amplifier. See its manual for details. (2) Switch on the [TX¥ON] button. Note: See page 27 for details about the AX-Synth’s MIDI functions. Controlling the AX-Synth from an external MIDI device The AX-Synth’s tone generator can also receive MIDI...
-
Page 16: Using Headphones
Making connections Working with a computer or sequencer If you want to use the AX-Synth as Master keyboard for recording applications that involve a computer with sequencing software, or take advantage of the “AX-Synth Editor” software, here is the most useful con-... -
Page 17: Powering Up
(a few seconds) after power up is required before it will operate normally. Note: If the AX-Synth is connected to a keyboard amp or audio amp, turn on the power of the AX-Synth first, and then switch on your amp. -
Page 18: Playing The Ax-Synth
4 “SPECIAL” Tones. These sounds can be played via the 49 velocity-sensitive keys (or via MIDI). Selecting ‘regular’ Tones sequentially The AX-Synth’s “regular” Tones are grouped into 8 fami- lies with 32 “variations” (sounds) each. (1) Connect the AX-Synth to your amplifier (page 14) and switch it on (page 17). -
Page 19: Selecting 'Supernatural' And 'Special' Tones
The AX-Synth contains four SuperNATURAL sounds: VIOLIN, CELLO, SHAKUHACHI and TROMBONE. (1) Connect the AX-Synth to your amplifier (page 14) and switch it on (page 17). (2) Press the [SuperNATURAL÷SPECIAL¥TONE] button. (3) Press one of the first four TONE buttons to select the corresponding SuperNATURAL Tone. - Page 20 Playing the AX-Synth Recalling FAVORITE memories To select the Tones assigned to the FAVORITE memories, proceed as follows. (1) Press the FAVORITE [A] or [B] button to select the bank. The FAVORITE button you press lights and the display shows “A -” (bank “A”) or “b -” (bank “B”).
-
Page 21: Using The Ax-Synth's Performance Functions
5. Using the AX-Synth’s performance functions The AX-Synth provides several functions that allow you to add expression to your music, change the pitch/key, etc. Master Tune This parameter allows you to change the AX-Synth’s overall tuning. The factory default, 440Hz, represents the reference pitch used by most electronic musical instruments. -
Page 22: Shifting The Keyboard Pitch In Octave Steps
“OCH” or “Var”, however… (b) Keep holding [SHIFT] and press OCTAVE/VARIATION [+] or [–] to select “OCS”. You only need to do this once: the AX-Synth will remember this setting until you change it again. The [WRITE] button now flashes. -
Page 23: Aftertouch
Tone you are using: the knob may change the Tone’s level or pitch, generate filter sweeps etc. (This needs to be specified using the “AX-Synth Editor” soft- ware.) Note: The knob does not return to its minimum setting auto- matically. -
Page 24: Portamento
(3) Keep holding [SHIFT] and press [PORTAMENTO] once or twice to select the desired mode: Please use your thumb to avoid having to flip the AX-Synth over: you need to be able to see the dis- play. The [WRITE] button flashes. -
Page 25: Sustaining Notes
Optional footswitch (Roland DP-series, BOSS FS-5U) For obvious reasons, connecting a footswitch to the AX-Synth while using it to move around on stage seems impractical. In such cases, we recommend using the [HOLD] button. Note: Please use a Roland DP-series or a BOSS FS-5U foot- switch to ensure that it uses the correct polarity (on when pressed, off when released). -
Page 26: Editing Tone Settings
“AX-Synth Editor” software and a com- puter, you can change the volume and Reverb Send lev- els of the Tones on the AX-Synth itself and save those changes to a FAVORITE memory. Note: The two parameters discussed here are not available for SuperNATURAL or SPECIAL Tones. -
Page 27: Using The Ax-Synth As Midi Controller
7. Using the AX-Synth as MIDI controller The AX-Synth can transmit and receive performance data when connected to an external MIDI device, which enables the two devices to control each other’s performance. For example, one device can play or switch sounds on the other device. -
Page 28: Transmitting Program Change Numbers
Program Change messages. Bank Select messages (CC00 and CC32) cannot be entered by hand. What you can do, however, is first select one of the AX-Synth’s internal Tones that uses the correct bank, and then proceed with the following. Transmitting Program Change numbers sequen- tially (1) Switch on the [TX¥ON] button (it must light). -
Page 29: Using The Bulk Dump Function
MIDI IN socket. MIDI OUT AX-Synth MIDI IN MIDI sequencer You can also connect the AX-Synth’s USB port to a USB port on your computer and use a sequencer pro- gram: AX-Synth Computer with sequencer software (2) Hold down the VARIATION [DEC÷–] + [INC÷+] + TONE [6] (STRINGS/PAD) buttons and switch on the AX-Synth. - Page 30 Note: If the “Err” message appears during the reception of bulk data, the AX-Synth was unable to process the data correctly, then stop the sequencer. The FAVORITE [WRITE] button will go dark at that time. In such a case, please repeat the entire procedure.
-
Page 31: Using The Ax-Synth's Usb Port
8. Using the AX-Synth’s USB port The AX-Synth is equipped with a USB port for MIDI communication with a computer. General considerations Possible applications If you connect the USB port located on the AX-Synth’s rear panel to a USB port of your computer, you’ll be able to do the following things. -
Page 32: Making The Settings For The Usb Driver
Select this if you use a generic USB driver included with the OS. (3) Press the [WRITE] button to confirm your selection. (4) Release the [SHIFT] button. (5) Switch the AX-Synth off, wait a few seconds, then switch it on again. -
Page 33: About V-Link
How to use V-LINK Activating V-LINK (1) Connect the AX-Synth’s MIDI OUT socket to the MIDI IN socket of your optional Edirol video device. Note: V-LINK communication is not possible via the USB port. -
Page 34: Additional Functions
All indicators flash. (3) Wait until the “dne” message appears in the dis- play, then switch the AX-Synth off, wait a few sec- onds, and switch it back on. Note: Never switch off the AX-Synth while the [WRITE] button is still lit, because doing so may damage it. -
Page 35: Appendix
TROLLER ribbon is used Could the Pitch Bend Range be set to 0? → Set the Pitch Bend Range to a value other than “0”. This needs to be done in the “AX-Synth Editor” software after connecting the AX-Synth to your computer. -
Page 36: Control Change List
Appendix Control Change list Here are the official or frequently-used functions of Control Change numbers CC00~127. Not all MIDI instruments support all Control Changes, while some instruments may use certain numbers for different pur- poses. Be sure to check the MIDI implementation chart of the external instrument. -
Page 37: Tone List
0 121 Folk Gtr 2 0 122 Folk Gtr 3 0 123 Harp 0 124 Aerial Harp 0 125 r AX-Synth Owner’s Manual LostParadise 0 126 Sitar 0 127 Santur Stack 0 128 Brass/Poly Synth CC00 CC32 PC 80s Brass 1... - Page 38 Appendix Organ/Clavi CC00 CC32 PC Lord Organ 1 1 65 Lord Organ 2 1 66 Rotary Org 1 1 67 Rotary Org 2 1 68 Vintage Org 1 1 69 Vintage Org 2 1 70 VK Organ 1 1 71 VK Organ 2 1 72 D-Bars 1...
-
Page 39: Specifications
BENDER MODE button (2 modes), HOLD button, OCTAVE/VARIATION buttons Connectors OUTPUT L/MONO, R: 1/4” phone jacks x2 PHONES: 1/4” TRS phone jack x1 FOOT PEDAL: for Roland DP-series or BOSS FS-5U footswitch USB port: COMPUTER (supports USB–MIDI) * See http://www.Roland.com for the supported operating systems MIDI: IN, OUT... -
Page 40: Midi Implementation Chart
MIDI implementation chart 13. MIDI implementation chart [Shoulder Synthesizer] Model: AX-Synth Function... Basic Default Channel Changed Mode Default Message Altered Note Number True Voice Velocity Note ON Note OFF After Key’s Touch Ch’s Pitch Bend Control Change 1~31, 33~95 100, 101... -
Page 41: Index
MIDI Channels ... . .27 r AX-Synth Owner’s Manual ON ..... . 27 USB . - Page 42 Information When you need repair service, call your nearest Roland Service Center or authorized Roland distributor in your country as shown below. AFRICA PHILIPPINES G.A. Yupangco & Co. Inc. 339 Gil J. Puyat Avenue EGYPT Makati, Metro Manila 1200, Al Fanny Trading Office...
- Page 43 AX-Synth Owner’s Manual For China...
- Page 44 R® 602.00.0354.02 RES 750-09 AX-Synth Owner's Manual - E...