Table of Contents
Advertisement
OWNER'S MANUAL
Microprocessor
Controlled,
Fully Automatic
Operation
Battery
Charger
with Engine Starter
Plus Battery and Alternator Tester
2=AIVlP SLOW CHARGE
15=AMP FAST CHARGE
40-AMP
RAPID
CHARGE
125=AMP
ENGINE
START
FOR 12=VOLT
BATTERIES
Model No.
200.71226
CAUTION:
Read all Safety Rules and Operating Instructions,
and follow them with each use of this product.
Sears, Roebuck and Co., Hoffman
Estates, IL 60179 U.S.A.
0099000537/0206
Advertisement
Table of Contents

Related Manuals for DieHard 200.71226


Summary of Contents for DieHard 200.71226
- Page 1 125=AMP ENGINE START FOR 12=VOLT BATTERIES Model No. 200.71226 CAUTION: Read all Safety Rules and Operating Instructions, and follow them with each use of this product. Sears, Roebuck and Co., Hoffman Controlled, Fully Automatic Charger Estates, IL 60179 U.S.A. 0099000537/0206...
-
Page 2: Table Of Contents
Battery Charger with Engine Starter Plus Battery and Alternator Tester offers features to accommodate the needs for home or light commercial use. This manual will explain how to use the battery charger safely and effectively. Please read and follow these instructions and precautions carefully. -
Page 3: Important Safety Instructions
Wash hands after handling. • Read all instructions and cautions printed on the battery charger, battery, and vehicle or equipment using bat- tery. • Use charger only on lead-acid type rechargeabte batteries, such as those used in cars, trucks, tractors, air- planes, vans, RVs, trolling motors, etc. -
Page 4: Personal Safety Precautions
• Always operate the battery charger in an open, well-ventilated • Never smoke or allow a spark or flame in the vicinity of the battery or engine. -
Page 5: Before Using Your Battery Charger
Itisimportant tounderstand your c harger's electrical requirements PLUGGING ITIN Your c harger requires a 120V AC2-prong wall o utlet r eceptacle installed according toalllocal c odes a ndordinances. ASSEMBLING YOUR CHARGER Included withyour b attery c harger aretwo cord wrap cleats f orstorage oftheclamp cables. -
Page 6: Operating Instructions
NOTE: Amarine ( boat) boat b attery m ust b eremoved and charged onshore. T o charge i tonboard r equires equipment specially designed formarine u se. IMPORTANT: Follow allsafety i nstructions tery. W ear c omplete eyeprotection andclothing protection. Charge y our b attery i na welt-ventilated area. -
Page 7: Charging Battery Removed From The Vehicle
8. Clean and store the charger in a dry location. USING ENGINE START Your battery charger can be used to jump start your car if the battery is low. Fol- low these instructions on how to use the ENGINE START feature. -
Page 8: Using Your Battery Charger
Itstarts at180 and counts down t o0.The 125A S TART L ED blinks onceeverysecond. During thecool down period, nocurrent isdelivered to OVERVIEW Using this battery charger is very simple. First, connect the battery and AC power following the precautions "OPERATING INSTRUCTIONS". -
Page 9: Charger Controls
Ifthecharge m ode i schanged after c harg- inghasstarted ( bypressing the CHARGE RATE or CHARGE T YPEbutton), t he charging process wilt b erestarted. 71226 CONTROL DISPLAY MODE SWITCH Use this switch button to set the function of the digital display to one of the following. •... -
Page 10: Control Panel Guide
MODE OF OPERATION Initial power-up, battery not detected No battery or reversed battery detected Battery tester activated Battery tester with charged battery Battery tester with no battery Voltage meter activated Alternator tester activated Alternator tester on good alternator Alternator tester on bad alternator 2 Amp charge... -
Page 11: Using The Built-In Battery Tester
OVERVIEW This battery charger has a built-in battery tester that displays either an accurate battery voltage or an estimate of the battery's relative charge based on the battery voltage and the Battery Council International scale. TESTING SEQUENCE There are four basic steps required to use the 71226 as a battery tester. - Page 12 This battery c harger hasabuilt-in a lter- nator t ester t hat d isplays either a naccu- rate alternator voltage o ranestimate of thealternator's relative o utput compared tonormal alternators. The Alternator % values d isplayed should b etaken as general reference, notprecise d iagnosis.
-
Page 13: Battery Percent And Charge Time
This charger adjusts the charging time in order to charge the battery completely, efficiently and safely. The microproces- sor automatically makes the necessary decisions. However, this section includes guidelines that can be used to estimate charging times. The duration of the charging process depends on three factors: 1. -
Page 14: Maintenance And Care
A minimal amount of care can keep your battery charger working properly for years. 1. Clean the clamps each time you are finished charging. Wipe off any battery fluid that may have come in contact with the clamps to prevent corrosion. -
Page 15: Troubleshooting
The battery is connected and the charger is on, but isn't charging. Indicator lights are tit in an erratic manner not explained in the "Using Your Battery Charger" section. The CHECK (red) LED always flashes before the battery is completely charged. -
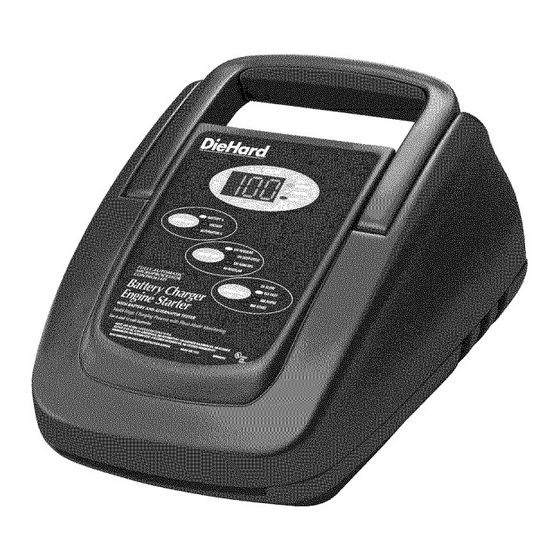
Page 16: Parts
This section shows an illustration of your battery charger. Use it to become familiar with part locations and appearance. Replacement Parts List Sears 71226 iTEM DESCRIPTION HandleAssembly Case,Top Faceplate ControlBoardAssembly 2299001463 OutputCablesand Clamps PowerCord Cord Cleat Transformer PowerBoard/ HeatsinkAssembly CircuitBreaker...