Hardy Diagnostics QuickSlide HemaPRO User's Operation Manual
Hide thumbs
Also See for QuickSlide HemaPRO:
- User's operation manual (33 pages) ,
- Quick start manual (2 pages) ,
- User's operation manual (9 pages)
Table of Contents
Advertisement
Advertisement
Table of Contents

Related Manuals for Hardy Diagnostics QuickSlide HemaPRO


Summary of Contents for Hardy Diagnostics QuickSlide HemaPRO
- Page 1 ...
-
Page 2: Table Of Contents
Table of Contents SPECIFICATIONS ............................ 4 1.0 INTRODUCTION .......................... 5 Operator Responsibility – Safety Instructions .................. 5 2.0 WORK AREA REQUIREMENTS ...................... 6 3.0 RECEIVING AND UNPACKING ...................... 6 4.0 MATERIALS REQUIRED BUT NOT PROVIDED .................. 6 4.1 General Information ........................... 7 4.2 Ordering Information .......................... 7 4.3 Reagent Kit Installation ........................ 7 5.0 OPERATIONS OVERVIEW / PREPARATION .................. 8 5.1 Instrument Diagram .......................... 8 5.2 Specimen Slide Preparation ........................ 9 5.3 Instrument Preparation (First Time Set‐up) .................. 10 6.0 OPERATING INSTRUCTIONS ...................... 12 6.1 General Guidelines .......................... 12 6.2 Stain Procedure .......................... 12 7.0 SYSTEM SOFTWARE / MENU NAVIGATION .................. 14 7.1 Alter Stain / Buffer Timing ........................ 14 ... - Page 3 Congratulations! You have made an excellent choice for your Lab. Hardy Diagnostics thanks you for the trust you have placed in our products and services. This operating manual has been designed to help you gain an understanding of the operation and application of our HemaPRO.
-
Page 4: Specifications
SPECIFICATIONS Dimensions/Weight Width 30.48 cm (12 in.) Height 26.67 cm (10.5 in.) Depth 27.94 cm (11 in.) Weight 4.5 kg (10.00 lbs.) Power Requirements Input 100-240V, 50-60 Hz, 0.8 A Standard power cords are supplied to meet local standards. Temperature, Ambient Operation 16-32 Degrees C (60-90 Degrees F) Humidity... -
Page 5: Introduction
1.0 INTRODUCTION This Operation Manual is provided to guide the user in all aspects of unit set-up, operational use, and user-level maintenance of the QuickSlide HemaPRO Automated Hematology stainer unit. The HemaPRO microscope slide stainer is capable of automatically performing a hematology stain (Wright Giemsa) sequence on a slide containing a biological specimen for in vitro diagnostic use. -
Page 6: Work Area Requirements
4.0 MATERIALS REQUIRED BUT NOT PROVIDED Standard microbiological supplies are required, but not provided. If additional supplies are needed, reagents and tubing kits can be ordered through Hardy Diagnostics Customer Service. Call (800) 266-2222 (option 1), or go to www.HardyDiagnostics.com. Alternatively, you can contact your preferred distributor. -
Page 7: General Information
The remaining count should be carefully monitored so that fresh reagents may be ordered and available when needed. Call Hardy Diagnostics Customer Service at 800-266-2222 (option 1) to order supplies. Reagent Kit Installation The HemaPRO reagents are supplied to the unit through cannulas connected to the individual reagent containers. -
Page 8: Operations Overview / Preparation
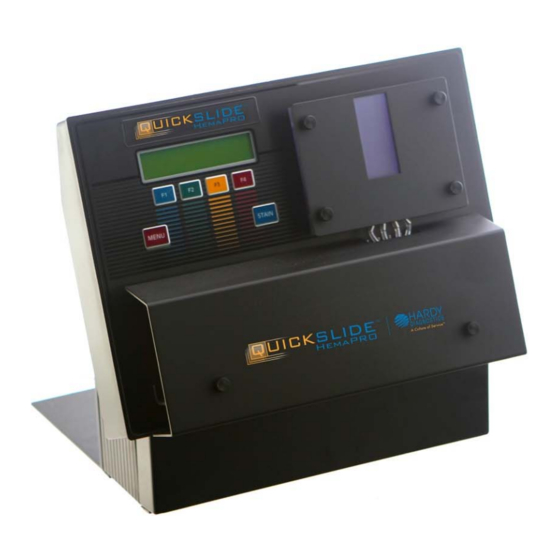
5.0 OPERATIONS OVERVIEW / PREPARATION 5.1 Instrument Diagram The basic anatomy of the HemaPRO is identified in the diagram above. Display screen – The user interface that prompts which buttons to select for procedures. Buttons (F1-F4, Menu, and Stain) are color coded to more easily differentiate options. Cuvette –... -
Page 9: Specimen Slide Preparation
Specimen Slide Preparation 5.2.1 Blood Specimen For a blood smear use a clean slide with a frosted end (Cat. no. PF72P). Fill a disposable pipette at least ¾ full with well-mixed blood. Place a drop of blood approximately 4 mm in diameter on the slide, approximately 0.5 cm from the frosted area. -
Page 10: Instrument Preparation (First Time Set-Up)
Instrument Preparation (First Time Set-up) 5.3.1 Remove the two thumb screws to open the front panel that is covering the pump tube rollers and attach all four orange pump tubes around their pump rollers. When installing a new pump tube kit, refer to section 8.1 for detailed instructions. - Page 11 5.3.7 Before using the instrument, you will need to Prime the unit twice with each new tubing kit that has been installed. From this Home Screen, select the blue <F1> button to initiate the Priming process. This will need to be performed two separate times (Press <F1>, allow a prime to run;...
-
Page 12: Operating Instructions
6.0 OPERATING INSTRUCTIONS General Guidelines 6.1.1 If using Bone Marrow Specimen, ensure the smear is methanol fixed and dried before placing into the cuvette. Do not place the slide in the cuvette unless the display instructs you to do so. 6.1.2 Use high quality, clean slides (Cat. - Page 13 6.2.3 When prompted, load the slide into the cuvette with the specimen facing out towards the front (facing you). Once the slide is loaded, press the blue <STAIN> button. 6.2.4 Once the staining process is complete, promptly remove the slide from the cuvette and press the red <F4>...
-
Page 14: System Software / Menu Navigation
7.0 SYSTEM SOFTWARE / MENU NAVIGATION The HemaPRO has five (5) menu options from the Home screen, as explained below: Upon first press of the Menu button, you will see our splash screen shown below. No further action can be taken from this screen. Alter Stain / Buffer Timing 7.1.1 A second press of the red Menu button will allow you to alter Stain times (pictured on the left) for either <F1>... -
Page 15: Sound Settings
7.1.3 Stain and buffer times are changed in five second intervals. Press the blue <F1> to decrease staining times and press the green <F2> key to increase staining times. Press <F4> to save the custom stain and buffer times. ... -
Page 16: Hemapro User Maintenance
NOTE: It is not recommended that the sound be turned off, as these alerts are meant to inform the technician when the machine needs attention. 7.2.2 After the sound setting has been saved, the screen will prompt you to Choose Slide Type to run a stain cycle. -
Page 17: Setting Fill Levels
8.1.6 Remove the orange pump tubes off of each roller. 8.1.7 Starting from the left (“Rinse” Pump #1 above) pull the bottom “T” of the orange pump tube so that it is free of the black rack that holds the pump tubes in place. You will need to cut any zip-ties that are holding the clear tubing together. - Page 18 8.2.2 Once the unit is primed, power the instrument off. 8.2.3 Place a blank 1”x3”x1mm slide into the cuvette. A slide must be loaded before fill levels can be adjusted. 8.2.4 While the machine is off, hold down the red <F4> button. While still holding the <F4>...
- Page 19 8.2.6 You will now see the following screen, instructing to either <F1> Drain or <F4> Fill the cuvette. If the cuvette has any residual fluid remaining, press and hold the blue <F1> button until it has emptied completely. When cuvette is completely empty, press the red <F4>...
-
Page 20: Hardy Diagnostics Quickslide™ Service Request
MENU button. The unit will automatically save the fill levels and cycle back to the Main Menu. 8.3 Hardy Diagnostics QuickSlide™ Service Request 8.3.1 If a problem is encountered that is beyond the scope of this manual or additional... -
Page 21: Hemapro Warranty
Extended warranties do not include the routine replacement of the tube sets. Hardy Diagnostics shall not be obligated under this warranty if the need for repairs or replacements results from Buyer’s or end users’ failure to operate and maintain the system as specified in the operating manual. Hardy Diagnostics shall not be responsible for results generated from or damage caused by Buyer’s... - Page 22 Hardy Diagnostics represents and warrants to Buyer that all products shipped by Hardy Diagnostics to Buyer, as of the date of such shipment, shall conform in all material respect to the specifications last published at www.HardyDiagnostics.com before the time of shipment of the products. HARDY...
-
Page 23: Training Checklist
Training Checklist Trainee Name: HemaPRO Training Checklist Refer to the user manual for each item on this checklist. Enter trainee’s initials for each item trained. Trainee’s Initials ______ Instrument Preparation: Section 5.3 ______ Registering Reagent Kits with Module: Section 5.3.3 - 5.3.4 ______ Specimen Slide Preparation: Section 5.2...