HP ProOne 600 Hardware Reference Manual
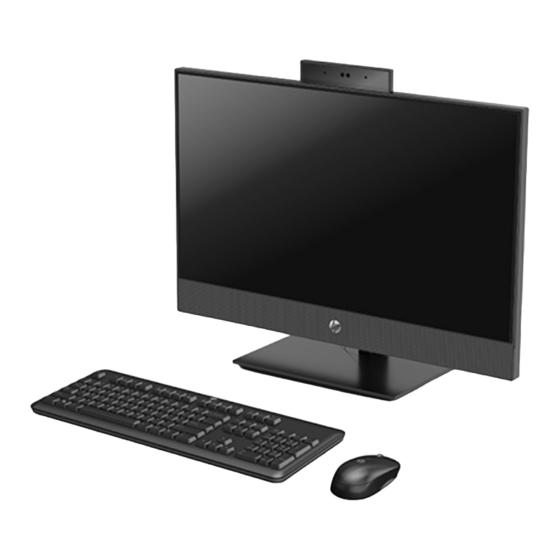
Hp proone 600 g4 21.5-inch all-in-one business pc
hp proone 400 g4 23.8-inch all-in-one business pc
hp proone 400 g4 20-inch all-in-one business pc
Hide thumbs
Also See for ProOne 600:
- Illustrated parts & service map (4 pages) ,
- Hardware reference manual (59 pages) ,
- Hardware reference manual (49 pages)

Related Manuals for HP ProOne 600


Summary of Contents for HP ProOne 600
- Page 1 Hardware Reference Guide HP ProOne 600 G4 21.5-inch All-in-One Business PC HP ProOne 400 G4 23.8-inch All-in-One Business PC HP ProOne 400 G4 20-inch All-in-One Business PC...
- Page 2 United States and/or other countries. The information contained herein is subject to change without notice. The only warranties for HP products and services are set forth in the express warranty statements accompanying such products and services. Nothing herein should be construed as constituting an additional warranty.
- Page 3 About This Book This guide provides basic information for upgrading this computer model. WARNING! Text set off in this manner indicates that failure to follow directions could result in bodily harm or loss of life. CAUTION: Text set off in this manner indicates that failure to follow directions could result in damage to equipment or loss of information.
- Page 4 About This Book...
-
Page 5: Table Of Contents
Table of contents 1 Product features ............................1 Overview ................................1 HP ProOne 600 and HP ProOne 400 23.8-inch components ................2 Front components ..........................2 Side components ..........................3 Rear components ..........................4 Bottom components ..........................4 HP ProOne 400 20-inch components ........................5 Front components .......................... - Page 6 Connecting and disconnecting power ......................... 17 Connecting power ..........................17 Disconnecting power ......................... 18 Webcam ................................18 Webcam operation ..........................18 Setting up Windows Hello ......................... 18 Synchronizing the optional wireless keyboard and mouse ................19 3 Hardware repair and upgrade ........................21 Warnings and cautions ............................
-
Page 7: Product Features
Product features Overview NOTE: For the latest manuals on this product, go to http://www.hp.com/support. Select Find your product, and then follow the on-screen instructions. Overview... -
Page 8: Hp Proone 600 And Hp Proone 400 23.8-Inch Components
HP ProOne 600 and HP ProOne 400 23.8-inch components Front components Component Component Webcam microphones (2) (optional) Webcam/IR lens (optional) IR LED (optional) IR LED (optional) Webcam LED (optional) Speakers (2) (optional) Chapter 1 Product features... -
Page 9: Side Components
USB 3.1 Type-C port Optical disc drive light (optional) USB 3.1 Type-A (charging) port Optical disc drive eject button (optional) USB 3.1 Type-A port SD card reader (optional) Audio-out (headphone)/Audio-in (microphone) combo jack HP ProOne 600 and HP ProOne 400 23.8-inch components... -
Page 10: Rear Components
Rear components Component Component DisplayPort port (optional) RJ-45 (network) jack – or – HDMI port (optional) – or – Serial port (optional) USB 3.1 Type-A ports (2) Power connector DisplayPort port Security cable slot Bottom components Component Component Power button Hard drive activity light Power light Chapter 1 Product features... -
Page 11: Hp Proone 400 20-Inch Components
HP ProOne 400 20-inch components Front components Component Component Webcam LED Webcam microphone Webcam lens Speakers (2) (optional) Side components Component Component Optical disc drive (optional) USB 3.1 Type-C port Optical disc drive light (optional) USB 3.1 Type-A (charging) port Optical disc drive eject button (optional) USB 3.1 Type-A port... -
Page 12: Rear Components
Rear components Component Component DisplayPort port (optional) RJ-45 (network) jack – or – HDMI port (optional) – or – Serial port (optional) USB 3.1 Type-A ports (2) Power connector DisplayPort port Security cable slot Bottom components Component Component Power button Hard drive activity light Power light Chapter 1 Product features... -
Page 13: Keyboard Features
Keyboard features Your keyboard and mouse may be different. Component Component Sleep Mute Volume Fast Reverse Decrease Volume Play/Pause Increase Volume Stop Function Fast Forward Keyboard features... -
Page 14: Labels
Microsoft® Certificate of Authenticity label (select models only prior to Windows 8)—Contains the Windows Product Key. You may need the Product Key to update or troubleshoot the operating system. HP platforms preinstalled with Windows 8 or Windows 8.1 do not have the physical label, but have a Digital Product Key electronically installed. -
Page 15: Setup
Attaching a fixed-height stand To install the stand: Place the computer facedown on a soft flat surface. HP recommends that you set down a blanket, towel, or other soft cloth to protect the bezel and screen surface from scratches or other damage. -
Page 16: Removing A Fixed-Height Stand
Disconnect the AC power cord from the AC outlet and disconnect any external devices. Place the computer facedown on a soft flat surface. HP recommends that you set down a blanket, towel, or other soft cloth to protect the bezel and screen surface from scratches or other damage. -
Page 17: Removing An Adjustable Height Stand
Disconnect the AC power cord from the AC outlet and disconnect any external devices. Place the computer facedown on a soft flat surface. HP recommends that you set down a blanket, towel, or other soft cloth to protect the bezel and screen surface from scratches or other damage. -
Page 18: Attaching The Computer To A Mounting Fixture
Attaching the computer to a mounting fixture The computer can be attached to a wall, swing arm, or other mounting fixture. NOTE: This apparatus is intended to be supported by UL or CSA Listed wall mount bracket. Insert the VESA mount bracket in the two large holes in the upper part of the back of the computer (1), and then rotate it down. -
Page 19: Connecting And Disconnecting Cables
If you are adding a display that has a DisplayPort port, then no video adapter is required. If you are adding a display that does not have a DisplayPort port, you can purchase a video adaptor from HP for your configuration. -
Page 20: Disconnecting Cables
Removing and installing the rear port cover Removing the rear port cover Place the computer facedown on a soft flat surface. HP recommends that you set down a blanket, towel, or other soft cloth to protect the bezel and screen surface from scratches or other damage. -
Page 21: Installing The Rear Port Cover
Installing the rear port cover ▲ Align the rear port cover with the computer, press all tabs on the panel into place (1), and then secure it with four screws (2). Positioning the computer This computer may ship with a fixed-height stand or an adjustable height stand. ●... -
Page 22: Adjusting An Adjustable Height Stand
Adjusting an adjustable height stand CAUTION: Use caution when reclining a computer if a cable lock is installed. The cable or the lock may interfere with the angle of recline. This stand allows you to: Tilt the computer from –5° to 20° from the desktop ●... -
Page 23: Installing A Security Cable
Installing a security cable A security cable is a key lock device that has a wire cable attached. You attach one end of the cable to your desk (or other stationary object) and the other end of the cable to the security cable slot on the computer. Secure the security cable lock with the key. -
Page 24: Disconnecting Power
– or – On the HP ProOne 400 20-inch, slide the webcam shutter to the right to open the webcam. On the HP ProOne 600 or HP ProOne 23.8-inch computer, press the webcam down until it locks to close ▲... -
Page 25: Synchronizing The Optional Wireless Keyboard And Mouse
Synchronizing the optional wireless keyboard and mouse The wireless keyboard and mouse are optional components. The mouse and keyboard are synchronized at the factory. If they do not work, remove and replace the batteries. If the mouse and keyboard are still not synchronized, then follow this procedure to manually re-synchronize the pair. - Page 26 NOTE: If the mouse and keyboard still do not work, then remove and replace the batteries. If the mouse and keyboard are still not synchronized, then synchronize the keyboard and mouse again. Chapter 2 Setup...
-
Page 27: Hardware Repair And Upgrade
Additional information For more information on removing and replacing hardware components, the Computer Setup utility, and troubleshooting, refer to the Maintenance and Service Guide (available in English only) for your computer model at http://www.hp.com. Warnings and cautions... -
Page 28: Removing Batteries From The Optional Wireless Keyboard Or Mouse
Removing batteries from the optional wireless keyboard or mouse NOTE: The wireless keyboard and mouse are optional components. To remove batteries from the wireless keyboard, remove the battery door on the underside of the keyboard (1) and lift the batteries out of the battery compartment (2). To remove batteries from the wireless mouse, remove the battery door on the underside of the mouse (1) and lift the batteries out of the battery compartment (2). -
Page 29: Locating Internal Components
Locating internal components Component Component Optical disc drive (optional) RTC battery Memory modules Hard drive Removing and installing memory The memory slots on the system board can be populated with up to two industry-standard small outline dual inline memory modules (SODIMMs). These memory slots are populated with at least one preinstalled memory module. -
Page 30: Populating Memory Module Slots
HP offers upgrade memory for this computer and advises that the consumer purchase it to avoid compatibility issues with unsupported third-party memory. Populating memory module slots The system will automatically operate in single channel mode, dual channel mode, or flex mode, depending on how the memory modules are installed. -
Page 31: Installing Memory Modules
Installing memory modules There are two memory slots on the system board. To remove or install memory modules: To locate the memory modules on the system board, see Locating internal components on page To remove a memory module, press outward on the two latches on each side of the memory module (1), then pull the memory module out of the slot (2). -
Page 32: Replacing The Rtc Battery
The lifetime of the lithium battery can be extended by plugging the computer into a live AC outlet. The lithium battery is only used when the computer is NOT connected to AC power. HP encourages customers to recycle used electronic hardware, HP original print cartridges, and rechargeable batteries. For more information about recycling programs, go to http://www.hp.com/recycle. -
Page 33: Replacing Drives
Replacing drives Replacing a hard drive The 2.5 inch primary hard drive is installed on the right side of the computer. To locate the hard drive on the system board, see Locating internal components on page Removing a hard drive Remove the screw securing the hard drive to the computer. -
Page 34: Installing The Optical Disc Drive
Connect the power and data cables to the hard drive (1). Align the hard drive and slide it toward the edge of the computer until the hard drive snaps into place (1), and then secure it with a screw (2). Installing the optical disc drive The optical disc drive is located above the system components. -
Page 35: Appendix A Electrostatic Discharge
Use conductive field service tools. ● Use a portable field service kit with a folding static-dissipating work mat. If you do not have any of the suggested equipment for proper grounding, contact an HP authorized dealer, reseller, or service provider. NOTE: For more information on static electricity, contact an HP authorized dealer, reseller, or service provider. -
Page 36: Appendix B Computer Operating Guidelines, Routine Care, And Shipping Preparation
Computer operating guidelines, routine care, and shipping preparation Computer operating guidelines and routine care Follow these guidelines to properly set up and care for the computer and monitor: Keep the computer away from excessive moisture, direct sunlight, and extremes of heat and cold. ●... -
Page 37: Optical Disc Drive Precautions
CAUTION: If any object or liquid falls into the drive, immediately unplug the computer and have it checked by an authorized HP service provider. Shipping preparation Follow these suggestions when preparing to ship the computer: Back up the hard drive files to an external storage device. Be sure that the backup media is not exposed to electrical or magnetic impulses while stored or in transit. -
Page 38: Appendix C Accessibility
Accessibility HP designs, produces, and markets products and services that can be used by everyone, including people with disabilities, either on a stand-alone basis or with appropriate assistive devices. Supported assistive technologies HP products support a wide variety of operating system assistive technologies and can be configured to work with additional assistive technologies. -
Page 39: Index
HP ProOne 400 side 5 hard disk drive installing 25 HP ProOne 600 2 2.5 inch, installing 27 maximum 23 HP ProOne 600 bottom 4 hard drive removing 25 HP ProOne 600 front 2 2.5 inch 27 slots 23 HP ProOne 600 rear 4 2.5 inch, removing 27... - Page 40 18 computer 8 Windows Hello 18 Windows Hello 18 rear components HP ProOne 400 6 HP ProOne 600 4 rear port cover 14 installing 15 removing 14 removing 2.5 inch hard drive 27 removing battery 26...