Table of Contents
Advertisement
Quick Links
Advertisement
Chapters
Table of Contents

Related Manuals for Siemens CM836GPB6A


Summary of Contents for Siemens CM836GPB6A
- Page 1 Built-in oven CM836GPB6A en Instruction manual...
-
Page 3: Table Of Contents
Table of contents e n I n s t r u c t i o n m a n u a l Intended use ......4 Microwave. -
Page 4: Intended Use
This appliance is intended for use up to a replacement parts and services can be found at maximum height of 4000 metres above sea www.siemens-home.bsh-group.com and in the online level. shop www.siemens-home.bsh-group.com/eshops This appliance may be used by children over... -
Page 5: Important Safety Information
Important safety information Water in a hot cooking compartment may Risk of scalding! (Important safety ■ create hot steam. Never pour water into the information hot cooking compartment. Warning – Risk of injury! G eneral information Scratched glass in the appliance door may I m p o r t a n t s a f e t y i n f o r m a t i o n ■... -
Page 6: Microwave
Important safety information Airtight packaging may burst when food is Microwave Risk of burns! ■ heated. Always observe the instructions on Warning – Risk of fire! the packaging. Always use oven gloves to Using the appliance for anything other than remove dishes from the cooking ■... -
Page 7: Meat Thermometer
Causes of damage If using the appliance in microwave mode ]Causes of damage ■ only, placing cookware and containers made of metal or featuring metal detailing G eneral information inside the appliance may cause sparks C a u s e s o f d a m a g e when the appliance is operating. -
Page 8: Microwave
Environmental protection Microwave 7Environmental protection Caution! Creation of sparks: Metal – e.g. a spoon in a glass – Y our new appliance is particularly energy-efficient. ■ must be kept at least 2 cm from the cooking E n v i r o n m e n t a l p r o t e c t i o n Here you can find tips on how to save even more compartment walls and the inside of the door. -
Page 9: Environmentally-Friendly Disposal
Environmental protection Open the appliance door as infrequently as possible ■ when the appliance is in use. It is best to bake several cakes one after the other. ■ The cooking compartment stays warm. This reduces the baking time for the second cake. You can place two cake tins next to each other in the cooking compartment. -
Page 10: Getting To Know Your Appliance
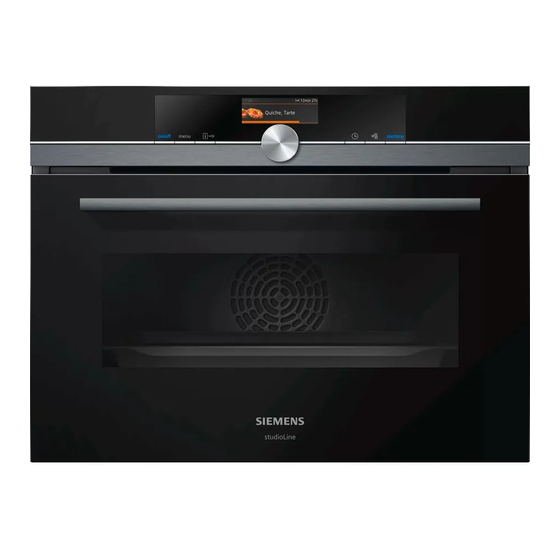
Getting to know your appliance Depending on the appliance model, individual Note: *Getting to know your details and colours may differ. appliance Control panel I n this chapter, we will explain the indicators and In the control panel, you can use the various buttons G e t t i n g t o k n o w y o u r a p p l i a n c e controls. -
Page 11: Operating Modes Menu
Getting to know your appliance Operating modes menu Countdown If you have started your appliance without a cooking The menu is divided into different operating modes. In time, you can see how long the operation has already this way, you can quickly access the required function. been running for at the top right in the status bar. -
Page 12: Further Information
Getting to know your appliance Grill, large area Grill settings: For grilling flat items such as steaks, sausages or bread, and for browning food. 1 = low The whole area of the grill heating element becomes hot. 2 = medium 3 = high Grill, small area Grill settings:... -
Page 13: Accessories
Accessories Inserting accessories _Accessories The cooking compartment has three shelf positions. The shelf positions are counted from the bottom up. Y our appliance is accompanied by a range of A c c e s s o r i e s accessories. -
Page 14: Optional Accessories
Before using for the first time When inserting the wire rack, ensure that the catch Universal pan, non-stick tappet is at the rear and is facing downwards. The ‚ For moist cakes, pastries, frozen meals and large roasts. lettering "microwave" must be at the front and the outer Pastries and roasts can be removed more easily from the universal rail must face downwards ¾... -
Page 15: Cleaning The Cooking Compartment And Accessories
Operating the appliance Setting the time 1Operating the appliance The time starts at 12:00. Use the rotary selector to set the current time. Y ou have already learnt about the controls and how O p e r a t i n g t h e a p p l i a n c e Touch the arrow they work. -
Page 16: Setting The Type Of Heating And Temperature
Time-setting options Use the rotary selector to change the selection. Making settings Depending on the selection, change further settings. Ensure you have selected a suitable type of heating. Use the start/stop button to start. The temperature must be set to above 100 °C, The elapsed time appears in the display. -
Page 17: Timer
Time-setting options Set the cooking time using the rotary selector. Using the button, you can request information ■ during the operation, which then appears briefly in the display. Timer You can set the timer at any time, even if the appliance is switched off. -
Page 18: Childproof Lock
Childproof lock Confirm with the Start/Stop button. QBasic settings T here are various settings available to you in order to B a s i c s e t t i n g s help use your appliance effectively and simply. You can change these settings as required. -
Page 19: Changing The Time
Microwave ^Microwave Warning: Baking tray in Display Do not display Y ou can use the microwave to cook, heat up or defrost Night-time dimming Switched off M i c r o w a v e food quickly. The microwave can be used on its own, or Switched on (display dimmed between 10 in combination with a type of heating. -
Page 20: Microwave Power Settings
Microwave You can change the values at any time. To do so, touch Accessories included the appropriate field and use the rotary selector to Only the wire rack provided is suitable when using the change the values. microwave only. If you use the universal pan or the baking tray, this may create sparks, which may damage The cooking time has elapsed the cooking compartment. -
Page 21: Dry
Sabbath mode touch the appropriate field and enter a cooking time. FSabbath mode The operation starts again. Pausing the operation W ith the Sabbath mode, a cooking time of up to 74 S a b b a t h m o d e hours can be set. -
Page 22: Meat Thermometer
Meat thermometer Meat: For large pieces of meat, insert the meat probe at @Meat thermometer an angle from above as far as it will go into the meat. For relatively thin pieces of meat, insert the meat probe from the side at the thickest point. T he meat thermometer Plus makes precise cooking M e a t t h e r m o m e t e r possible. -
Page 23: Setting The Core Temperature
Meat thermometer Setting the core temperature Food Core temperature in °C Insert the meat thermometer in the socket on the left- Loin of pork, well done 72-80 hand side of the cooking compartment. Use the rotary selector to select the type of heating Beef or the "Dishes"... -
Page 24: Home Connect
Home Connect Press the WPS button on the router. oHome Connect Wait until "Network connection successful" is shown on the display. T his appliance is Wi-Fi-capable and can be remotely H o m e C o n n e c t controlled using a mobile device. -
Page 25: Remote Start
Home Connect Use the "Home Connect" SSID and the "Home Remote Start Connect" key to register the mobile device on the If you want to start an oven operation using your mobile oven network. device, you must activate remote start. Notes "Remote start"... -
Page 26: Remote Diagnostics
Home Connect app. A detailed RED Declaration of Conformity can be found The remote control is automatically activated when ■ online at www.siemens-home.bsh-group.com on the the remote start is activated. product page of your appliance with the additional documents. Press the menu button. -
Page 27: Cleaning Agent
Cleaning agent 2.4 GHz band: max. 100 mW Plastic Hot soapy water: 5 GHz band: max. 100 mW Clean with a dish cloth and then dry with a soft cloth. Do not use glass cleaner or a glass scraper. Painted surfaces Hot soapy water: Clean with a dish cloth and then dry with a soft cloth. -
Page 28: Surfaces In The Cooking Compartment
Cleaning agent When the cooking compartment has cooled down, Notes Slight differences in colour on the front of the remove the brown or white residue with water and a soft ■ appliance are caused by the use of different sponge. materials, such as glass, plastic and metal. -
Page 29: Rails
Rails Inserting the holders pRails If the holders fall out when you remove the rails, these must be re-inserted. W ith good care and cleaning, your appliance will retain R a i l s The holders at the front differ from those at the rear its appearance and remain fully functional for a long (fig. -
Page 30: Appliance Door
Appliance door Then fold it forwards and insert it (fig. qAppliance door And push it downwards (fig. W ith good care and cleaning, your appliance will retain A p p l i a n c e d o o r its appearance and remain fully functional for a long time to come. -
Page 31: Removing And Fitting The Door Panels
Appliance door Removing and fitting the door panels The hinges on the appliance door move when ■ opening and closing the door, and you may be To facilitate cleaning, you can remove the glass panels trapped. Keep your hands away from the hinges. from the appliance door. -
Page 32: Trouble Shooting
Trouble shooting 3Trouble shooting Warning – Risk of electric shock! Incorrect repairs are dangerous. Repairs may only be carried out and damaged power cables replaced by I f a fault occurs, there is often a simple explanation. one of our trained after-sales technicians. If the T r o u b l e s h o o t i n g Before calling the after-sales service, please refer to the appliance is defective, unplug the appliance from the... -
Page 33: Customer Service
Customer service 4Customer service PDishes O ur after-sales service is there for you if your appliance Y ou can use the "Dishes" operating mode to prepare a C u s t o m e r s e r v i c e D i s h e s needs to be repaired. -
Page 34: Selecting A Dish
Dishes Selecting a dish Applying settings for dishes The dishes are arranged in a uniform structure: You will be guided through the entire setting process for your chosen food. Always touch the "Next" field. Category ■ Food Press the menu button. ■... -
Page 35: Tested For You In Our Cooking Studio
Tested for you in our cooking studio By preparing several dishes at the same time, you can JTested for you in our make energy savings of up to 45 per cent. Position cooking studio baking tins/dishes next to one another or offset and vertically stacked in the cooking compartment. - Page 36 Tested for you in our cooking studio Types of heating used: Top/bottom heating ■ 4D hot air Pizza setting ■ ■ Dish Accessories/cookware Shelf posi- Heating Tempera- Cooking tion function ture in °C time in mins. Cakes in tins Sponge cake, simple Ring tin/cake tin 150-170 55-70...
- Page 37 Tested for you in our cooking studio Dish Accessories/cookware Shelf posi- Heating Tempera- Cooking tion function ture in °C time in mins. Choux pastry Baking tray 200-220 30-45 Danish pastry Baking tray 160-180 20-30 Biscuits Viennese whirls Baking tray 150-160** 25-40 Viennese whirls Baking tray...
-
Page 38: Bread And Rolls
Tested for you in our cooking studio Bread and rolls Recommended setting values The table lists the optimal heating type for various kinds Your appliance offers you a range of heating types for of bread and bread roll. The temperature and baking baking bread and rolls. -
Page 39: Pizza, Quiche And Savoury Cakes
Tested for you in our cooking studio Types of heating used: Circulated air grilling ■ 4D hot air Grill, large area ■ ■ Top/bottom heating Grill, small area ■ ■ Dish Accessories Shelf posi- Heating Tempera- Grill Cooking tion function ture in °C setting time in... - Page 40 Tested for you in our cooking studio Always place ovenware, tins and dishes on the wire the lower values to start with. A lower temperature will rack. result in more even browning. You can use a higher setting next time if necessary. Universal pan or baking tray Slide the universal pan or the baking tray in carefully as Baking times cannot be reduced by using higher...
-
Page 41: Bakes And Soufflés
Tested for you in our cooking studio Dish Accessories Shelf posi- Type of Tempera- Cooking tion heating ture in °C time in mins. Empanada de atún Universal pan 180-190 35-45 Börek Universal pan 180-200 35-45 * Preheat ** Observe the information on the packaging Bakes and soufflés Cookware Use wide, shallow cookware for bakes and gratins. -
Page 42: Poultry
Tested for you in our cooking studio Poultry Use tongs to turn the pieces of food you are grilling. If you pierce the meat with a fork, the juices will run out Your appliance offers you a range of heating types for and it will become dry. -
Page 43: Meat
Tested for you in our cooking studio Types of heating used: Grill, large area ■ Top/bottom heating coolStart function ■ ■ Circulated air grilling ■ Dish Accessories/cookware Shelf posi- Type of Tempera- Grill Cooking tion heating ture in °C setting time in mins. -
Page 44: Pork
Tested for you in our cooking studio Observe the manufacturer's instructions for your Smoke may be produced when grilling. ■ roasting cookware. Meat thermometer Uncovered cookware You can cook accurately using a meat thermometer. Use a deep roasting tin/dish for roasting meat. Place Read important notes on using the meat thermometer in the tin/dish onto the wire rack. -
Page 45: Veal
Tested for you in our cooking studio Dish Accessories/cookware Shelf posi- Type of Tempera- Grill Cooking tion heating ture in °C setting time in mins. Joint of pork with rind, e.g. shoulder, 2 kg Wire rack 190-200 130-140 Pork tenderloin steak, 1.5 kg Cookware, uncovered 220-230 70-80... -
Page 46: Fish
Tested for you in our cooking studio Fish When stewing, add two to three tablespoons of liquid and a little lemon juice or vinegar into the cookware. Your appliance offers you a range of heating types for Very hot steam may escape when opening the lid after preparing fish. -
Page 47: Vegetables And Side Dishes
Tested for you in our cooking studio Types of heating used: Pizza setting ■ Circulated air grilling coolStart function ■ ■ Grill, large area ■ Dish Accessories/cookware Shelf posi- Heating Tempera- Grill Cooking tion function ture in °C setting time in mins. -
Page 48: Yogurt
Tested for you in our cooking studio Types of heating used: Grill, large area ■ 4D hot air coolStart function ■ ■ Dish Accessories Shelf posi- Type of Tempera- Grill Cooking tion heating ture in °C setting time in mins. Vegetable dishes Grilled vegetables Universal pan... - Page 49 Tested for you in our cooking studio Always place ovenware, tins and dishes on the wire selected temperature. Always cut greaseproof paper to rack. size. Universal pan or baking tray Recommended setting values Slide the universal pan or the baking tray in carefully as Here, you can find specifications for various dishes.
-
Page 50: Acrylamide In Foodstuffs
Tested for you in our cooking studio Dish Accessories/cookware Shelf posi- Type of Tempera- Cooking tion heating ture in °C time in mins. Pot-roasted beef, 1.5 kg Cookware, covered 200-220 140-160 Joint of veal, 1.5 kg Cookware, uncovered 170-180 110-130 Fish Fish, braised, whole 300 g, e.g. -
Page 51: Drying
Tested for you in our cooking studio Type of heating used: Slow cooking ■ Dish Cookware Shelf posi- Heating Searing time Tempera- Cooking tion function in mins ture in °C time in mins Poultry Duck breast, medium rare, 300 g Cookware, uncovered 45-60 each... -
Page 52: Preserving
Tested for you in our cooking studio will be and the more aromatic the dried food will Recommended setting values remain. Setting ranges are indicated for this reason. In the table, you can find settings for drying various foodstuffs. The temperature and cooking time are If you wish to dry additional foodstuffs, you should use dependent on the type, moisture, ripeness and similar foodstuffs in the table as a reference. -
Page 53: Prove Dough
Tested for you in our cooking studio Type of heating used: 4D hot air ■ Preserving Cookware Shelf posi- Type of Tempera- Cooking time in mins. tion heating ture in °C Vegetables, e.g. carrots 1-litre preserving jars 160-170 Before it starts bubbling: 30-40 When it starts to bubble: 30-40 Residual heat: 30 Vegetables, e.g. -
Page 54: Keeping Warm
Tested for you in our cooking studio Type of heating used: 4D hot air ■ Dish Accessories Shelf posi- Type of Tempera- Cooking tion heating ture in °C time in mins. Bread, bread rolls Bread & bread rolls general Baking tray 40-70 Cake Cake, moist... - Page 55 Tested for you in our cooking studio Type of heating used: Grilling Grill, large area Also slide in the universal pan. The liquid will be caught ■ and the cooking compartment stays cleaner. Dish Accessories Shelf posi- Type of Grill Cooking tion heating...
- Page 56 *9001358714* 9001358714 980417...