Advertisement
Table of Contents
- 1 Parts List
- 2 Parts Enclosed in Carton
- 3 Hardware and Tool Diagram
- 4 Furniture Care Instructions
- 5 Room Climate Control
- 6 The Ideal Environment for Fine Furniture
- 7 Sticking Doors and Drawers
- 8 Product Assistance Procedures
- 9 Converting Crib to a Toddler/Day Bed
- 10 Converting Crib to a Full Size Bed
- Download this manual
14
Enclosed please find the simple step-by-step instructions to help you quickly assemble your product. Before you begin we
recommend that you follow the steps below:
1. Please read the instructions thoroughly
2. Identify all parts and hardware.
3. You may need to provide the following tools:
Philips Head screw driver
Flat head screw driver
Hammer.
Do Not Use Power Drills or Drivers.
To protect your parts during assembly please place them on a soft surface. To clean surface use only water on a damp cloth.
Do not use window cleaners or cleaning abrasives as it will scratch the surface and could damage the protective coating.
PARTS LIST
REF.
PART NAME
Back Assembly
1.
Front Assembly
2.
Crib End Left
3.
4.
Crib End Right
Back Left Leg
5.
Back Right Leg
6.
7.
Front Left Leg
8.
Front Right Leg
9.
Bottom Stretcher Bar
10.
Metal Spring Support Platform
Model Number
04540-671
04540-689
04540-671
04540-679
04540-67D
04540-67F
Conforms to
ASTM F1169
Safety Standards
ASSEMBLY INSTRUCTIONS
Small parts may present choking hazard prior to assembly.
QUANTITY
1
1
1
1
1
1
1
1
1
1
01
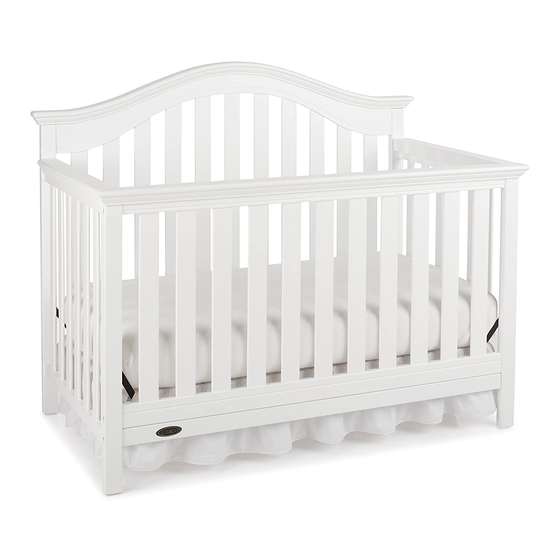
Convertible Crib
Adult assembly required.
ID756
Advertisement
Table of Contents

Related Manuals for Graco Bryson


Summary of Contents for Graco Bryson
- Page 1 ASSEMBLY INSTRUCTIONS Convertible Crib Adult assembly required. Small parts may present choking hazard prior to assembly. Enclosed please find the simple step-by-step instructions to help you quickly assemble your product. Before you begin we recommend that you follow the steps below: 1.
- Page 2 Attention Customers living in the United States and Canada If you are missing parts, hardware, or if your product has been damaged during shipping, DO NOT RETURN YOUR PRODUCT The store does not stock parts and may not be able to help you. Contact Stork Craft directly and we will ship you the parts you need to your shipping address at no cost to you.We have three convenient ways for you to reach us: •...
- Page 3 ASSEMBLY INSTRUCTIONS (continued) PARTS ENCLOSED IN CARTON...
- Page 4 ASSEMBLY INSTRUCTIONS (continued) HARDWARE AND TOOL DIAGRAM x 6 (3-3/8”) x 8 (2-3/8”) x 4 (1-3/4”) x 4 (5/8”) x 10 (5/8”) x 4 (1-5/8”)
- Page 5 Furniture Care Instructions Room Climate Control Wood, when first cut contains more than 50 percent water. When it is prepared for furniture construction it is placed in a Kiln and the moisture content is brought down to 8 to 10 percent. Wood is porous and responds to its environment.
- Page 6 Product Assistance Procedures You have purchased a quality piece of furniture. Our international team has spent many hours designing and engineering this piece and packaging to ensure you will be satisfied with your purchase. But if for any reason you need help with your purchase please contact us at any time.
- Page 7 WARNING! • FAILURE TO FOLLOW THESE WARNINGS AND ASSEMBLY INSTRUCTION COULD RESULT IN SERIOUS INJURY OR DEATH. • TO REDUCE THE RISK OF SIDS, PEDIATRICIANS RECOMMEND HEALTHY INFANTS TO BE PLACED ON THEIR BACKS TO SLEEP, UNLESS OTHERWISE ADVISED BY YOUR PHYSICIAN. •...
- Page 8 ASSEMBLY INSTRUCTIONS (continued) Step 1 F x 2 A x 4 E x 4 Model shown is example only. Styles may vary.
- Page 9 ASSEMBLY INSTRUCTIONS (continued) Step 2 Right C x 4 Left Model shown is example only. Styles may vary.
- Page 10 ASSEMBLY INSTRUCTIONS (continued) Step 3 F X 2 B x 4 E x 4 Model shown is example only. Styles may vary.
- Page 11 ASSEMBLY INSTRUCTIONS (continued) Step 4 B x 2 Model shown is example only. Styles may vary.
- Page 12 ASSEMBLY INSTRUCTIONS (continued) Step 5 Model shown is example only. Styles may vary.
- Page 13 ASSEMBLY INSTRUCTIONS (continued) Step 6 A x 2 E x 2 B x 2 x 2 (3”) x 2 (2-3/8’’) Model shown is example only. Styles may vary.
- Page 14 ASSEMBLY INSTRUCTIONS (continued) Converting Crib to a Toddler/Day Bed Model shown is example only. Styles may vary. WARNING! FOR TODDLER BED USE • Failure to follow these warnings and assembly instruction could result in serious injury or death from entrapment or strangulation. •...
- Page 15 ASSEMBLY INSTRUCTIONS (continued) Converting Crib to a Full Size Bed Headboard (Full size Bed Frame Sold Seperately; Styles may vary) Footboard...
- Page 16 STORAGE AND CARE/DÉMONTAGE DU LIT DE BEBE/ALMACENAMIENTO Y CUIDADO DO NOT remove any part that is attached with wood screws, The stationary side rail, mattress base can all be disassembled for storage. Simply review the assembly instructions for each and reverse the order to disassemble. Wipe all parts with a dampened clean cloth.