
Related Manuals for Brother DA-927A


Summary of Contents for Brother DA-927A
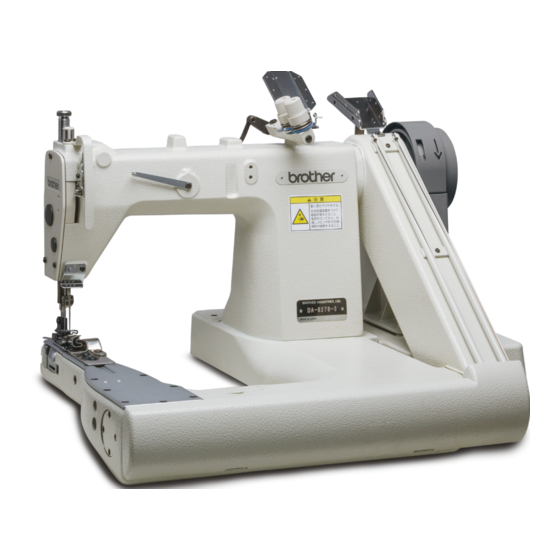
- Page 1 DA-927A INSTRUCTION MANUAL DA-928A Please read this manual before using the machine. Please keep this manual within easy reach for quick reference. TWIN NEEDLE / THREE NEEDLE FEED OFF THE ARM DOUBLE CHAIN STITCHER...
- Page 2 Thank you very much for buying a BROTHER sewing machine. Before using your new machine, please read the safety instructions and the explanations given in the instruction manual. With industrial sewing machines, it is normal to carry out work while positioned directly in front of moving parts such as the needle and thread take-up, and consequently there is always a danger of injury that can be caused by these parts.
- Page 3 Furthermore, do not excessively bend the cords or secure them too Contact your Brother dealer or a qualified firmly with staples. electrician for any electrical work that may need to If this is not observed, fire or electric shocks may be done.
- Page 4 Ask your Brother dealer or a qualified electrician to carry out any maintenance and inspection of the Use only the proper replacement parts as specified electrical system.
- Page 5 The following warning labels appear on the sewing machine. Please follow the instructions on the labels at all times when using the machine. If the labels have been removed or are difficult to read, please contact your nearest Brother dealer. * Safety devices:...
- Page 6 Oil tank 4284B DA-927A, DA-928A...
-
Page 7: Table Of Contents
7-1. Adjusting the thread tension ......14 7-2. Presser foot pressure adjustment ....14 7-3. Adjusting the stitch length ......15 8. CLEANING ......... 8-1. Daily cleaning ..........16 8-2. Changing the lubricating oil (every three months) ........16 DA-927A, DA-928A... -
Page 8: Names Of Major Parts
1. NAMES OF MAJOR PARTS 1. NAMES OF MAJOR PARTS 4243B (1) Machine pulley (4) Needle bar (2) Front cover (5) Lapper (3) Presser foot Safety devices (6) Thread take-up cover (7) Finger guard (8) Pulley cover DA-927A, DA-928A... -
Page 9: Machine Specifications
1/8 x 2 1/8 x 2 Needle (type) Organ TV x 64NY SCHMETZ TV x 5 Needle (count) #130 #140 Arm size When the thread breaks due to heat at a speed of 4,000 sti/min sewing, reduce the sewing speed. DA-927A, DA-928A... -
Page 10: Table And Motor
The top of the table should be 40 mm in thickness and should be strong enough to hold the weight and withstand the vibration of the sewing machine. ・ Drill holes as indicated in the illustration below. Chain hole Motor mounting holes (3 places) Cotton stand hole Ground hole 4246B DA-927A, DA-928A... -
Page 11: Motor
For details on the relationship between the motor pulleys and belts, refer to the table below. * The belt should be an M-type V-belt. Pulley O.D. Belt size 50Hz 3100 3500 4000 Sewing speed (sti/min) 60Hz 3100 3500 4000 DA-927A, DA-928A... -
Page 12: Installation
The machine may operate if the treadle is qualified technician. depressed by mistake, which may result in injury. Contact your Brother dealer or a qualified electrician for Be sure to connect the ground. any electrical work that may need to be done. - Page 13 (10) to the table with the two screws (11) as shown in the illustration. 4250B 5. Connect the presser foot lifter chain (4) to the knee lifter lever (12) and the foot lifter pedal (13). 4251B DA-927A, DA-928A...
-
Page 14: Ground Wire Connections
(4), and then secure it to the pulley cover base with the four screws (5). 4254B 3. Push the belt (2) downward, and then install the pulley cover B (6) to the pulley cover A (3) with the three screws (7). 4255B DA-927A, DA-928A... -
Page 15: Beit Tension Adjustment
9.8 N. 1477B 4-5. Assembling the cotton stand 1. Assemble the cotton stand while referring to the instruction manual for the cotton stand. 2. Install the cotton stand to the table with the nut (1). 1478B DA-927A, DA-928A... -
Page 16: Lubrication
・ Use only the lubricating oil (JXTG Nippon Oil & Energy SEWINGLUBE N 10; VG10) specified by Brother. * If this type of lubricating oil is difficult to obtain, the recommended oil to use is Exxon Mobil Essotex SM10, VG10. -
Page 17: Checking The Machine Pulley Rotating Direction
* For the first 3 - 4 days of use, run the machine at 500 sti/min lower than the usual speed. This will help contribute to a longer service life for the machine. 4258B DA-927A, DA-928A... -
Page 18: Preparation Before Sewing
2. Loosen the three set screws (2), hold the three needles (3) with their long grooved side facing front, insert them into the needle clamp (1) all the way, and fasten the needle with the three set screws (2). 4259B DA-927A, DA-928A... -
Page 19: Threading The Lower Threads
However, the motor will keep turning even after the power is switched off as a result of the motor’s inertia. Wait until the motor stops fully before starting work. The machine may operate if the treadle is depressed by mistake, which may result in injury. 4262B 1491B DA-927A, DA-928A... -
Page 20: Sewing
3. Release the foot lifter pedal (1). 4. The machine starts running when the treadle (2) is stepped down. 1492B 5. After sewing the work, move the work to the thread trimmer (3) to make blank stitches, and cut the thread with it. 4263B DA-927A, DA-928A... -
Page 21: Thread Tension
7-2. Presser foot pressure adjustment Adjust the presser foot pressure by turning the adjusting screw (1) so that the pressure is just enough to feed the work positively and keep the work from slipping. Becomes Becomes stronger weaker 4265B DA-927A, DA-928A... -
Page 22: Adjusting The Stitch Length
・ Be sure to adjust the needle guard after changing the stitch length. If you use the sewing machine without adjusting the needle guard, skipped stitches may occur or the looper tip may become broken. 4266B DA-927A, DA-928A... -
Page 23: Cleaning
* When installing the screw (1), check that the O-ring (2) is fitted onto it. 3. Fill the machine with oil until the oil level reaches the point in between the upper and lower reference lines on the oil gauge. (Refer to “4-6. Lubrication”.) DA-927A, DA-928A... -
Page 24: Standard Adjustments
Maintenance and inspection of the sewing machine should only be carried out by qualified personnel. Ask your Brother dealer or a qualified electrician to carry out any maintenance and inspection of the electrical system. Turn off the power switch and disconnect the power cord from the wall outlet at the following times. -
Page 25: Adjusting The Looper Rocking Movement And Forward-Back Movement
3. After adjusting, tighten the two set screws. 4. Install the forward feed arm cover (3). Set screw at the front Set screw at the rear 4276B 1520B DA-927A, DA-928A... -
Page 26: Needle And Looper Timing Adjustment
If the adjustment is not correct, repeat the adjustment 4335B procedure from step 5 again. 10. Close the belt cover plate (4), and then tighten the two screws (3). 11. Install the presser foot, needle plate and feed dogs. <Looper forward travel> <Looper backward travel> 4275B DA-927A, DA-928A... -
Page 27: The Clearance Between The Needles And Loopers
* Check that the clearance between the needle (2) and the back of the looper (1) is 0.2 mm or less during the looper's backward travel. 4330B 927A: Clearance of 0.05 to 0.1 mm 928A: Pushes 0.1 to 0.2 mm 4277B DA-927A, DA-928A... -
Page 28: Needle Guard Adjustment
Be sure to adjust the needle guard (3) after changing the stitch length. If you use the sewing machine without adjusting the needle guard (3), skipped stitches may occur or the looper tip may become broken. 4331B 4332B DA-927A, DA-928A... -
Page 29: Feed Dog Height Adjustment
(2) is at the distance from the center of the upper thread take-up hole (1) as shown in the illustration. * The higher the upper thread take-up guide (2) positions, the greater the upper thread loops will be. 4280B 3. Tighten the screw (3). DA-927A, DA-928A... -
Page 30: Adjusting The Upper Thread Guide
3. Raise the lower thread take-up (1) 7 mm [for the 927A] or 5 mm [for the 928A] above the lower thread take-up base (3). In addition, adjust so that the clearances at left and right are approximately equal. 4. After the adjustment, retighten the two set screws (4) securely. 4281B DA-927A, DA-928A... -
Page 31: Installing The Lapper
Adjust felling distance of point [A] by loosing the screw (1). After the adjustment, retighten the screw (1). Adjust felling distance of point [B] by losing the two screws (2). After the adjustment, retighten the two screws (2). 4282B 1534B DA-927A, DA-928A... -
Page 32: Troubleshooting
3. Seam position is The sub-feed dog height is incorrect. Adjust the sub-feed dog height. incorrect. The presser foot pressure is incorrect. Adjust the presser foot pressure. The feed dog height is incorrect. Adjust the feed dog height. DA-927A, DA-928A... - Page 33 ・ It is extremely dangerous to leave any pieces of broken needle sticking in the material. If the needle breaks, search for all pieces until the whole of the needle is found again. ・ Furthermore, we recommend that thorough steps be taken to account for such needles to comply with product liability regulations. 1543B DA-927A, DA-928A...
- Page 34 INSTRUCTION MANUAL * Please note that the contents of this manual may differ slightly from the actual product purchased as a result of product improvements. © 2018 Brother Industries, Ltd. All Rights Reserved. DA-927A, DA-928A This is the original instructions.