Table of Contents
Advertisement
Quick Links
B4100336 / 02
December 2002
© 2002 BARCO NV. All rights reserved
BarcoView
MFGD 2320
Theodoor Sevenslaan 106
8500 Kortrijk, Belgium
Phone: +32(0)56 23 32 44
Fax: +32(0)56 23 33 74
User Manual
E-mail: sales.medical@barco.com
http://www.barcoview.com
BarcoView Inc
3059 Premiere Parkway
Duluth, Georgia, 30097,USA
Phone: +1 678 475 8000
Fax: +1 678 475 8100
E-mail: sales.medical@barco.com
http://www.barcoview.com
BarcoView LTD
16F-1, Cheng Loong Plaza 33, Min Sheng Road
Section 1, Pan Chiao, Taipei Hsien, Taiwan, R.O.C.
Phone: +886 2 2957 8357
Fax: +886 2 2957 4080
Advertisement
Table of Contents

Related Manuals for Barco MFGD 2320


Summary of Contents for Barco MFGD 2320
- Page 1 B4100336 / 02 December 2002 © 2002 BARCO NV. All rights reserved BarcoView MFGD 2320 Theodoor Sevenslaan 106 8500 Kortrijk, Belgium Phone: +32(0)56 23 32 44 Fax: +32(0)56 23 33 74 User Manual E-mail: sales.medical@barco.com http://www.barcoview.com BarcoView Inc 3059 Premiere Parkway...
-
Page 2: Table Of Contents
Contents Safety instructions ... 5 1. Overview ... 6 1.1. Introduction ... 6 1.2. Package contents ... 7 1.3. Controls and connectors ... 8 Front ... 8 Side ... 8 Rear ... 9 2. Installation ... 10 2.1. Precautions ... 10 2.2. - Page 3 3.7. Selecting inputs ... 22 To enter the Inputs menu: ... 22 You can select the following input selection settings: ... 23 3.8. Settings ... 23 To enter the Settings menu: ... 23 The Settings menu contains the following items: ... 24 3.9.
-
Page 4: Safety Instructions
The 12 VDC power supply must be powered by the AC mains voltage. User manual MFGD 2320 • Power cord with CEE 7 plug ( of the mains lead are colored in accordance with the following code: Green-and-yellow:... -
Page 5: Overview
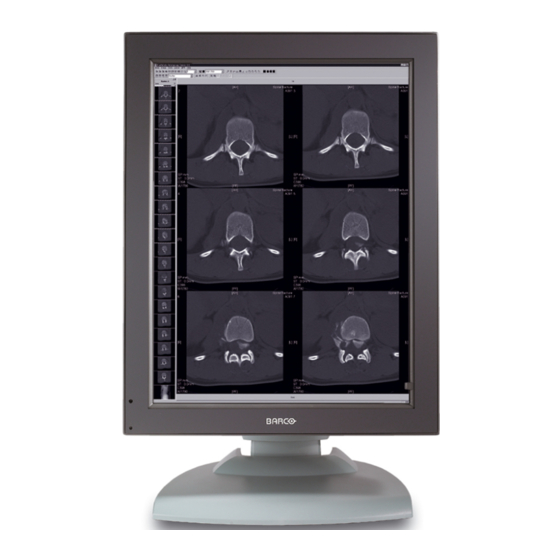
1. OVERVIEW 1.1. Introduction The MFGD 2320, BARCO’s 20” 2 megapixel grayscale LCD display, guarantees perfect image quality in medical imaging applications. The display combines a TFT (thin film transistor) liquid crystal display panel structure and a built-in backlight with inverter for a better picture quality. -
Page 6: Package Contents
MFGD 2320 display. Power saving (DPMS) The MFGD 2320 is equipped with a power saving system. When left idle for a certain time, the computer connected to the display, will power down the display. The power saving system can be switched on or off using the on-screen menus. -
Page 7: Controls And Connectors
The LED is orange when the display is in Stand-by power-saving mode. Side (3) USB downstream connector (4) Control wheel for navigating through the on-screen display (OSD) menus and changing values in the menus User manual MFGD 2320... -
Page 8: Rear
Digital DVI (video and data) input D15 (VGA) video connector Vertical sync input Composite / Horizontal sync input Composite video input (10) USB downstream connector (11) USB upstream connector (12) DC 12V power input User manual MFGD 2320 D 15 C S/HS VIDEO... -
Page 9: Installation
3 Pull the lower side of the cover towards you and simultaneously slide the cover downward. 4 Pull the red strap out of the fixation holes in the foot. You can better leave the cover off the foot while connecting the signal cables to the display. User manual MFGD 2320 Strap... -
Page 10: Portrait Or Landscape Position
2 Connect the other end of the DVI cable to the video output of your DVI signal source. 3 Route the cable so that it enters the connector compartment at the place where the cover is bulged. User manual MFGD 2320... - Page 11 1 Connect the output of the 12V DC power supply to the DC input (12) of the display. 2 Connect one end of the proper power cable to the AC input of the 12V DC power supply. User manual MFGD 2320...
-
Page 12: Routing The Signal Cables
3 Press the cover to the foot so that both clips make a clicking sound. Push the upper side of the cover onto the foot User manual MFGD 2320 Connect one end of power cable Connector compartment... -
Page 13: Using The Usb Hub
The display foot allows adjusting the horizontal viewing angle, vertical viewing angle and panel height. 2.8. Starting up Proceed as follows: 1 Switch on the signal source (E.g., PC). 2 If necessary, select a suitable resolution or signal format for the signal source. User manual MFGD 2320... -
Page 14: Operation
To display the on-screen menus, turn the wheel (4). The Main Menu appears. This is the top level of the menu system. MFGD 2320 MAIN MENU Autoset* Video Contrast* Video Brightness* Luminance Adjustments Input Selection Settings Scan Mode Information EXIT User manual MFGD 2320 Auto * Not in DVI mode... -
Page 15: Saving Changes
There are 60 programmable memory locations. You can clear their contents by means of the Scan Mode -> Reset All function (see further). User manual MFGD 2320... -
Page 16: Using The Autoset* Functions
1 In the main menu, turn the control wheel to select the Autoset menu. Autoset* Video Contrast* Video Brightness* Luminance Adjustments Input Selection Settings Scan Mode Information EXIT * Not in DVI mode User manual MFGD 2320 MFGD 2320 MAIN MENU Auto... -
Page 17: The Autoset Menu Contains The Following Items
MFGD 2320 MAIN MENU Autoset* Video Contrast* Video Brightness* Luminance Adjustments Input Selection Settings Scan Mode Information EXIT User manual MFGD 2320 AUTOSET functions one after another. geometry automatically sampling phase and frequency automatically levels (black and white) automatically Auto... -
Page 18: To Change Video Contrast Or Video Brightness Manually
3 Turn the control wheel to select EXIT. Next, click the control wheel shortly to return to the Main menu. Additional information If you change Video Contrast or Video Brightness manually, the changed value is saved in the memory. User manual MFGD 2320... -
Page 19: Setting The Luminance Value
1 In the main menu, turn the control wheel to select the Adjustments menu. MFGD 2320 MAIN MENU Autoset Video Contrast* Video Brightness* Luminance Adjustments Input Selection Settings Scan Mode Information EXIT * Not in DVI mode User manual MFGD 2320 Auto Auto... -
Page 20: Geometry Adjustments
Scaling ... Click to select the desired scaling option: Orientation** ... Click to select the desired option: * Not in DVI mode ** Works only if the Portrait Accelerator option is installed User manual MFGD 2320 geometry automatically horizontally vertically... -
Page 21: Phase Adjustments
1 In the main menu, turn the control wheel to select the Input Selection menu. MFGD 2320 MAIN MENU Autoset Video Contrast* Video Brightness* Luminance Adjustments Input Selection Scan Mode Settings Information EXIT * Not in DVI mode User manual MFGD 2320 sampling phase and frequency automatically frequency manually phase manually Auto... -
Page 22: You Can Select The Following Input Selection Settings
EXIT * Not in DVI mode 2 Click the control wheel. The Settings menu appears. User manual MFGD 2320 selects the input to which a video signal is connected. If more than one video signal is connected, priority is given to DVI, followed by DB15 and BNC in this order. -
Page 23: The Settings Menu Contains The Following Items
To enter the Scan Mode menu: 1 In the main menu, turn the control wheel to select the Scan Mode menu. User manual MFGD 2320 automatic power saving system (DPMS) LED's orange DPMS state is not influenced by this setting. So, when the display goes into power-saving mode, the LED will turn orange, even if it was switched off by this setting. -
Page 24: The Scan Mode Menu Contains The Following Items
To enter the Information menu: 1 In the main menu, turn the control wheel to select the Information menu. User manual MFGD 2320 MFGD 2320 Auto programmable memory location only. Turn the control wheel to change the current character. -
Page 25: The General Information Menu Contains The Following Items
Scan Name ... The name of the current memory scan mode Hor Frequency ... The currently measured horizontal sync fre- Vert Frequency ... The currently measured vertical sync frequency Resolution ... Displays the actual video signal resolution User manual MFGD 2320 MFGD 2320 Auto operating, including the time in stand-by... -
Page 26: Advanced Functions
Important The functions described in this chapter are intended for trained service staff only! Improper use of these functions may disorder the display. BARCO cannot be held responsible for the results or damage caused by improper use of these functions. -
Page 27: Advanced Functions In The Adjustments Menu
Select the filter that gives the best result. Readjustment of sample phase is necessary after selection of a different filter. User manual MFGD 2320 of the ALC control system: Measure Min Ambient Light: Decrease the light in the room to the minimum possible level you are likely to work in. -
Page 28: Advanced Functions In The Settings Menu
Standard input mode RGB->Y ... The RGB video signals from the imaging board RGB->RGB ... The R video signal drives the R sub-pixels, the G User manual MFGD 2320 are calculated and transformed into a single luminance value according to the formula 0.3R + 0.59G + 0.11B. - Page 29 GBR->Y ... The RGB video signals from the imaging board BRG->Y ... The RGB video signals from the imaging board BGR->Y ... The RGB video signals from the imaging board User manual MFGD 2320 is used as luminance value to drive the RGB subpixels of the panel equally.
-
Page 30: Osd Position
Display Ser No ... Indicates the display serial number Display Stock No ... Indicates the display order number Panel ... Indicates the flat panel serial number Panel Prod Date ... Indicates the flat panel production date User manual MFGD 2320... -
Page 31: Firmware
Clean with a soft cloth dampened with mild detergent and water. Repeat with water only and wipe dry with a dry cloth. Removing dust from the rear of the glass panel User manual MFGD 2320 code operating, including the time in stand-by... -
Page 32: Troubleshooting
It may be possible that dust particles have entered the display and are stuck to the rear of the glass. We recommend to let this cleaning procedure be done in a BARCO service center. However, when really necessary, you can perform the cleaning on site if you can work in conditions that are as clean and dust-free as possible. -
Page 33: Pixel Faults
Please contact our Customer Service Department if the number of pixel faults exceeds the above-mentioned figure. 7. TECHNICAL SPECIFICATIONS GEOMETRY • Screen size: 51 cm (20.1") • Display area: 408 mm x 306 mm (16.1" x 12") • Aspect ratio: 4:3 VISUAL PERFORMANCE User manual MFGD 2320... - Page 34 1600 x 1200 (1.9 MegaPixel) INPUTS • Complies to DVI Rev. 1.0 spec up to UXGA 60 Hz Video • Connector type: BNC / D15 • Inputs provided: composite video • Video input voltage: nominal 0.7Vpp User manual MFGD 2320...
-
Page 35: Scanning System
• • POWER SUPPLY Power source • Input for external 12 VDC power supply unit: 90 ~ 264 VAC • Input for display: 12 VDC. (The supplied 12 VDC power supply must be used) Power consumption User manual MFGD 2320... -
Page 36: Net Weight
-20°C to 60°C Due to our policy of continuous product improvement, the above specifications are subjected to change without notice. Barco shall not be liable for technical or editorial errors or omissions contained herein; nor for incidental or consequential damages whatsoever resulting from furnishing, performance or use of this material.