
Related Manuals for Samsung DVD-M301


Summary of Contents for Samsung DVD-M301
- Page 1 SAMSUNG ELECTRONICS AMERICA INC. 105 CHALLENGER ROAD, RIDGEFIELD PARK, NJ 07660 U.S.A. FOR YOUR NEAREST SAMSUNG SERVICE CENTER DIAL 1-800-SAMSUNG AH68-00719B...
- Page 2 FCC NOTE (for U.S.A): This equipment has been tested and found to comply with the limits for a Class B digital device, pursuant to Part 15 of the FCC rules. These limits are designed to provide reasonable protection against harmful interference in a residential installation.
-
Page 3: Table Of Contents
If remote doesn’t operate Install Batteries in the Remote Open the battery cover on the • Check the polarity + - of the batteries back of the remote. (Dry-Cell) • Check if the batteries are drained. Insert two AA batteries. Make sure that the polarities (+ and -) •... -
Page 4: General Features
Number Play Region Number Both the DVD player and the discs are coded by region. These regional codes must match in order for the disc to play. If the codes do not match, the disc will not play. The Region Number for this player is described on the rear panel of the player. -
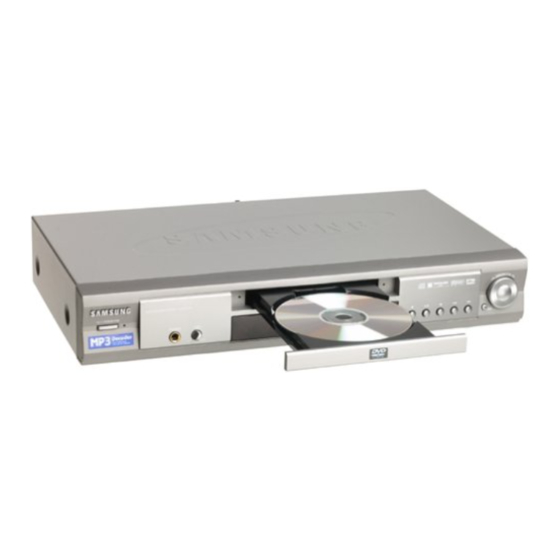
Page 5: Description-Front Panel
COMPONENT VIDEO OUT JACKS • Use these jacks if you have a TV with Component Video in jacks. These jacks provide Pr, Pb and Y video. Along with S-Video, Component Video provides the best picture quality. The Y, Pb, Pr must be selected in the VIDEO OUT SELECT. -
Page 6: Tour Of The Remote Control
(UP/DOWN or LEFT/RIGHT buttons) • This button functions as a toggle switch. TOP MENU • Takes you to the menu on the DVD disc or CD/VCD. REPEAT Button • Allows you to repeat play a title, chapter, track, or disc. -
Page 7: Choosing A Connection
• Always turn off the DVD player, TV, and other components before you connect or disconnect any cables. • Refer to the owner’s manual of the additional components you are connecting for more information on those particular components. Connection to an Audio System... -
Page 8: Playing A Disc
RESUME function When you stop disc play, the player remembers where you stopped, so when you press PLAY again, it will pick up where you left off (unless the disc is removed, the STOP button is pressed twice or the player is unplugged.). -
Page 9: Using The Search & Skip Functions
Using the Search & Skip Functions During play, you can search quickly through a chapter or track or use the skip function to jump to the next selection. Searching through a Chapter or Track During play, press the FWD or REV SEARCH button on the remote. -
Page 10: Repeat Play
• Depending on the disc, the Repeat function may not work. • If the title or track is completed before marking the end (B), the end of title or track becomes B automatically. • When in VCD 2.0 mode (MENU ON mode), this function does not work. -
Page 11: S.fit Play
Press the 'Skip' button for the next 9 chapters if the movie has more than 9. NOTE • You can play the DVD player starting with the desired chapter after directly moving to the scene you want. • 'DIGEST' may not operate depending on the disc in use. Digest Play... -
Page 12: Slow Repeat Play
UP/DOWN or LEFT/RIGHT buttons. Press the ENTER button. NOTE • In stop mode on VCD, press the TOP MENU button and the TRACK VIEW will be displayed. When pressing the TOP MENU button with a DVD; • the disc’s TITLE MENU function comes up. A disc must have at least two titles for the TITLE MENU function to work. -
Page 13: Selecting The Audio Language
Use the UP/DOWN buttons to select Stereo, Right or Left. (On VCD/CD) NOTE • This function depends on what languages are encoded on the disc and may not work with all DVDs. • A DVD disc can contain up to 8 audio languages. •... -
Page 14: Changing The Camera Angle
The Master Volume must be reset for each disc you play. Once a disc is done playing, the Master Volume returns to the default position (64). The Bookmark function lets you select parts of a DVD or VCD (MENU OFF mode) so that you can quickly find the section at a later time. -
Page 15: Using The Zoom And 3D Sound Functions
Sound feature on or off. The Setup menu lets you customize your DVD player by allowing you to select various language preferences, set up a parental level, even adjust the player to the type of television screen you have. With the unit in Stop mode, press the SETUP button on the remote. -
Page 16: Setting Up The Language Features
Setting Up the Language Features If you set the player menu, disc menu, audio and subtitle language in advance, they will come up automatically every time you watch a movie. Using the Player Menu Language With the unit in Stop mode, press the SETUP button. -
Page 17: Setting Up The Parental Control
Setting up in LEVEL6. NOTE • How to make the SETUP MENU disappear or return to menu screen during set up; Press RETURN button. • Certain audio features of this product manufactured under a license from Desper Products, Inc. -
Page 18: Setting Up The Display Options
• How to make the SETUP MENU disappear or return to menu screen during set up; Press RETURN button. Controlling a TV with the Remote The remote can also be set up to control most TVs. To program the remote, use the code that corresponds to your brand. CODE Turn on the TV If the TV turns off, setup is complete. -
Page 19: Troubleshooting
• Make sure you have selected the correct Digital Output in the Audio No audio. Options Menu. • Press power on from a cold start with no disc in the unit. Press the STOP Forgot password and PLAY buttons simultaneously on the front panel for three seconds. The Select Menu Language display will appear. -
Page 20: Warranty
One (1) Year Parts and Labor This limited warranty begins on the original date of purchase, and is valid only on products purchased and used in the United States, and does not include transportation, installation, removal or reinstallation. Warranty repairs must be performed by SAMSUNG’s authorized service center. - Page 21 Memo Memo...