Table of Contents
Advertisement
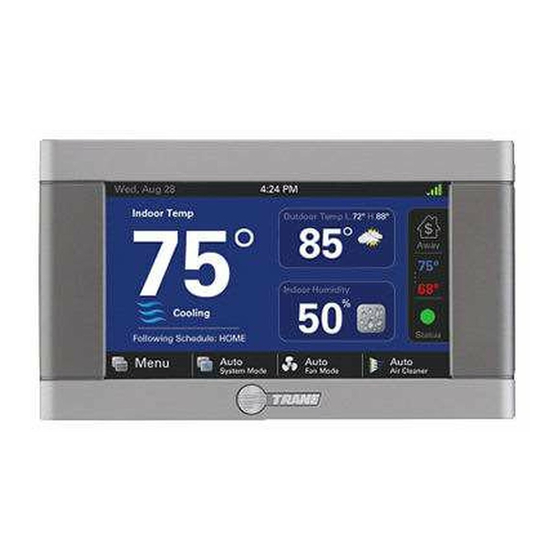
Trane XL824
Smart Control User Guide
The XL824 is an easy-to-use,
programmable control with a
color touch-screen.
When connected with
Nexia™ smart home, you can
control your home's heating
and cooling system and
up to 230 separate Z-Wave
devices from a smart phone,
PC or tablet from virtually
anywhere.
This guide will help you
configure and connect your
XL824 Smart Control quickly
and easily.
Start using your
new XL824 now!
See "Start Here!"
on page 3.
032-5090-05
Advertisement
Table of Contents

Related Manuals for Trane XL824


Summary of Contents for Trane XL824
- Page 1 Trane XL824 Smart Control User Guide The XL824 is an easy-to-use, programmable control with a color touch-screen. When connected with Nexia™ smart home, you can control your home’s heating and cooling system and up to 230 separate Z-Wave devices from a smart phone, PC or tablet from virtually anywhere.
-
Page 2: Table Of Contents
Up to four smart controls of any combination of the FCC Notice ...............32 http://www.nexiahome.com/ 1050, 850, XL824 and 624 are allowed on your Nexia™ ICC NOTICE ..............32 smart home account for no additional cost. A monthly For tutorials search: XL824. -
Page 3: User Setup Wizard
Internet connection) Wizard guides • Adjust the Screen brightness, backlight, through • Your XL824 control comes equipped with screen saver and color themes. the XL824’s User remote access and other features from Schedule Settings c o n f i g u r a b l e Nexia™... -
Page 4: Navigating The Control
Navigating the Control Home Screen - Simple View Default Home Screen can be customized with several widgets. To learn more about this feature see the section in this user guide about customization. page 4 824 User Guide... - Page 5 Home Screen View Homeowners may toggle between Home Screen Options by pressing: Home Screen > Menu > Settings > Home View Options. Select Simple View or Classic View. NOTE: Simple View is the default view. Simple View Classic View 032-5090-05 page 5...
- Page 6 Home Screen - Classic View Home Screen can be customized with several widgets. To learn more about this feature see the section in this user guide about customization. page 6 824 User Guide...
-
Page 7: Temperature Control Panel
Temperature Control Panel The Temperature Control Panel is where target Available when Available when temperatures are manually set and adjusted. Scheduling is Enabled Scheduling is Disabled Press Away, Home or Sleep to activate The panel is shown on the Classic View Home Cooling Set Point 1-Touch Presets Press to disable... -
Page 8: Adding Widgets
Adding Widgets Optionally, up to 2 widgets may be chosen to appear on your home screen. They can be selected by navigating to Menu > Settings > Screen > Screen Layout When scheduling is enabled, the Preset button is disabled and a Permanent Hold button is displayed. -
Page 9: Home Screen Customization
Home Screen Customization Homeowners may customize the Home Screen by pressing: Menu > Settings > Screen > Screen Layout Choose up to two widgets to show up on the Home Screen. Make selection and press Apply. 032-5090-05 page 9... -
Page 10: Menu Screen
Menu Screen Navigate to Menu Screen by pressing: Home Screen > Menu page 10 824 User Guide... -
Page 11: Settings Screen
Settings Screen Navigate to Settings Screen by pressing: Home Screen > Menu > Settings Press to con gure 1-Touch Presets Press to modify screen Push to set Time, Date, (if scheduling is enabled, Away brightness, backlight timer, and Daylight Savings will be the only option) screensaver, and color theme Press to set... -
Page 12: Scheduling
Scheduling Schedule Screen Navigate to Scheduling Screen by pressing: Home Screen > Menu > Schedules page 12 824 User Guide... - Page 13 Grouping Screen Navigate to Grouping Screen by pressing: Home Screen > Menu > Schedules > Grouping HINT: To copy a schedule between days, group them, press Apply, then open the grouping menu and de-select the days. Press Apply again. 032-5090-05 page 13...
-
Page 14: Changing Periods
78º 78º 82º adjust the time using the UP and DOWN Start arrows. Note: The XL824 uses intelligent technology and will not allow setting an Use the Up and illogical start or end time. Periods must be Down Arrows to... -
Page 15: Adding Periods
Adding Periods Navigate to add Periods by pressing: Home Screen > Menu > Schedules > Add Period The XL824 Smart Control is capable of adjusting 3. Choose a name for the new Period or select the temperature settings throughout the day New to define a custom name and press 6. -
Page 16: Deleting Periods
Deleting Periods Navigate to delete Periods by pressing: Home Screen > Menu > Schedules > Delete Period Deleting Periods Press the trash can to mark a period for deletion 1. From the Schedule Screen press DELETE PERIOD, the Delete Periods Screen is Delete Periods displayed. -
Page 17: Overriding Schedules
Overriding Schedules Note: These functions require Scheduling to be 6. Press in the STATUS AREA again to toggle Use the UP and DOWN Arrows to adjust the enabled. To enable Scheduling, go to HOME > to the Time setting. The Time will appear in Set Point to the desired temperature. -
Page 18: Configuring 1-Touch Presets
Away Preset Away When a temperature change is desired, the user Temperatures must manually adjust the XL824 Control to the Home new setting. Press to 62º Configuring 1-Touch Presets decrease active 1. To change the Cooling Set Point, press the... - Page 19 HEATING SET POINT area to activate the savings. set points are maintained indefinitely. When a setting. The current System Mode indicator temperature change is desired, the user must will display red wavy lines. manually adjust the XL824 Control to the new setting. 032-5090-05 page 19...
-
Page 20: Setting Access Restrictions
Setting Access Restrictions To select access restrictions press: Home Screen > Menu > Settings > Screen > Access Restrictions page 20 824 User Guide... -
Page 21: Nexia™ Smart Home
Z-Wave Devices for more information on taking advantage of this functionality. A basic Nexia™ smart home account subscription is included with the XL824 Control at no additional charge. Note: Adding additional devices may add charges to your Nexia™ smart home account. -
Page 22: Network Setup
Option 2. WPS for Wi-Fi connection Wi-Fi Step 1. Navigate Home > Menu > Settings > Network > Connect WPS Step 1. Press the WPS button on your router, then return to your XL824 to WiFI Network. Select your network. - Page 23 CONNECT. Option 4. Ethernet connection The XL824 also features an Ethernet jack on the back and may be connected to a router using CAT5 cable. The control Hidden WiFi Step 2. Enter the name of the network you would like to connect will recognize an Ethernet connection.
-
Page 24: Nexia™ Registration
Nexia™ Registration A Nexia registration button is located on the Menu screen of the XL824. After the control is registered with Nexia the button may be used to add devices or remove devices from a Z-Wave network. Z-Wave Settings may be used to add or remove Z-Wave devices before connecting the control (thermostat) to a local area Wi-Fi network and registering the control with Nexia smart home. - Page 25 To control your home climate system from your web enabled smartphone, tablet or computer and follow these steps. Step 4. Select the THERMOSTATS drop down Your XL824 comes equipped with remote climate access from Nexia™ arrow. Smart Home Systems: • Control your home climate from your smartphone Step 2.
- Page 26 Nexia™ Registration Your XL824 comes equipped with remote climate access from Nexia™ Smart Home Systems: • Control your home climate from your smartphone • View local weather • Receive alerts Go to www.mynexia.com to set up your account before proceeding.
-
Page 27: Adding/Removing Z-Wave Devices (Via Xl824)
1. From the HOME Screen, press MENU, then Removing Z-Wave Devices press NEXIA. Your XL824 is designed to integrate seamlessly with 2. Press ADD DEVICE and follow the device 1. From the HOME Screen, press MENU, then a Nexia™ smart home system. -
Page 28: Adding Z-Wave Devices (Via Mobile App)
Adding Z-Wave Devices (via mobile app) Alternatively, your XL824 allows you to add Z-Wave devices using the Nexia app on your mobile device. Adding Z-Wave Devices 1. Start the Nexia app. 2. Press the menu button in the top left corner. -
Page 29: Advanced Z-Wave Settings
Advanced Z-Wave Settings Navigate to Advanced Z-Wave Settings Screen by pressing: Home Screen > Menu > Nexia > Advanced Bridge Information Nexia’s ADVANCED SETTINGS screen contains in all the devices in your network being removed. three very powerful functions. Each of these Following the reset, it will be necessary to remove If this bridge is being used as a secondary or functions is very specific and should be approached... - Page 30 Advanced Z-Wave Settings Terminology The following terms may be used interchangeably by other devices, manufacturers, and Nexia. Add, include, inclusion, enroll, connect REMOVE Remove, exclude, exclusion COPY Copy, learn, replicate, replication Association Group Information Table Other Information Command Class Group This device ignores Basic Set/Get Group Profile...
-
Page 31: Other Features
Smart Optimization takes 90 minutes to complete and during the process, heating and cooling operations are disabled. The screen will indicate that the XL824 Control is in Smart Optimization mode. To delay Smart Optimization for an additional 18 hours, touch the XL824 Control Screen and hold for five seconds. -
Page 32: Notices
Notices FCC Notice ICC NOTICE to radio communications. However, there is no guarantee that interference will not occur in a INFORMATION TO USER This device complies with Industry Canada particular installation. If this equipment does license-exempt RSS standard(s). Operation is This device complies with Part 15 of the FCC cause harmful interference to radio or television subject to the following two conditions: (1) this...