
Related Manuals for Gigaware 2603143


Summary of Contents for Gigaware 2603143
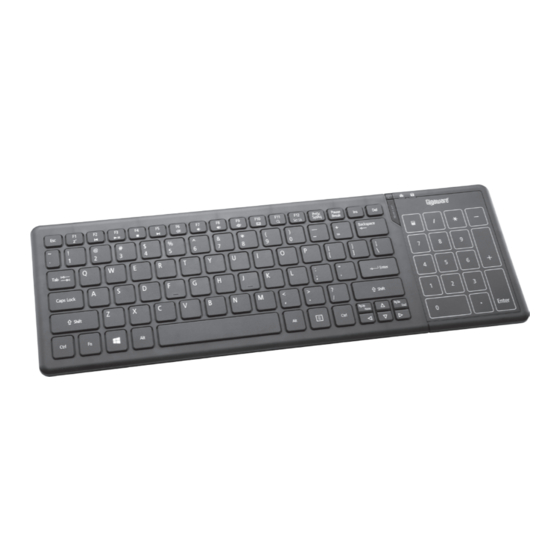
- Page 1 2603143 User’s Guide Wireless Touchpad Keyboard Please read this user’s guide before using your new touchpad keyboard.
-
Page 2: Package Contents
Package Contents • Touchpad Keyboard • USB Receiver • Touchpad Driver CD (Windows 8 only) ® • User’s Guide Features • Provides the convenience of both a touchpad and a numeric keypad • Ultra-compact USB receiver • Ideal for Windows 8 to take advantage of multi-touch gestures to move the cursors, zoom in and out, rotate, scroll, and more System Compatibility • Windows 8/7 • Windows Vista ® • Windows XP... -
Page 3: Install Batteries
Install Batteries 1. Open the battery compartment cover at the bottom of the keyboard. 2. Insert two AA batteries according to the polarity symbols (+ and –) marked inside. 3. Replace the cover. Battery Notes: • When the keyboard is on and battery is low, the power indicator G flashes. Replace the batteries with new ones. • Dispose of batteries promptly and properly. Do not burn or bury them. -
Page 4: Sleep Mode
Plug in the Receiver 1. Remove the USB receiver dongle from the keyboard’s battery compartment. 2. Turn on your PC. 3. Plug the receiver into your computer’s USB port. 4. Slide the G switch on the back of the keyboard to ON (green). Your keyboard and receiver are automatically paired. Notes: • If you do not plan to use your keyboard for a long time, slide G switch to OFF (red) to save battery power. • See your operating system’s online help for additional keyboard configuration information. -
Page 5: Standard Operations
Standard Operations Multimedia Function Keys Internet Function Key Sleep • Fn + F2 — Play previous track • Fn + F9 — Internet Fn + F1 Z • Fn + F3 ; — Play or pause media • Fn + F10 — Mail • Fn + F4 D — Stop playback • Fn + F11 — Search • Fn + F5 — Play next track • Fn + F6 — Turn mute on and off • Fn + F7 — Lower speaker volume • Fn + F8 — Increase speaker volume Caps Lock Turn caps lock on and off. - Page 6 Power G Indicator ernet Function Keys Scroll Lock (Fn + F12) Flashes when battery power + F9 — Internet Turn Scroll Lock on and off. is low. icon lights blue when + F10 — Mail scroll lock is activated + F11 — Search Num Lock Turn the number lock (Num Lock) on and off. The Num Lock LED lights blue when function is activated. Num Lock LED is off when touchpad function is activated.
- Page 7 Touchpad Press Num Lock to turn on the touchpad function. The Num Lock LED turns off. Basic Touchpad Functions Function Gesture Move Cursor Slide one finger on the touchpad. Click / Tap the touchpad with one finger for less than 0.2 seconds. Select / Left button function Open file / Tap the touchpad twice with one finger. Execute Program Right-click Tap the touchpad with two function fingers for less than 0.2 seconds.
- Page 8 Function Gesture Scrolling 1. Slide two fingers on the touchpad vertically or horizontally in the desired direction. 2. Remove fingers from the touchpad to stop scrolling. Drag and Drop Select and move one object: 1. Move cursor to the selected object. 2. Tap once and remove finger from the touchpad. 3. Tap again and hold finger on the touchpad. 4. Move finger to drag the object. Select and move multiple objects: 1. Move cursor to an open space in the window you want to select from. 2. Tap once and remove finger from the touchpad. 3. Tap again and hold finger on the touchpad. 4. Move finger to select a group of objects. 5. Tap to release. 6. Tap and hold finger on the selected objects, then drag the objects to their new location.
- Page 9 Windows 8 Functions Install the touchpad driver for additional Windows 8 functions. 1. Insert the driver CD into your computer’s CD drive. The CD will run the installation program automatically. 2. Follow the onscreen instructions to complete installation. A Touchpad shortcut icon will appear on your desktop for easy access to touchpad settings and a demonstration. Function Gesture Swipe page • Move three fingers to the left to launch the assigned function (Page Up). • Move three fingers to the right to launch assigned function (Page Down).
- Page 10 Function Gesture Toggle to Place and hold one finger on the previous app left edge of the touchpad and then swipe to the right. Toggle Charm Place and hold one finger on the right edge of the touchpad and then swipe to the left. Toggle Place and hold one finger on the Application Bar top edge of the touchpad and (application then swipe down dependent) Supported Applications Only (See “Supported Applications and Gestures” on page 11) Rotating Move two fingers clockwise or counterclockwise. Zoom in and • Zoom In: Place two fingers on the touchpad and then move them closer together. • Zoom Out: Place two fingers on the touchpad and move them apart.
- Page 11 Supported Applications and Gestures Supported Scrolling Zoom In/Out Rotatio Application Vertical (zoom) ® Microsoft Windows Photo Viewer — ® Microsoft Windows Photo Viewer (Win 8) Vertical (zoom) ® Windows Live Essential Photo Gallery Artwork ® Microsoft Word 2010/2007/2003 — ® Microsoft PowerPoint 2010/2007/2003 ...
- Page 12 Supported Gestures In/Out Rotation Swipe Left/ Swipe Up/ Swipe Page Right Down Page up/down — — — — — — Page up/down — — Artwork Page up/down — — — Page up/down — — Artwork Page up/down — — — Previous/next e-mail — — —...
-
Page 13: Troubleshooting
Troubleshooting If you have difficulty pairing your touchpad keyboard with your computer, or if you have difficulty using the gesture controls: • Make sure you have properly installed fresh batteries. • Pair the keyboard and receiver again: 1. Place the keyboard within 2 inches of the receiver dongle. 2. Press and hold Right/Ctrl for 2 seconds then and slide the switch to ON (green). The power indicator flashes then turns off when pairing is sucessful. 3. If pairing fails, switch the switch OFF (red), then repeat pairing steps. Class 1 Laser Product This device uses a laser light beam and is classified as a CLASS 1 laser product. Do not attempt to disassemble this unit. Laser rays from the optical pickup are dangerous to the eyes. DANGER: Visible and invisible laser radiation is possible if open or if the interlock fails or is defeated. Avoid direct exposure to the beam. CAUTION: There are no user-serviceable parts inside this unit. Do not open the top cover. Make sure that pins or other foreign objects do not get inside the keyboard. Only a qualified service person should remove the cover or attempt to service this device due to possible eye injury. -
Page 14: Specifications
Important Information Do not place the keyboard or the receiver on a metal • surface. Metal may impair the RF communication. • For optimal performance, place the keyboard closer to the receiver. • Do not place the receiver on the top of computer, wireless router, or monitor to avoid interference. • If nearby RF devices cause interference, move them away from your keyboard and receiver. • Do not modify or tamper with your keyboard’s internal components. It may cause a malfunction and invalidate the warranty. • Use and store the keyboard only in room temperature environments. • Keep the keyboard dry; if it gets wet, wipe it dry immediately. • Keep the keyboard away from dust and dirt, and wipe it with a damp cloth occasionally to keep it looking new. • Handle the keyboard carefully; do not drop it. Specifications RF Distance ................9.8 ft. (3 m) RF Frequency ................2.4 GHz RF Modulation ................GFSK USB ..................2.0 Version Dimensions ..........14.52 × 4.88 × 0.92 inches ...............(369mm × 124 mm × 23.5mm) Power Supply Keyboard . -
Page 15: Fcc Information
FCC Information This equipment has been tested and found to comply with the limits for a Class B digital device, pursuant to Part 15 of the FCC Rules. These limits are designed to provide reasonable protection against harmful interference in a residential installation. This equipment generates, uses and can radiate radio frequency energy and, if not installed and used in accordance with the instructions, may cause harmful interference to radio communications. However, there is no guarantee that interference will not occur in a particular installation. If this equipment does cause harmful interference to radio or television reception, which can be determined by turning the equipment off and on, the user is encouraged to try to correct the interference by one or more of the following measures: • Reorient or relocate the receiving antenna. • Increase the separation between the equipment and receiver. • Connect the equipment into an outlet on a circuit different from that to which the receiver is connected. • Consult the dealer or an experienced radio/TV technician for help. Changes or modifications not expressly approved by Ignition L.P . may cause interference and void the user’s authority to operate the equipment. This device complies with Part 15 of the FCC Rules. Operation is subject to the following two conditions: (1) This device may not cause harmful interference, and (2) this device must accept any interference received, including interference that may cause undesired operation. Limited Warranty Ignition L.P . warrants this product against defects in materials and work- manship under normal use by the original purchaser for ninety (90) days after the date of purchase. IGNITION L.P . MAKES NO OTHER EXPRESS WARRANTIES. This warranty does not cover: (a) damage or failure caused by or attributable to abuse, misuse, failure to follow instructions, improper installation or maintenance, alteration, accident, Acts of God (such as floods or lightning), or excess voltage or current; (b) improper or incorrectly performed repairs by... - Page 16 WARRANTIES THAT MAY BE IMPOSED BY LAW, INCLUDING THE IMPLIED WARRANTY OF MERCHANTABILITY AND, IF APPLICABLE, THE IMPLIED WARRANTY OF FITNESS FOR A PARTICULAR PURPOSE, SHALL EXPIRE ON THE EXPIRATION OF THE STATED WARRANTY PERIOD. EXCEPT AS DESCRIBED ABOVE, IGNITION L.P . SHALL HAVE NO LIABILITY OR RESPONSIBILITY TO THE PURCHASER OF THE PRODUCT OR ANY OTHER PERSON OR ENTITY WITH RESPECT TO ANY LIABILITY, LOSS OR DAMAGE CAUSED DIRECTLY OR INDIRECTLY BY USE OR PERFOR- MANCE OF THE PRODUCT OR ARISING OUT OF ANY BREACH OF THIS WARRANTY, INCLUDING, BUT NOT LIMITED TO, ANY DAMAGES RESULT- ING FROM INCONVENIENCE AND ANY LOSS OF TIME, DATA, PROPERTY, REVENUE, OR PROFIT AND ANY INDIRECT, SPECIAL, INCIDENTAL, OR CONSEQUENTIAL DAMAGES, EVEN IF IGNITION L.P . HAS BEEN ADVISED OF THE POSSIBILITY OF SUCH DAMAGES. Some states do not allow limitations on how long an implied warranty lasts or the exclusion or limitation of incidental or consequential damages, so the above limitations or exclusions may not apply to you. This warranty gives you specific legal rights, and you may also have other rights which vary from state to state. You may contact Ignition L.P . at: Ignition L.P ., 3102 Maple Ave Suite 450, Dallas, TX 75201 02/09 For product support, call 1-866-315-0426 Microsoft, Excel, Internet Explorer, Outlook, PowerPoint, Windows, Windows Live, Windows Vista, and Word are registered trademarks of Microsoft Corporation in the United States and/or other countries. Adobe, Acrobat, and Reader are registered trademarks of Adobe Systems Incorporated in the United States and/or other countries. Picasa is a trademark of Google Inc. © 2012. Ignition L.P . All rights reserved. Gigaware Printed 09A12 is a registered trademark used by Ignition L.P . in China 2603143...