Table of Contents
Advertisement
Quick Links
Advertisement
Table of Contents

Related Manuals for Bosch D9068


Summary of Contents for Bosch D9068
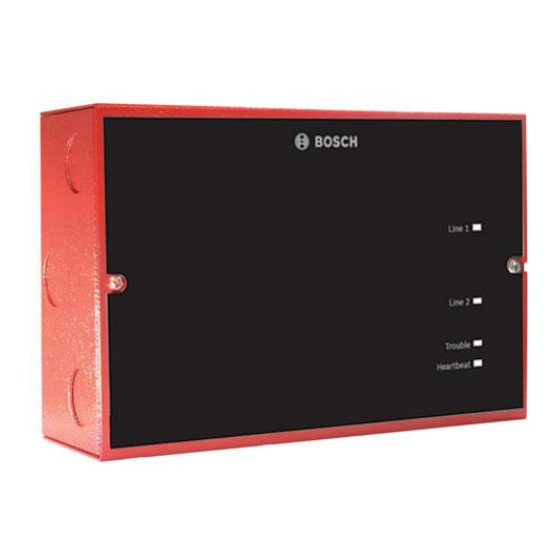
- Page 1 D9068 Operation and Installation Guide Fire Communicator...
- Page 2 D9068 | Operation and Installation Guide | FCC registration number = ESVMUL-46514- Trademark AL-E. Molex is a registered trademark of Ringer equivalence = 0.0B. Molex Incorporated. Do not use this equipment on coin Notices service provided by the telephone company or connected to party lines.
- Page 3 Input points might be unsupervised if the D9068 is mounted within 20 ft Do not attempt to make such (6 m) of the fire alarm control connections. Contact the panel (FACP) with wiring in a appropriate electric inspection conduit.
-
Page 4: Table 1: Programming Features
D9068 | Operation and Installation Guide | Contents Table 1: Programming Features Program Feature or Permitted in Possible Settings Settings Permitted in Option UL864? (Yes/No) UL864 Auto Test 1) 4 h 1) 4 h Frequency 2) 12 h 2) 12 h... -
Page 5: Table Of Contents
D9068 | Operation and Installation Guide | Contents Program Menu Tree ..... 34 Contents Programming the D9068 ..37 5.4.1 PROG TIME ..... 37 Overview ......7 5.4.2 PROG TIMERS ....38 System Overview ....7 5.4.3 PROG INPUTS ....39 Features and Specifications .. - Page 6 D9068 | Operation and Installation Guide | Contents Figure 4: Light Pipe ....11 Tables Figure 5: Mounting the D9068 Board ... 12 Table 1: Programming Features ..4 Figure 6: Conduit Connections ..12 Table 2: Power Specifications ..7 Figure 7: Molex Connector Descriptions Table 3: Input Point Specifications ..
-
Page 7: System Overview
D9068 | Operation and Installation Guide | 1.0 Overview The output (report) buffer might 1.0 Overview clear and all pending reports are lost. System Overview Alarms initiated before the power The D9068 Fire Communicator is a loss might reset. If the alarm... -
Page 8: Input Configuration
D9068 | Operation and Installation Guide | 1.0 Overview 1.2.7 Communication Table 3: Input Point Specifications Formats The D9068 supports four protocols: Modem IIIa , Contact ID, SIA, and 4/2. Number of Points Report Routing Class B (Style 4) Circuit Type... -
Page 9: History Buffer
D9068 | Operation and Installation Guide | 1.0 Overview 1.2.8 History Buffer Table 5: Parts List The D9068 has a history buffer that retains up to 100 events. Each event is tagged with the date and time of Quantity Part occurrence. -
Page 10: Figure 1: D9068 Pcb Layout
D9068 | Operation and Installation Guide | 1.0 Overview Figure 1: D9068 PCB Layout LINE 1 LINE 2 SYS TROUBLE HEARTBEAT NC C NO 1 2 3 4 5 KEYPAD + + - - A B 7 - Heartbeat LED... -
Page 11: Mounting The Enclosure
D9068 | Operation and Installation Guide | 2.0 Installation Figure 3: Mounting D9068 Case to Wall 2.0 Installation You can install the D9068 up to 500 ft (152 m) from the FACP when using a minimum of 18 AWG wire. -
Page 12: Figure 5: Mounting The D9068 Board
D9068) 6 - Enclosure 10 - Metal edge 6. Connect the D9068 and FACP using conduit (refer to Figure 6). Figure 6: Conduit Connections 1 - FACP 3 - Use no more than 500 ft (152 m) of... -
Page 13: Connecting The D9068
Remove all power before making or breaking any connections to the D9068. Failure to do so can cause personal injury and/or damage to the equipment. When making connections to the D9068, refer to Figure 7 through Figure 13 on this page through page 16. Figure 7: Molex Connector Descriptions... -
Page 14: Figure 8: Open Collector Input Point Wiring (Supervised)
D9068 | Operation and Installation Guide | 2.0 Installation Figure 8: Open Collector Input Point Wiring (Supervised) 3 4 5 NC C NO KEYPAD Power (+) Open Collector Output Panel Ground Earth Ground 1 - D9068 6- Earth ground (green) 7 - EOL resistor 2.21 k ... -
Page 15: Figure 10: Dry Contact Input Point Wiring (Supervised)
D9068 | Operation and Installation Guide | 2.0 Installation Figure 10: Dry Contact Input Point Wiring (Supervised) KEYPAD NC C NO 3 4 5 Power (+) Contact Relay Panel Ground Earth Ground 1 - D9068 5- Keypad terminals 2 - Power + (red) 6 - Earth ground (green) 7 - EOL resistor: 2.21 k ... -
Page 16: Trouble Relay Connections
D9068 | Operation and Installation Guide | 2.0 Installation 2.2.2 Trouble Relay Connections Refer to Figure 12 when making connections to the D9068 Trouble Relay terminals. Figure 12: Typical Trouble Relay Connections (Supervised) 3 4 5 NC C - A B... -
Page 17: Analog Facp Connections
Use the D9068 with the Bosch D8024 and D10024/D10024A Analog FACPs to send reports to a central station. A D9052 RS-232 Bus Module between the FACP and D9068 is required. The FACP must be assigned a network address of 1. Refer to Appendix F: D8024/D10024/D10024A Analog FACP Operation on page 64 for the events generated by the D8024 and D10024/D10024A. -
Page 18: Figure 15: Rj31X Wiring
D9068 | Operation and Installation Guide | 2.0 Installation If the telephone company changes its Location communications facilities, equipment, To prevent jamming of alarm and other operations, or procedures that could reports, wire and locate the RJ31X jack affect the performance of the D9068, the... -
Page 19: System Start Up
D9068 | Operation and Installation Guide | Figure 16: Connecting a Keypad to the 3.0 System Start Up D9068 System Power-up This section describes the proper sequence of events when first powering up the D9068. 3.1.1 Before Power-up LINE 1... -
Page 20: System Quick Start
D9068 | Operation and Installation Guide | 4.0 System Operation System Quick Start 4.0 System Operation The D9068 starts in a trouble condition until the installer completes the Communicator Operation following steps: The D9068 has an integrated communicator 1. Connect the D7033/FMR-DACT-KEYPAD that sends reports to a monitoring Keypad Programmer. -
Page 21: Telephone Line Supervision
D9068 | Operation and Installation Guide | 4.0 System Operation The exception to these options occurs When an Automatic Test Report when sending Test Reports (Manual or is received by the central Auto). Test Reports are sent to station every other day, and... -
Page 22: Call Attempts
D9068 | Operation and Installation Guide | 4.0 System Operation Then, the D9068 makes up to ten attempts Phone 2 Backup is the default to communicate the Comm Fault to the and recommended setting for all central station. If the D9068 does not event types. -
Page 23: Communications Tests
Section 5.4.1 PROG TIME on page 37. following phone call. The time when automatic testing begins If the D9068 fails to send the Auto Test and the testing frequency interval are Report after ten tries, a Comm Fault established from the D7033/FMR-DACT- Report is sent. - Page 24 D9068 | Operation and Installation Guide | 4.0 System Operation Manual Test Initiate a Manual Communications Test from the D7033/FMR-DACT-KEYPAD. Refer to Section 5.5.4 3- TEST on page 50. When a Manual Test is initiated, you are prompted to select a telephone line (Line 1 or Line 2).
-
Page 25: Input Point Operation
Refer to Appendix A: Troubleshooting on page 51 for information about error messages or messages indicating abnormal operating conditions. The D9068 supports five inputs that can be activated by dry contact relays or open collector outputs. The initiating circuits or points can be configured for seven... -
Page 26: Table 8: Input Point Voltage Levels
D9068 | Operation and Installation Guide | 4.0 System Operation The AC Fail Delay time set for Table 8: Input Point Voltage Levels the FACP is independent of the AC Fail Delay time set for the D9068. When you program the... -
Page 27: Trouble Relay Operation
D9068 | Operation and Installation Guide | 4.0 System Operation Keypad Operation Figure 17: System Fault/Fault on Open Connections During the installation of the D7033/FMR-DACT-KEYPAD Keypad Programmer, the system does not monitor the input points or the serial connection on the FACP. -
Page 28: D7033/Fmr-Dact-Keypad Keypad Programmer
D9068 | Operation and Installation Guide | 4.0 System Operation Figure 18: D7033/FMR-DACT-KEYPAD Keypad Programmer Alarm SYSTEM NORMAL Silenced 0: PROGRAM Power Trouble Silence Reset Drill Disable Test Command Program Clear History 1 - First line of display 6 - [Test] key... -
Page 29: Scrolling Menus
Table 10: D7033/FMR-DACT-KEYPAD and FMR-DACT-KEYPAD Keypad Function Key Name Key Function Reset Initiates a manual reset of D9068. Refer to Section 4.5 Reset on page 32 for more information). Clears the character selected by the cursor. Refer to Figure 19 on page 29. Drill Advances to the next programmable feature or character position. -
Page 30: Selecting Menu Items
D9068 | Operation and Installation Guide | 4.0 System Operation The Programming Menu and Test Menu Figure 23: Submenu Items options also flash across the second line, one at a time at 1-sec intervals. The display rate speed can be adjusted. -
Page 31: Communication
D9068 | Operation and Installation Guide | 4.0 System Operation Figure 24: Event History Example Table 11: Event History Abbreviations Abbreviation Meaning A,ALRM Alarm AUTOTST Auto test 037/037 KEYPD:IN ARST Alarm restore BATT:LOW Battery low 02:51 010100 BAT:RSTR Battery restore... -
Page 32: Using The Keypad
D9068 | Operation and Installation Guide | 5.0 Programming Reset 5.0 Programming Reset the D9068 in one of four ways: Using the Keypad 1. At the LCD remote keypad, press [4] to select Reset from the Main Menu or Use the D7033/FMR-DACT-KEYPAD Keypad press [Reset]. -
Page 33: Programming Key Sequences
D9068 | Operation and Installation Guide | 5.0 Programming When you enter Programming Mode, Figure 26: Programming Key Sequence all monitoring ceases. The D9068 Diagram does not process input point events, supervise the phone lines, or monitor the serial link. The central station communication is disabled. -
Page 34: Program Menu Tree
D9068 | Operation and Installation Guide | 5.0 Programming Program Menu Tree Level 2 Level 3 Level 4 Level 5 (Programming Menu) 1: SYSTEM 1: TEST TIME TEST FREQ (_) 1: PROG TIME 2: AUTO TEST 2: TEST FREQUENCY 1: 4 HOURS... - Page 35 D9068 | Operation and Installation Guide | 5.0 Programming Level 2 Level 3 Level 4 Level 5 Level 6 (Programming Menu) 3: PHONE 3: PHONE 1 1: 19D, 14A, 10PS 5: PROG ACC’NTS CONTROL TONE 2: 18D, 23A, 10PS 3: 19D, 14A, 20PS For 4/2 reporting format only.
- Page 36 D9068 | Operation and Installation Guide | 5.0 Programming Level 2 Level 3 Level 4 Level 5 (Programming Menu) 1: FIRE ALRM D1 1: EVENTS 1: 4/2 POINT RPT 6: PROG FORMATS 2: FIRE RSTR D1 3: WATERFLOW D1 4: SUPERVISE D1...
-
Page 37: Programming The D9068
D9068 | Operation and Installation Guide | 5.0 Programming To set the current date and time for Programming the D9068 system operations: The D9068 uses scrolling menus to show At the Prog Time submenu, press [1] the menu choices. The Main Menu shows:... -
Page 38: Prog Timers
D9068 | Operation and Installation Guide | 5.0 Programming 1. At the Prog Time submenu, press [3] To program the frequency of Auto Test to select 3: DAYLIGHT SAV. The window Reports: shows: 1. At the Auto Test submenu, press [2]... - Page 39 AC Fail Report .25 X (1-16): _____ is sent immediately. 2. The current setting appears in To set the D9068 to wait and send AC parentheses on the first line. Enter Fail and Low Batt Reports the desired value and press simultaneously: [# Command].
- Page 40 D9068 | Operation and Installation Guide | 5.0 Programming CONFIGURE The AC Fail Delay time set for the FACP is independent of the To access CONFIGURE, select AC Fail Delay time set for the [0]: PROGRAM [3]: PROG INPUTS[1]: D9068. If you program the FACP CONFIGURE.
- Page 41 D9068 | Operation and Installation Guide | 5.0 Programming To allow supervision of the input and Selecting 1: CONFIGURE FACP connection: determines whether a system 1. At the Prog Inputs submenu, press [2] fault condition is activated on to select 2: SUPERVISED. The window...
-
Page 42: Prog Acc'nts
D9068 | Operation and Installation Guide | 5.0 Programming 3. Press [* Clear] to return to the ACCOUNT NUMS Programming Menu. 1: NUMBER 1 2: ACTIV GND STRT 2: NUMBER 2 2. Press the number that corresponds Refer to Table 1 on page 4 for... - Page 43 D9068 | Operation and Installation Guide | 5.0 Programming PHONE NUMS 3: PHONE 1 TONE and 4: PHONE 2 1- PHONE #1 TONE options are in 4/2 format 2- PHONE #2 only. Refer to Step 4 in this procedure for tone settings.
- Page 44 D9068 | Operation and Installation Guide | 5.0 Programming setting appears in parentheses on the NONSUP ALRM (__) first line. 1- PHONE 1 ONLY 2- PHONE 2 ONLY 11.Press [# Command] to verify your selection. Press [* Clear] to return 3- PHON 1 AND 2 to the Phone Control submenu.
-
Page 45: Prog Formats
D9068 | Operation and Installation Guide | 5.0 Programming The Dialing Type determines which 6: ACK WAIT TIME format the D9068 uses for dialing on To access ACK WAIT TIME, select each telephone line. Tone/Pulse [0]: PROGRAM[5]: PROG ACC’NTS attempts tone dialing first, and then [6]: ACK WAIT TIME. -
Page 46: Figure 27: 4/2 Point Report Example
D9068 | Operation and Installation Guide | 5.0 Programming 2. Press [1] to select 1: EVENTS. The Figure 27: 4/2 Point Report Example window shows: 4/2 POINT RPT 1: FIRE ALRM D1 2: FIRE RSTR D1 3: WATERFLOW D1 4: SUPERVISE D1... - Page 47 D9068 | Operation and Installation Guide | 5.0 Programming 8. At the 4/2 Point Rpt submenu, press 2: RPT CODES [2] to select ZONES 1 TO 9 and assign To access RPT CODES, select [0]: the event type to a point. The window PROGRAM...
- Page 48 D9068 | Operation and Installation Guide | 5.0 Programming a hexadecimal value and press 4. The current setting appears in [# Command]. parentheses on the first line. Using the keypad, enter a value from 1 to 4. To view the hexadecimal codes, press 9, or press [Test] for a list of [Test].
-
Page 49: Serial Conectn
D9068 | Operation and Installation Guide | 5.0 Programming Analog FACP: Setting this option to Yes All programming, including the enables the D9068 to communicate with a point configurations and option D10024/D10024A or D8024 using an RS-232 selections, is lost when this serial link. -
Page 50: Operating Modes
D9068 | Operation and Installation Guide | 5.0 Programming Operating Modes SEL PHONE LINE 1: LINE 1 The D9068 operating modes are Program, 2: LINE 2 Status, History, Test, and Reset. Each 3: ALTERNATE mode appears as an option on the D9068’s Main Menu. -
Page 51: Appendix A: Troubleshooting
D9068 | Operation and Installation Guide | Appendix A: Troubleshooting Ensure that the fault message is PHONE FAULT and not COMM FAULT. Set Appendix A: report steering for all events to Troubleshooting Phone 1 Only if only one telephone number is available for reporting. -
Page 52: Input Points
D9068 | Operation and Installation Guide | Appendix A: Troubleshooting You must reprogram all Table 12: Sys Trouble LED Indications configuration settings. If this failure occurs No. of often, contact Bosch Indicates Description Flashes Security Systems, Inc. Technical Support Internal... -
Page 53: Manual Test Report Failure
D9068 | Operation and Installation Guide | Appendix A: Troubleshooting Manual Test Report Failure If the D9068 fails to send the Manual Test Report in two attempts, or the [* Clear] key is pressed, the report transmission is aborted. A COMM FAULT message is not sent. -
Page 54: Power
Ground Fault Trouble Restore. Sent for ground fault trouble problems. 1 Item is sent only when the D9068 is configured to communicate with a Bosch Security Systems, Inc. D8024 or D10024/D10024A Analog FACP. Bosch Security Systems, Inc. | 3/13 | F01U071094-07... - Page 55 UNKNOWN FALT Unknown Fault. Sent for problems of an unknown nature. Item is sent only when the D9068 is configured to communicate with a Bosch Security Systems, Inc. D8024 or D10024/D10024A Analog FACP. 2 Item is for future use.
-
Page 56: Appendix C: Fire Communicator Report Summary
D9068 | Operation and Installation Guide | Appendix C: Fire Communicator Report Summary Appendix C: Fire Communicator Report Summary Note 1: Some codes are used for more than one event type. Note 2: For SIA and Modem IIIa , no area is reported. -
Page 57: Table 14: Reporting Summaries
D9068 | Operation and Installation Guide | Appendix C: Fire Communicator Report Summary Table 14: Reporting Summaries Point-Related Events Report Contact Contact ID Code Modem IIIa Description Code Description ID Code Description Default Description Values Point Fire 1 110 aa... - Page 58 D9068 | Operation and Installation Guide | Appendix C: Fire Communicator Report Summary Table 14: Reporting Summaries (Continued) Point-Related Events Report Contact Contact ID Code Modem IIIa Description Code Description ID Code Description Default Description Values 1 301 aa AC Fail...
-
Page 59: Reset
Refer to Note 1 through Note 9 on page 56 * In Modem IIIa , the D9068 uses Communications Fail to report a Data Lost event. The D9068 reports an Equipment Fail and Equipment Fail Restore with Condition 006 to report an actual Communications Fault. - Page 60 D9068 | Operation and Installation Guide | Appendix C: Fire Communicator Report Summary Table 15: Equipment Fail Conditions (Continued) Data in Generated Code Event Description Address Field Control panel Control The notification appliance circuit FACP NAC A Open address panel (NAC) A is open.
-
Page 61: Appendix D: Programming Defaults
D9068 | Operation and Installation Guide | Appendix D: Programming Defaults Phone #1 Text: Appendix D: Programming Phone #2 Text: Defaults Report Steering Non-SUP Alarm: Phone 2 Backup This appendix contains a list of the Supervisory Alarm: Phone 2 Backup programming defaults for the D9068. - Page 62 D9068 | Operation and Installation Guide | Appendix D: Programming Defaults Program Formats (4/2 Rpt Codes Group 2) AC Fail Rst: Auto Tst Rpt: Off Norm Tst: Phone 1 Trbl: Phone 1 Trbl Rstrl: EB ...
-
Page 63: Appendix E: Report Routing
D9068 | Operation and Installation Guide | Appendix E: Report Routing Appendix E: Report Table 17: Non-Point Related Report Routing Routing The information in this appendix shows Non-Point-Related Events the mapping of point-related (Table 16) Report Report Report and non-point-related (Table 17) events... -
Page 64: Facp Operation
D9068 | Operation and Installation Guide | Appendix F: D8024/D10024/D10024A Analog FACP Operation device can be connected to the D9052 RS-232 Bus Module. The D9061 PC Graphics Appendix F: application and the D9068 can be used D8024/D10024/D10024A only on a FACP with two D9052 RS-232 Interface Modules installed. - Page 65 D9068 | Operation and Installation Guide | Appendix F: D8024/D10024/D10024A Analog FACP Operation 3. Connect the earth ground line (green) on the D9068 to the FACP terminal labeled “EAR.” The D9068 draws a maximum of 192 mA. The analog FACP can provide up to 320 mA.
-
Page 66: Facp Relay Connections To D9068
D9068 | Operation and Installation Guide | Appendix F: D8024/D10024/D10024A Analog FACP Operation D9068 to D8024 Serial Connections Figure 28: D9068 to D8024 or D10024/D10024A Power Connections + + - - A B 1 2 3 4 5 NC C NO... -
Page 67: Facp Programming
D9068 | Operation and Installation Guide | Appendix F: D8024/D10024/D10024A Analog FACP Operation When using the inputs on the D9068 as The memory must be locked at backup connections, use the mappings the end of the programming from the FACP event to the D9068 input session. -
Page 68: Peripheral Events
D9068 | Operation and Installation Guide | Appendix F: D8024/D10024/D10024A Analog FACP Operation reported_point_address = (loop_number – For example, if the remote notification 1) * 200 + point_on_loop appliance circuit (NAC) at Peripheral Address 10 on Panel 5 has a fault, the... -
Page 69: Sample Reports
D9068 | Operation and Installation Guide | Appendix F: D8024/D10024/D10024A Analog FACP Operation F.4.5 Sample Reports Table 21: Sample Reports lists the sample reports and the data sent to the central station. Refer to Appendix C: Fire Communicator Report Summary on page 56 for information on the Equipment Fail Codes. -
Page 70: Analog Facp Event Code To D9068 Report Mapping
D9068 | Operation and Installation Guide | Appendix F: D8024/D10024/D10024A Analog FACP Operation F.4.6 Analog FACP Event Code to D9068 Report Mapping Table 22 lists the event codes generated by a Bosch D8024 and D10024/D10024A Analog FACP and the respective D9068 Dialer Report Code. Table 22: Analog FACP Event Codes... - Page 71 D9068 | Operation and Installation Guide | Appendix F: D8024/D10024/D10024A Analog FACP Operation Bosch Security Systems, Inc. | 3/13 | F01U071094-07...
-
Page 72: Reported Event To Facp Cause Mapping
D9068 | Operation and Installation Guide | Appendix F: D8024/D10024/D10024A Analog FACP Operation F.4.7 Reported Event to FACP Cause Mapping Table 23 lists the events generated by a D8024 and D10024/D10024A Analog FACP and the causes of the events. Table 23: Analog Reports and Causes... - Page 73 D9068 | Operation and Installation Guide | Appendix F: D8024/D10024/D10024A Analog FACP Operation Table 23: Analog Reports and Causes (Continued) Analog FACP Comments Cause Event Network Failure Control panel A network failure is detected. generated. There is a problem with programming.
- Page 74 D9068 | Operation and Installation Guide | Appendix F: D8024/D10024/D10024A Analog FACP Operation Index Water flow ............... 23 Water-flow ............... 36 AC Fail Delay ............... 35 Installation Location ..............17 AC Failure Inputs ............37 Account Numbers ............38 Telephone Cord ............16 Alternate 4/2 Codes ............
- Page 75 D9068 | Operation and Installation Guide | Appendix F: D8024/D10024/D10024A Analog FACP Operation Supervisory Inputs ..........23, 37 System Fault Inputs..........23, 37 Report System Supervision ............6 4/2 Point ..............42 Report Codes ..............43 Report Steering ............7, 40 Time ................
- Page 76 Bosch Security Systems, Inc. 130 Perinton Parkway Fairport, NY 14450 www.boschsecurity.com © Bosch Security Systems, Inc., 2013 F01U071094-06...