Datavideo SE-2800 Quick Start Manual
8ch / 12ch digital video switcher
Hide thumbs
Also See for SE-2800:
- Instruction manual (45 pages) ,
- Instruction manual (44 pages) ,
- Instruction manual (43 pages)
Table of Contents
Advertisement
Quick Links
Download this manual
See also:
Instruction Manual
Advertisement
Table of Contents

Related Manuals for Datavideo SE-2800


Summary of Contents for Datavideo SE-2800
- Page 1 Digital Video Switcher SE-2800 (8CH / 12CH) Quick Start Guide www.datavideo-tek.com...
-
Page 2: Table Of Contents
Connections & Controls ............................. 5 Control Panel ..............................5 Rear Panel................................8 Calibrating the T-bar ..............................10 MENU Function Setting ............................11 Datavideo Switcher Configuration Utility........................16 LOGOS Setup................................18 Dimension ................................20 Specification (SE-2800-8) ............................21 Specification (SE-2800-12) ............................23... -
Page 3: Warnings & Precautions
7. This product should only be operated from the type of power source indicated on the marking label of the AC adapter. If you are not sure of the type of power available, consult your Datavideo dealer or your local power company. -
Page 4: What's In The Box
What’s in the box? Items Description Q’ty DB 9P(F) to DB 9P(F) Cable L:1.5M Knob key cap Knob key bottom PVC Mylar ( Wipe Function PVC Mylar ( Wipe Function AC Cord AD Switch 12V / 5A SE-2800 Instruction Manual... -
Page 5: Introduction
Introduction SE-2800 is designed for the event or activity that needs more then 3 cameras to produce the program. Versatile inputs/ outputs and powerful effects, cost effective on SE-2800 HD/ SD switcher with 12 inputs. Superb 4:2:2 10bit broadcast quality. SE-2800 is also easy for mobile or O.B Van demand. -
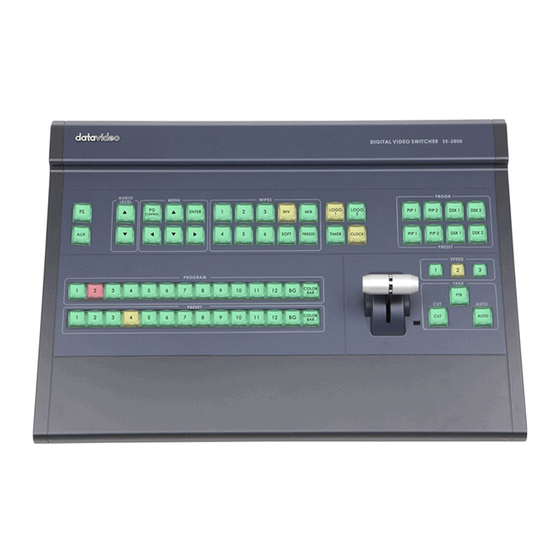
Page 6: Connections & Controls
Connections & Controls Control Panel 1. PRESET 7. LOGO1 & LOGO2 2. PROGRAM 8. PIP & DSK 3. AUX & FS 9. SPEED 4. AUDUO LEVEL 10. CUT / TAKE / AUTO 5. MENU 11. T-BAR 6. WIPES 12. TIME & CLOCK PRESET Used to select which of the 12 video input channels or background or color bar will be transitioned to or used as a PRESET source in an effect. - Page 7 AUX & FS Input signal switching to internal commutation unit can be invoked in the menu. We suppose it is enough. If you need a faster function control, it is possible to bring in a prefix AUX button. When a prefix AUX is pressed, a line of preview buttons will indicate what has been selected in the additional commutation unit;...
- Page 8 When it has travelled as far as it can go the transition is complete. For more information, see Calibrating the T-bar * If you don’t finish calibrating step, the T-Bar may cause incorrect results. TIME & CLOCK Select SE-2800 TIMER or CLOCK Functions on the screen.
-
Page 9: Rear Panel
It has been cleared up that inputs 1 & 2 are for CVBS, in 3 is for flash static pictures, and in 4 is to HDMI; All the video/audio input signals will be synchronized. The SE-2800 has 2 modes HD- SDI IN (8CH or 12CH), if you want upgrade 8CH to 12CH please update the SE-2800 firmware. - Page 10 The Control Panel is a desk mount unit which attaches to the Base Unit via a single (D-SUB 9 pin) cable. The Control Panel has all of the controls, and a series of set up menus for configuring the SE-2800. DC IN DC in socket connect the supplied 12V PSU to this socket.
-
Page 11: Calibrating The T-Bar
Calibrating the T-bar 1. Turn off the SE-2800. 2. Press and hold buttons In1 PRESET and In1 PROGRAM (1. 2. Fig-A) 3. Turn ON SE2800 - only 2 LED will flashing - T-Bar bottom and T-Bar top (3. 4 Fig-A) 4. -
Page 12: Menu Function Setting
VERSION NUMBER Press the ENTER button into item 1 for VERSION NUMBER. Press the RIGHT button to see the SE-2800 version. INPUT VIDEO SETTINGS Press the ENTER button and then press DOWN button select item 2 for INPUT VIDEO SETTINGS. - Page 13 HDMI IN EMB. AUDIO PAIR Press the ENTER button and then press DOWN button select item 6 for HDMI IN EMB. AUDIO PAIR. Press the RIGHT button and then press UP or DOWN button select INPUT4 / INPUT8 / INPUT12. Press the RIGHT button into your select.
- Page 14 SPEED BUTTONS SETTING Press the ENTER button and then press DOWN button select item 12 for SPEED BUTTONS SETTING. Press the RIGHT button to select SPEED 1 / SPEED 2 / SPEED3. Press the RIGHT button into your select. Press the UP or DOWN button to select your setting. Press the ENTER button to confirm your setting.
- Page 15 1kHZ to BARS Press the ENTER button and then press DOWN button select item 18 for 1kHZ to BARS. Press the RIGHT and then press UP button select your setting. Press the ENTER button to confirm your setting. KEYS BRIGHTNESS Press the ENTER button and then press DOWN button select item 19 for KEYS BRIGHTNESS.
- Page 16 MULTISCREEN MODE Press the ENTER button and then press DOWN button select item 26 for MULTISCREEN MODE. Press the RIGHT button to select A: W1=9 IN; W2=3 IN+PVW+PGM / B: W1=12 IN+PGM+PVW; W2=PGM / C: W1=8 IN+PGM+PVW; W2=PGM / D: W1=12 IN+PGM+PVW;W2=W1 / E: W1=8 IN+PGM+PVW;...
-
Page 17: Datavideo Switcher Configuration Utility
Datavideo Switcher Configuration Utility 1. Reanimate ‧Connection choose Enter IP 192.168.0.211 ‧Click” Reanimate” (about time 2.5HR) 2. Restore from file(Profiles):(about time 15minute) ‧Select Restore from file ‧ Open file and to execute ‧ Multiscreen_a, ‧Multiscreen_b, ‧Multiscreen_c, ‧Setings,WindowsSigns,logo,Clock... - Page 18 3. Load multi screen background picture (about time 15minute) ‧Select Multiscreen_a, Multiscreen_b, Multiscreen_c ‧Load Multiscreen for editing: multi_a, multi_b , multi_c ‧Open file ‧To execute Write...
-
Page 19: Logos Setup
LOGOS Setup Static Logos SE-2800 can store 7 static logos. SEConfig bookmark "Logos". The static Logos to be loaded and written into 1 to 7 memory slots must be 256x128 pixels. This Logos must be created in a graphics software package first as: •... - Page 20 Dynamic Logo SE -2800 can store 1 dynamic logo. SEConfig bookmark "Dynamic Logo". This Logo needs to be created in a graphics software package first as a sequence of up to 75 image. Image size must be 256 x 128 pix, 8 bits/channel Format is the same as for Static Logos: •...
-
Page 21: Dimension
Dimension... -
Page 22: Specification (Se-2800-8)
Specification (SE-2800-8) • Maximum 8 inputs, can be configurable to 8 HD SDI or 8 SD SDI, Inputs 4 CVBS, (2 HDMI and 2 HD SDI or 2 SD SDI) 4 CVBS, (4 HD SDI or 4 SD SDI) • 3 BNC output connectors for SDI Outputs •... - Page 23 Humidity • 10% to 90% (non condensing) Base Unit : 482mm (W) x 88mm (H) x 302mm (D) = 9 Kg Dimension & Weight Control Panel : 699.4mm (W) x 143.89mm (H) x 436.6mm (D) = 10 Kg Power • Input AC 100 ~ 240V Switching Adaptor, output DC 12V / 5A (48W)
-
Page 24: Specification (Se-2800-12)
Specification (SE-2800-12) • Maximum 12 inputs, can be configurable to Inputs HD SDI, 12 SD SDI, 6 CVBS or 3 HDMI • Possible combination, for example 10 HD SDI + 2 HDMI, or 3 HD SDI + 3 HDMI + 6 CVBS •... -
Page 25: Service & Support
It is our goal to make your products ownership a satisfying experience. Our supporting staff is available to assist you in setting up and operating your system. Please refer to our web site www.datavideo-tek.com for answers to common questions, support requests or contact your local office below.